
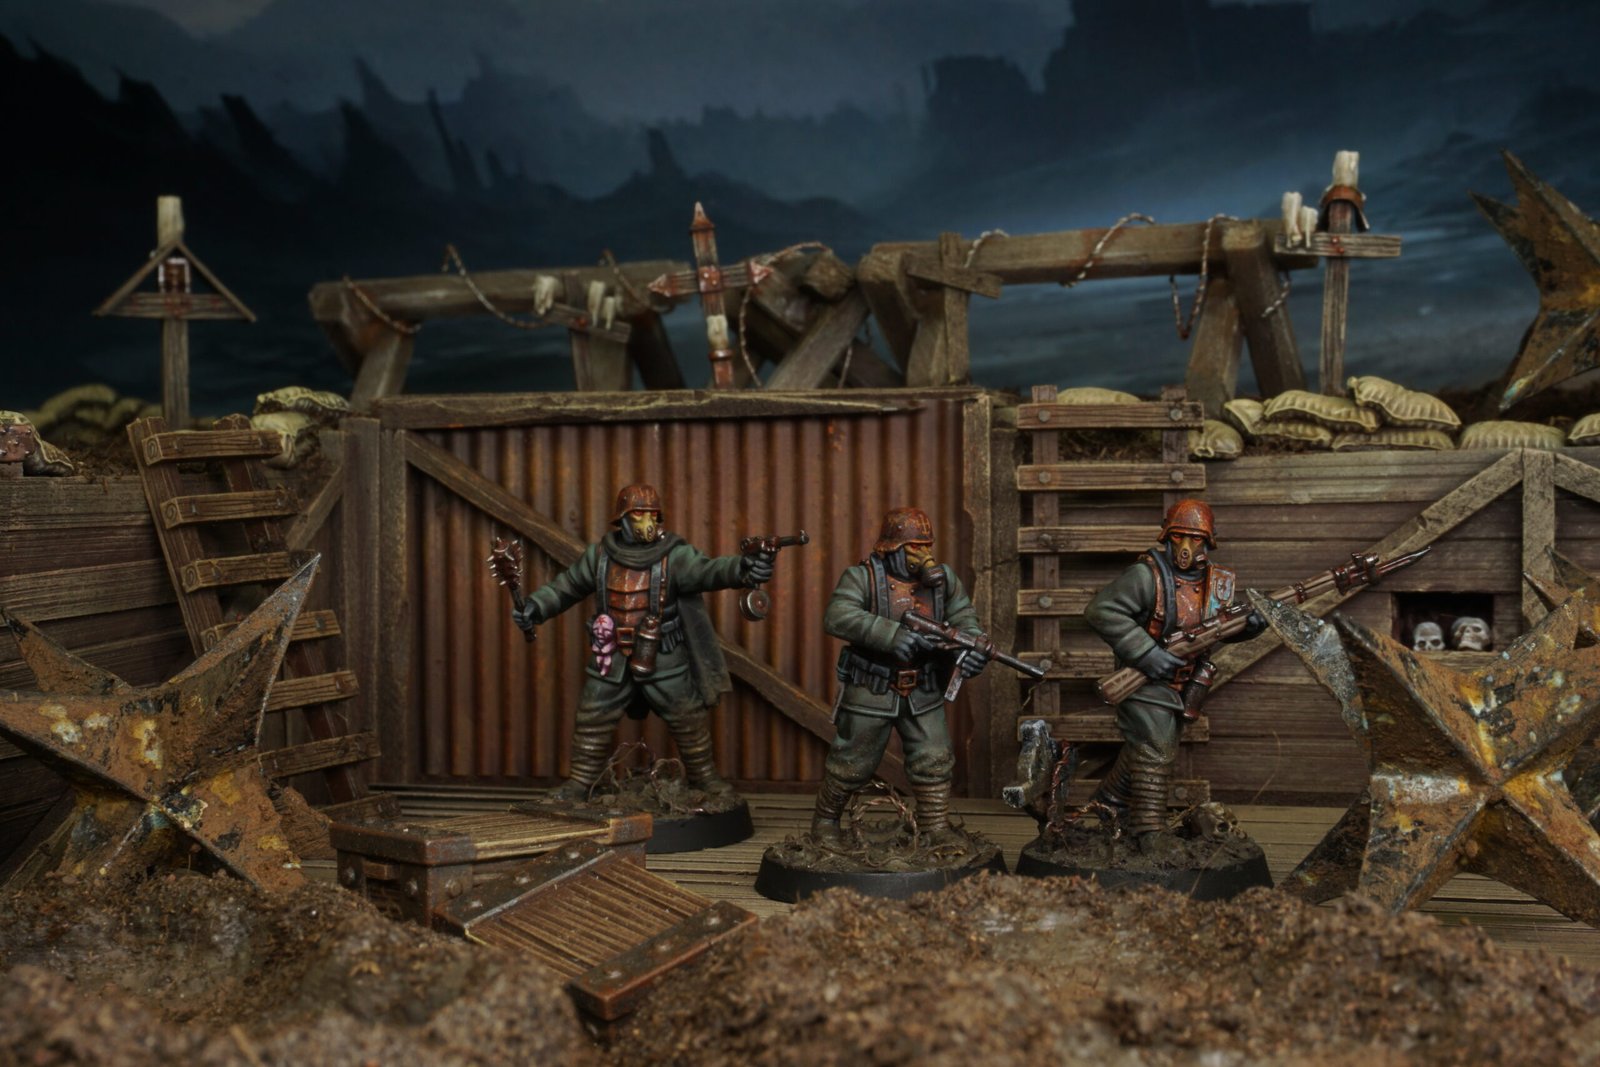
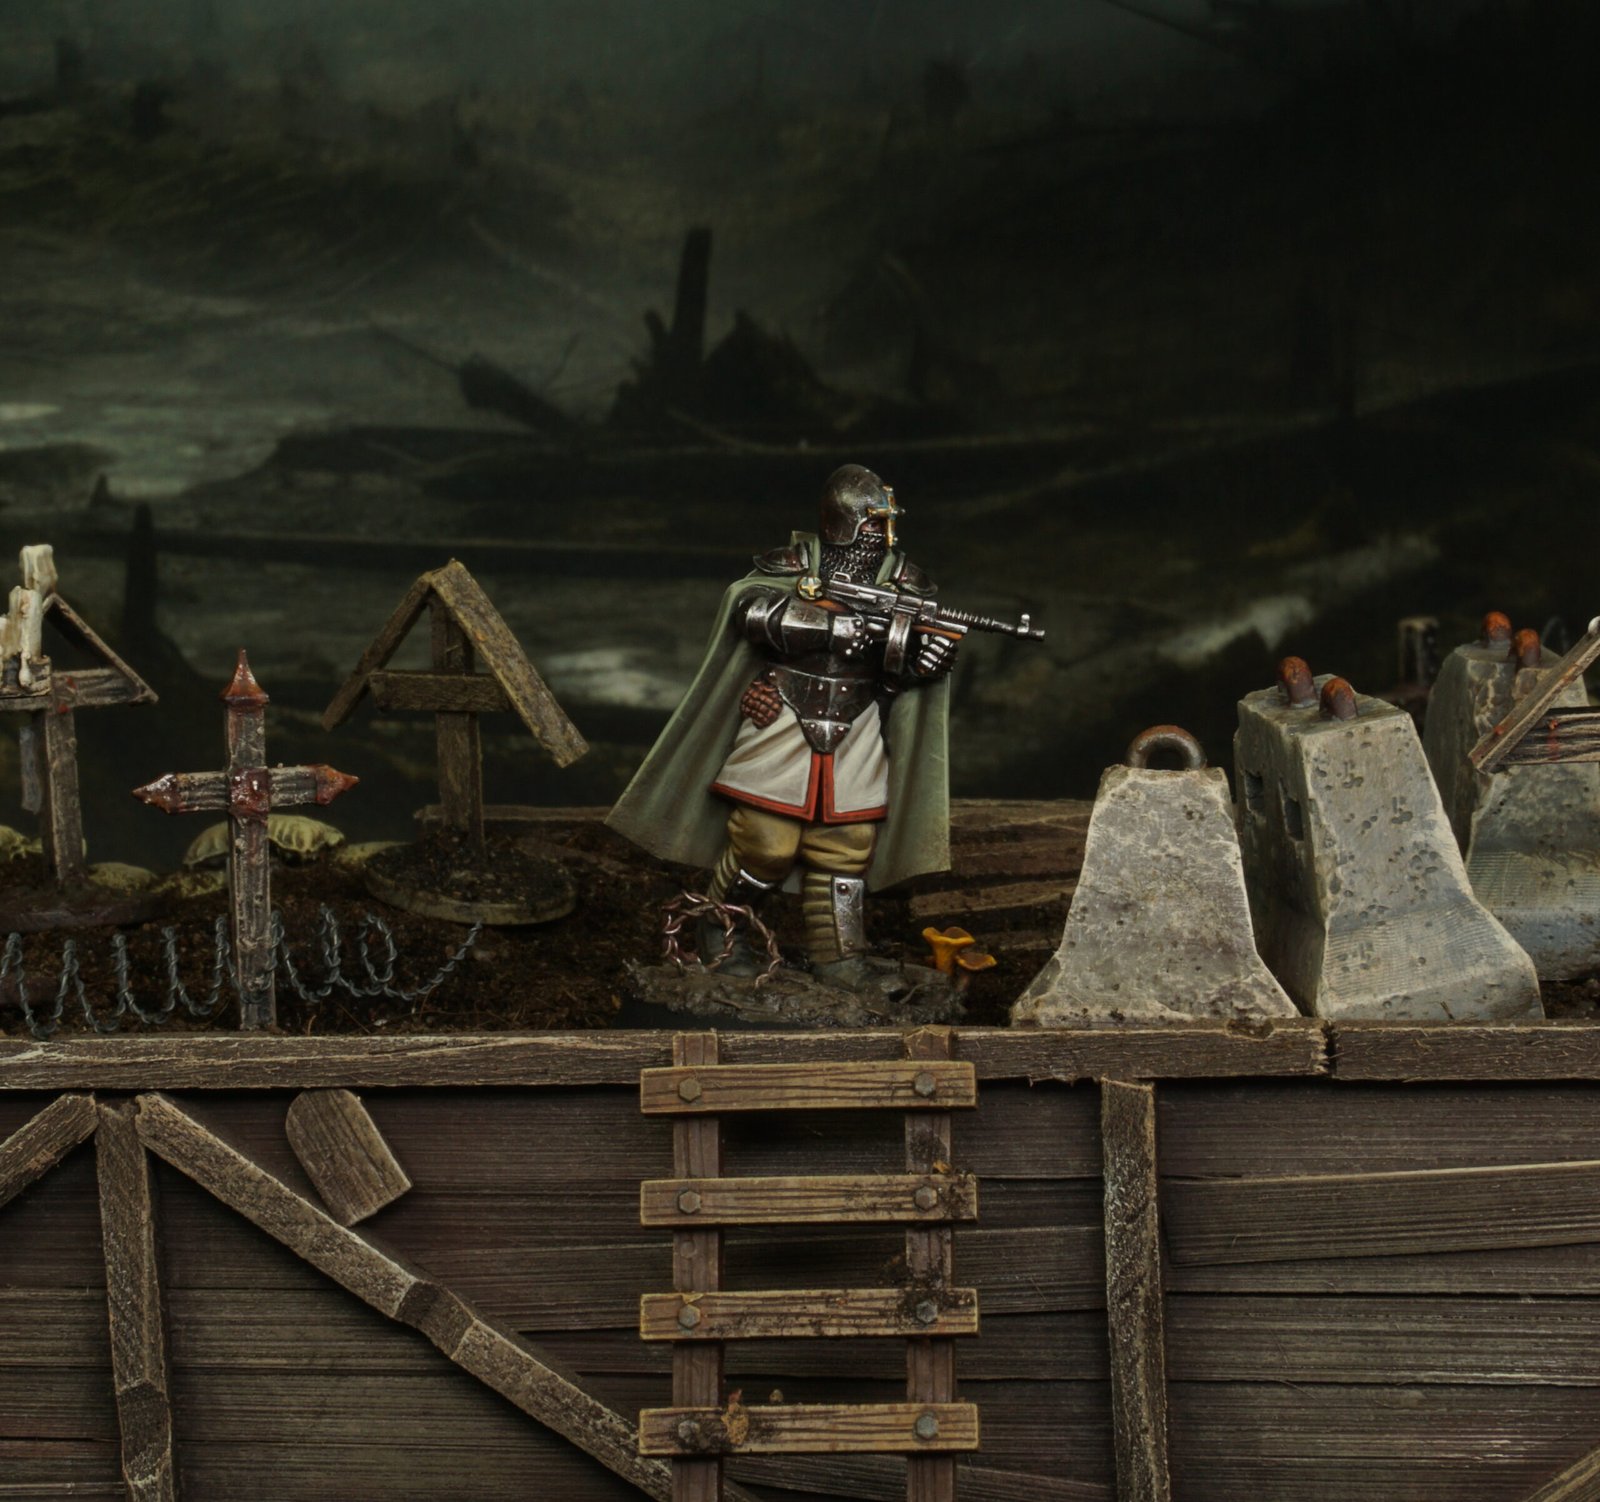
I have been quite busy lately with several projects, including a new series of books, and although my interest now leans more toward fantasy than historical subjects, I am still working on several World War II projects (stay tuned). The reason for this shift is a relatively new game, Trench Crusade, whose atmosphere, a haunting fusion of grimdark aesthetics, religious symbolism, and historical inspiration, has captivated thousands of hobbyists and painters. Its world, forged from the mud and madness of a holy war fought across endless trenches, evokes both fascination and dread. The mix of medieval devotion and early twentieth-century warfare creates an unsettling beauty that is hard to resist. And I am among those who have fallen under its spell. I am currently working on several projects, including a Spanish warband, so you can expect to see more about game in the blog soon.
I wanted to create a series of tutorials on how to build and paint scenery for Trench Crusade, since I have recently rediscovered the pleasure of taking scenic photographs. For this reason, I needed to prepare a new collection of terrain elements. In this first tutorial, we will focus on how to paint concrete structures. Soon, you can also expect guides on creating rust effects on heretic hedgehogs and building a trench section entirely from scratch.
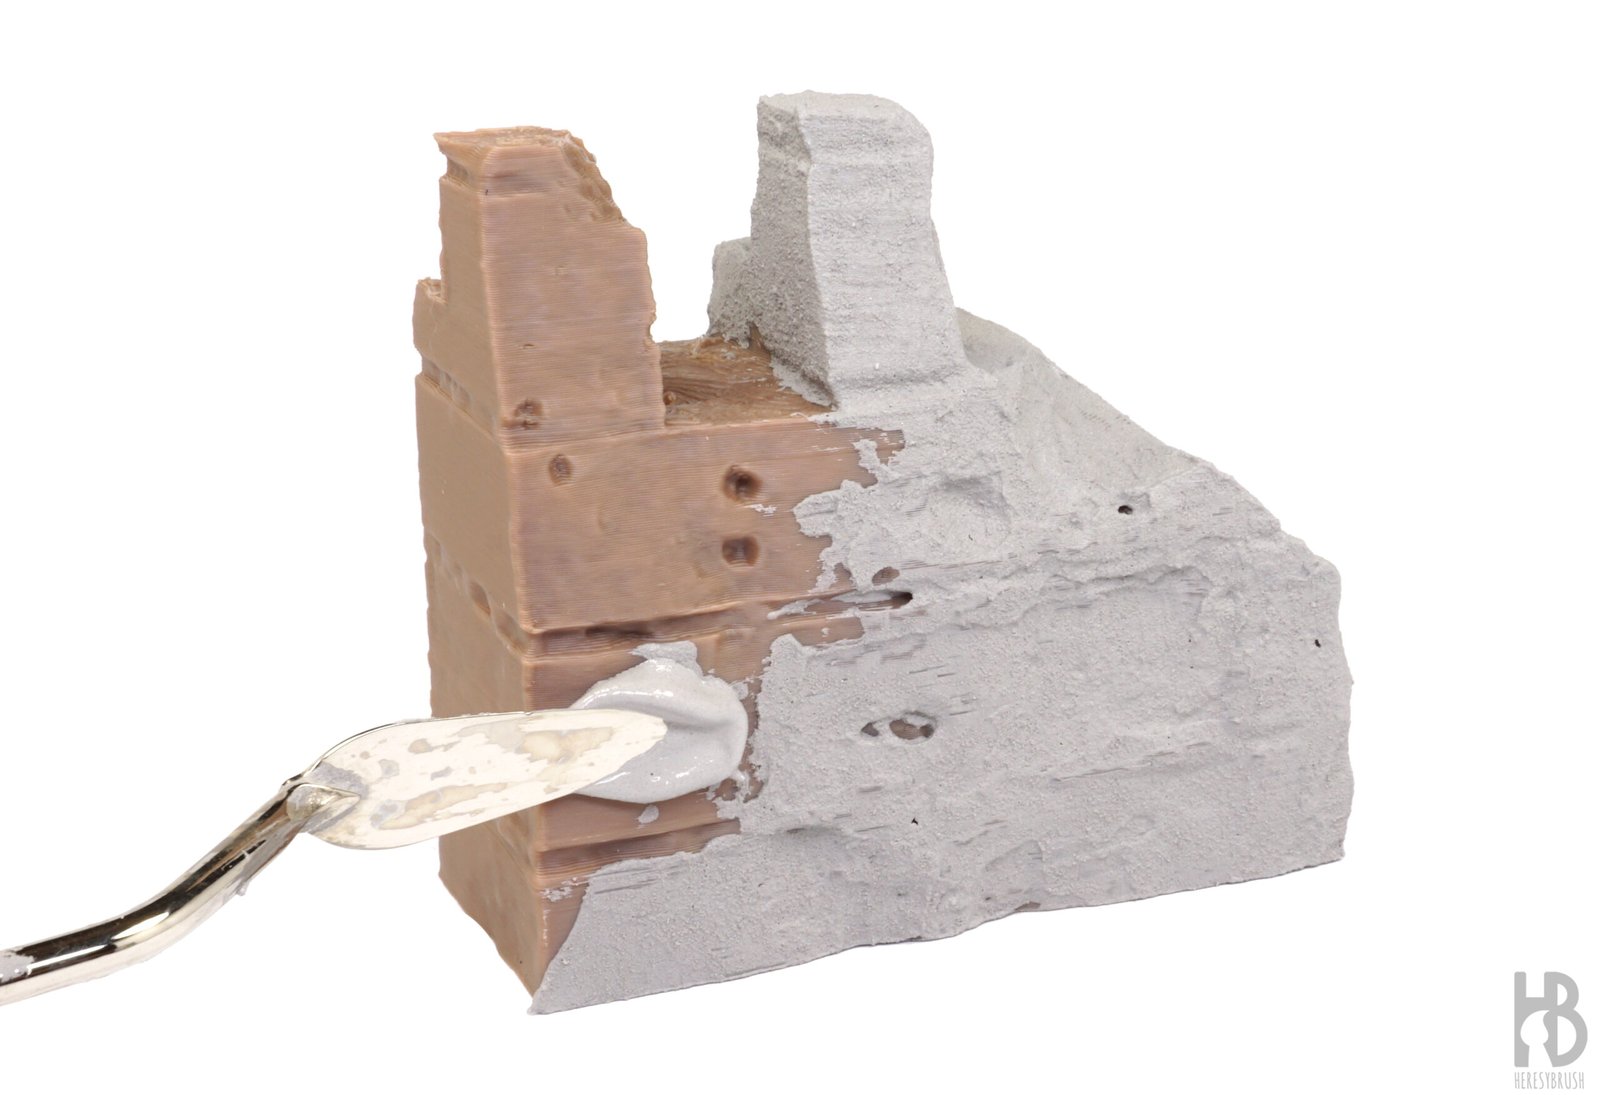
With the rise of 3D printing, our wargaming tables can be filled with terrain pieces in very little time. Although the quality is impressive, one of the challenges of 3D-printed elements (especially those made with filament printers) is the appearance of visible print lines. These can slightly spoil the overall finish, even if they do not affect playability. Since I am creating these pieces mainly for photography, the issue becomes more significant. However, in this tutorial, we will see how to transform a simple 3D-printed piece from Diceverse into a convincing concrete fortification.
Step 1
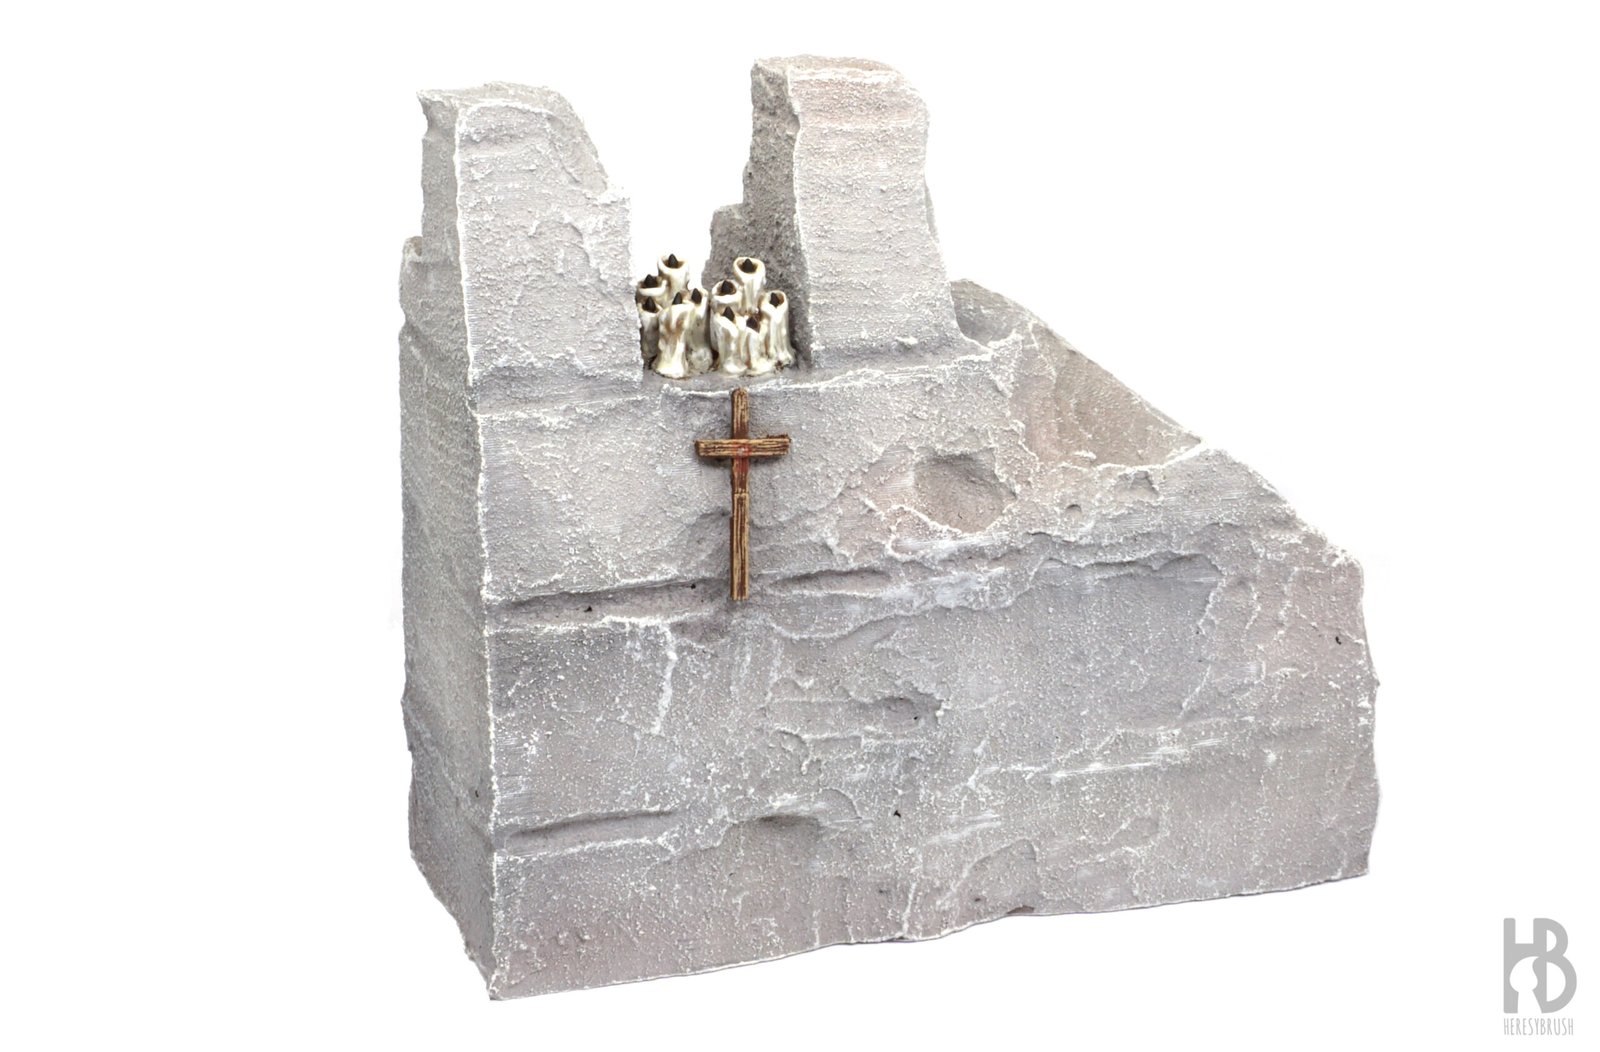
Now comes the essential part: how to fix the printing lines. We could file or sand the surface, but this process is time-consuming and, moreover, not recommended due to the dust it produces. The easiest and most effective approach is to cover the entire surface with an acrylic texture. For this, we can use Concrete Texture A.MIG-2158, which not only reproduces the rough appearance of concrete but also provides full coverage. And its natural grey tone allows us to achieve, in a single step, both texture and color. The texture is not applied with a brush, but rather with a spatula or an old piece of plastic, spreading it irregularly to enhance the realistic, uneven look of cast concrete.
Step 2
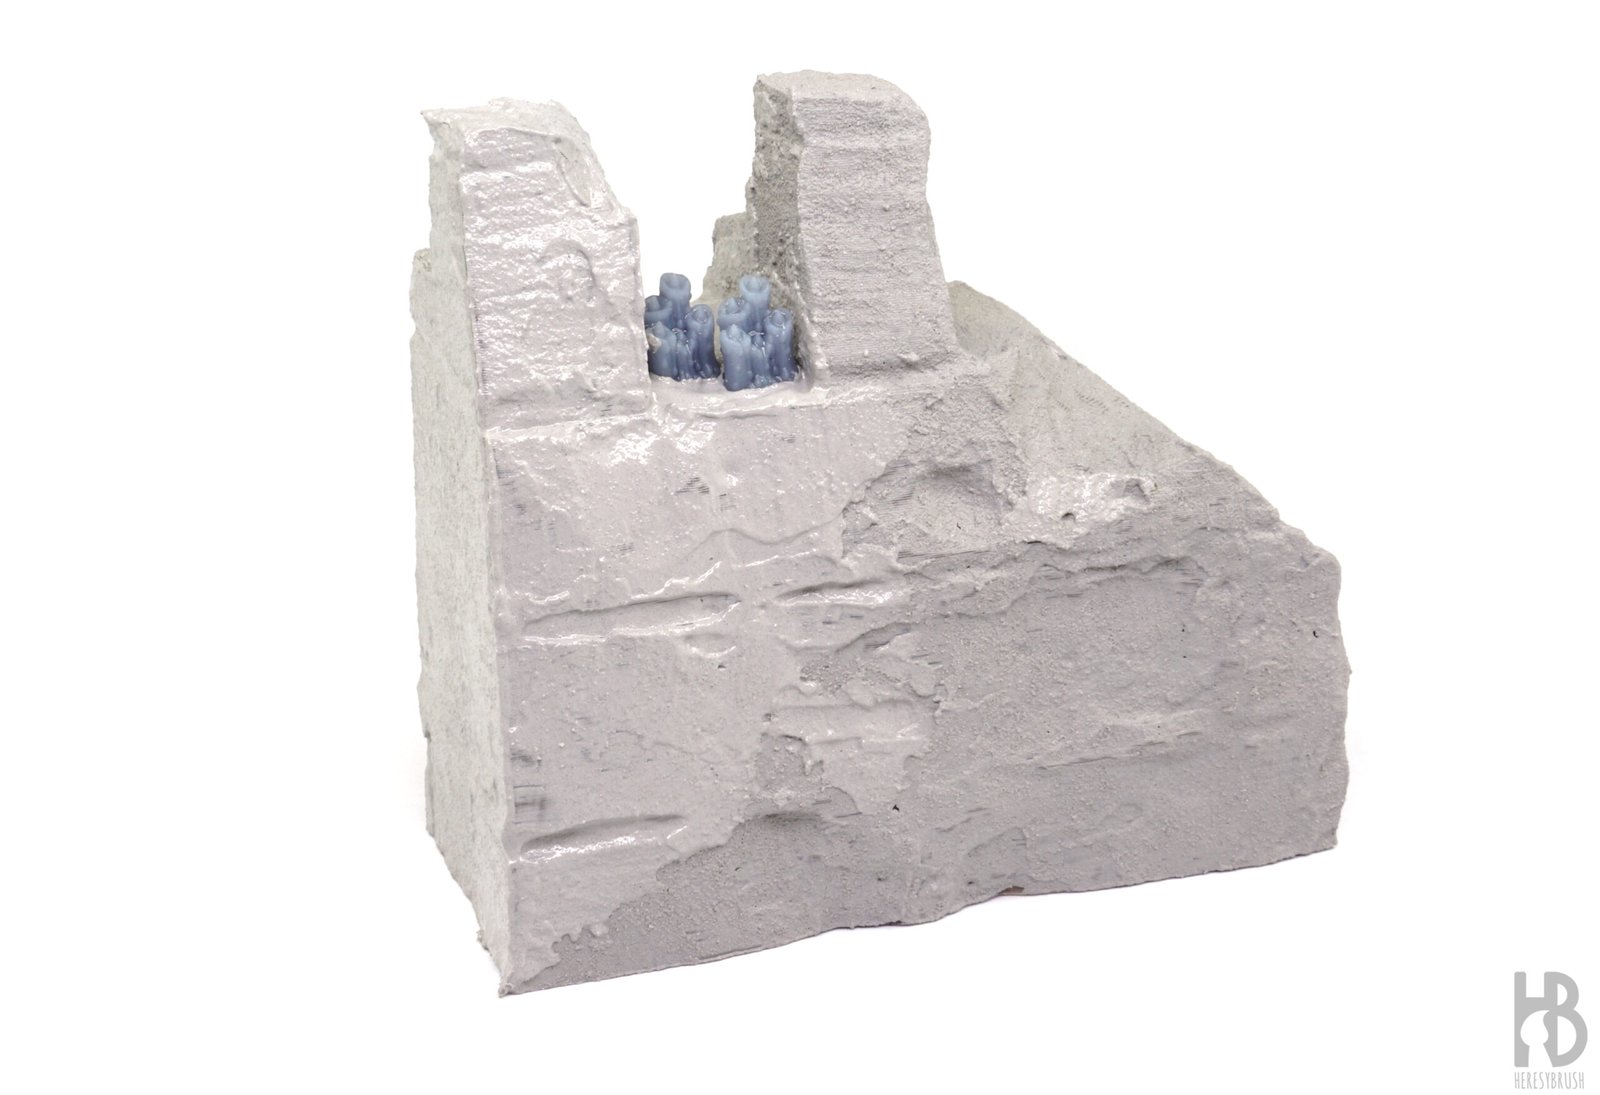
While the acrylic texture is still fresh, we can embed small decorative elements, also 3D printed using a resin printer, such as candles, crosses, or chains (you have many options on 3D Cults, such as MrJarrrrr profile). These details will break the monotony of the concrete surface and add visual complexity, creating a heavier and more charged appearance that perfectly suits the oppressive atmosphere of Trench Crusade.
Step 3
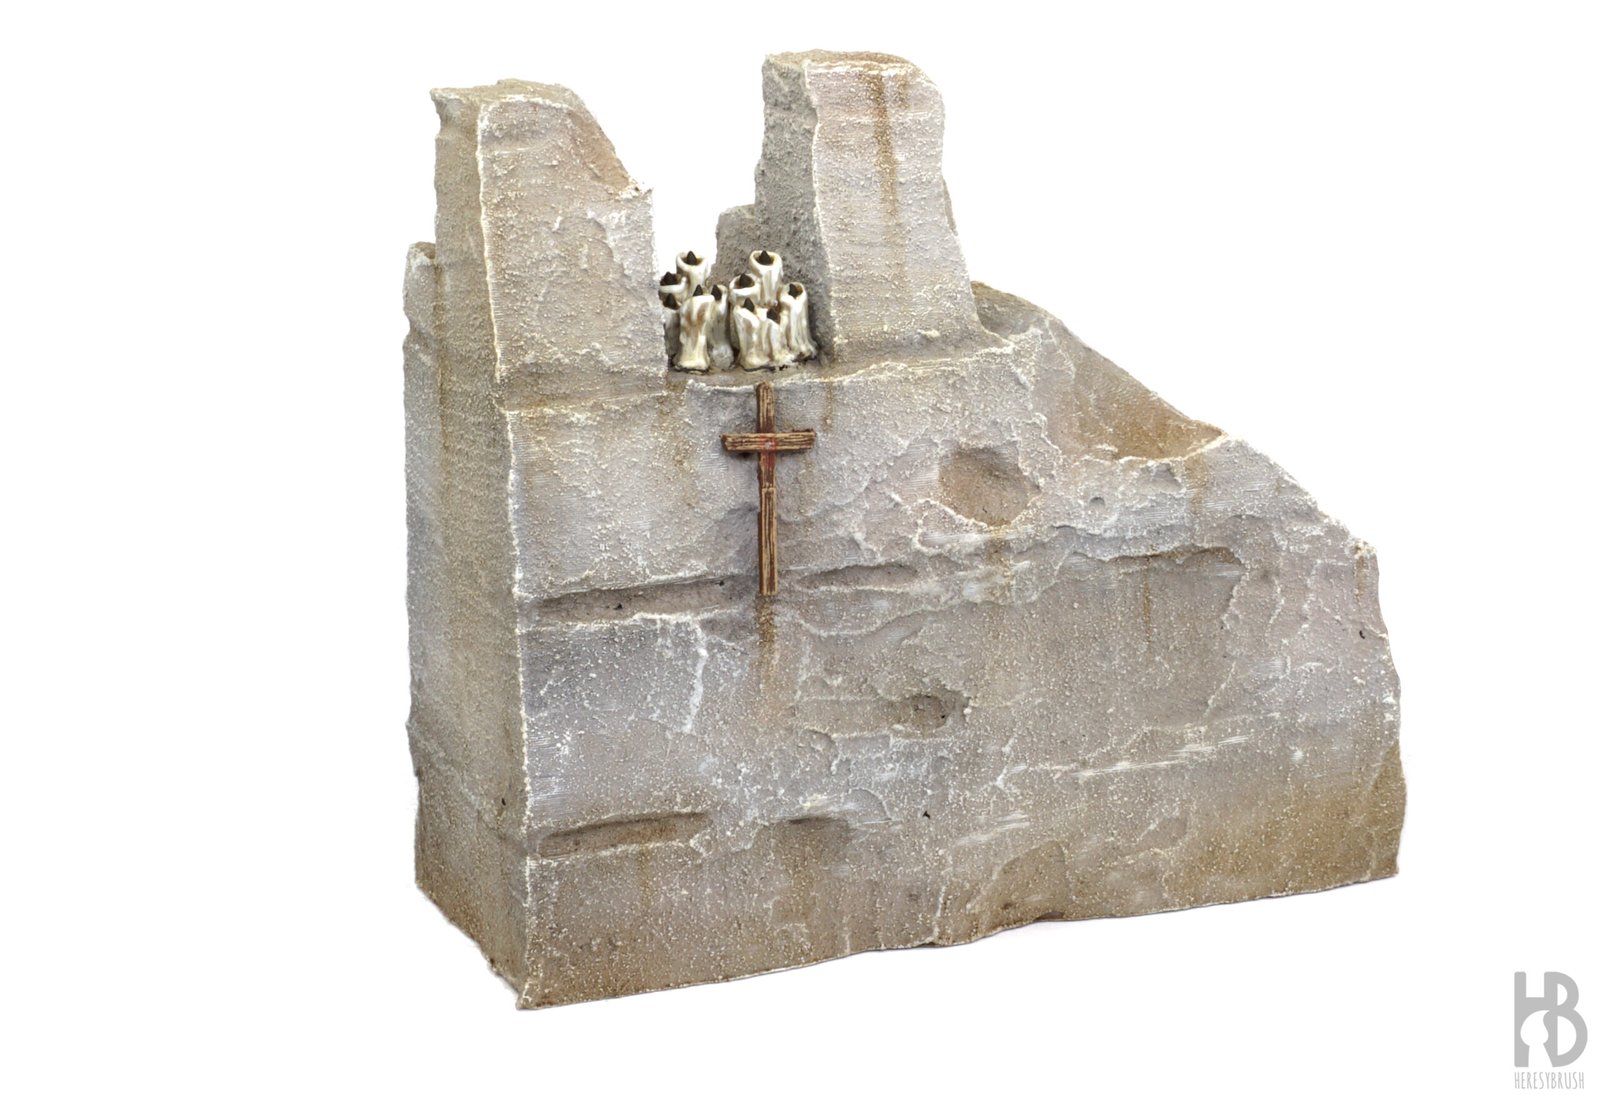
Once the texture is completely dry, we can enrich the concrete surface by introducing subtle nuances and tonal variation. This can be done using acrylic paints applied with the airbrush in very thin, translucent layers. For this purpose, I used AMMO Shaders, which are ideal for creating smooth chromatic transitions and enhancing depth (but you can use any other acrylic paint). In this case, I selected Dirt A.MIG-0853 (brownish tone) and Ash Black A.MIG-0858 (near black), applying them with the airbrush lightly around the edges, recesses, and lower areas to simulate accumulated dust and grime. These gentle passes of color break the uniformity of the grey surface and bring the concrete to life with a more natural, weathered look.
Step 4
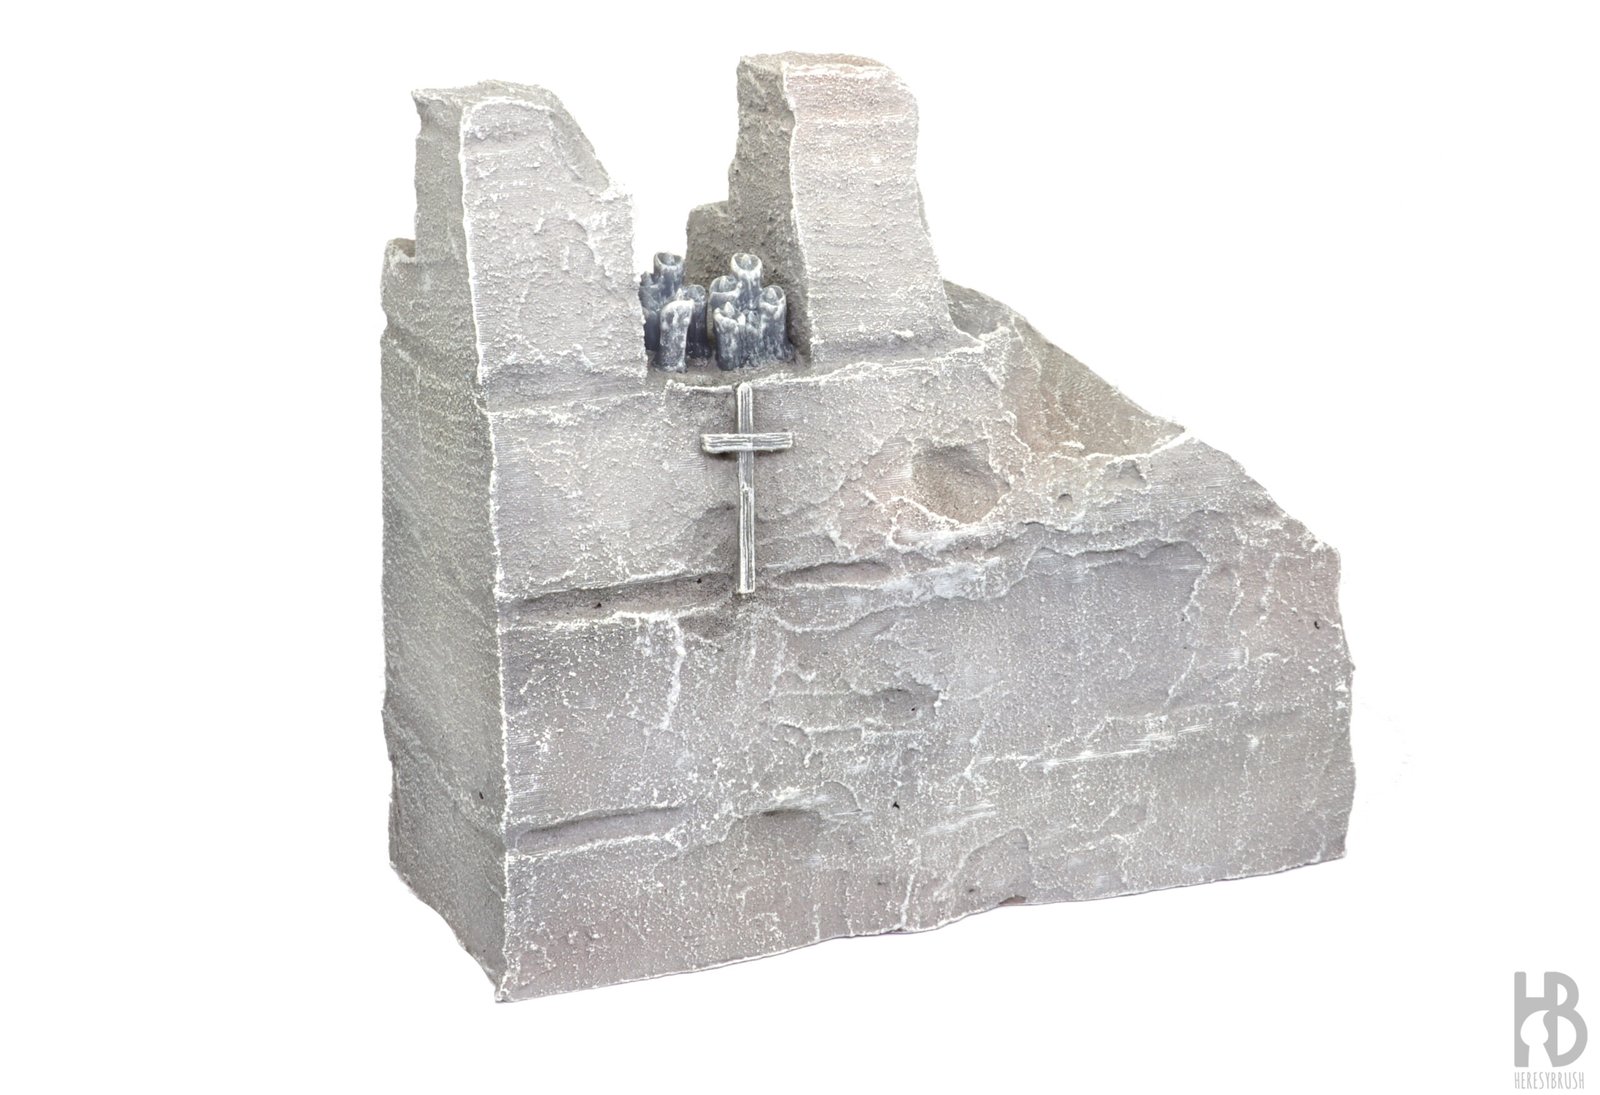
To add contrast and definition, we apply the classic drybrush technique in two consecutive layers. First, we perform a general drybrush using Light Grey A.MIG-0601, which will gently bring out the texture of the concrete. Then, we apply a second, more selective layer around the edges and the most prominent details with White A.MIG-0600. It is very important to ensure that the brush contains only a minimal amount of paint; otherwise, the excess could flatten the surface texture we have just created.
Step 5
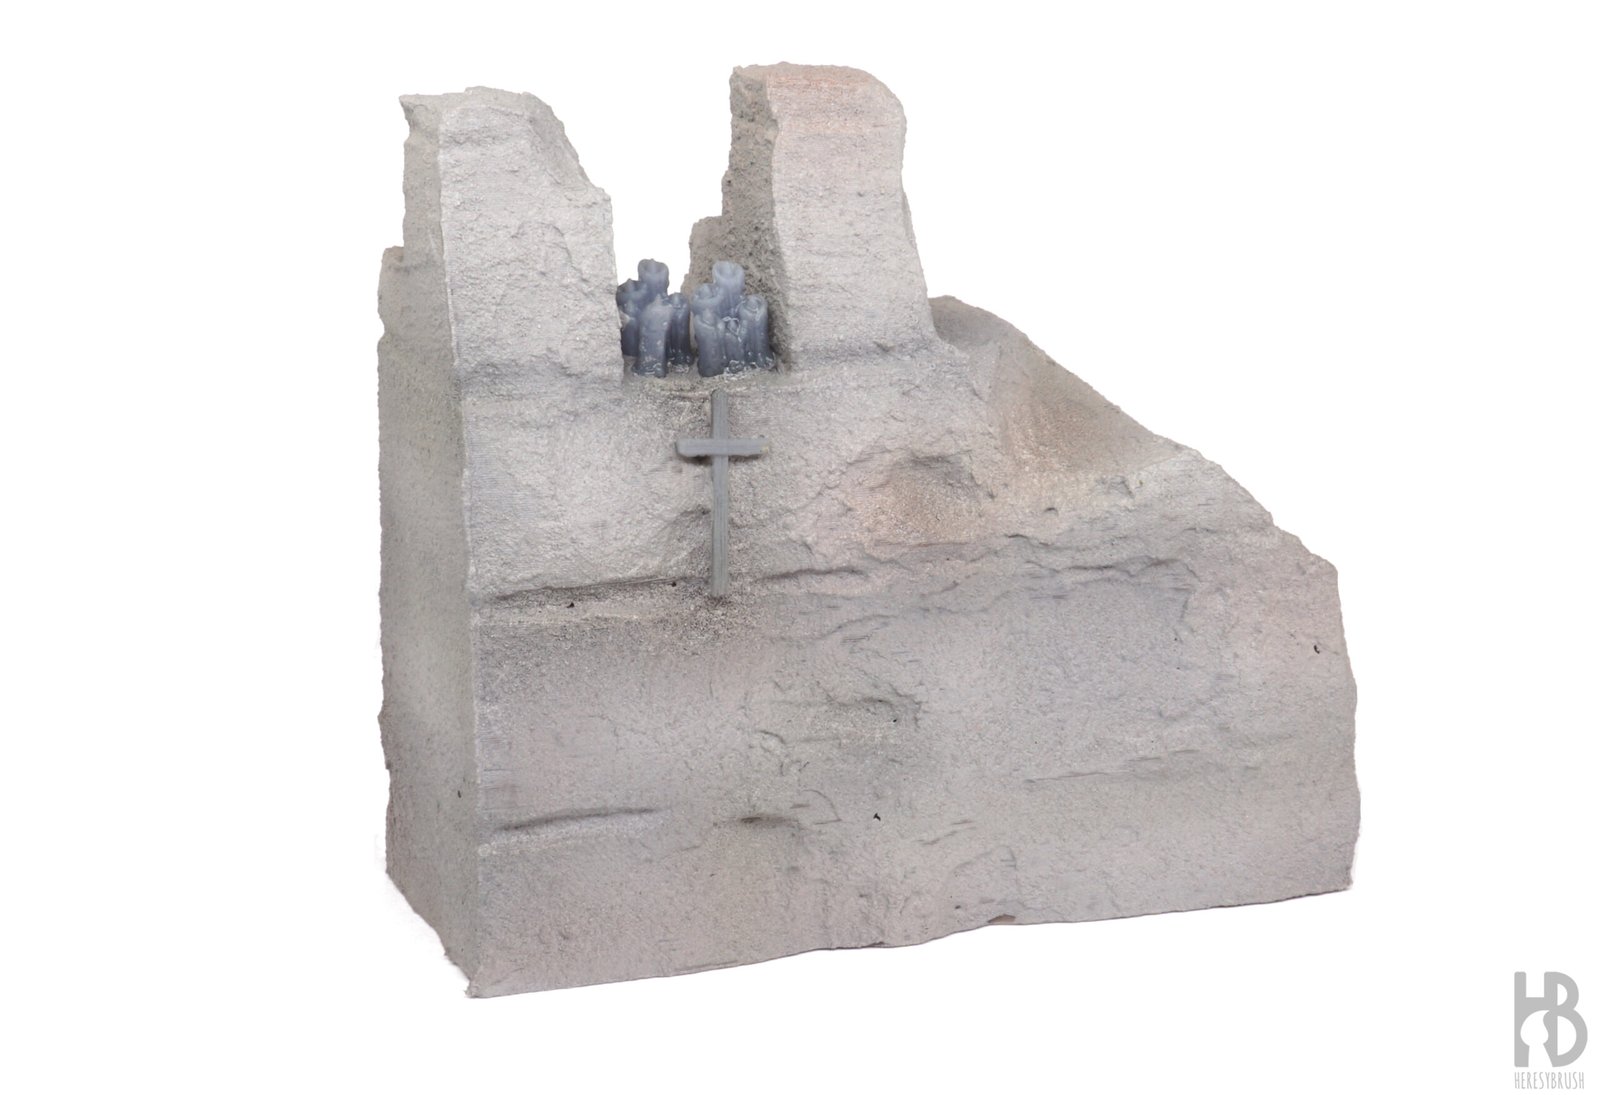
Now it is time to paint the smaller details, such as the cross and the candles, using a brush, acrylic paints, and your preferred technique. These elements do not require an exceptionally clean or precise paint job, as they are meant to serve as atmospheric decoration. For the cross, I used the drybrush technique to quickly bring out the texture of the surface. The candles, on the other hand, were painted with a dark brown wash to emphasize the recesses, and then I carefully re-applied the bone color on the raised areas to restore light and contrast.
Step 6
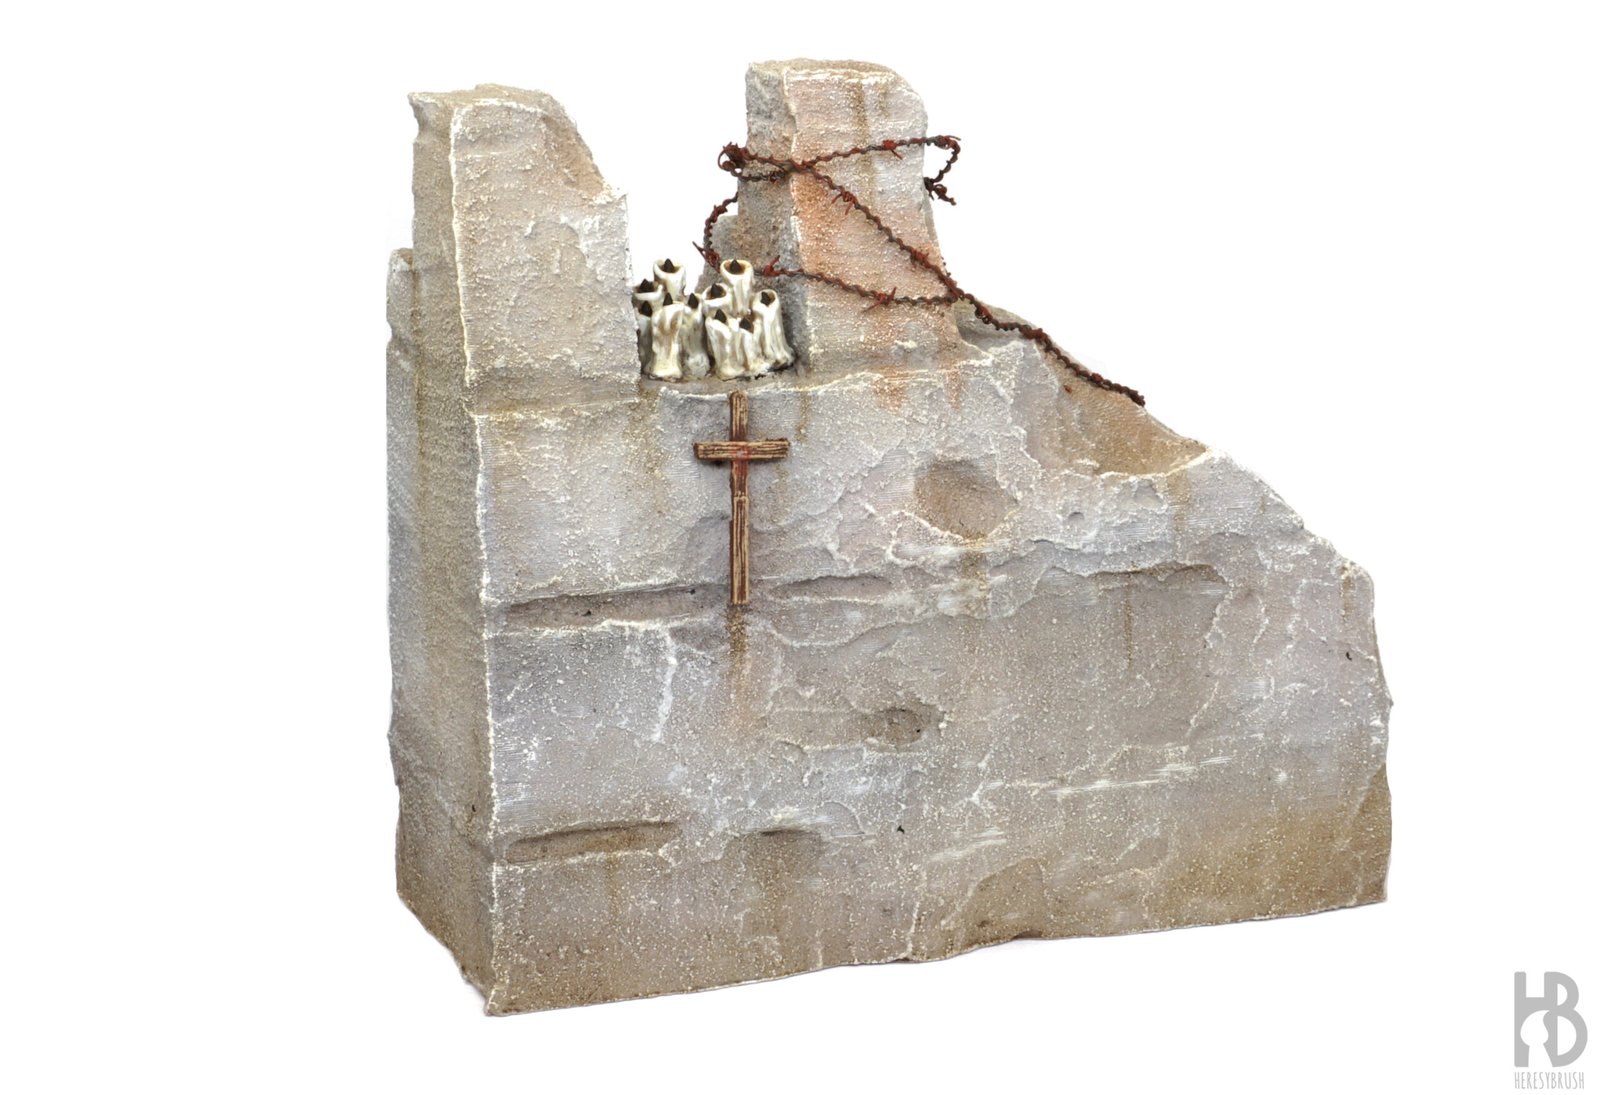
This is where the magic happens. To bring the concrete piece to life, we can use oil paints. Unlike acrylics, oils are thinned with enamel thinner instead of water, and they take several hours to dry. Their greatest advantage lies in their exceptional blendability, which allows us to create realistic effects such as streaking, stains, and accumulated dirt with remarkable ease.
For this step, I selected three tones, two browns for dirt and mud effects, and one reddish for rust effects: Oilbrush Dark Mud A.MIG-3508, Rust A.MIG-3510 , and Dark Brown A.MIG-3512. I used them in two different ways. First, I thinned each color with about 50–70% Enamel Odourless Thinner A.MIG-2019 and applied them selectively, focusing the darker browns on the lower areas and the rust tones around metallic details or weathered zones. These are applied as filters, not washes; meaning we do not flood the surface but instead place very thin, translucent layers to build subtle depth and variation. Second, I used the oils undiluted to create rust streaks. I began by painting a thin vertical line descending from the upper edges or around decorative elements, and then blended it gently downward using a brush moistened with thinner. We can accelerate the drying process with a hairdryer and repeat these steps several times to build up richness and depth in the finish.
This technique is something I regularly use in vehicles (e.g. steps 20-24 here).
Step 7
As a final touch, we can add barbed wire to enhance the scene and strengthen the grim industrial feeling of Trench Crusade. After receiving some helpful feedback from the Trench Crusade Facebook group about my initial, simpler approach (which used only coiled wire), I decided to create a more realistic version following this. Once the barbed wire was ready, I fixed it in place with instant glue, positioning it naturally around the concrete structure.
To weather it, I begin by applying a layer of acrylic rust tones, such as Rust IONIC-0156 and Black Brown IONIC-01600, directly on the wire. Then, to integrate it with the base, I enhance the effect using oils as before, blending them softly around the points where the wire meets the concrete.
Step 8
Optionally, we can apply a thin layer of matt varnish to protect the paintwork and unify the overall finish.
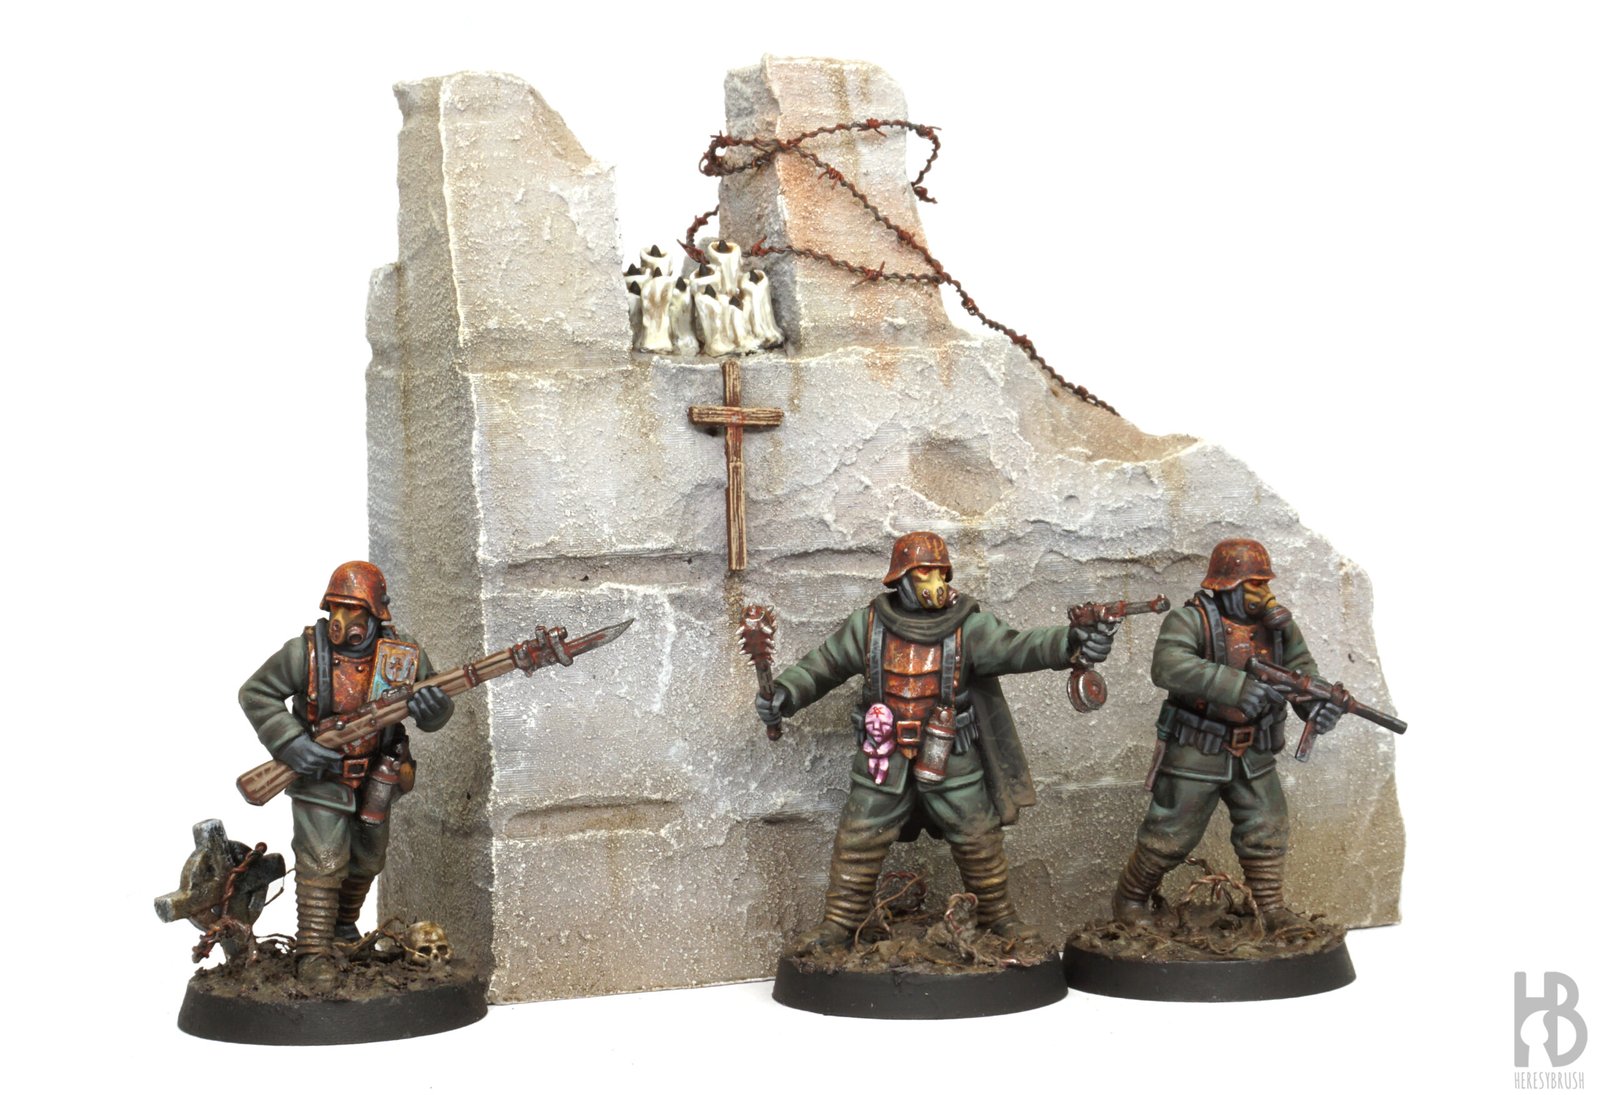
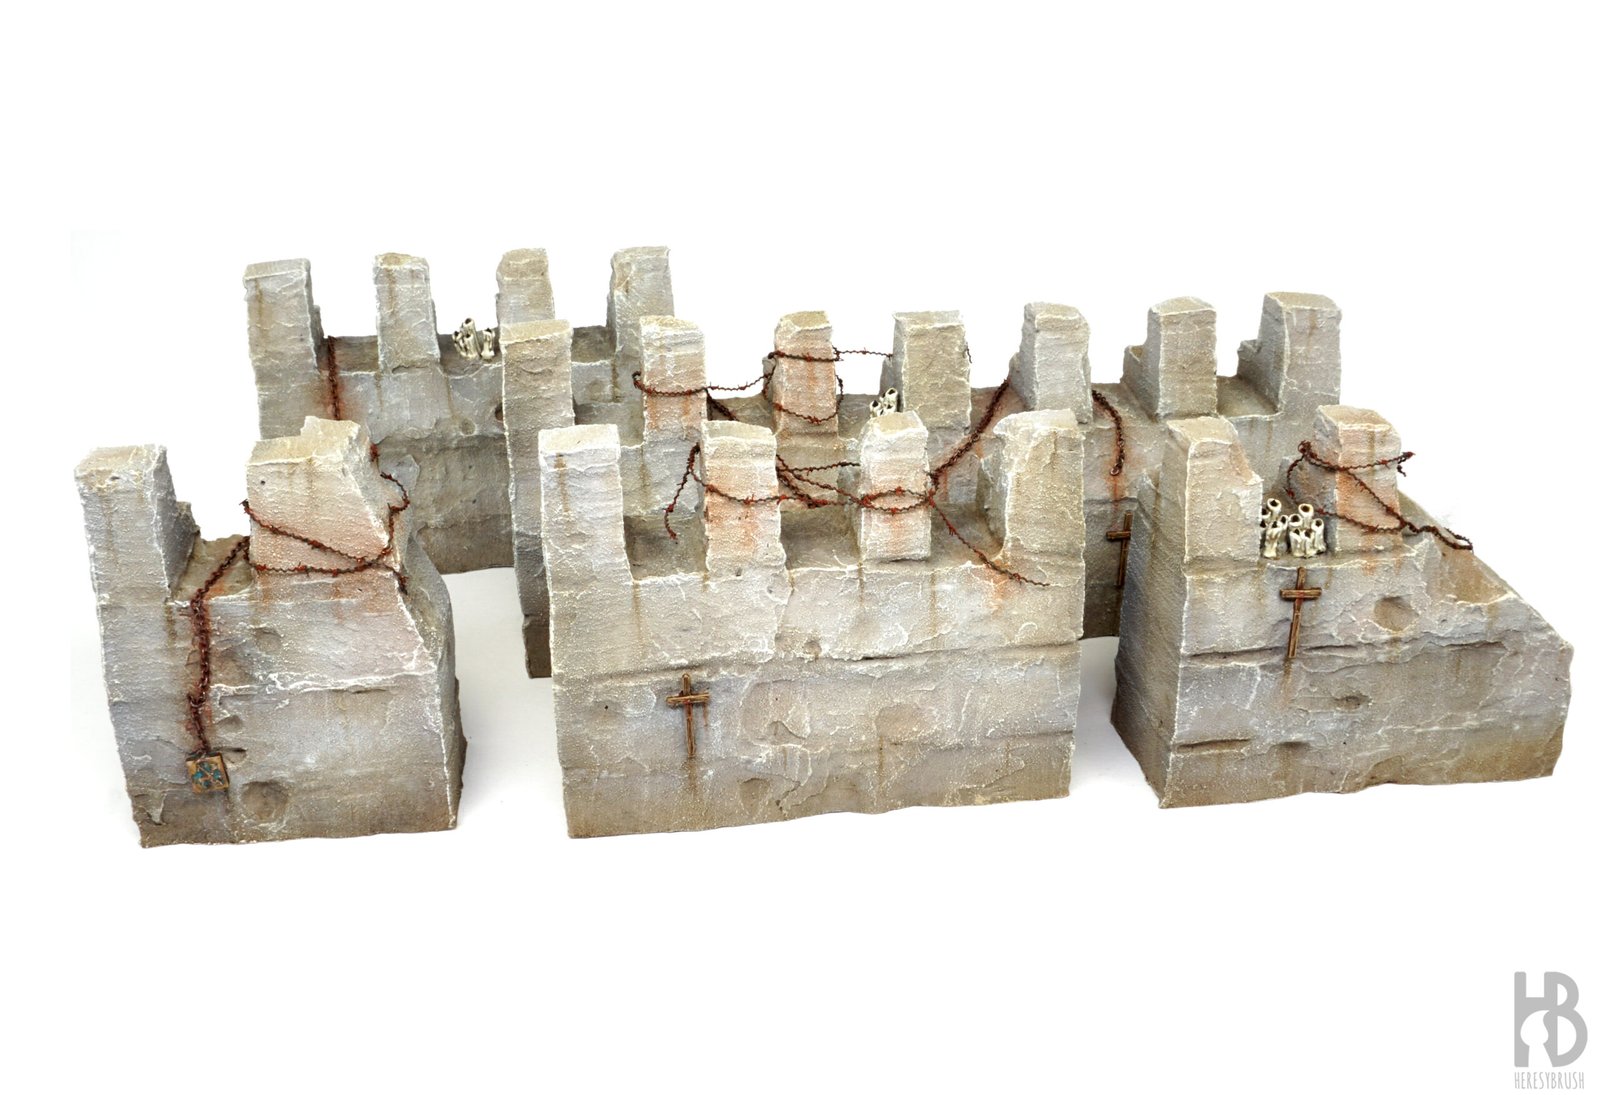
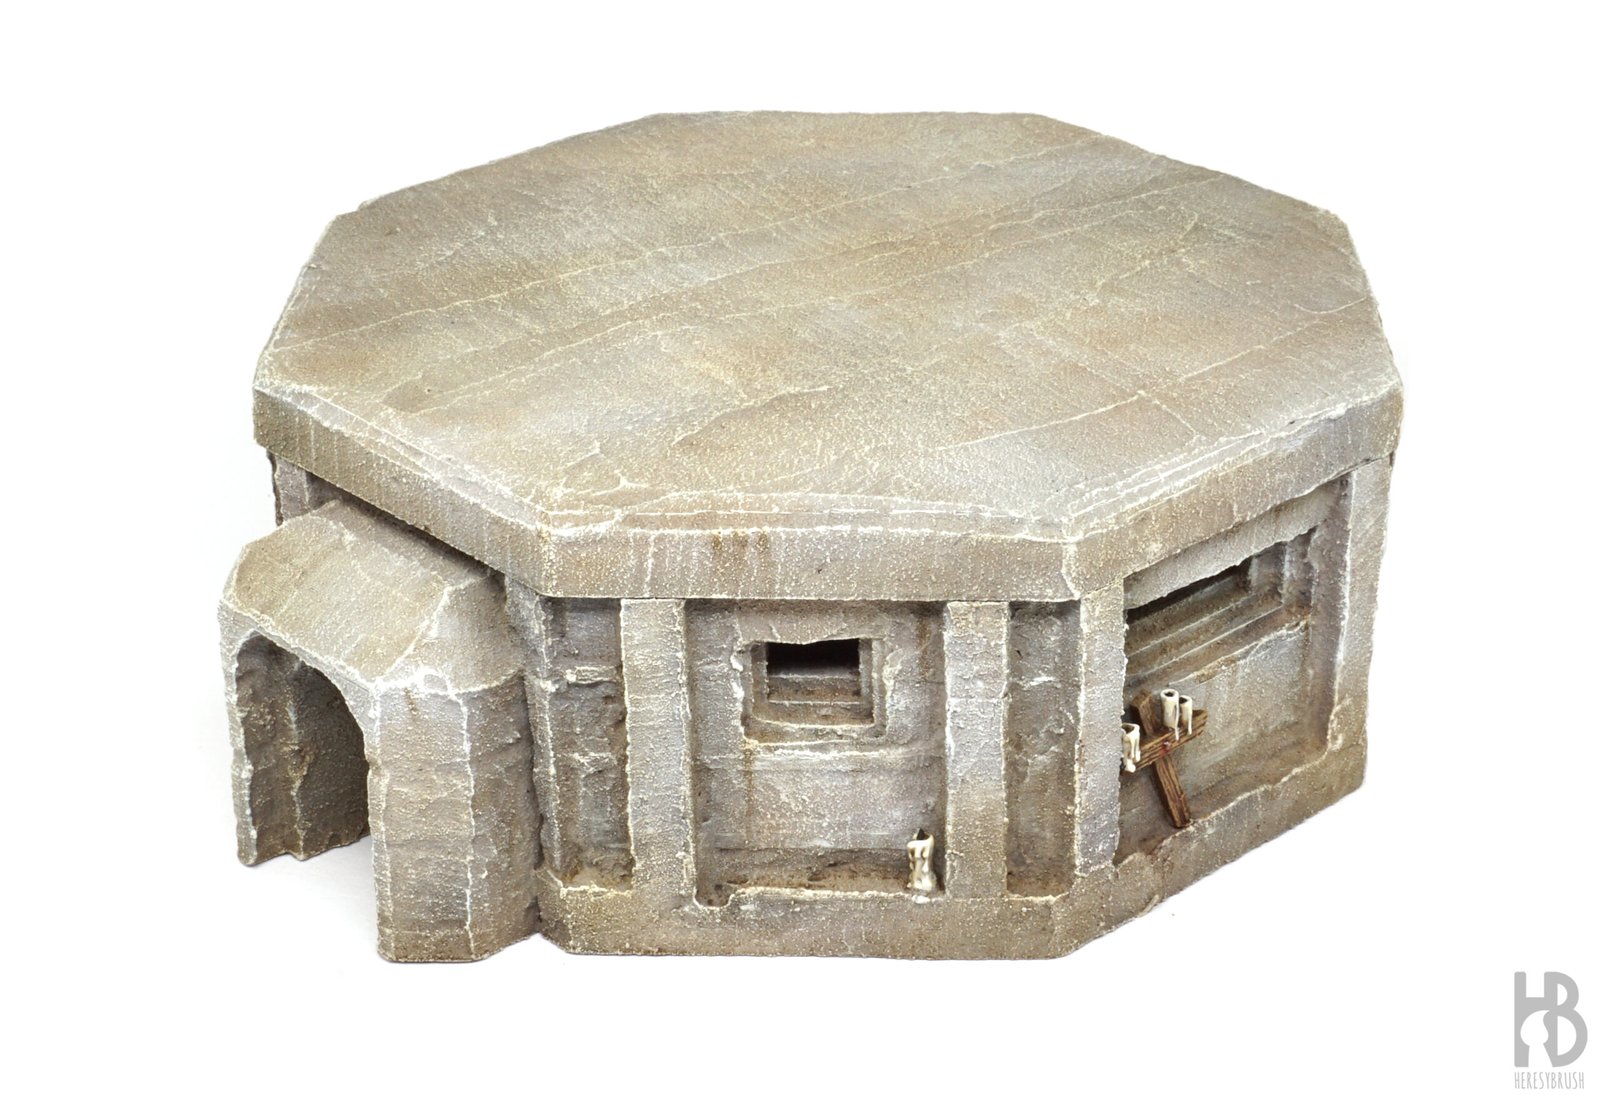
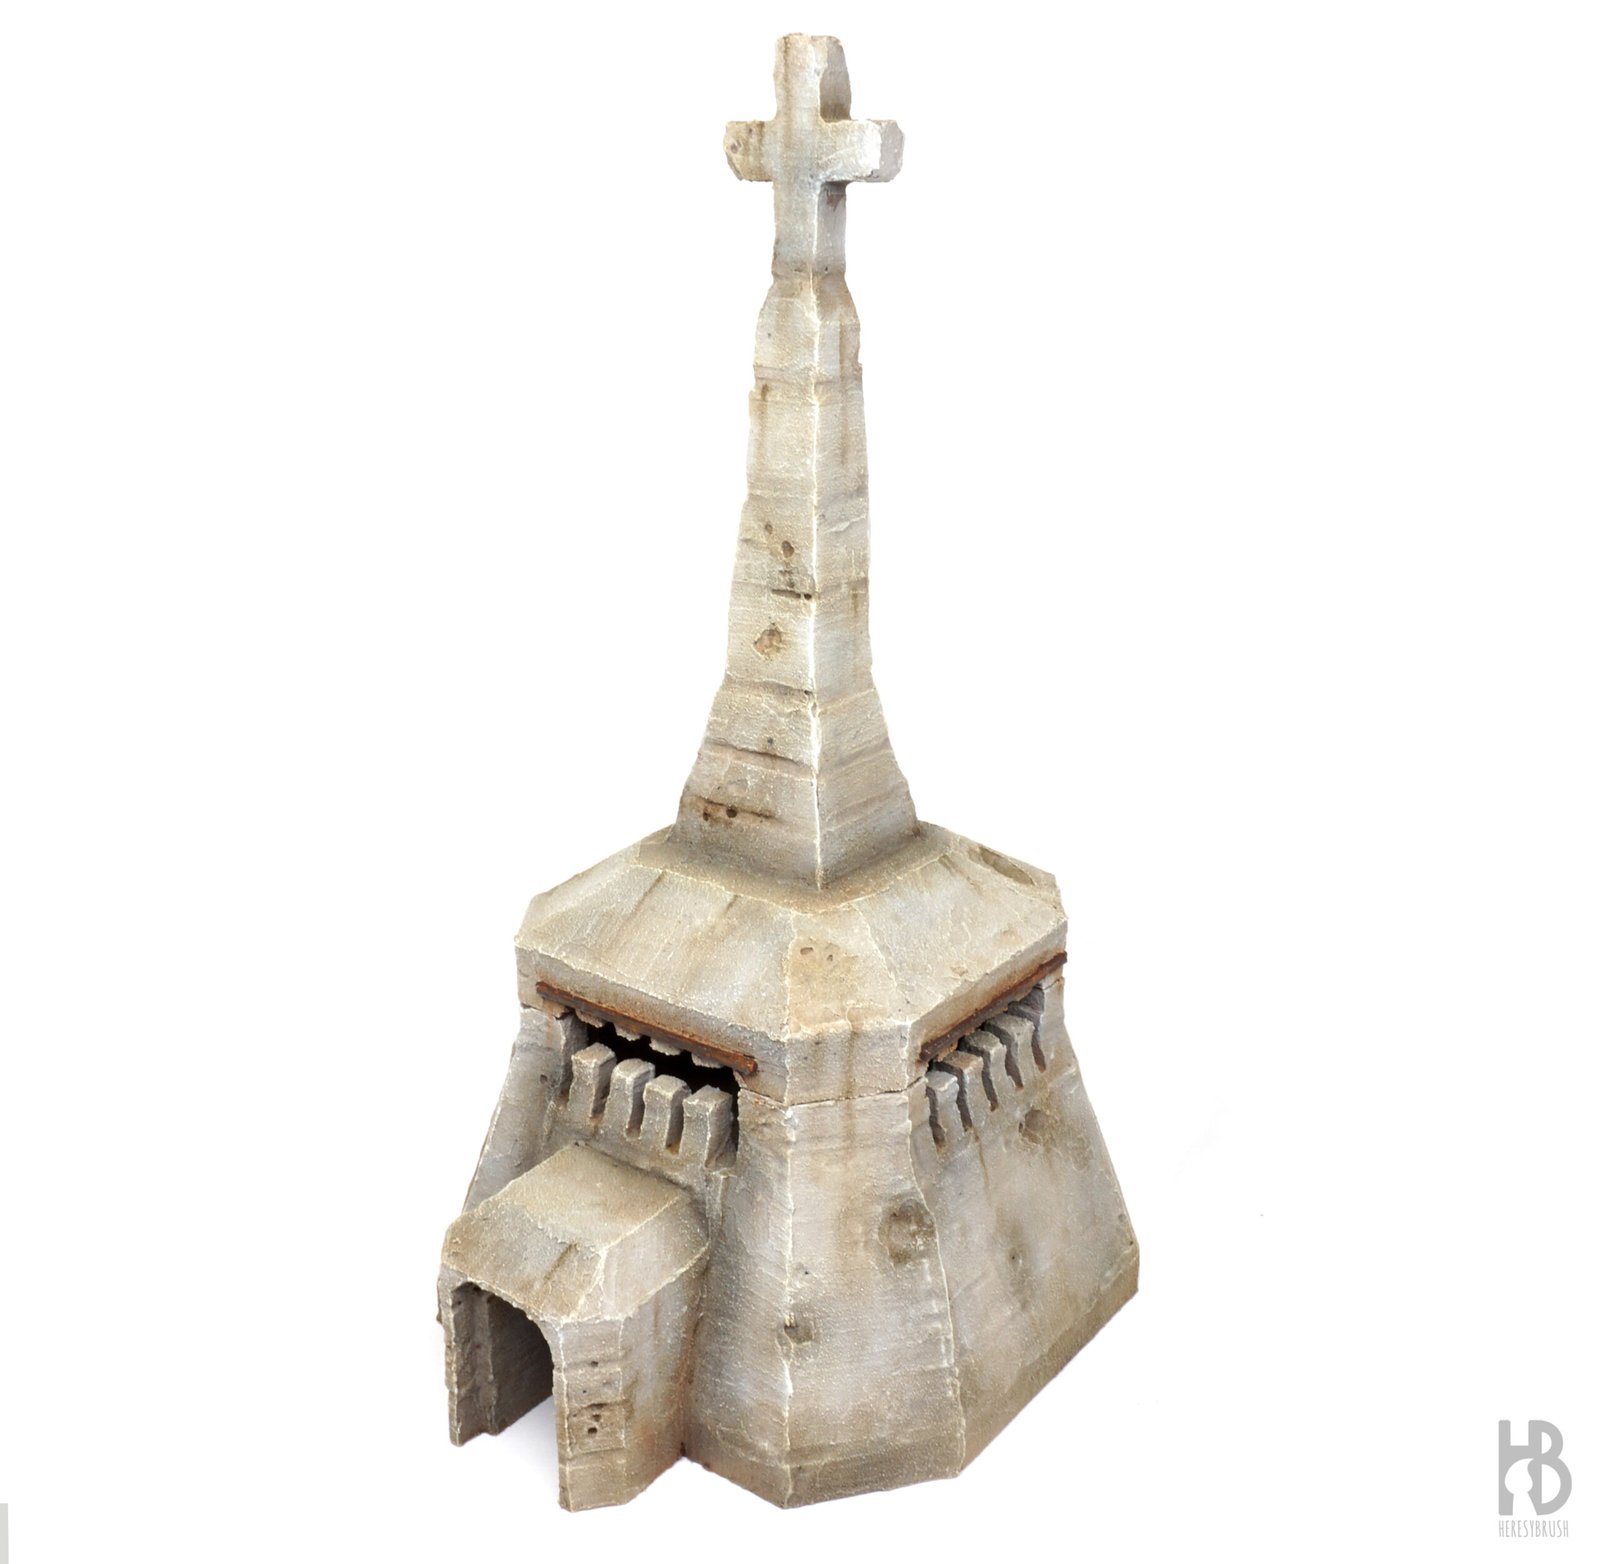
And I applied the same technique to paint several walls and even a couple of bunkers:
If you enjoyed this tutorial, do not miss our new book on Scenery for Wargames! It expands on topics like fortifications (including scratch-building with foam) and covers dozens of other environments, from meadows and deserts to industrial zones and snowy landscapes
And soon, more articles on this fascinating theme:

I am also collaborating closely with Hollow Crown Miniatures (Varus Miniatures and InfamousJT, with sculpts by Ari Nielsson). An exciting Kickstarter campaign is coming soon, stay tuned!
2 thoughts on “How to paint concrete fortifications”