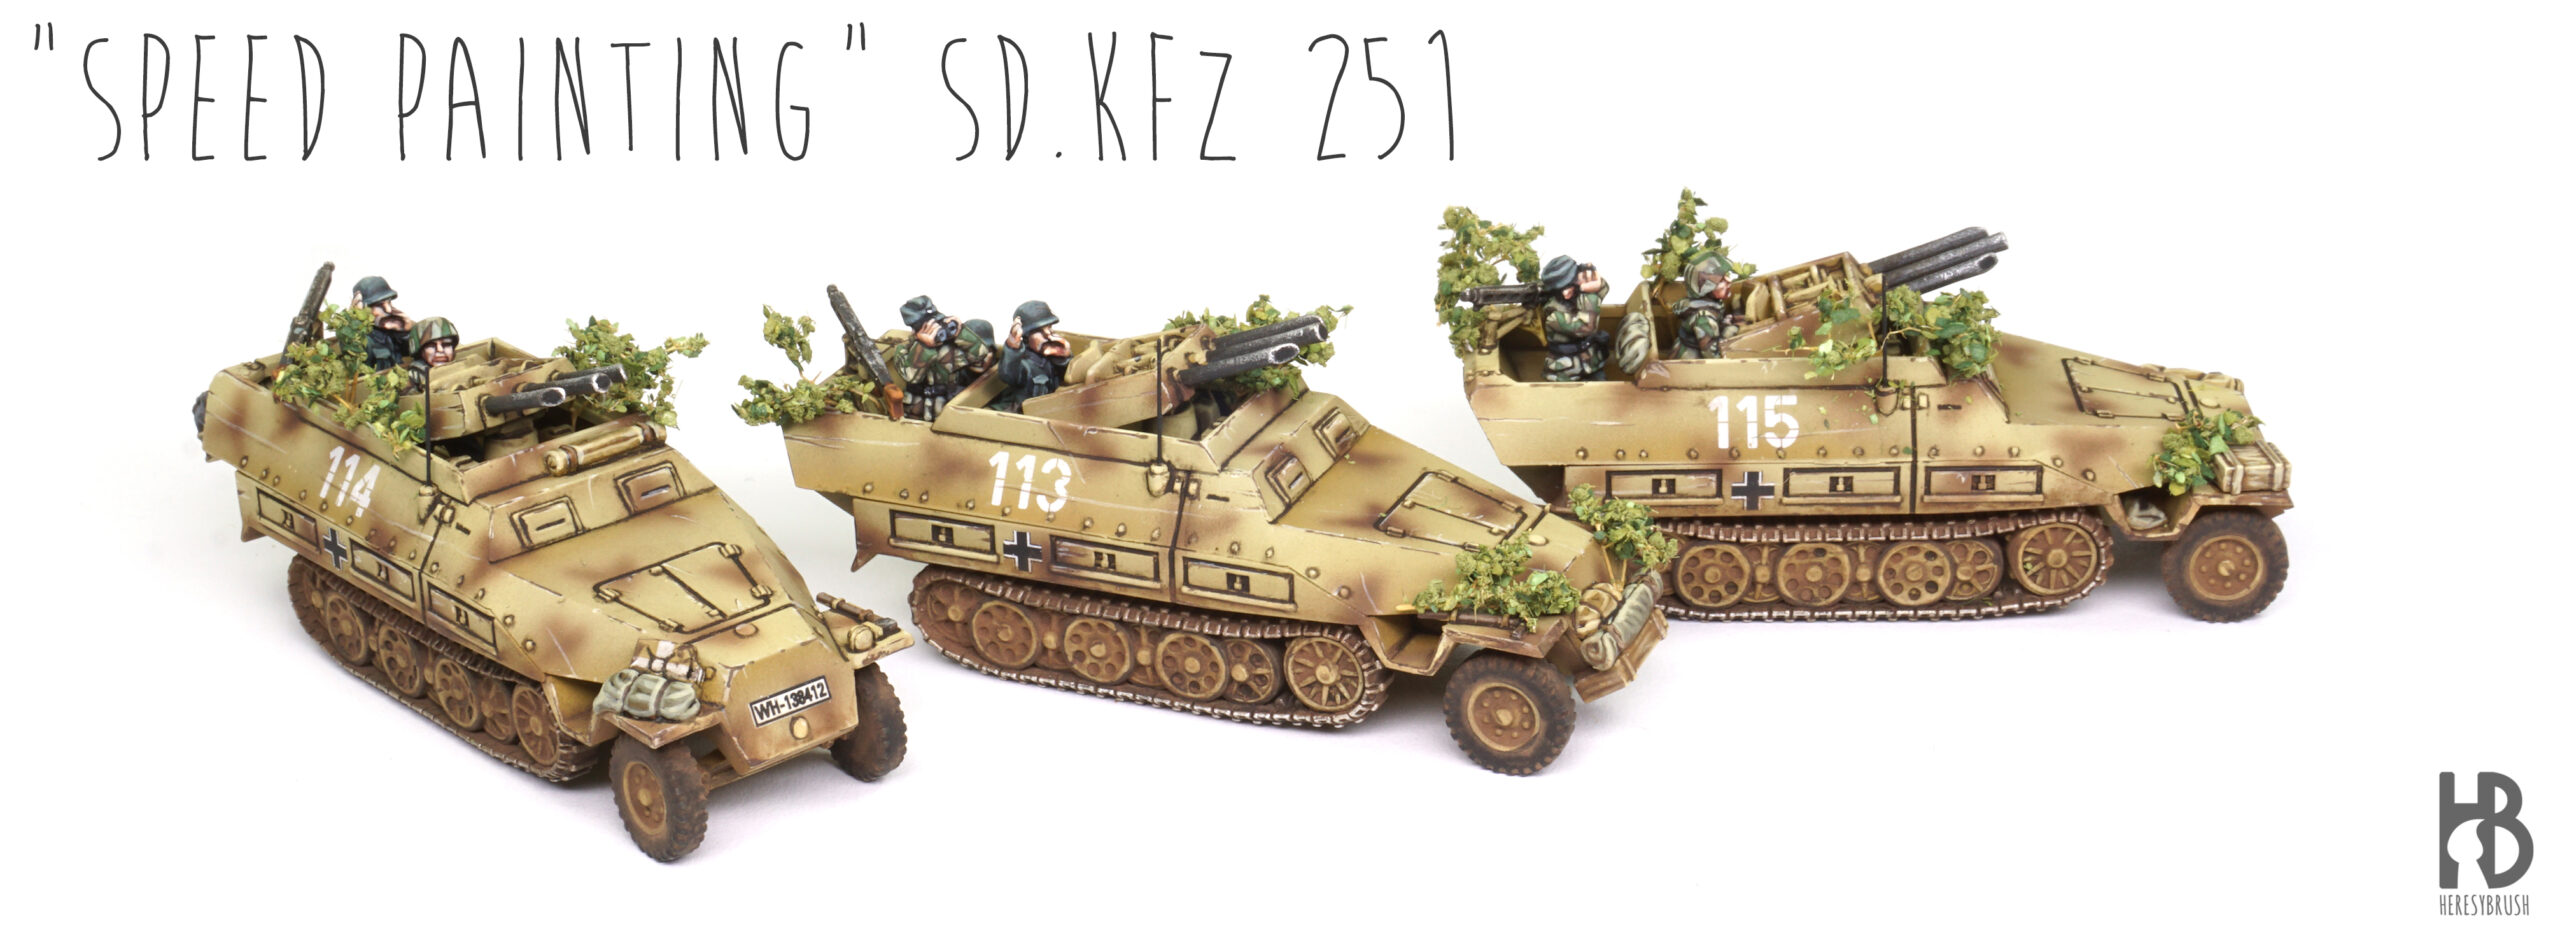
 En esta entrada vamos a describir un método de pintura rápida que comencé a usar el año pasado para pintar los vehículos de dos ejércitos alemanes completos para Flames of War. Pintura rápida es un término relativo: lo que puede ser rápido para mí podría no serlo para otro pintor. En mi caso, este método es rápido porque he simplificado ciertas técnicas que suelo utilizar regularmente (ver esto), como la modulación del color, y he omitido otras por completo, como el uso de óleos para crear efectos de suciedad o desgaste. En suma, todos estos cambios me han ahorran tiempo.
Vamos a utilizar el nuevo set de pinturas de IONIC para tanques alemanes de la 2GM; además de algunos esmaltes y pigmentos:

Este artículo fue publicado originalmente en la web de Battlefront, Parte 1 y Parte 2.
Previamente hemos hablado sobre cómo pintar un camuflaje de bordes duros usando masilla de enmascarar (ver aquí). En este caso, aplicaremos directamente las manchas de camuflaje con el aerógrafo para crear unos bordes suaves o difuminados. Esta técnica implica que no podremos añadir luces ni sombras a las manchas del camuflaje, lo que reducirá parcialmente el efecto de alto contraste que buscamos al pintar vehículos de 15 mm. ¡Sin embargo, ese es precisamente el objetivo del camuflaje: que el vehículo se mezcle con su entorno!
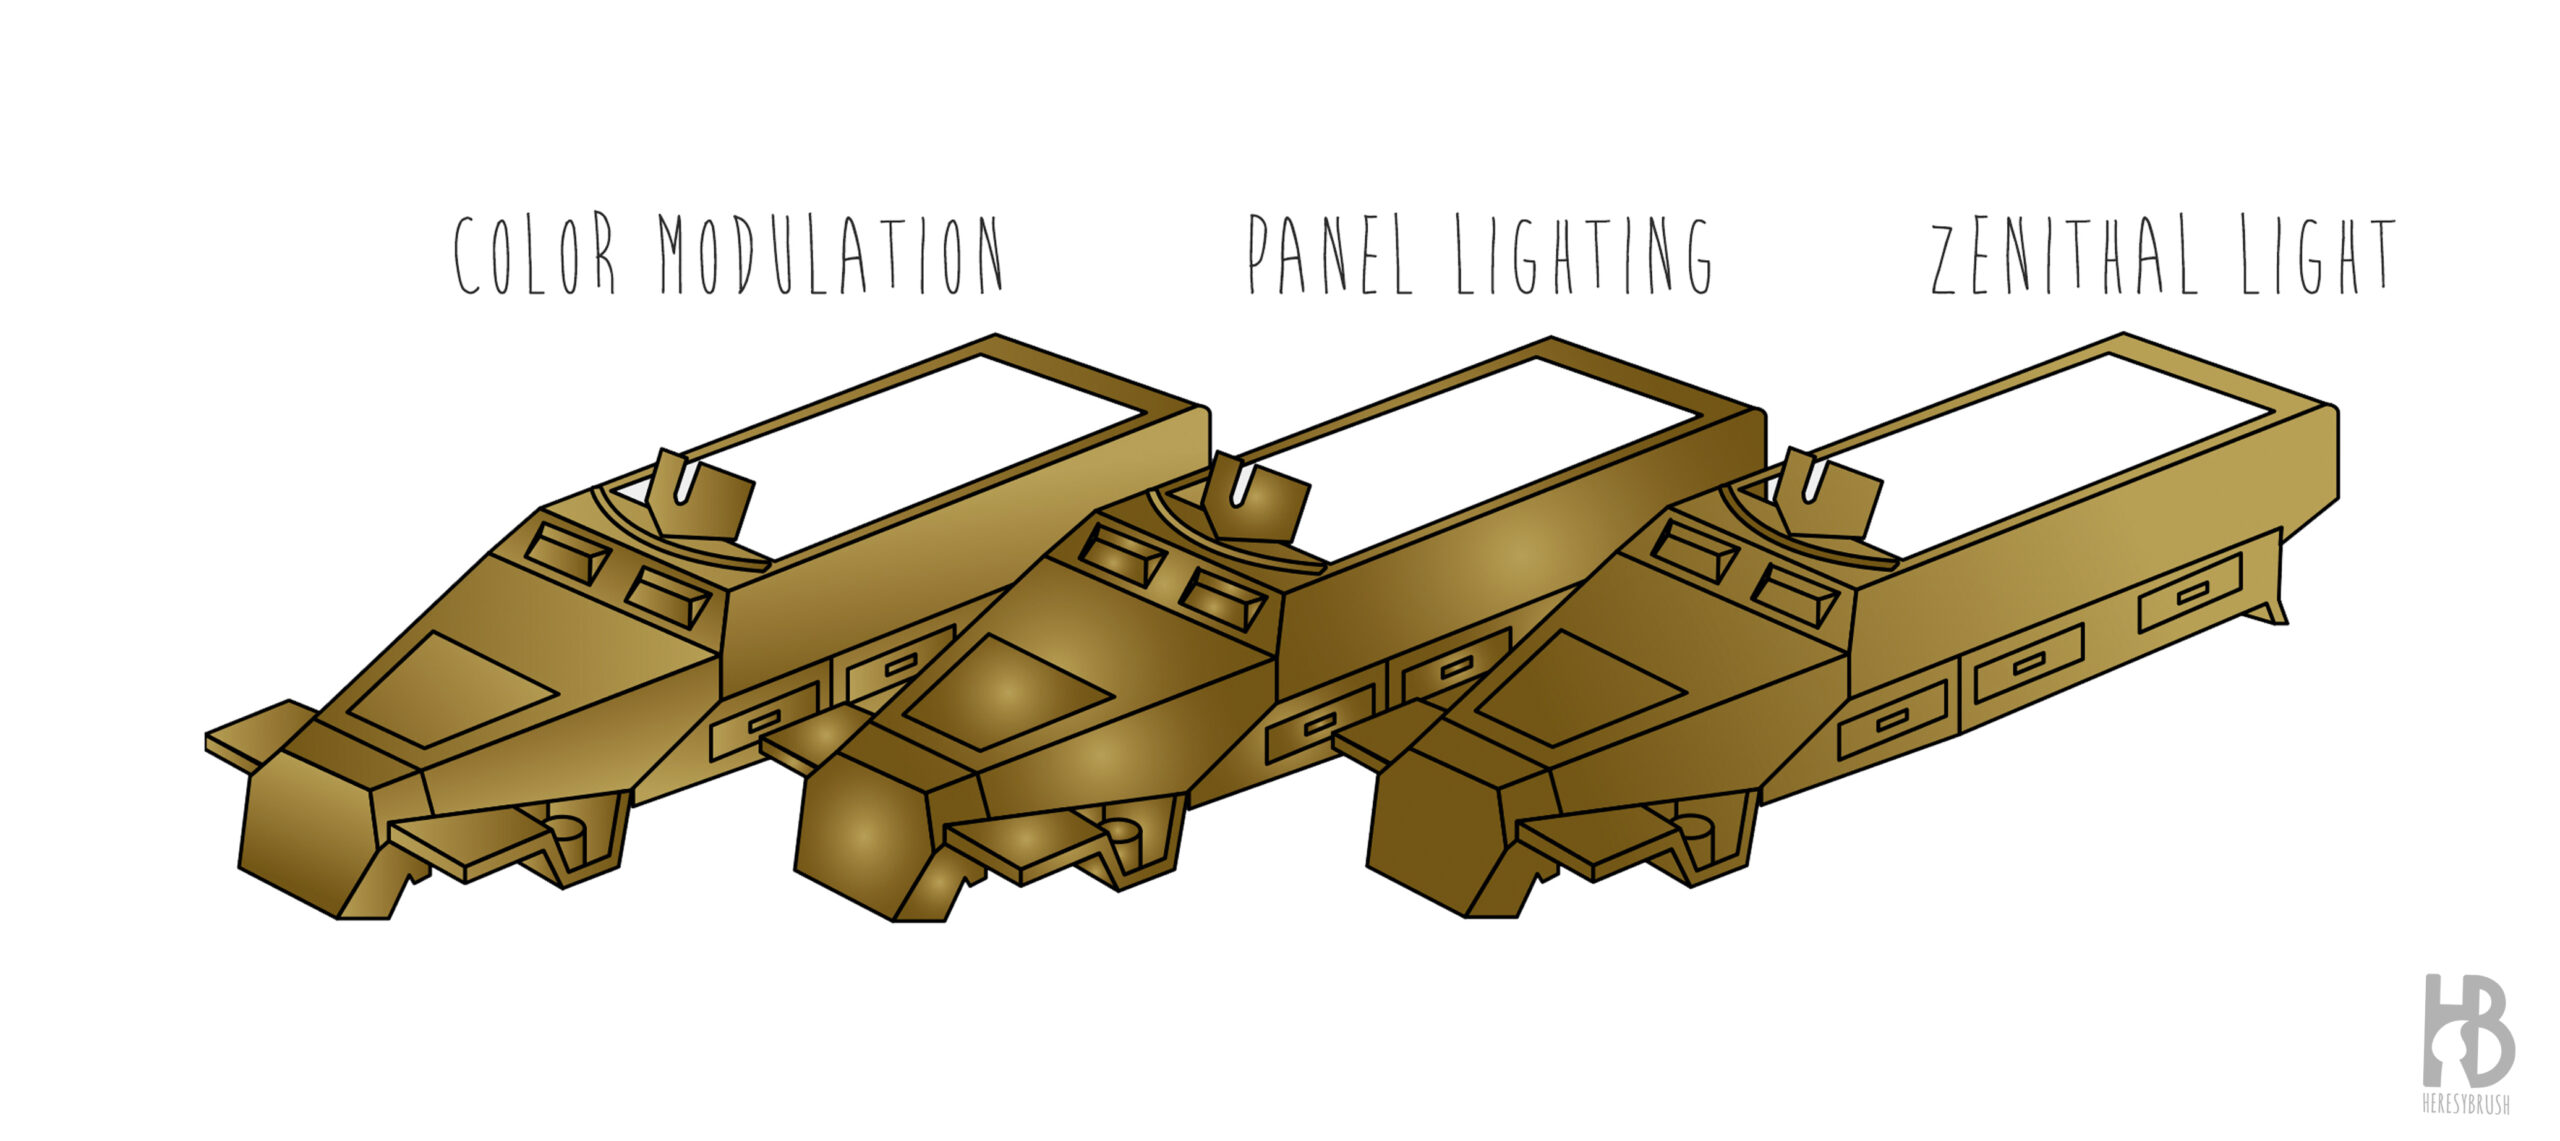
Aplicaremos un sistema relativamente complejo de iluminación sobre el color base amarillo oscuro, conocido como modulación de color (ver aquí). Esta técnica nos ayudará a crear contraste y compensará parcialmente la falta de definición de las manchas de camuflaje verde, que son planas, ya que las sombras y luces sobre el amarillo oscuro seguirán generando algo de volumen. Existen otras opciones más simples y realistas, como la iluminación cenital (imagina una fuente de luz situada sobre la miniatura, como el sol). Sin embargo, para mí, los resultados poco realistas de la modulación del color son precisamente los más idóneos para pintar vehículos de 15 mm, ya que ayudan a que destaquen mucho más nuestros pequeños tanques. Puedes leer más sobre este tema aquí.
En todo caso, puedes seguir esta guía usando cualquier otro sistema de iluminación, incluso un simple pincel seco o simplemente un color base (si eliges esta última opción, es recomendable usar un tono ligeramente más claro que el color real para compensar el pequeño tamaño de estos vehículos).
Paso 1: Preparación
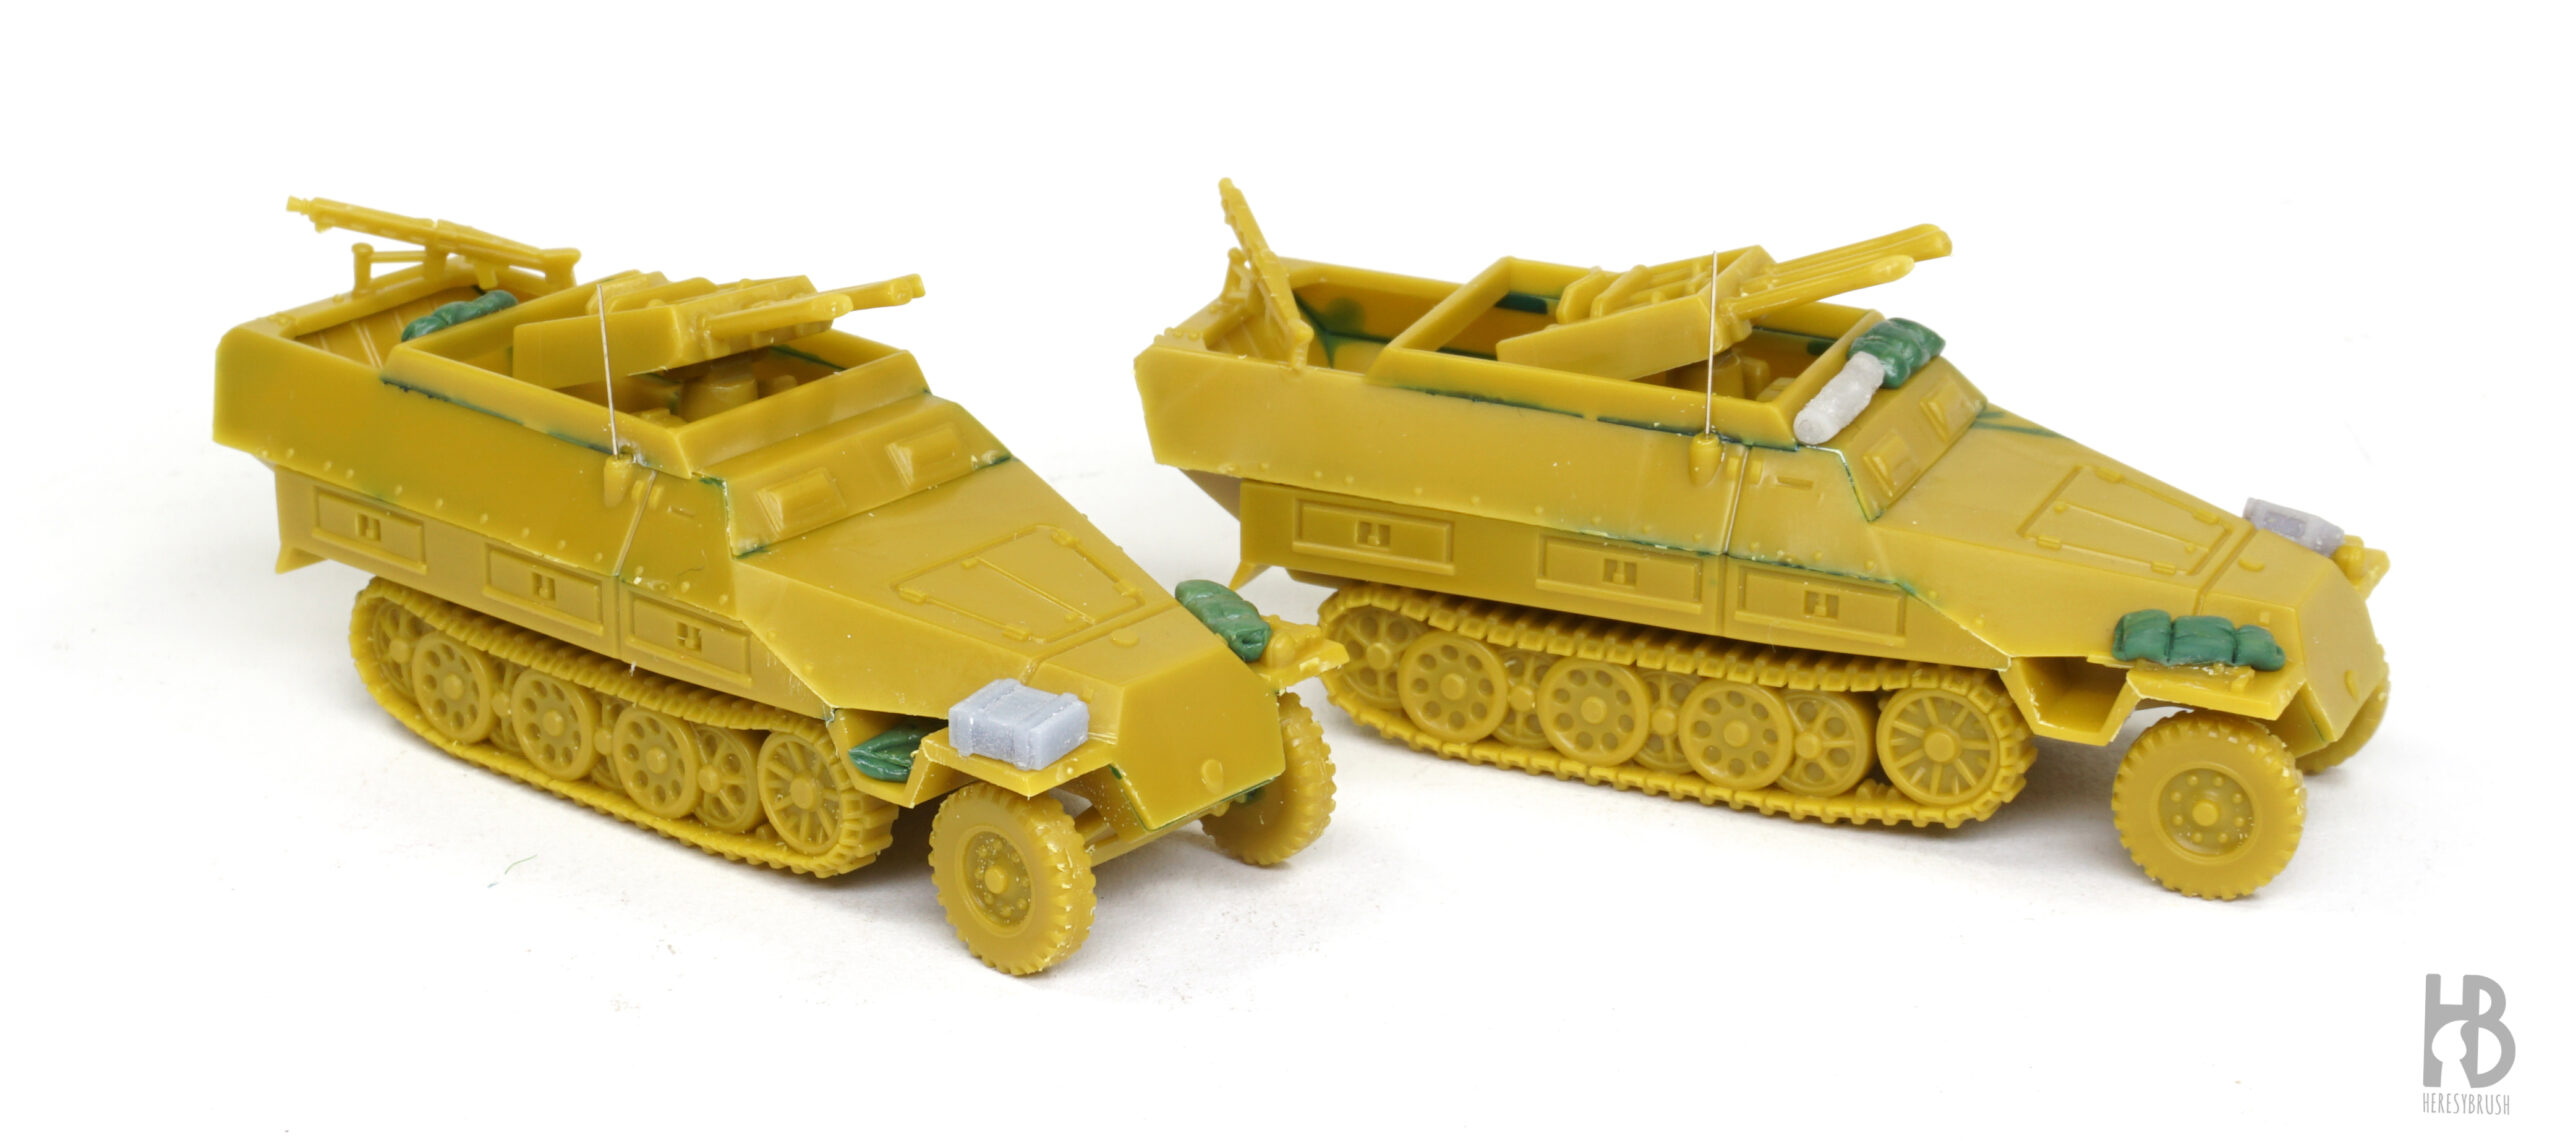
Después de limpiar cada pieza de plástico, las pegamos usando pegamento para plástico. Aquí he usado un pegamento de color azul (Night Blue Cement A.MIG-2045) para ayudar a ver dónde y cuánta cantidad se está aplicando, y para detectar posibles huecos que podrían necesitar ser rellenados con masilla de modelismo más tarde. Al pintar un pelotón con varios vehículos, es recomendable personalizarlos un poco para que cada uno sea único. Aquí he utilizado cajas impresas en 3D, bidones y lonas enrolladas, y también he esculpido mantas con masilla verde. Además, podemos añadir antenas usando varillas de níquel-plata de 0,2 mm (Albion Alloys), fijadas con pegamento instantáneo.
Paso 2: Imprimación
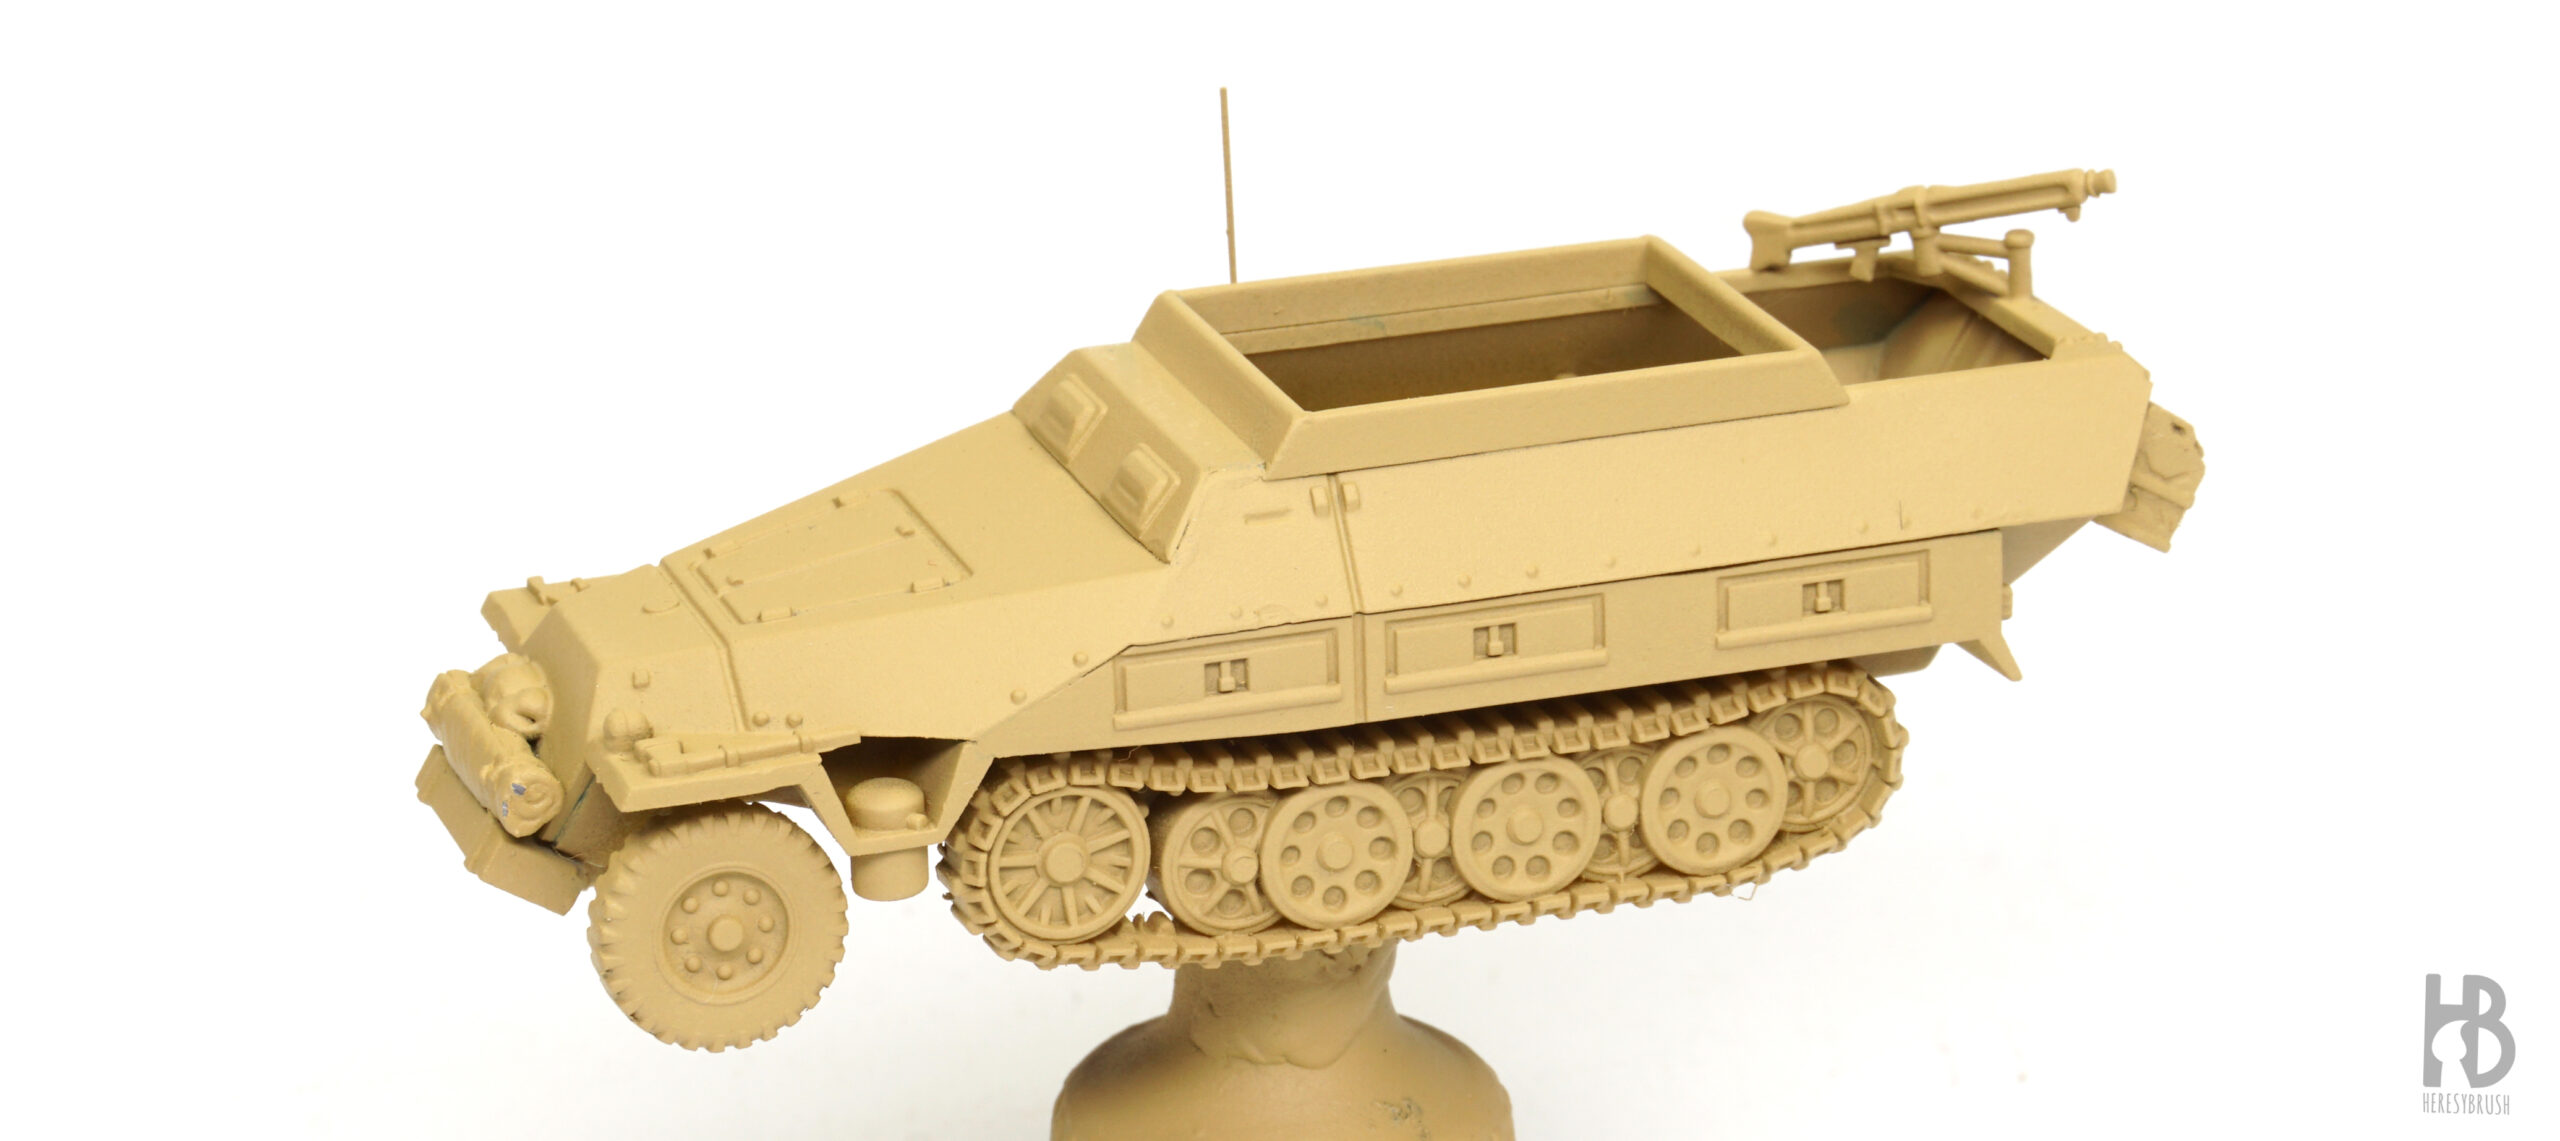
Una vez el vehiculo está completamente montado y personalizado, aplicamos la imprimación o capa base. Este paso es esencial, ya que facilita la aplicación de la pintura y mejora su durabilidad. Como vamos a pintar los semiorugas en amarillo oscuro, utilizamos un color similar para la imprimación. Un spray como TITANS Desert Yellow Primer TTH111 nos ahorrará mucho trabajo. Aunque no sea el color exacto que necesitamos, será mucho más fácil cubrirlo después con el tono correcto. Empezar con una imprimación negra o blanca requeriría aplicar varias capas del color base para lograr una superficie uniforme.
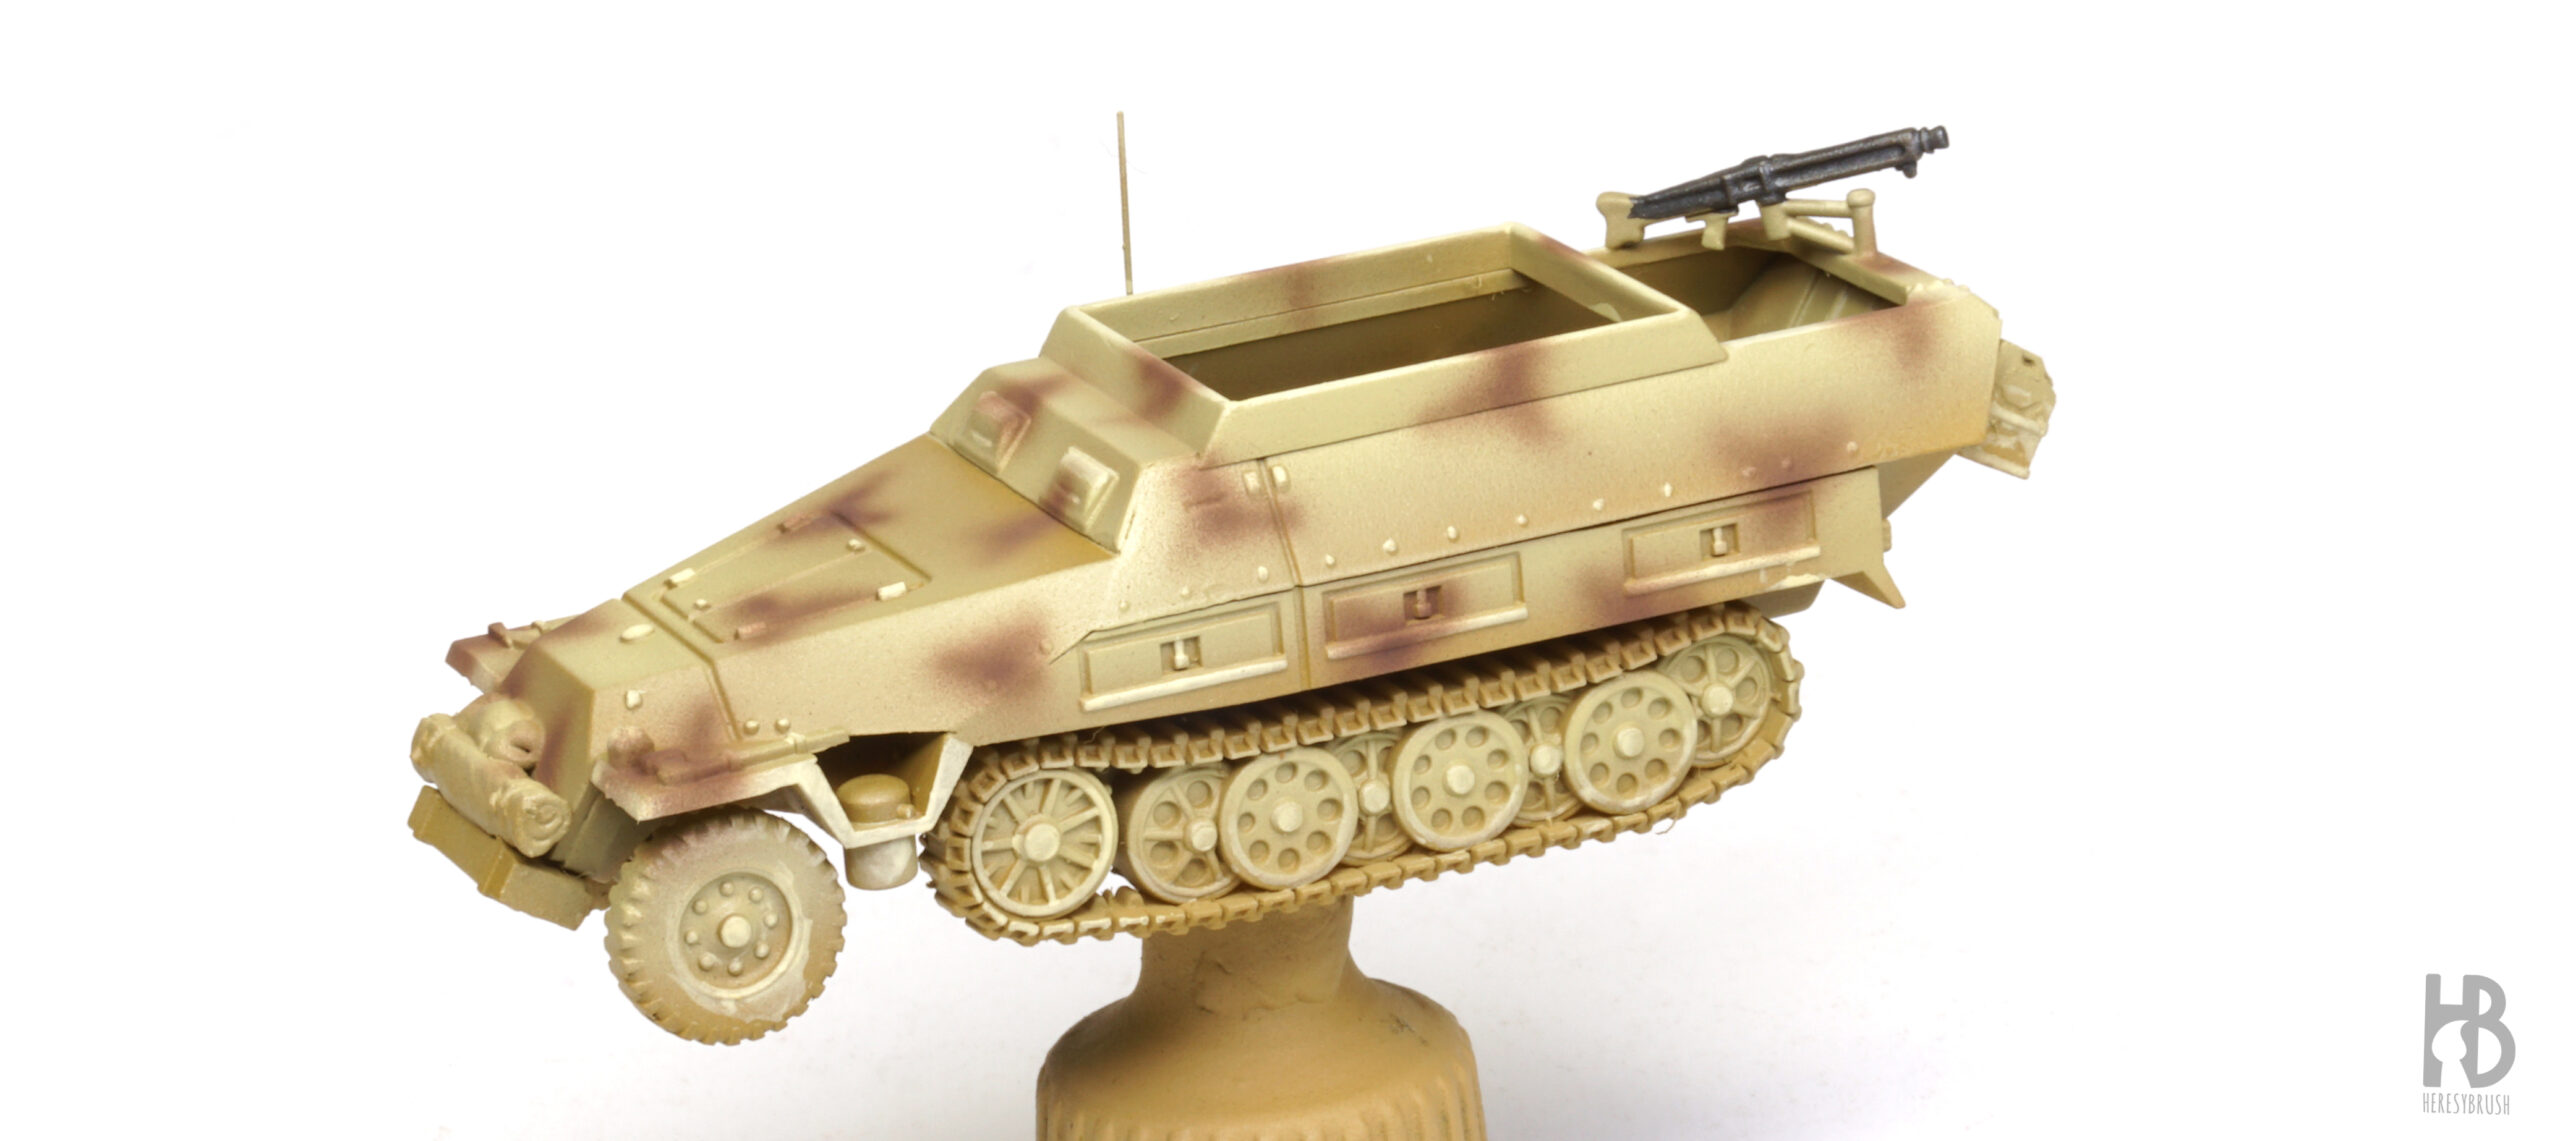
Paso 3: Dunkelgelb (amarillo oscuro): sombra
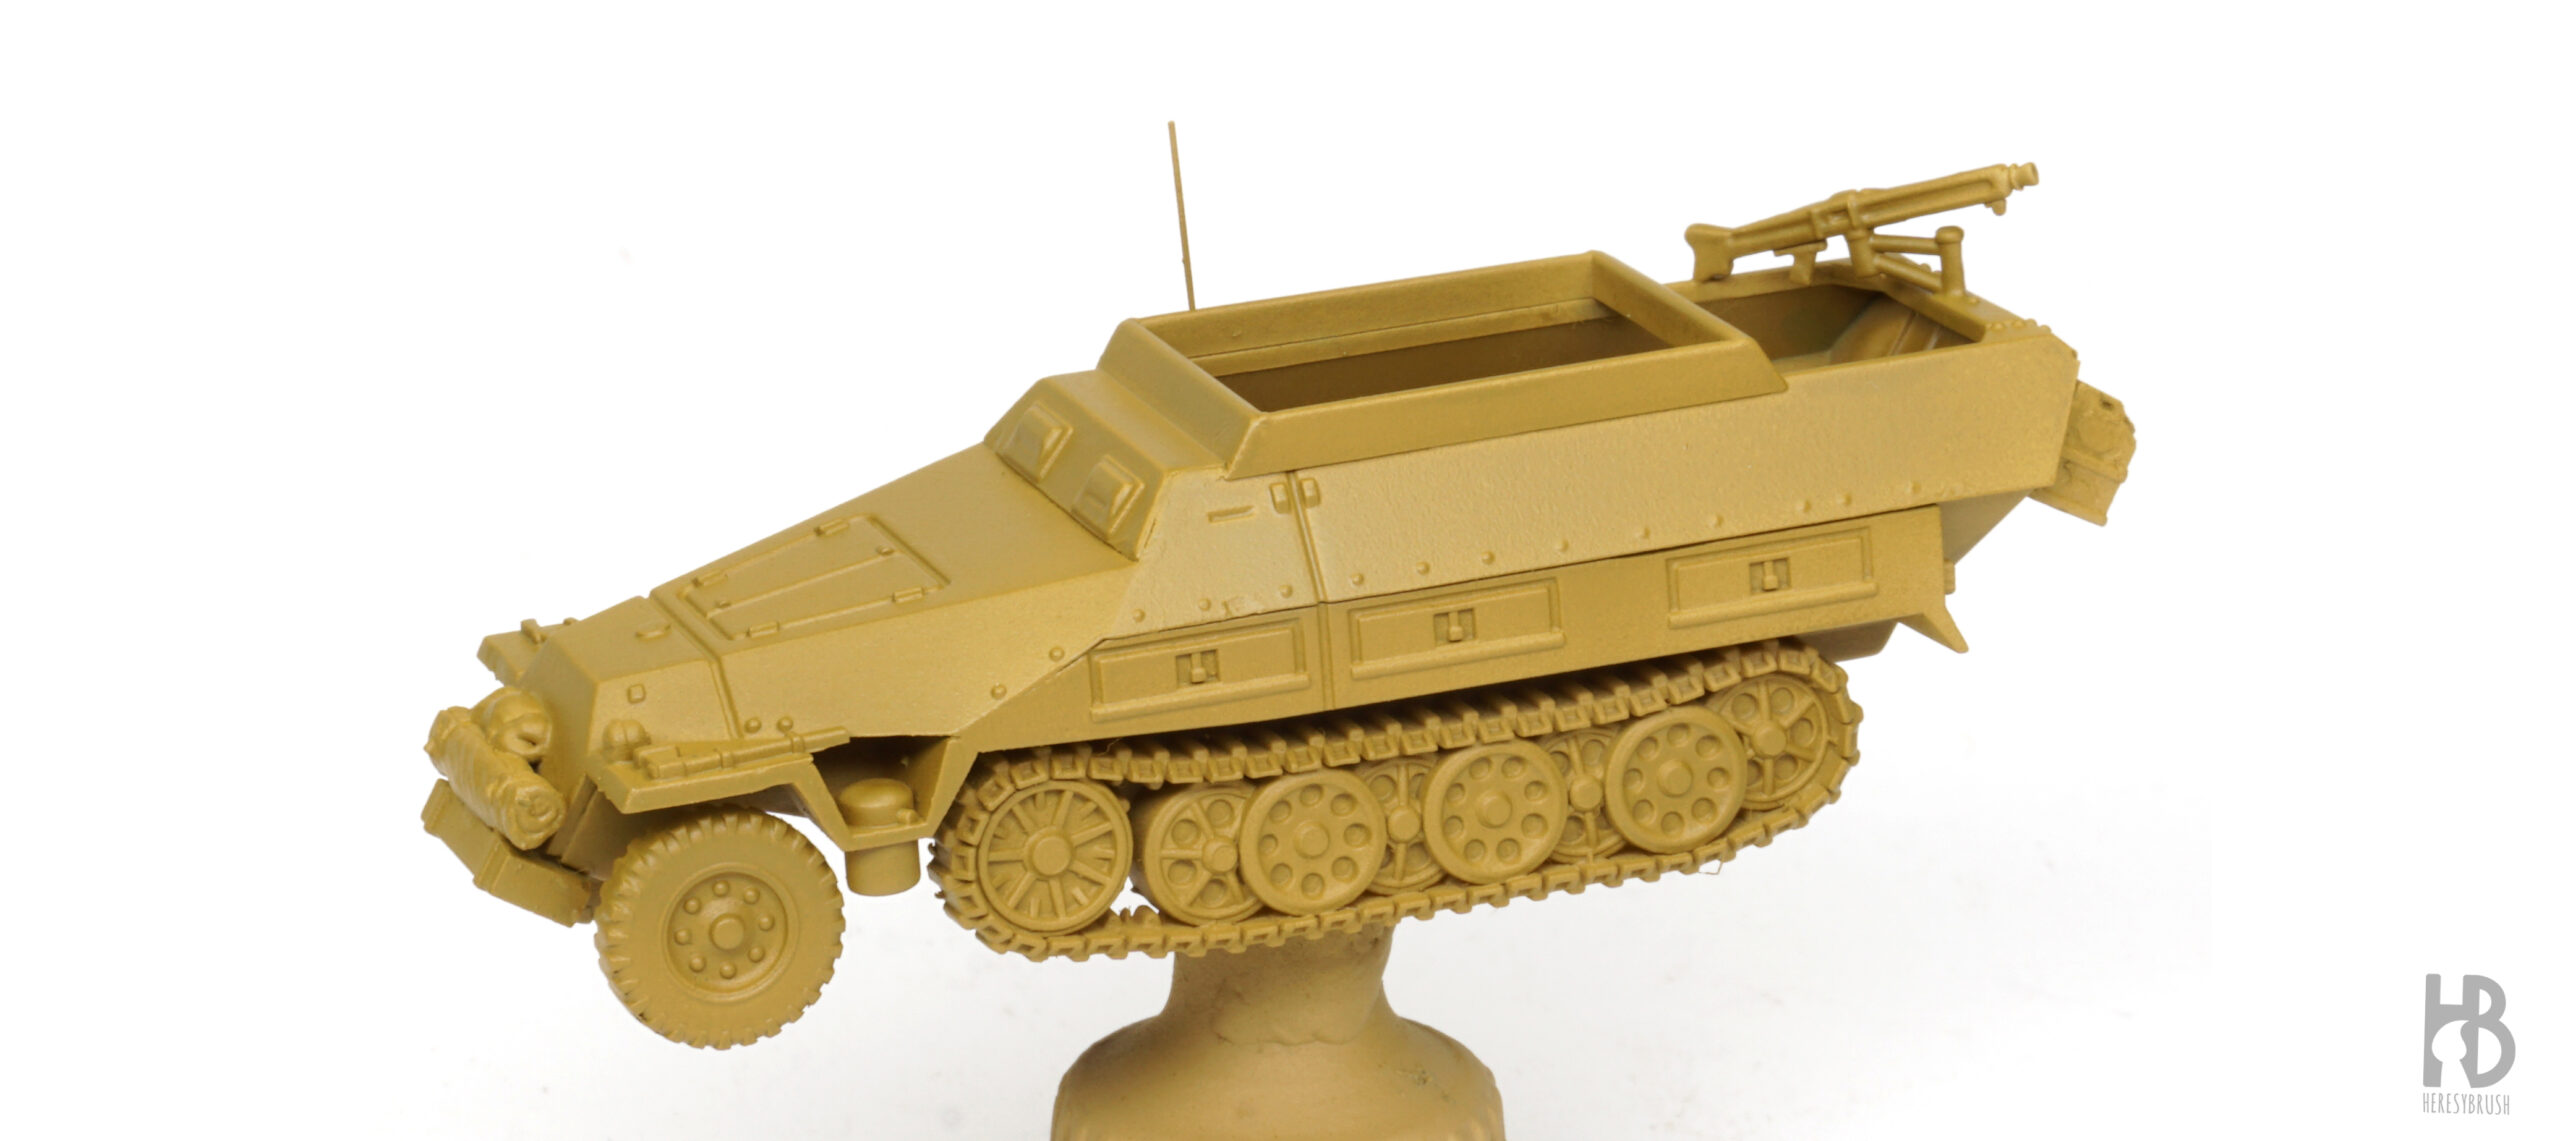
Los vehículos alemanes salían de la fabrica pintados en amarillo oscuro a partir de 1943, y las manchas de camuflaje (verdes o marrones) eran pintadas por las propias tripulaciones. Siguiendo este método, comenzamos pintando todo el vehículo en amarillo oscuro. Empezamos con un tono más oscuro del necesario para que funcione como “sombra”. Por ejemplo, con IONIC-1006 Dunkelgelb Dark Base, y cubrimos todo el vehículo de manera uniforme utilizando un aerógrafo.
Paso 4: Dunkelgelb (amarillo oscuro): base
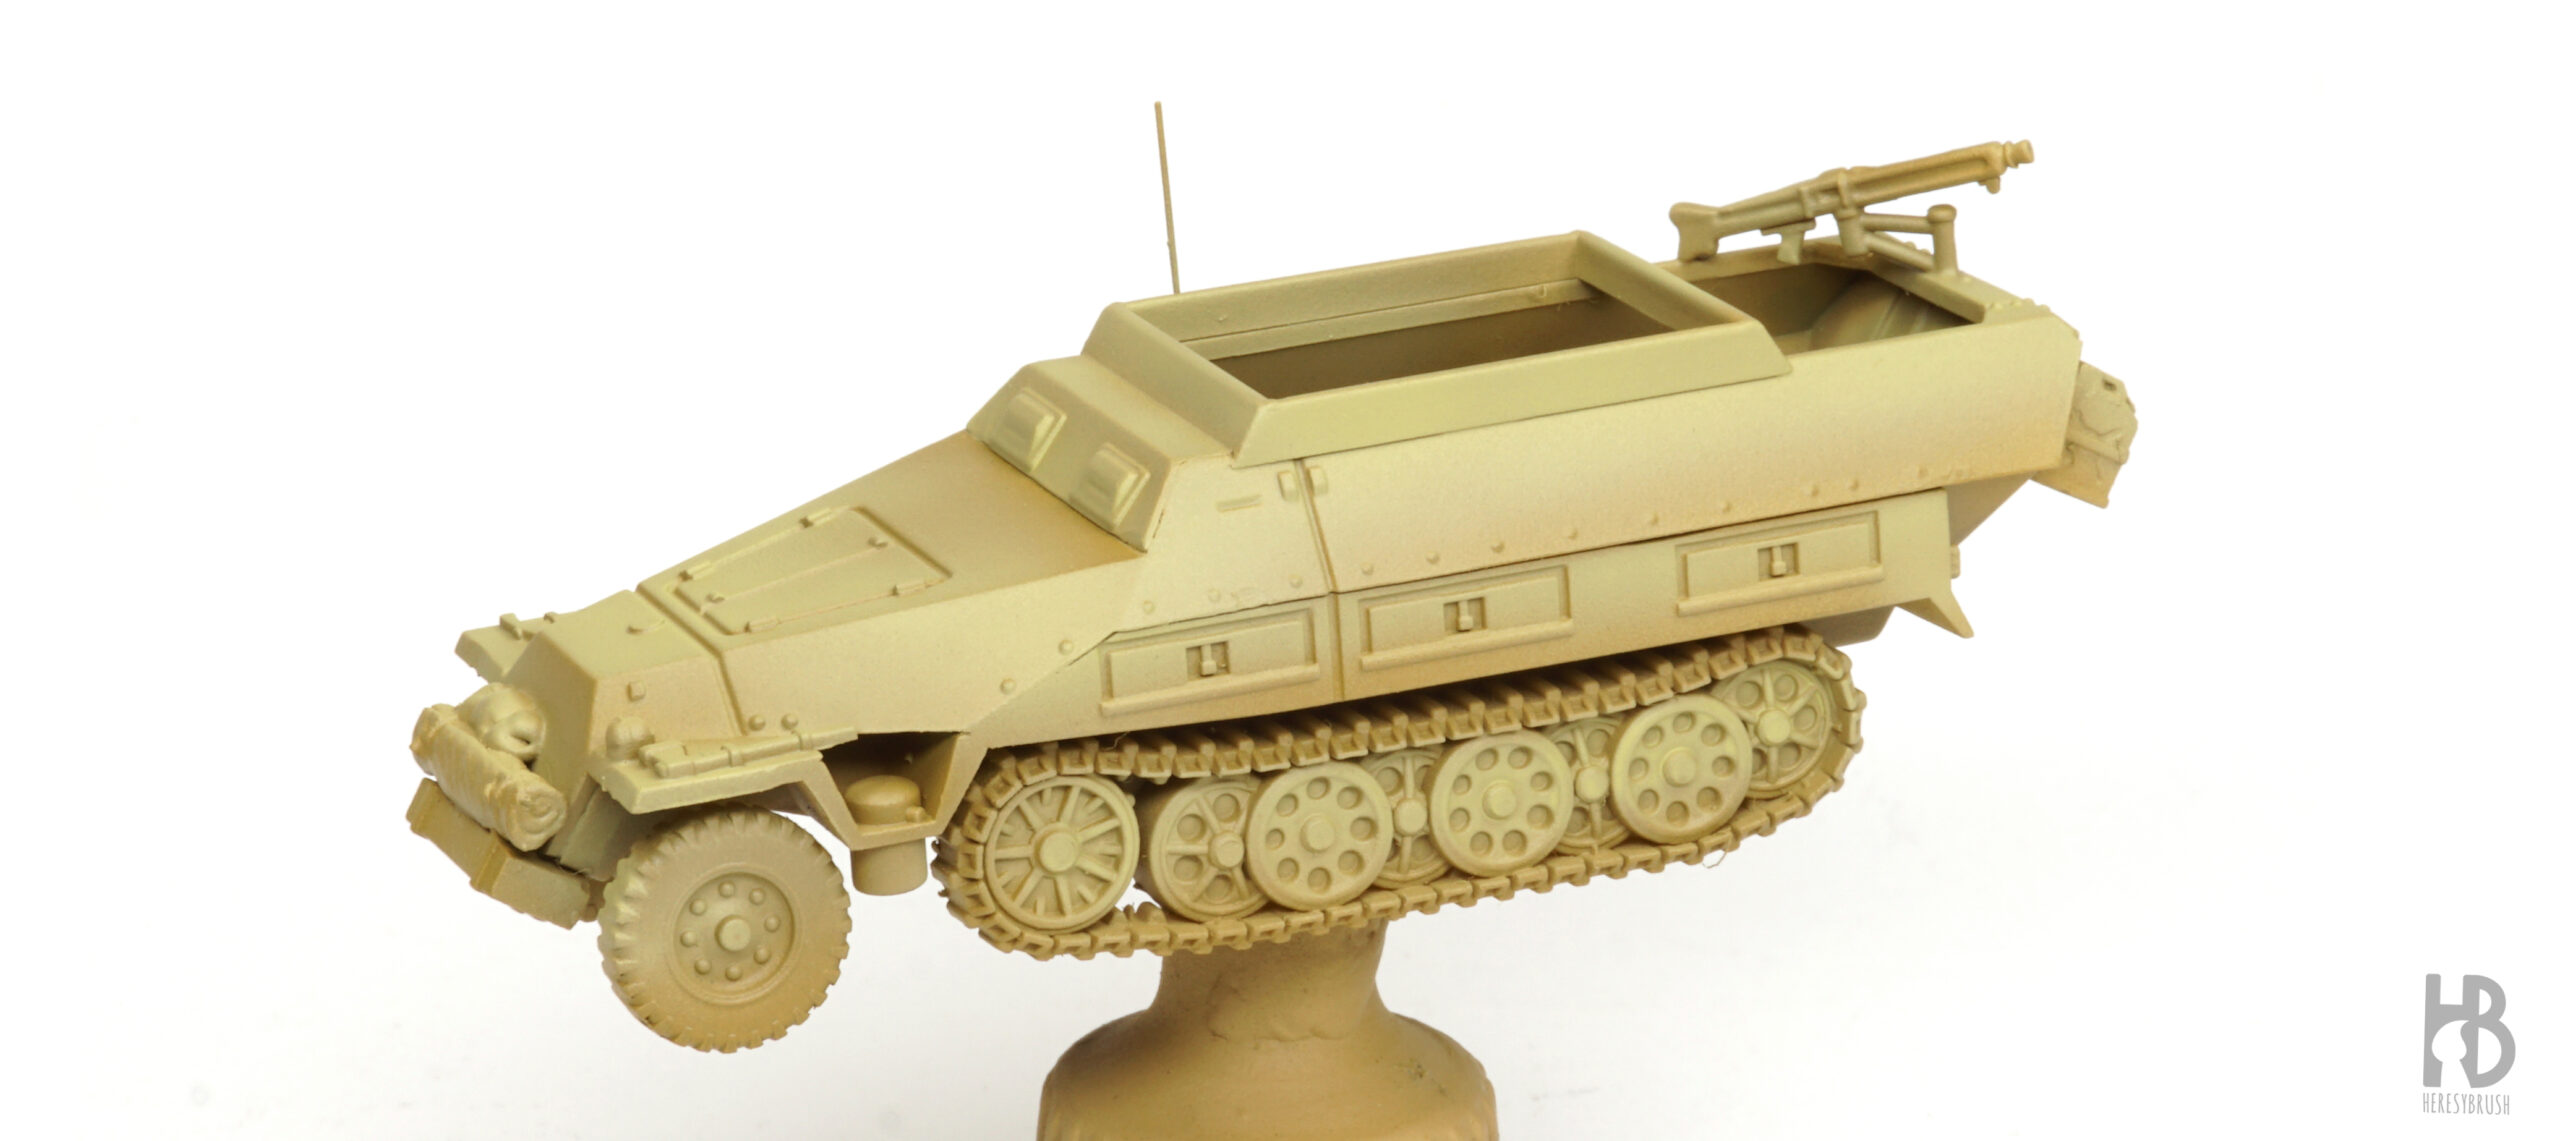
A continuation, aplicamos el color base usando IONIC-1007 Dunkelgelb (este vendría a ser el color «real»). Con el aerógrafo, comenzamos a crear la modulación del color pintando cada panel con sus propias luces para lograr un alto contraste. Esto implica colocar la máxima iluminación de un panel junto a la sombra más intensa de otro (os recomiendo leer el artículo que mencioné previamente).
Paso 5: Dunkelgelb (amarillo oscuro): luz I
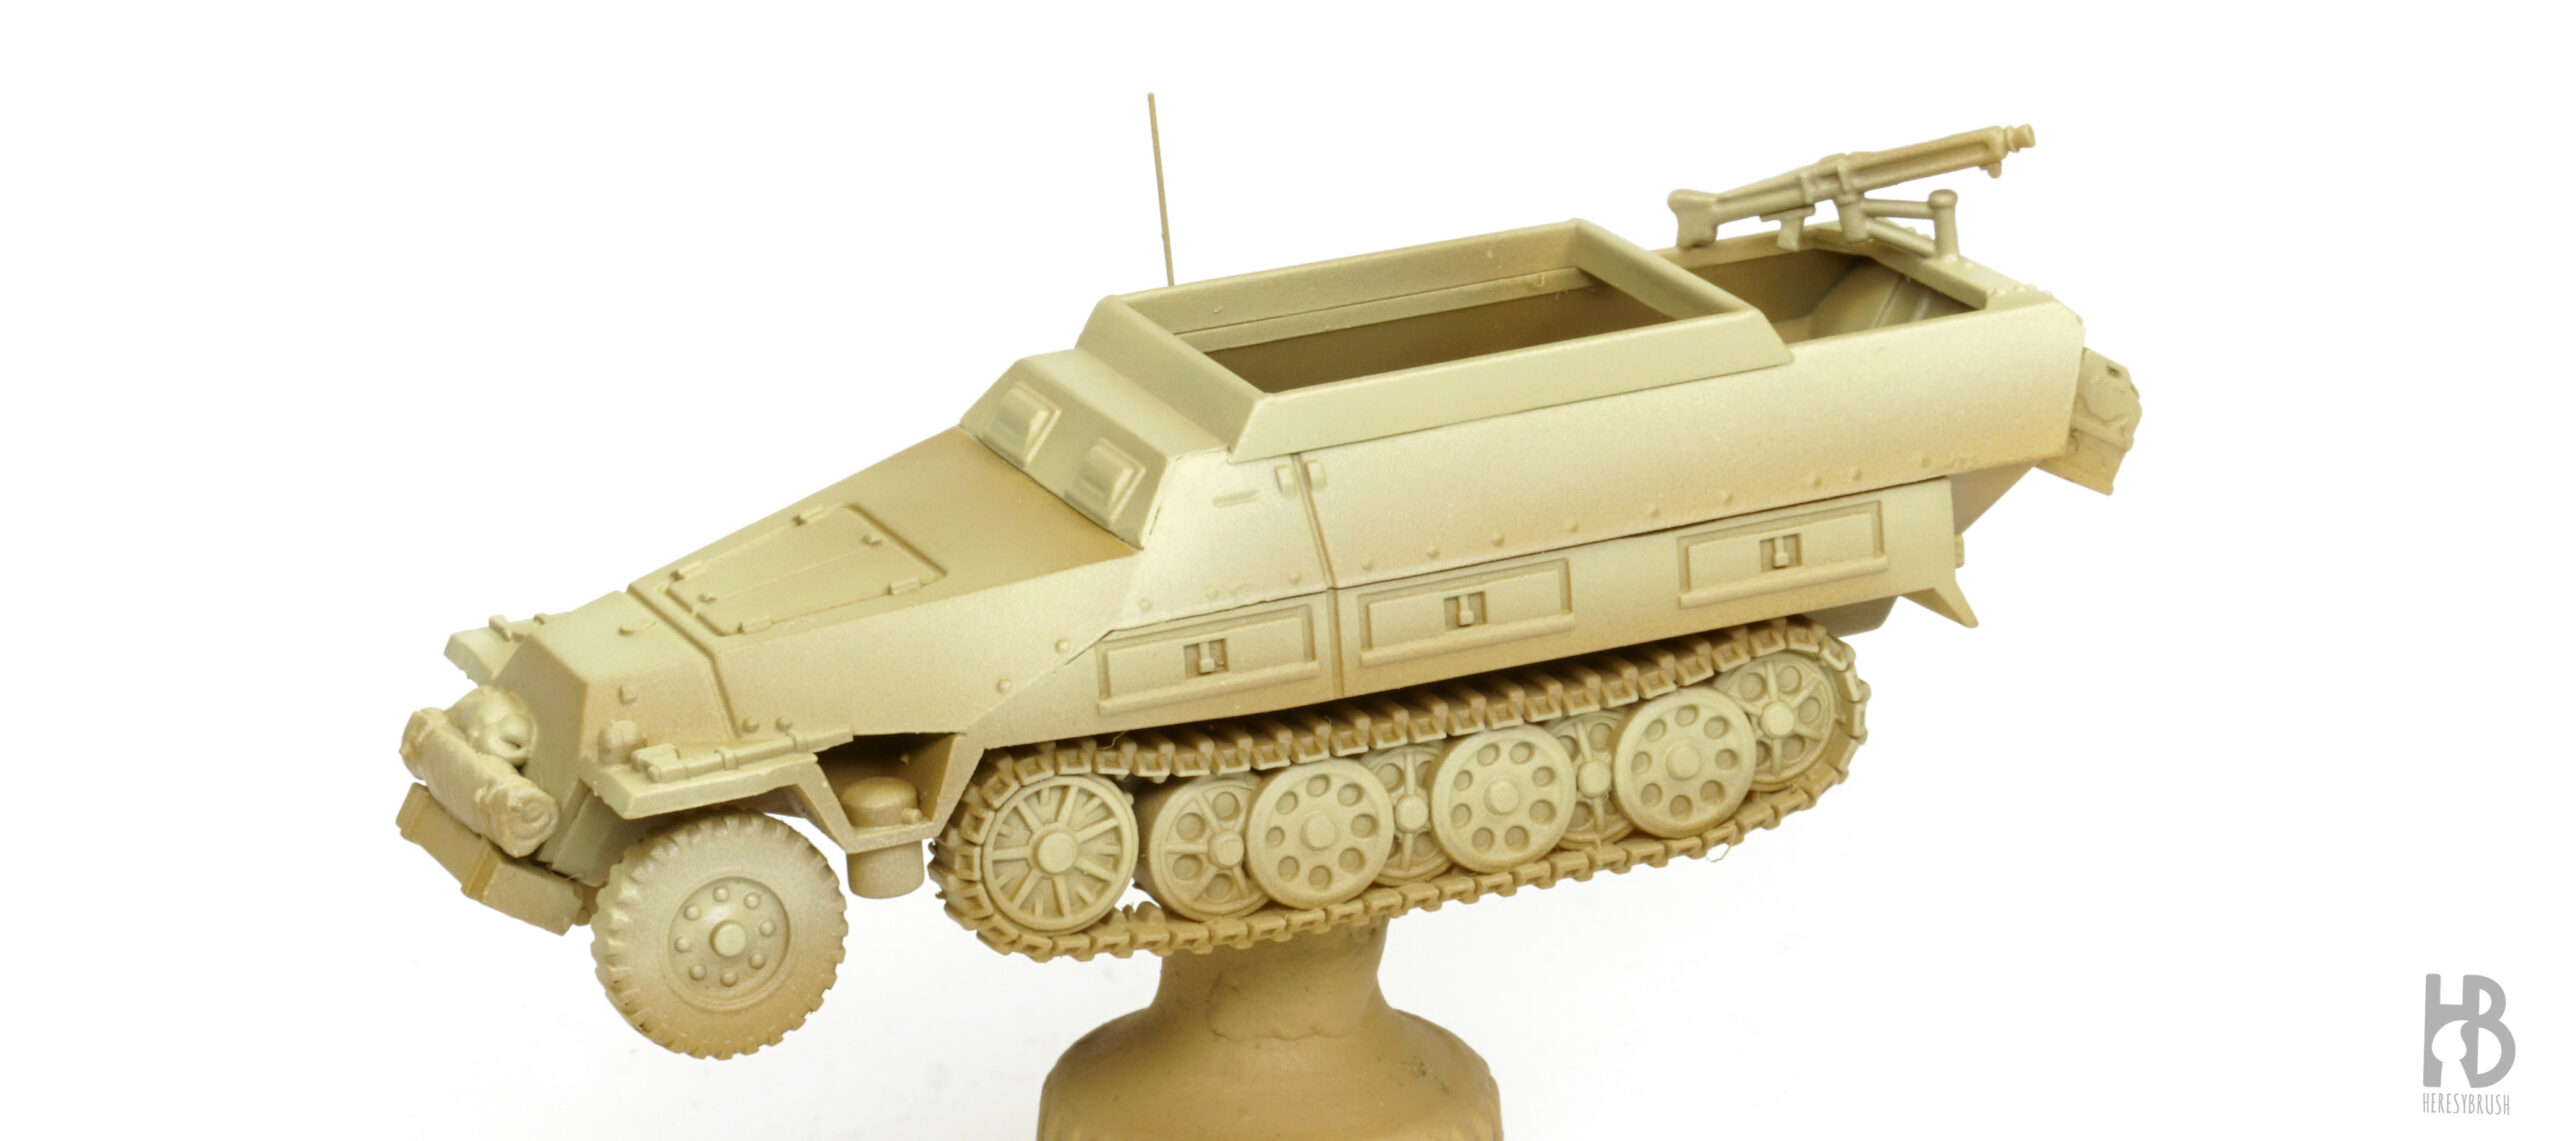
Aplicamos una única luz utilizando un color más claro, por ejemplo, mezclando un 70% IONIC-1007 Dunkelgelb + 30% IONIC-0009 Bone. Esta iluminación se aplica sobre las zonas que ya fueron resaltadas anteriormente, pero reduciendo el área pintada. Es fundamental que todas las capas y colores sean visibles en el resultado final. En esta versión simplificada hemos usado solo tres colores (sombra > base > luz). Normalmente, suelo aplicar hasta cinco. Es decir, he ahorrado casi la mitad de tiempo al simplificar el proceso.
Paso 6: Dunkelgelb (amarillo oscuro): luz II

La modulación del color se completa utilizando un pincel. El paso final consiste en usar un color aún más claro, mezclando un 40% IONIC-1007 Dunkelgelb + 60% IONIC-0009 Bone. Esta mezcla se utiliza para pintar todos los pequeños detalles, como remaches, pliegues y bordes superiores, usando un pincel.
Paso 7: Camuflaje marrón de bordes suaves
Una vez que el color base está listo, podemos aplicar las manchas de camuflaje. Decidí pintar un camuflaje sencillo con manchas marrones usando el aerógrafo y IONIC-1004 Schokobraun RAL 8017. Al pintar este tipo de camuflaje, debemos diluir la pintura con al menos un 40 % de diluyente acrílico para crear una mezcla semitransparente que nos dé más control sobre la intensidad, además de facilitar el trabajo de aerografia evitando que el aerógrafo se obture. Usando una presión de 2 bares (60 psi), pintamos manchas aleatorias aquí y allá. En lugar de hacer pequeños círculos o puntos, buscamos crear formas irregulares, pensando en patrones parecidos a letras como X o Y. Es recomendable probar la dilución y nuestras habilidades en una hoja de papel antes de aplicar la pintura sobre el vehículo.
Paso 8: Detalles
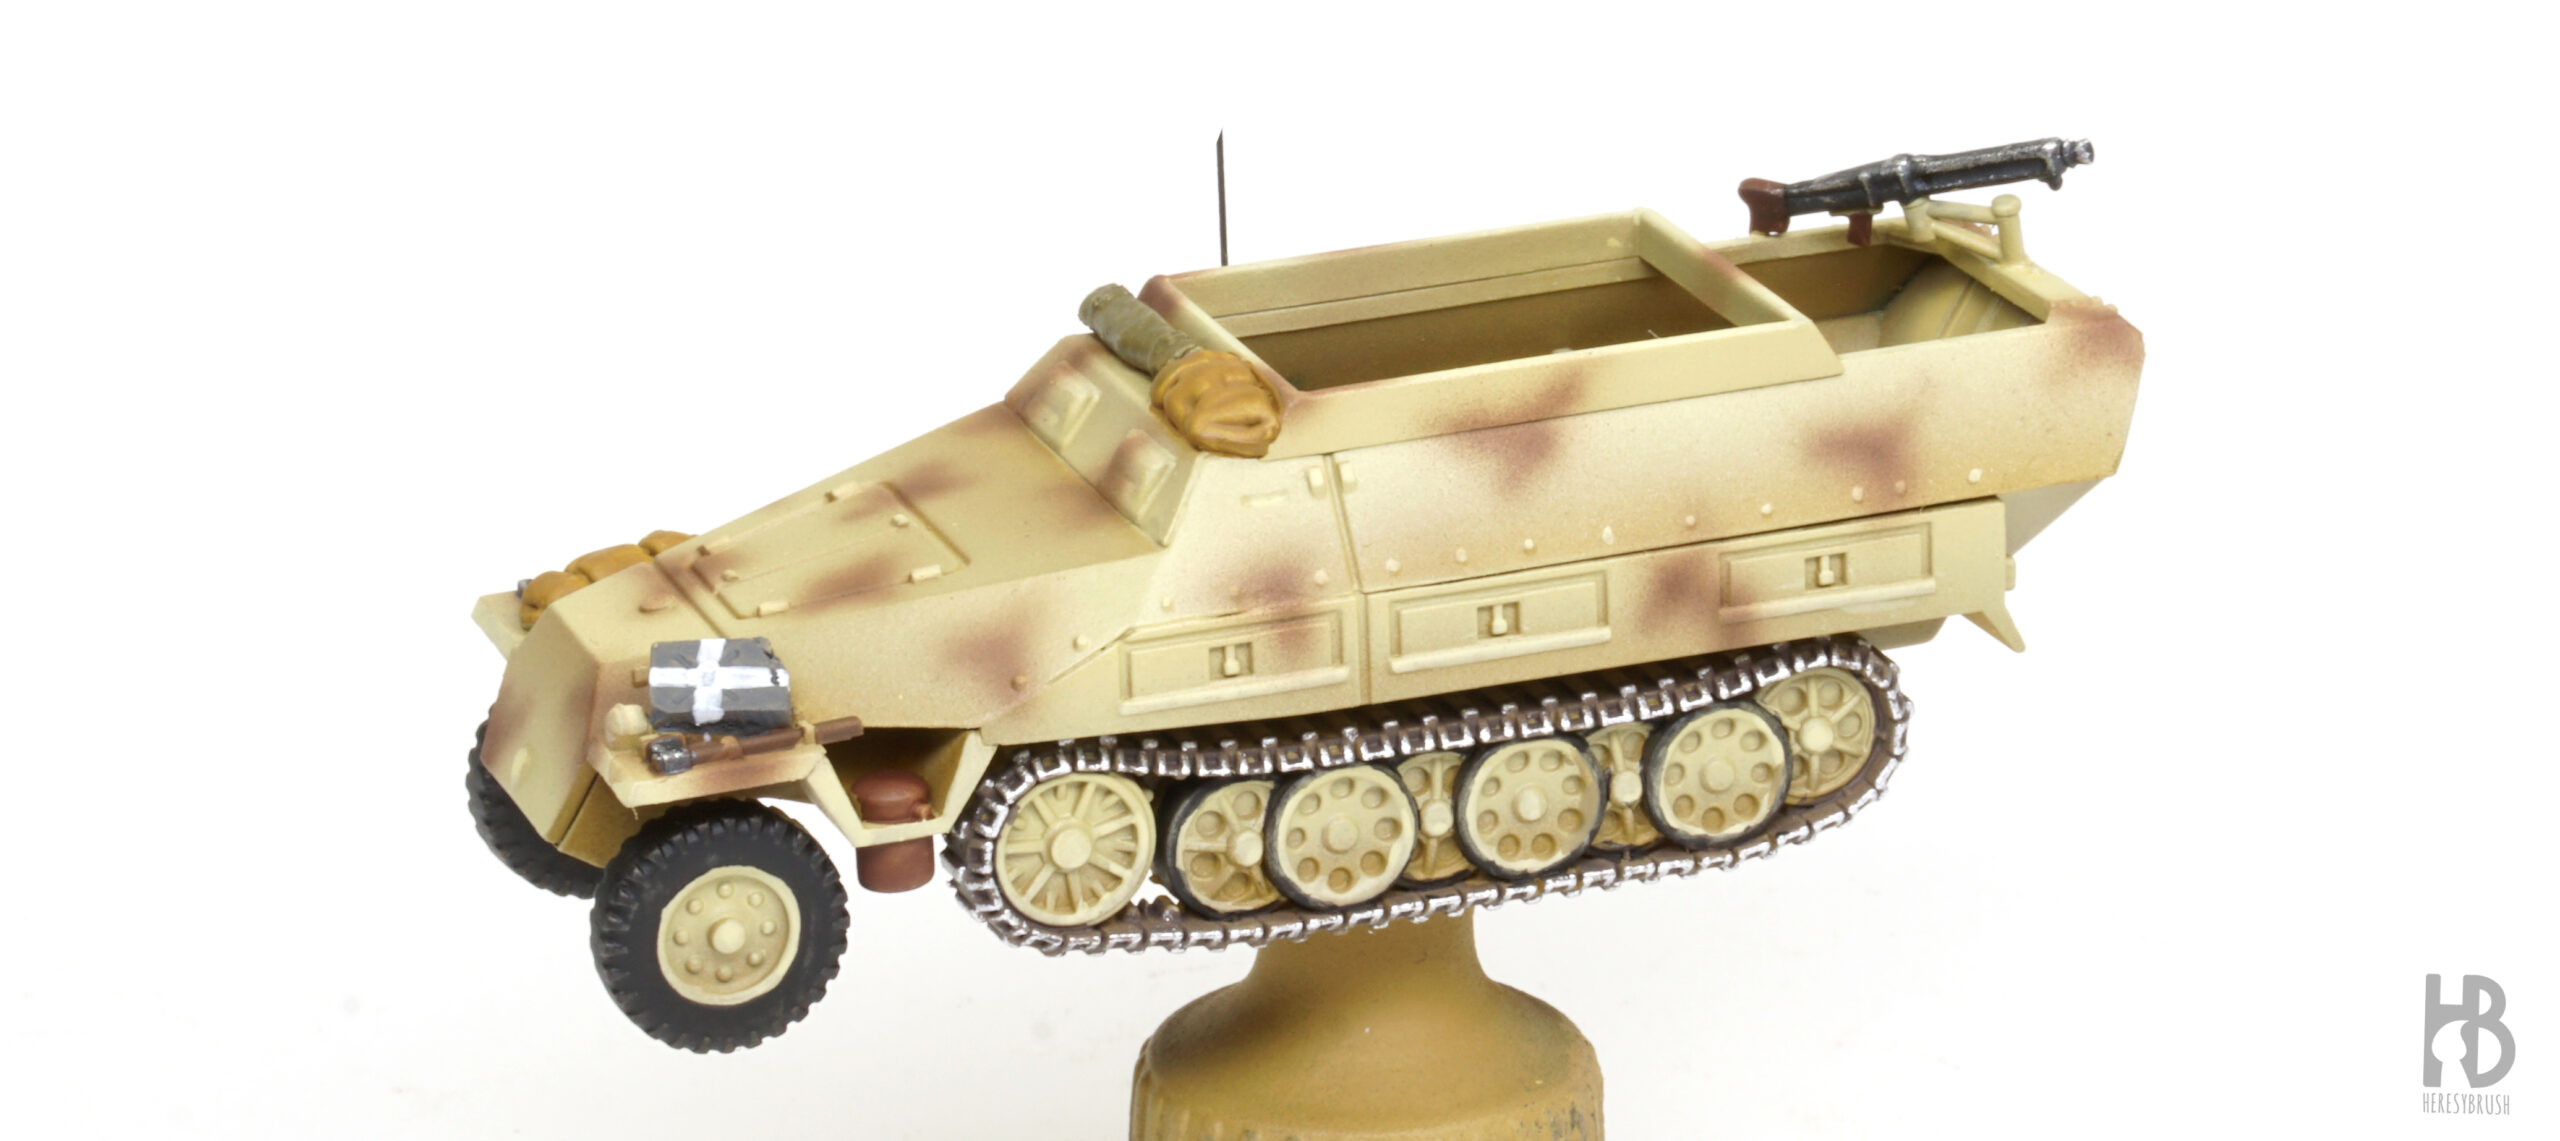 A continuación, pintamos las partes restantes del vehículo usando un pincel y pintura diluida con un 20 % de agua para facilitar su aplicación. Usamos negro puro, IONIC-0172 Black, para las ruedas y la goma de las orugas, mientras que las cadenas de las orugas se pintan primero con IONIC-0148 Graveyard Earth. Una vez seco, aplicamos un pincel seco con IONIC-0173 Black Metal para crear un brillo metálico. De manera similar se pinta la ametralladora, comenzando con negro. Para las mantas y lonas, usamos diferentes tonos de marrón, como IONIC-0154 Brown, mientras que para el bidón en este ejemplo utilizamos un gris, y luego pintamos una cruz blanca para indicar que contiene agua. Para el tubo de escape, usamos IONIC-0156 Rust.
Paso 9: Calcomanías y sellado con barniz brillante
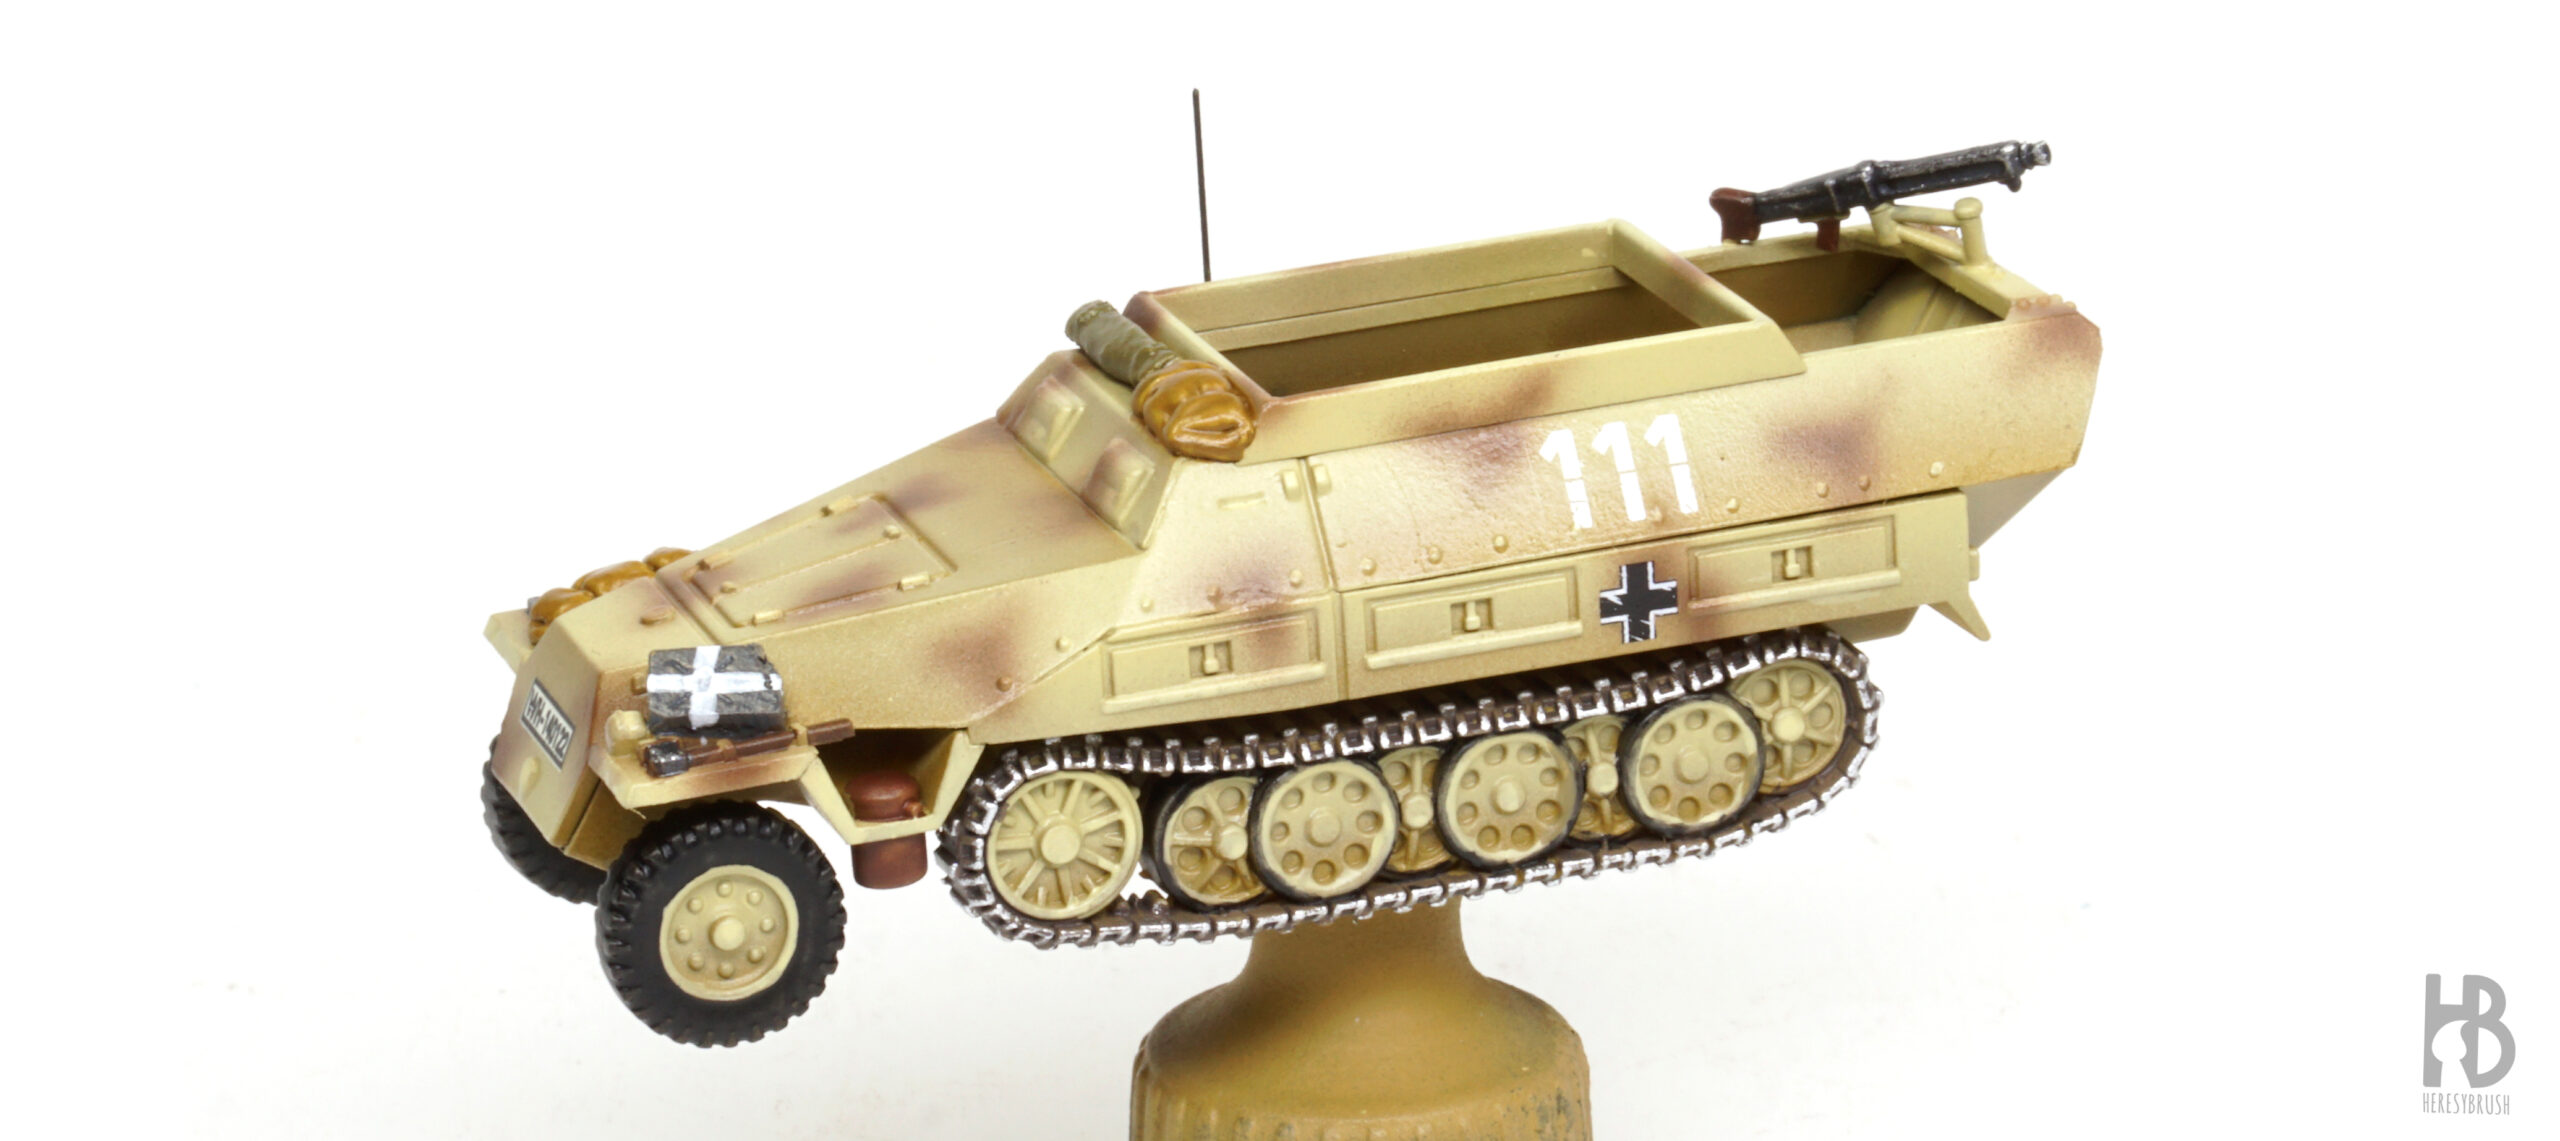
Ahora, si queremos, podemos poner calcomanías antes de empezar a trabajar los efectos de desgaste. Ya hemos explicado anteriormente el proceso de aplicación de calcomanías (ver Cómo Aplicar Calcomanías). Para proteger las calcomanías y preparar la superficie para los efectos de envejecido, aplicamos un par de capas finas de barniz brillante, como A-STAND Aqua Gloss Clear A.MIG-2503, usando el aerógrafo. El barniz brillante creará una superficie lisa y pulida, lo que garantizará la aplicación y distribución del lavado. Además, evitaremos que la superficie absorva parte de la pintura, lo que nos dará unos resultados más limpios.
Paso 10: Lavado oscuro tipo esmalte
Hasta ahora hemos utilizado pinturas acrílicas, que secan en segundos y pueden diluirse con agua. Ahora pasaremos a utilizar pintura de tipo esmalte. Este tipo de pintura, al igual que los óleos, tarda horas en secar y requiere un disolvente como el White Spirit o trementina para su uso. Aunque estas propiedades puedan parecer una desventaja (y lo son), la gran ventaja de los esmaltes frente a las acrílicas es la posibilidad de eliminar fácilmente el exceso de pintura, lo cual es crucial para este paso. Las acrílicas, una vez secas tras unos segundos, ya no se pueden quitar. Puedes leer más sobre este tema aquí.
Siguiendo esta idea, utilizamos un lavado marrón oscuro, como Dark Brown Wash for Green Vehicles A.MIG-1005, para aplicar un pin wash. Esto consiste en aplicar el lavado oscuro exclusivamente en los huecos y líneas de detalle usando un pincel fino. Aunque más adelante podremos eliminar el exceso de lavado, cuanto más limpios seamos en este paso, más fácil y rápido será el trabajo en las siguientes etapas.
Paso 11: Eliminar el exceso de lavado
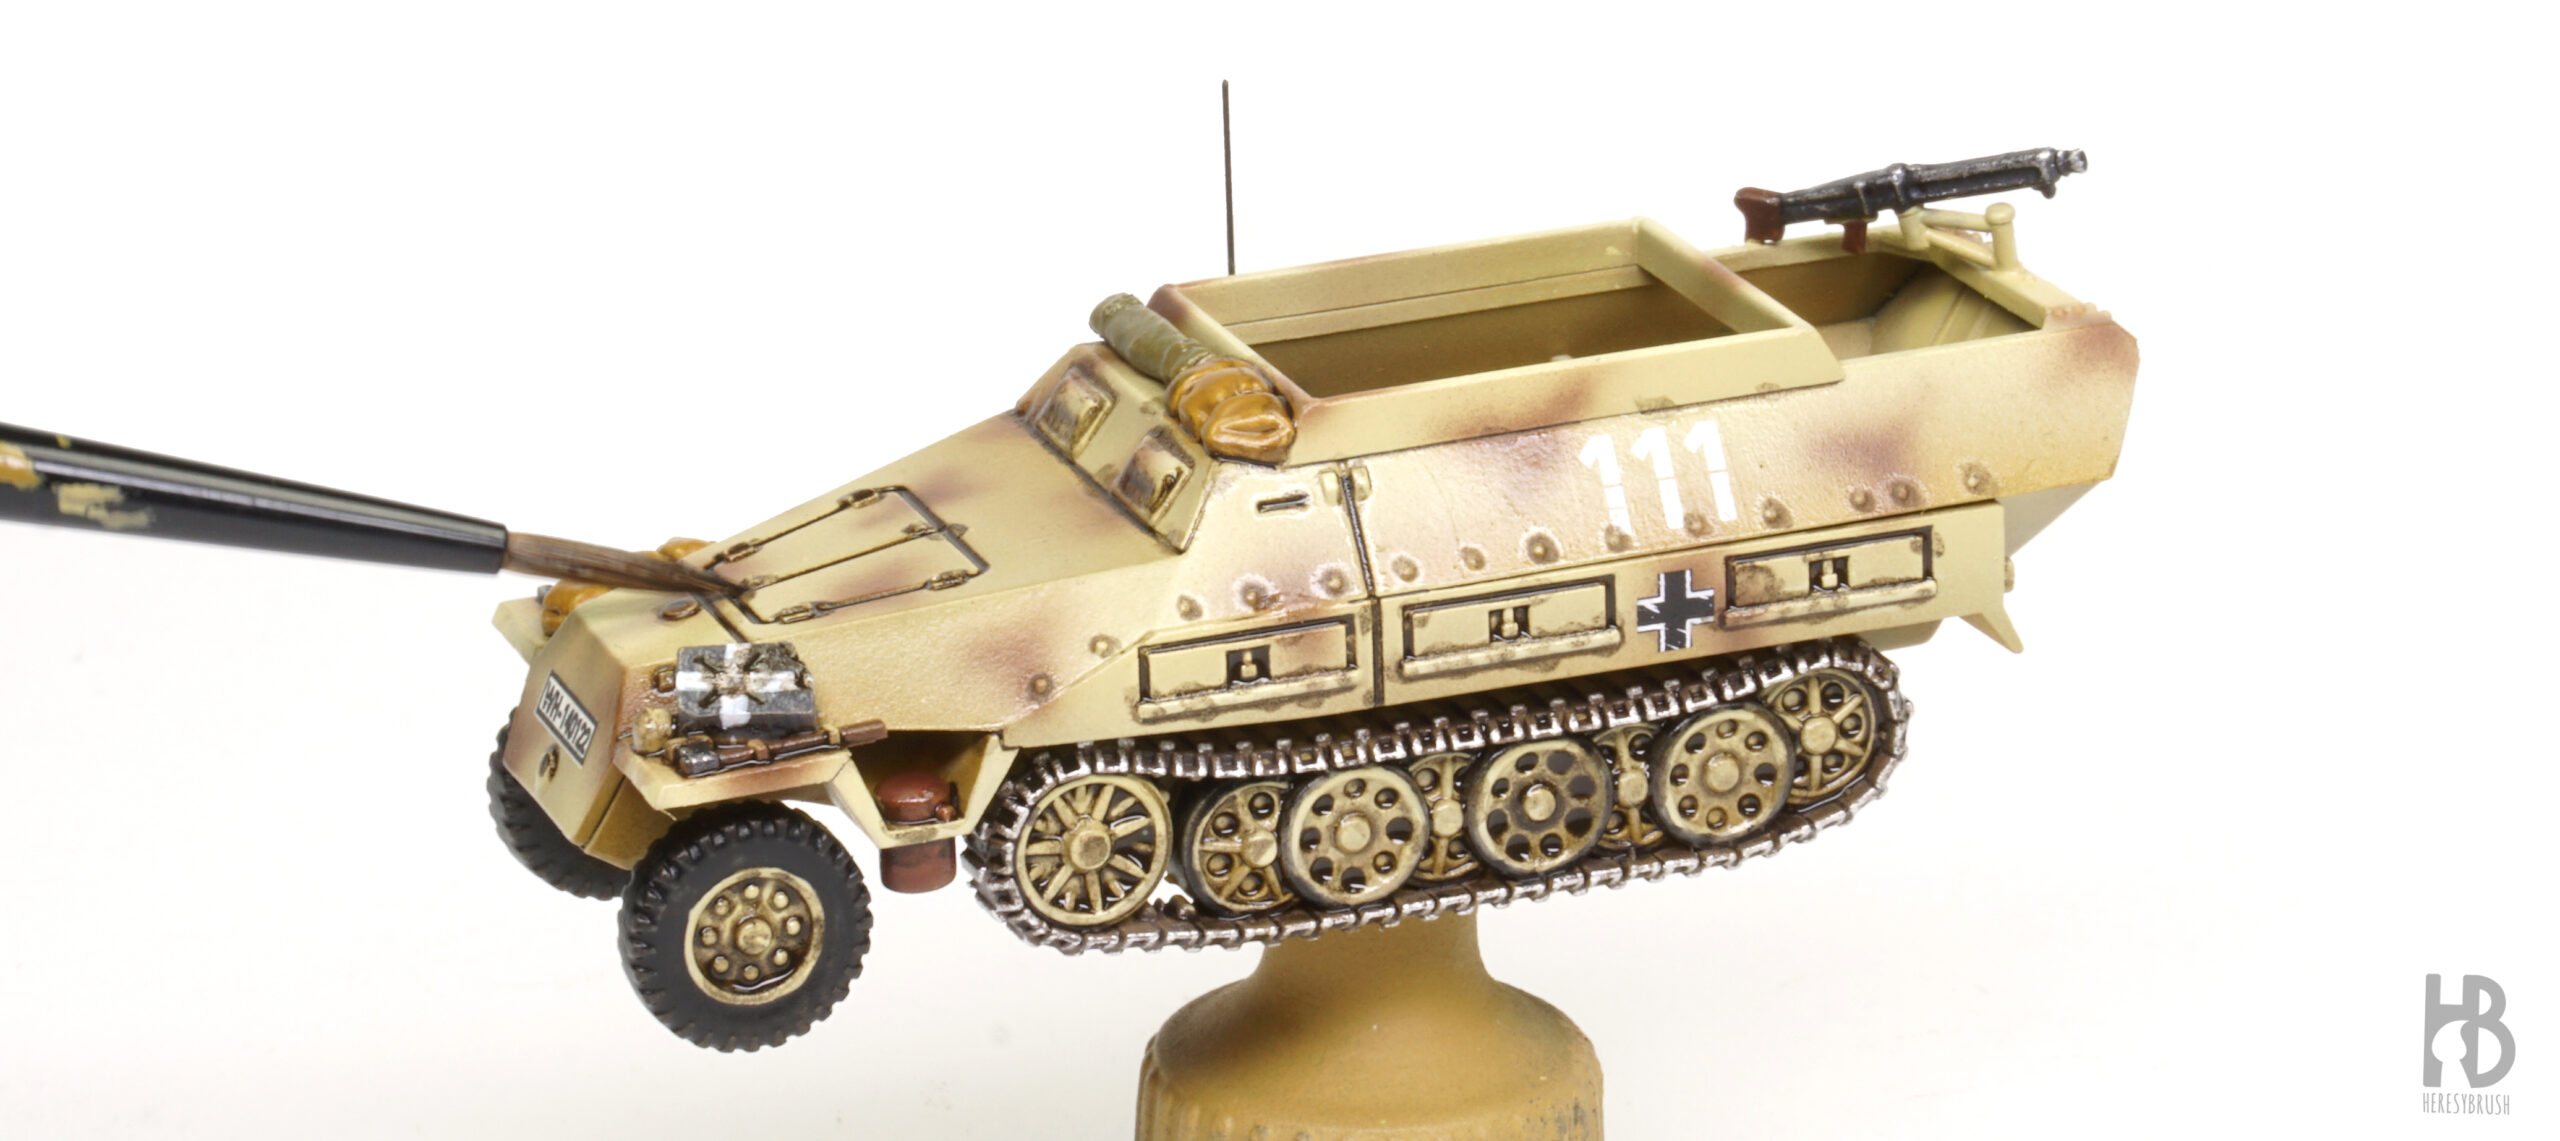
Después de esperar entre 30 y 60 minutos para que el lavado tipo esmalte se seque parcialmente (el secado completo tarda varias horas), retiramos el exceso utilizando un pincel o un bastoncillo de algodón humedecido con Enamel Odourless Thinner A.MIG-2019. Lo hacemos con suavidad, evitando eliminar la pintura de los huecos. Para lograrlo, frotamos la superficie en dirección opuesta a las hendiduras, siempre que sea posible. No es necesario que quede perfecto; lo importante es generar algo de contraste.
Paso 12: sellado con barniz mate
Opcionalmente, podemos usar un pincel fino y una pintura acrílica marrón oscura para retocar las zonas donde hayamos eliminado demasiado lavado o donde los detalles no sean lo suficientemente profundos. Esto ayuda a mejorar la definición y la limpieza, pero no es obligatorio. En caso contrario, eliminamos el efecto brillante aplicando un par de capas de Ultra-Matte Lucky Varnish A.MIG-2054 usando el aerógrafo (o un espray).
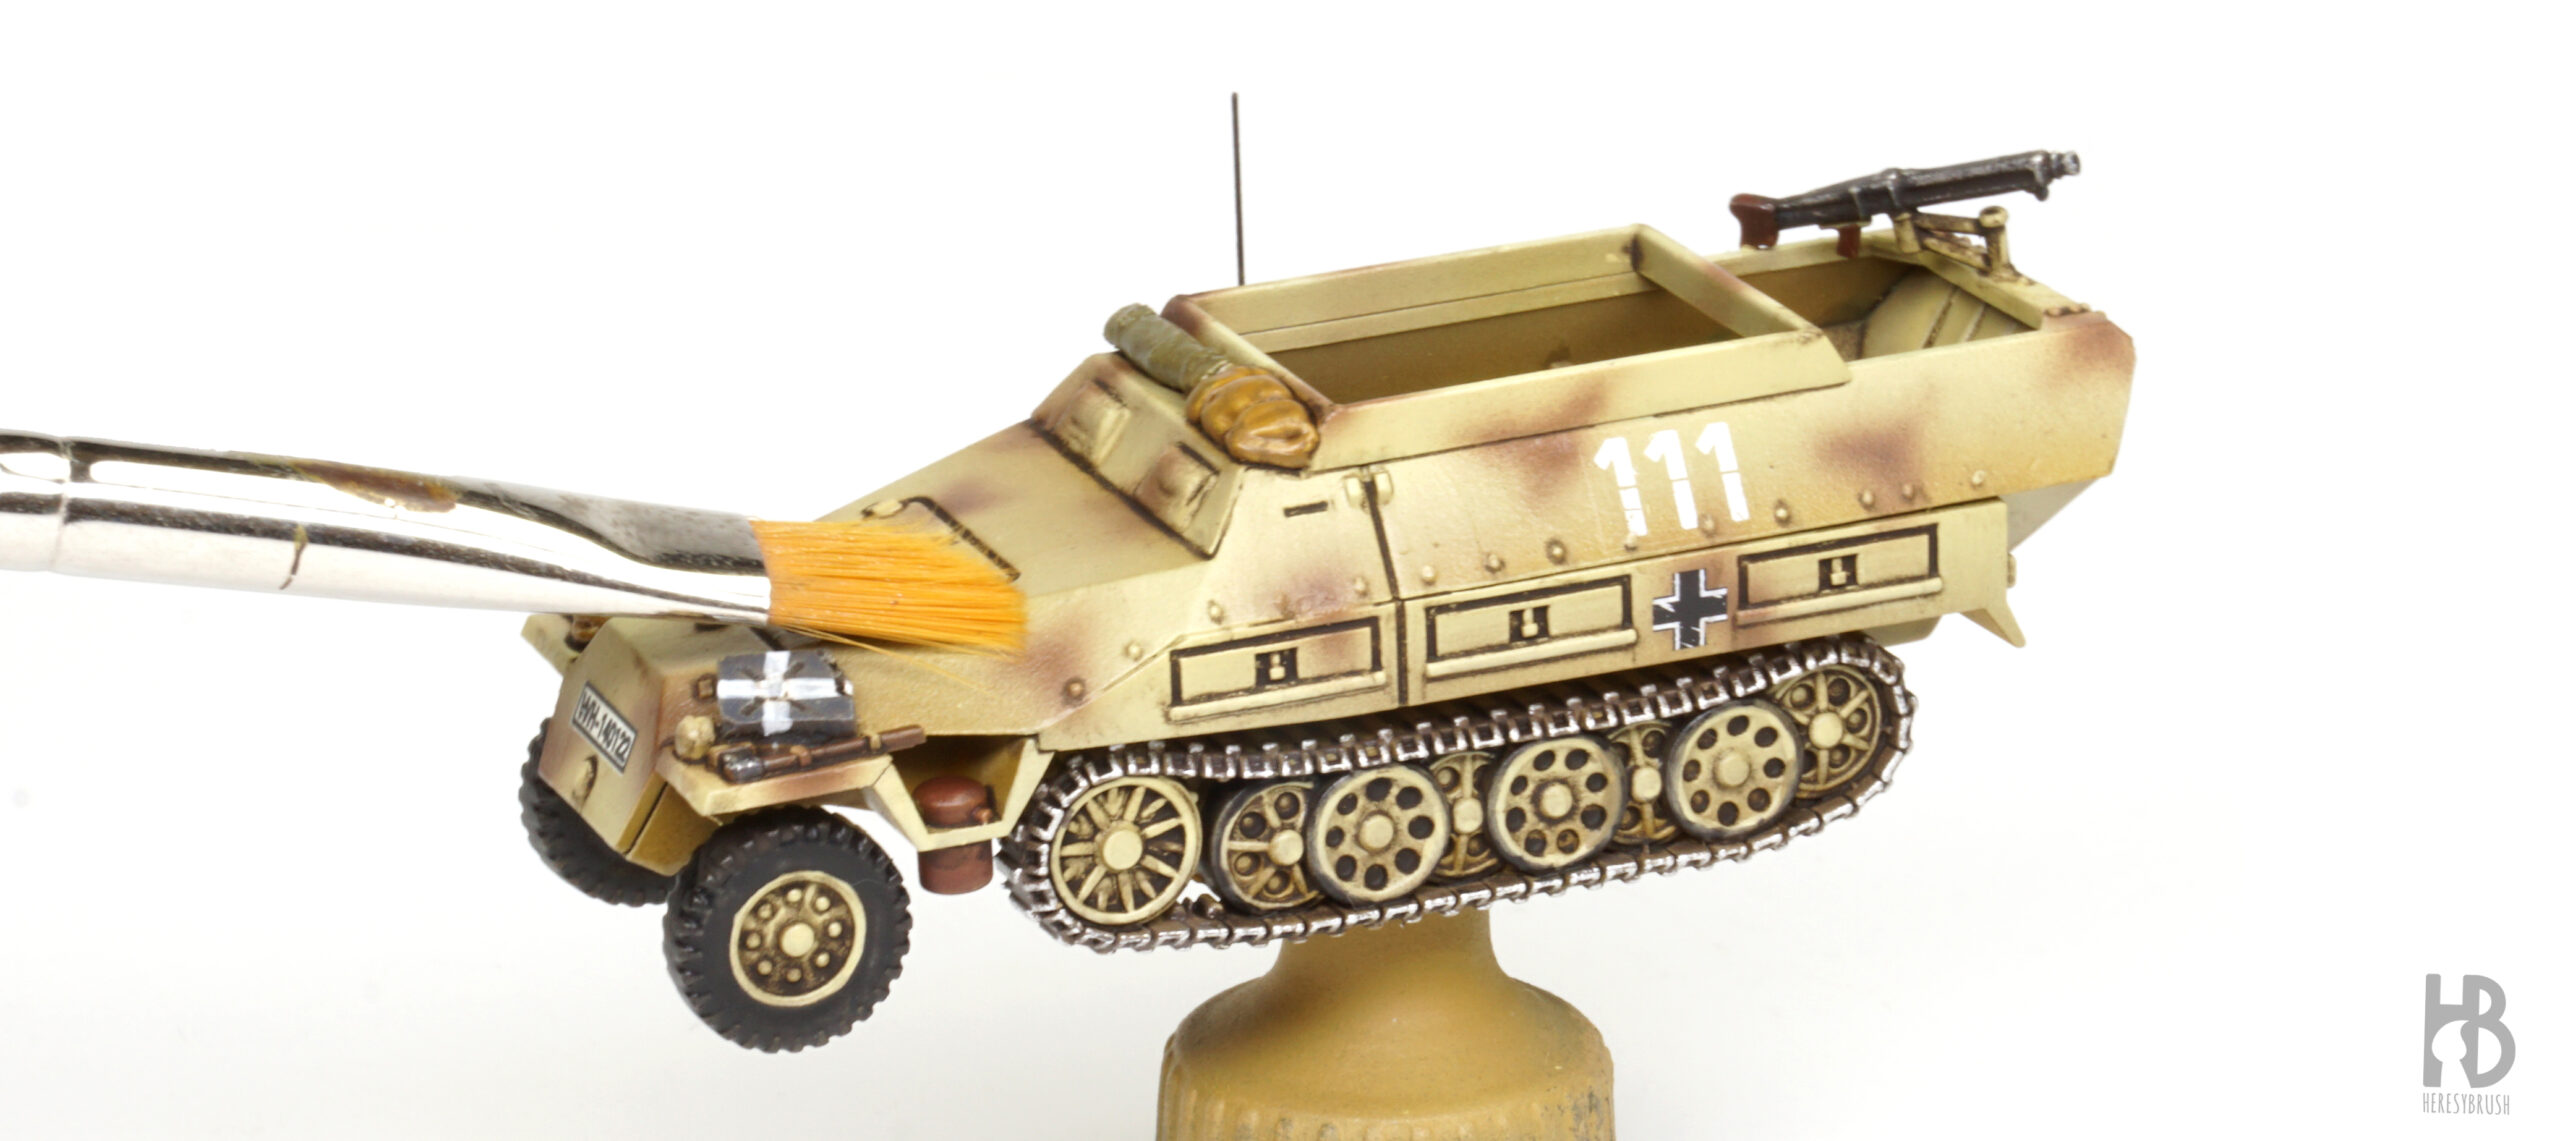
Paso 13: Desconchones I
 Creamos los efectos de desconchones en dos pasos. Primero, usamos un color claro para representar los desconchones superficiales y arañazos, y luego un marrón oscuro para simular los más profundos, que exponen el metal desnudo. Comenzamos con los primeros. Usando el color claro de la modulación (40% IONIC-1007 Dunkelgelb + 60% IONIC-0009 Bone) y un pincel fino, pintamos pequeños puntos y líneas principalmente en los aristas de los paneles, así como algunas líneas más largas que representen arañazos en las superficies verticales.
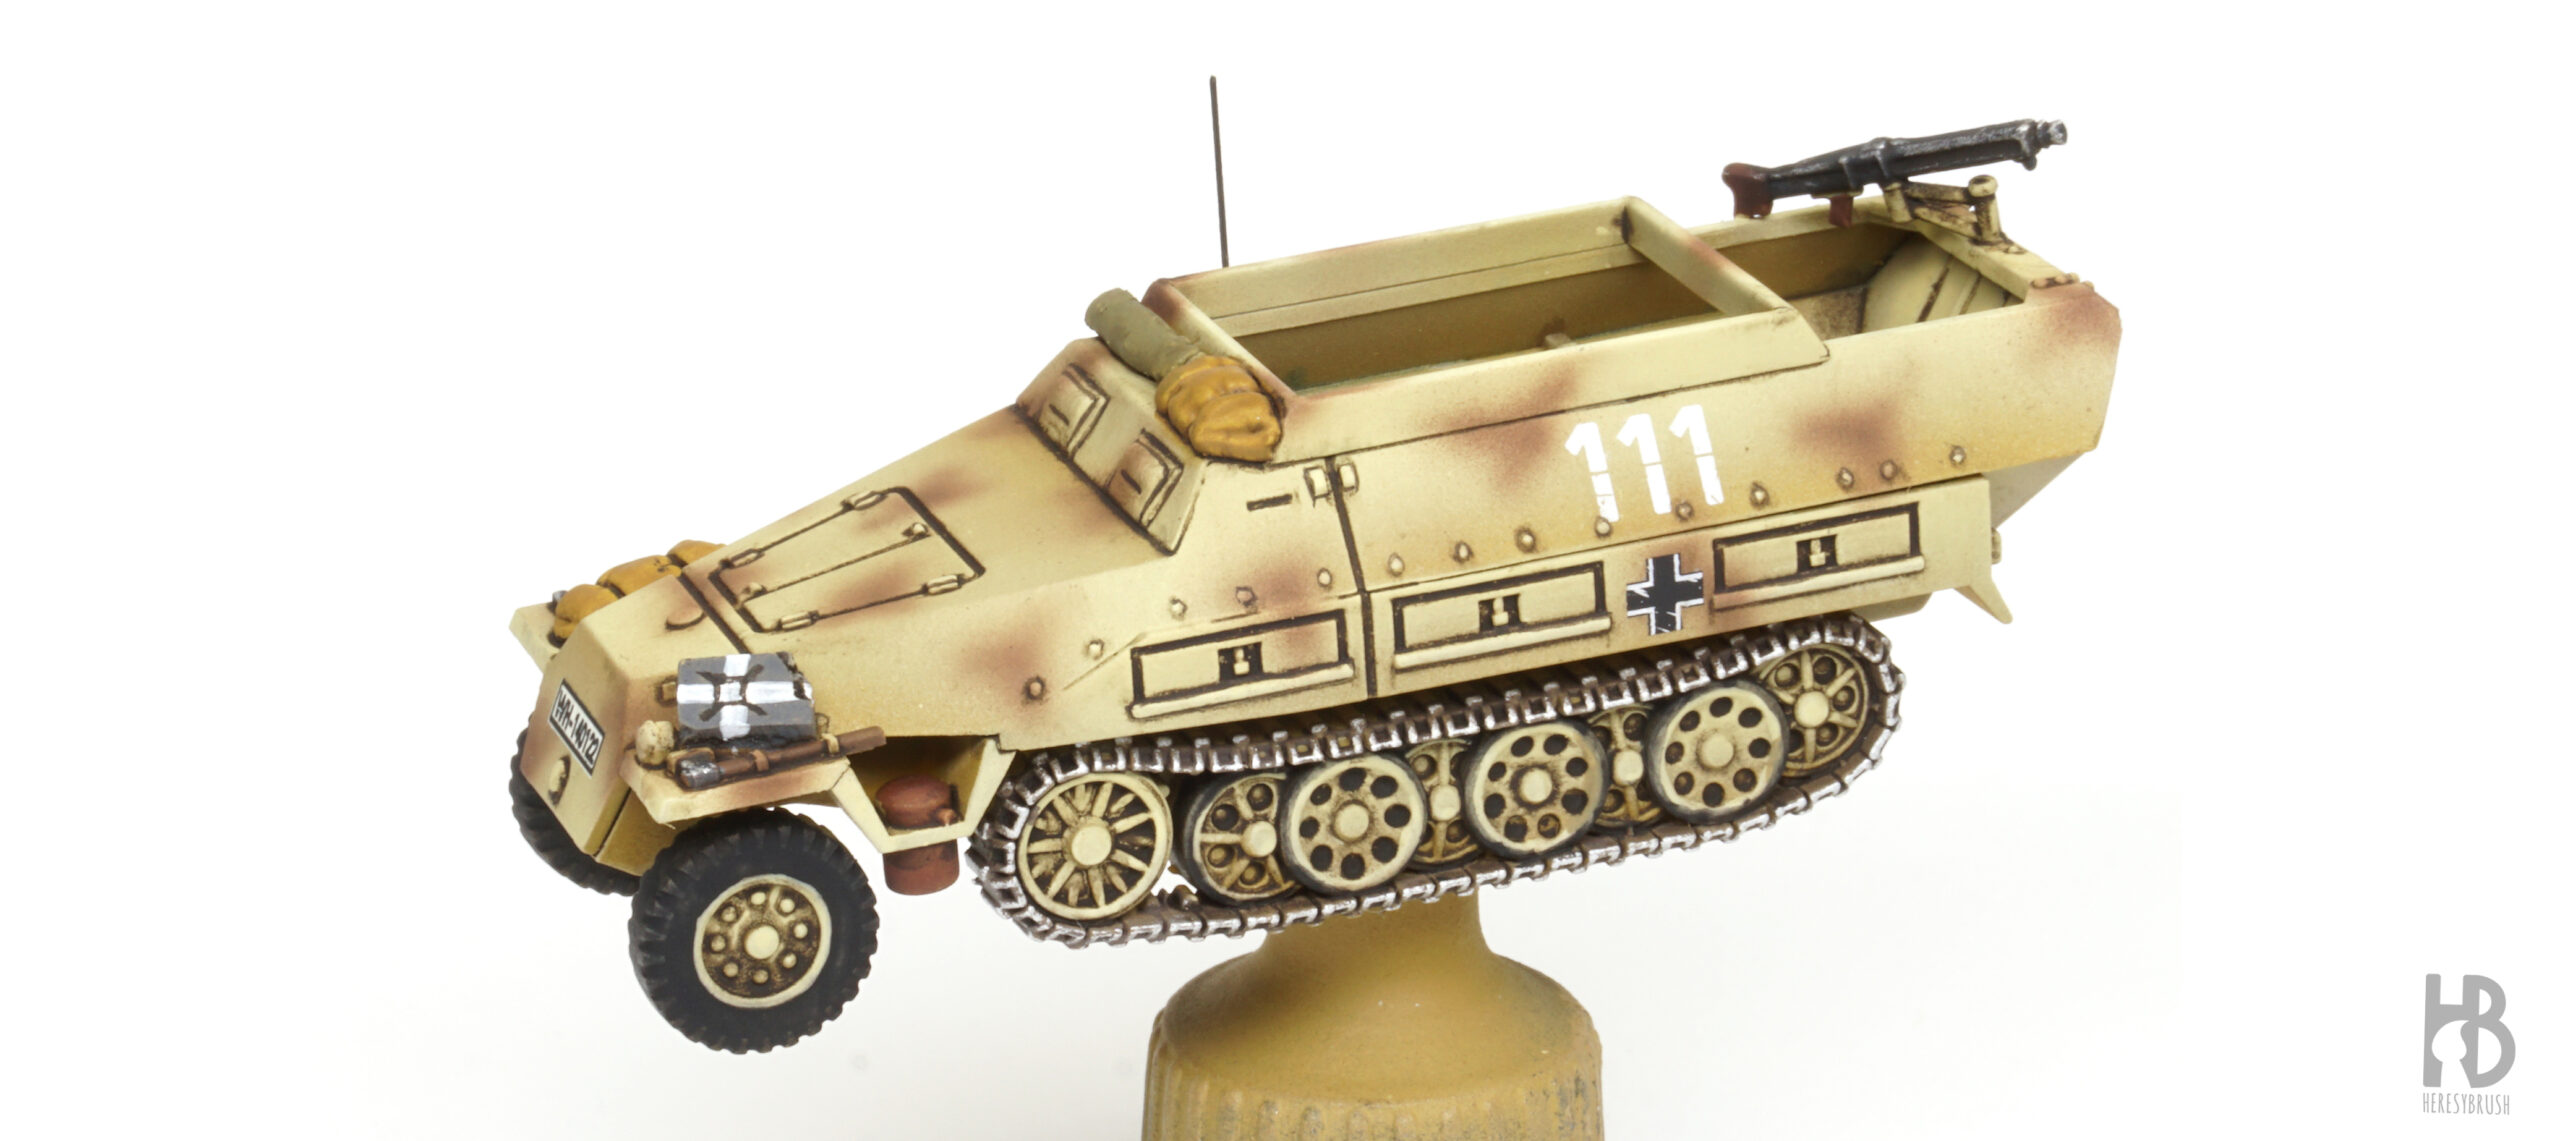
Paso 15: Desconchones II
Repetimos el mismo proceso utilizando un marrón oscuro, como IONIC-0160 Black Brown. La idea es colocar el color oscuro dentro o alrededor de los desconchones claros para darles volumen y crear un efecto tridimensional. Sin embargo, preservaremos algunos desconchones claros sin el tono oscuro para añadir variedad. Al aplicar estos efectos, es fundamental controlar el tamaño y la cantidad: deben ser muy pequeños y finos, y no debemos cubrir todos los bordes del vehículo. Cuanta más variedad, mejor.
Paso 16: Accessorios

Ahora finalizamos pintando los accesorios del vehículo, como las mantas, lonas, herramientas, etc. Utilizamos pinturas acrílicas y nuestra técnica de pintura preferida, como el método de base + lavado + iluminación que mencionamos anteriormente (ver aquí). También podemos añadir desconchones en el tubo de escape usando un tono de óxido más claro, como IONIC-0155 Light Rust.
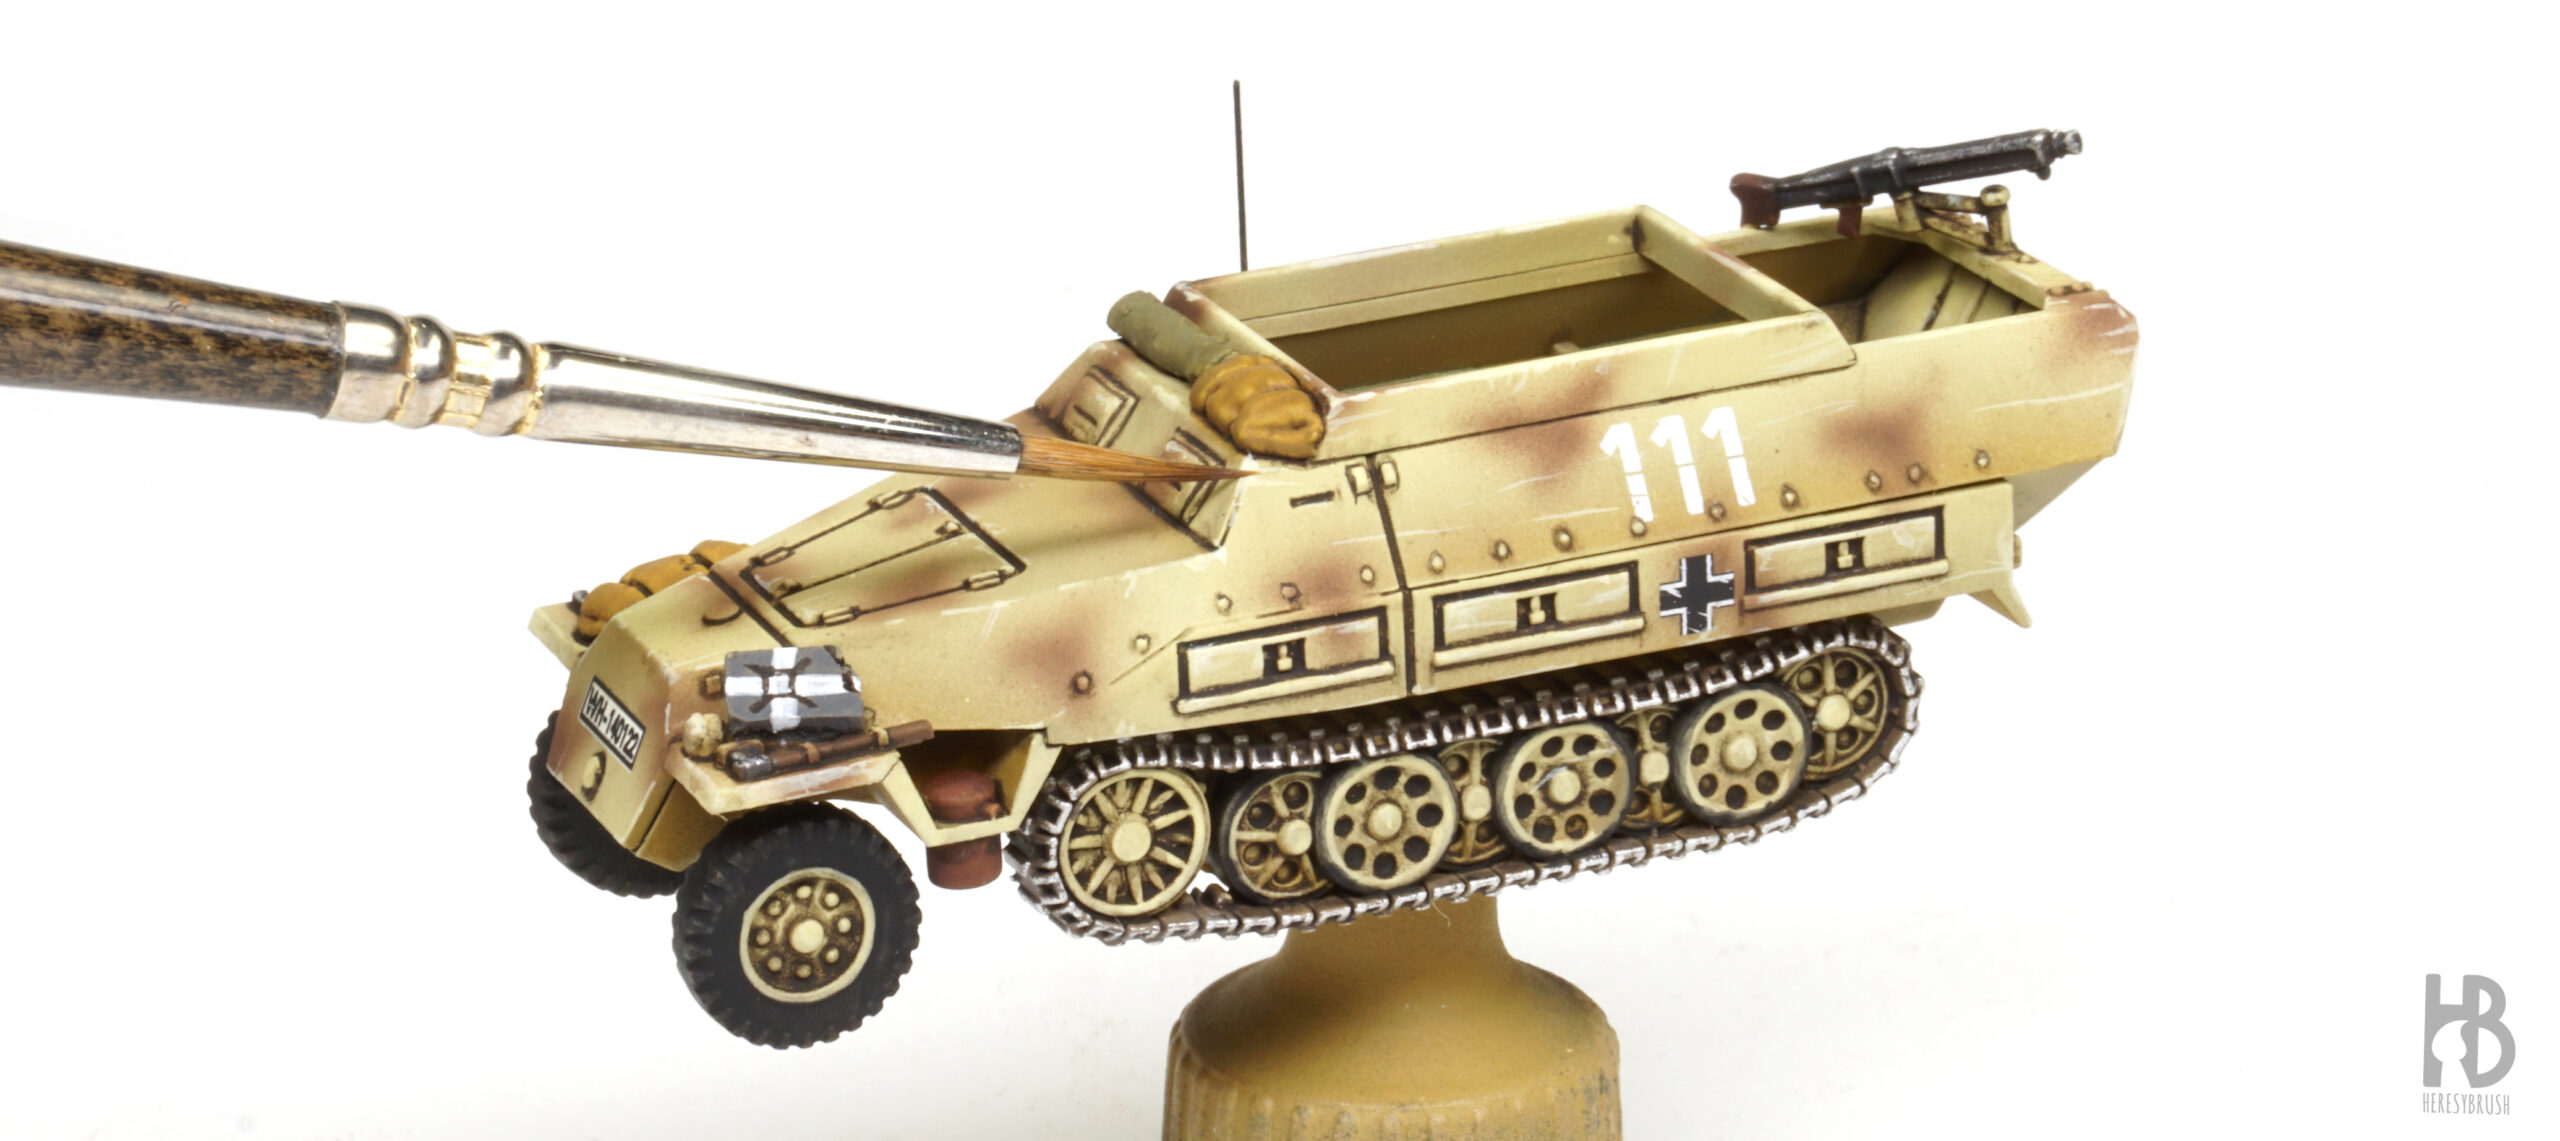
Paso 18: Pigmentos

La mejor herramienta para crear efectos de polvo son los pigmentos, que básicamente son polvos de color. Aunque se puede usar cualquier pigmento, es recomendable mezclar varios tonos para crear una mezcla cromáticamente más rica. Los pigmentos, a diferencia de las pinturas convencionales, no se funden por completo, lo que permite que cada pigmento mantenga su color incluso una vez mezclados. Esto da como resultado un efecto más interesante y realista. Dependiendo del resultado que busquemos, mezclamos los colores correspondientes. Por ejemplo, aquí hemos usado: A.MIG-3004 – Europe Earth, A.MIG-3029 – Winter Soil, A.MIG-3008 – Track Rust.
Paso 19: Lavado de pigmentos
 Los pigmentos se pueden aplicar de dos maneras: en seco, directamente de la botella, o en húmedo, suspendidos en agua o disolvente. El método en seco es ideal para crear efectos de polvo superficial, mientras que el método en húmedo permite generar acumulaciones en los huecos. En este caso, buscamos lo segundo: acumular polvo en las orugas y ruedas. Para ello, mezclamos los pigmentos con un 50 % de Enamel Odourless Thinner A.MIG-2019 y aplicamos los pigmentos húmedos a modo de lavado sobre las orugas, ruedas y parte inferior del chasis.
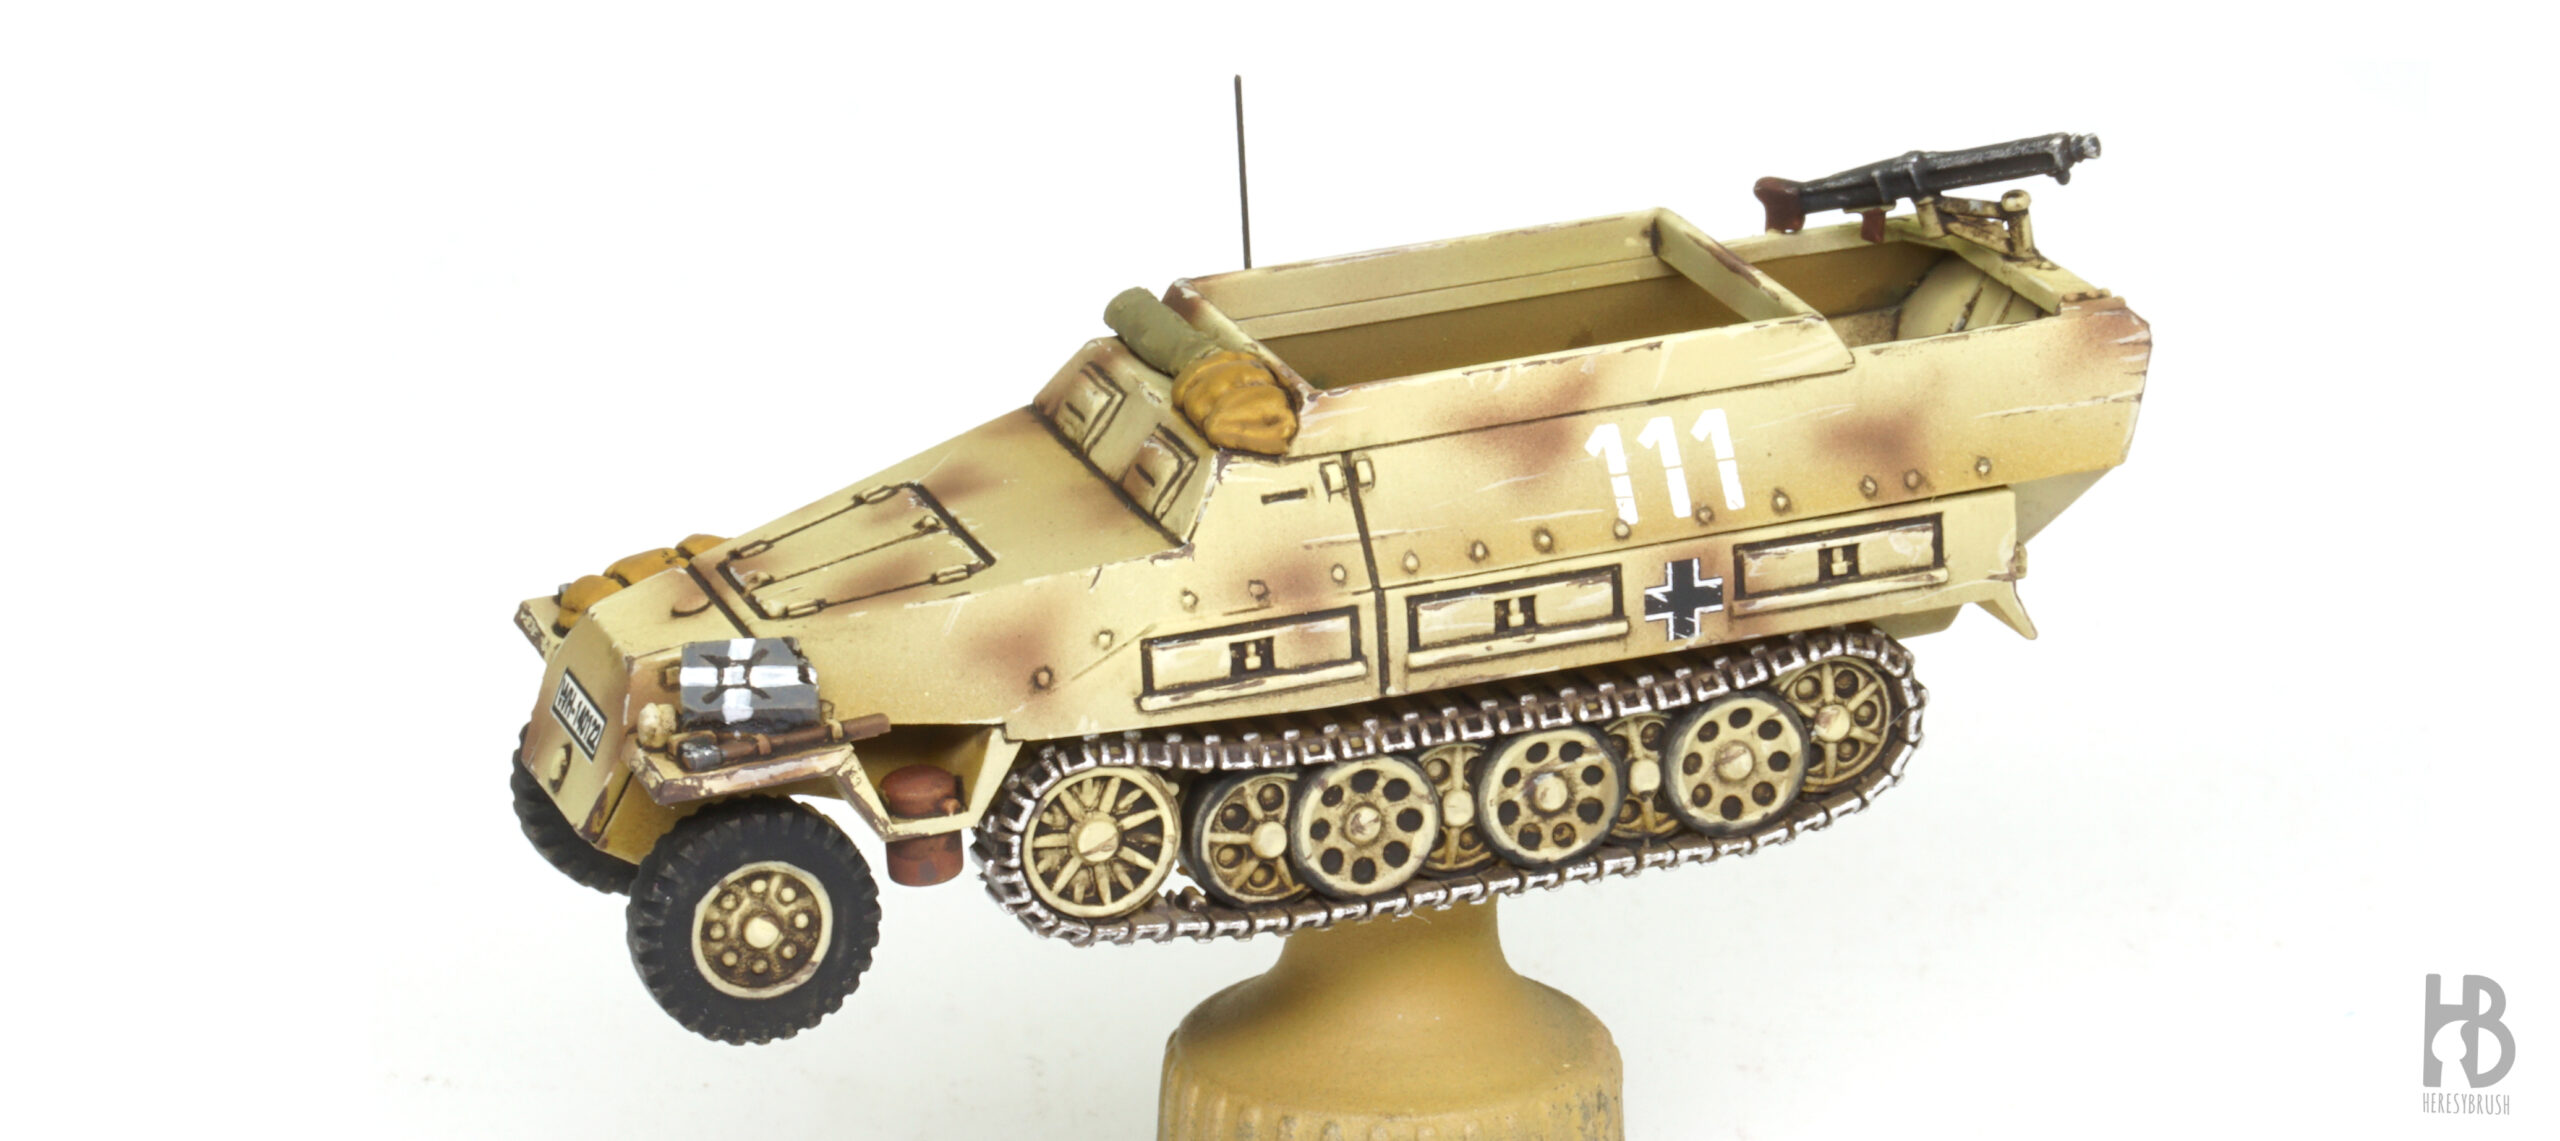
Paso 20: Eliminar el exceso de pigmento
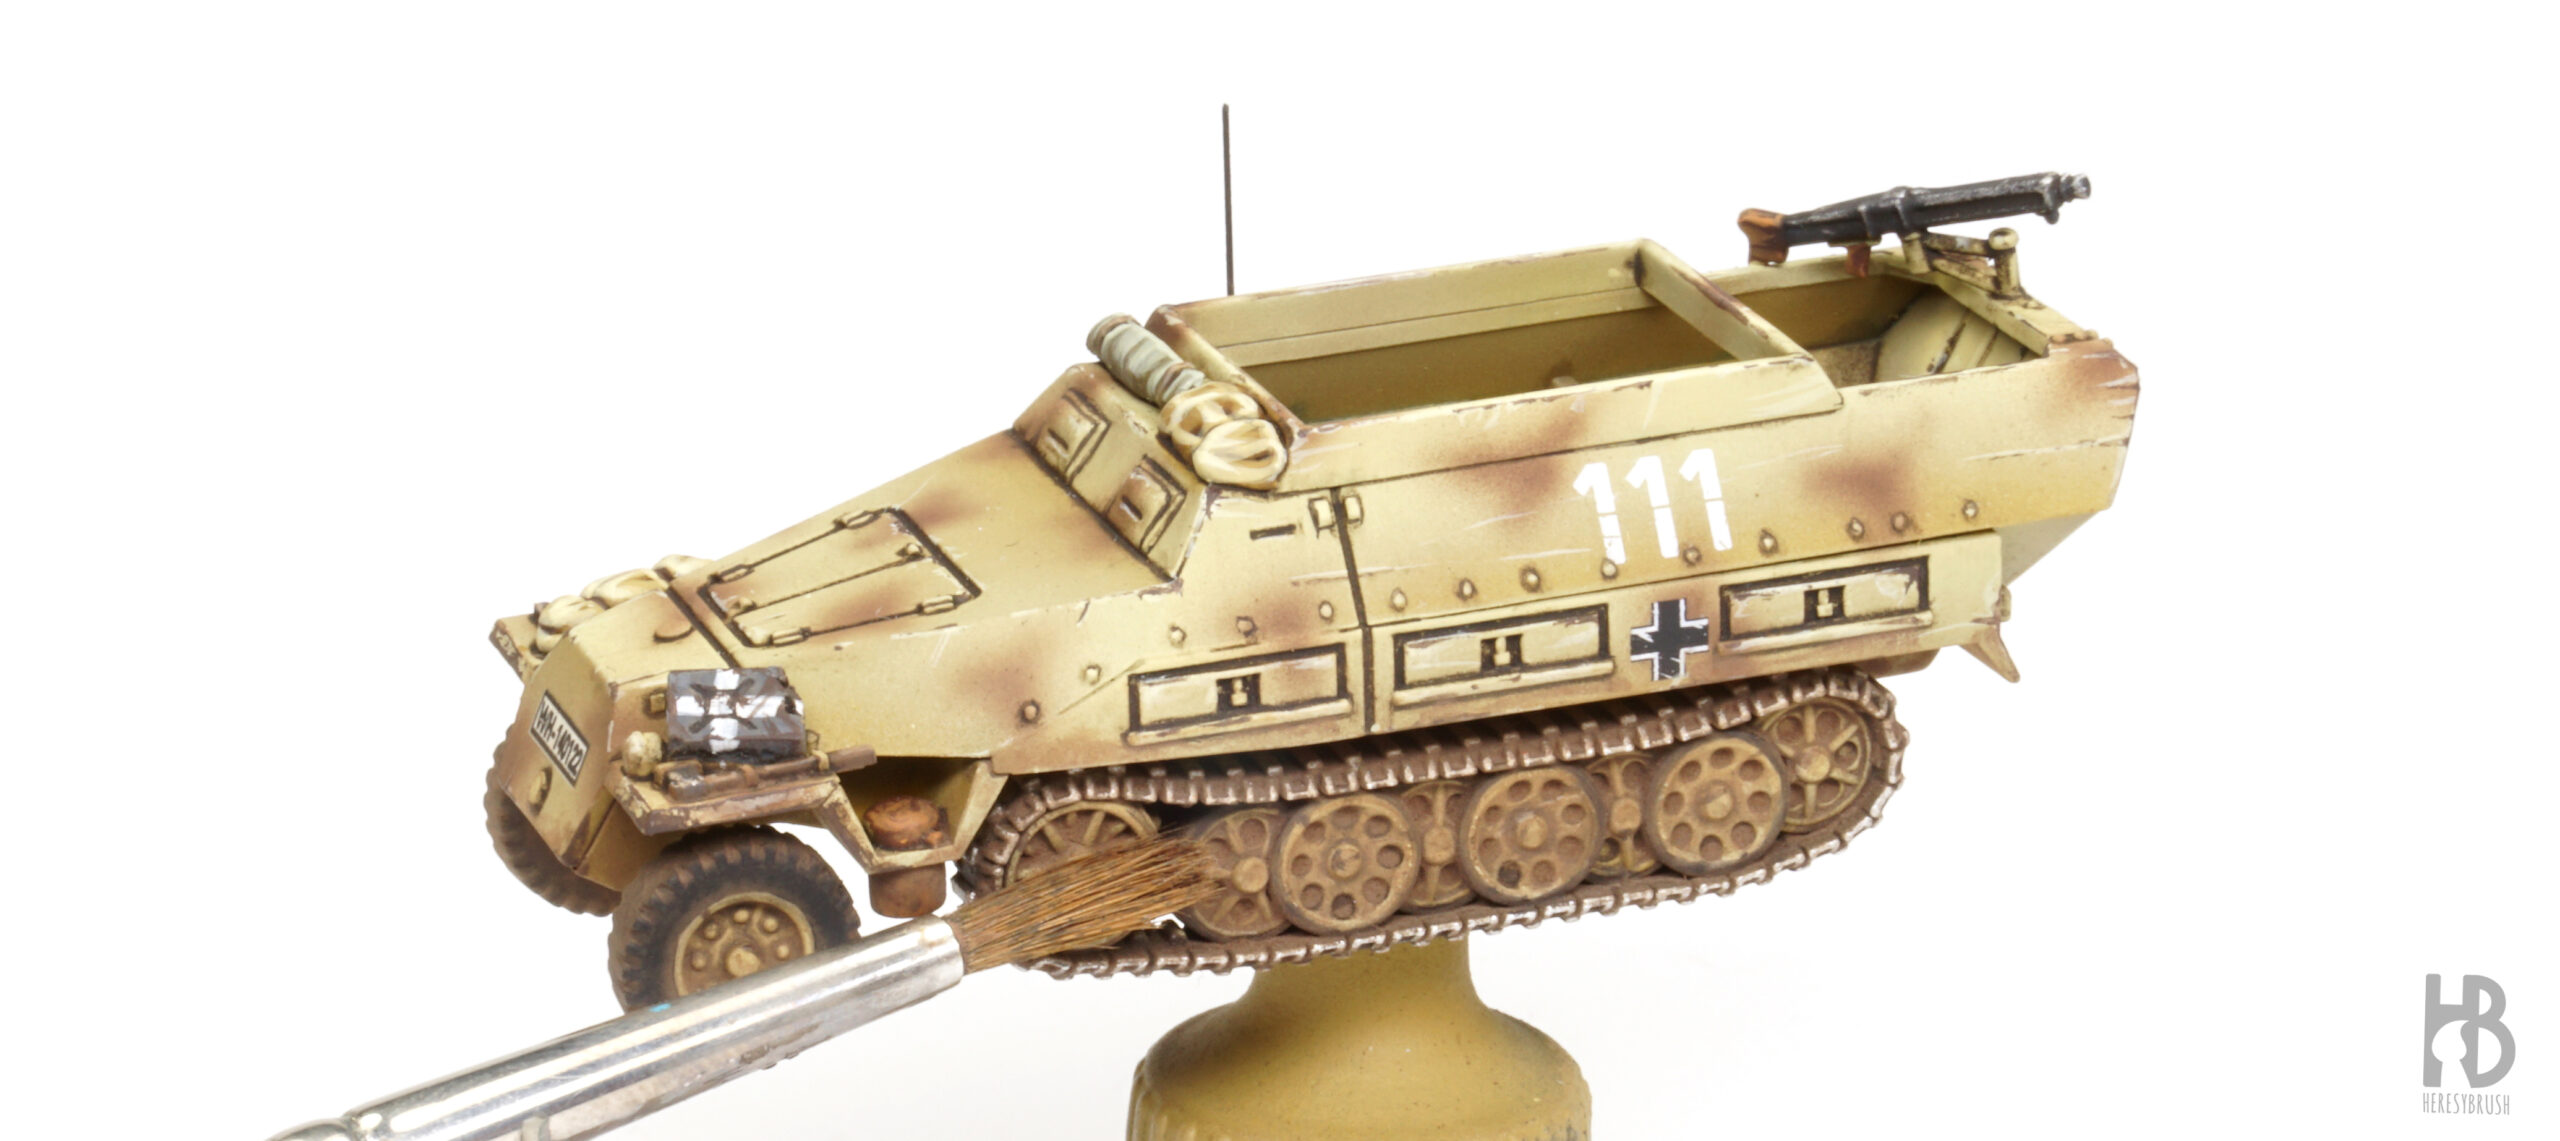
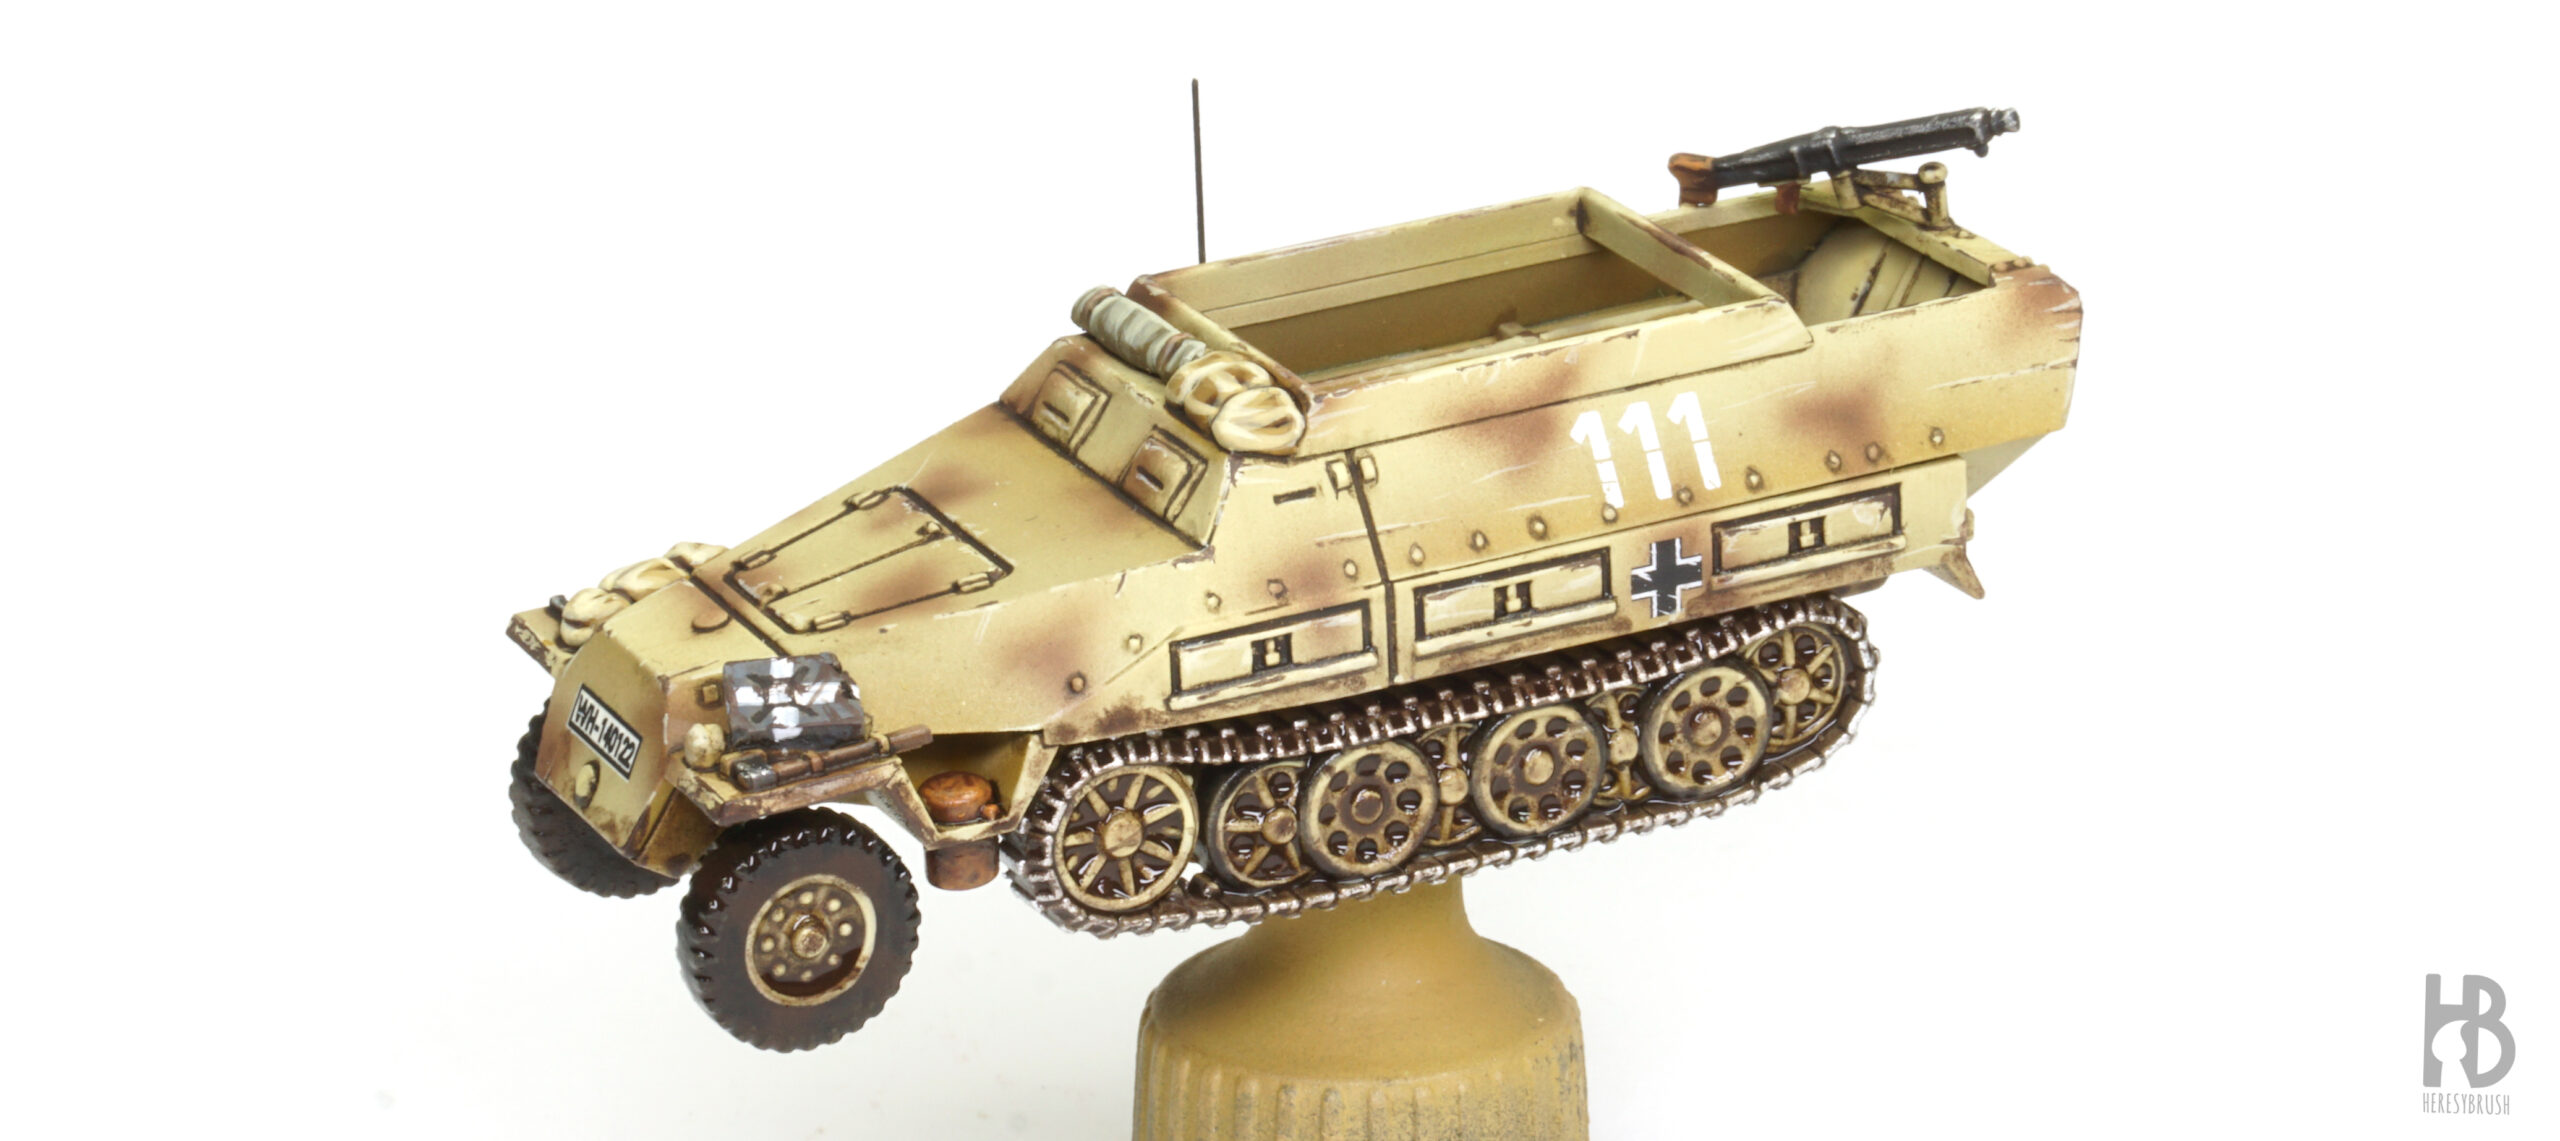
Dejamos que los pigmentos se sequen completamente durante varias horas o toda la noche, permitiendo que recuperen su aspecto polvoriento y ultra mate. Luego, utilizamos un pincel viejo o un bastoncillo para frotar suavemente las superficies, eliminando el exceso de pigmento y extendiéndolo sobre las partes expuestas (ten en cuenta que, al aplicar los pigmentos en forma de lavado, los acumulamos en los huecos, evitando las zonas más expuestas). Para lograr un efecto más marcado, especialmente en las ruedas donde queremos que el pigmento se acumule especialmente en los recovecos, podemos retirar una mayor cantidad de pigmento utilizando un dedo.
Paso 20: tripulación
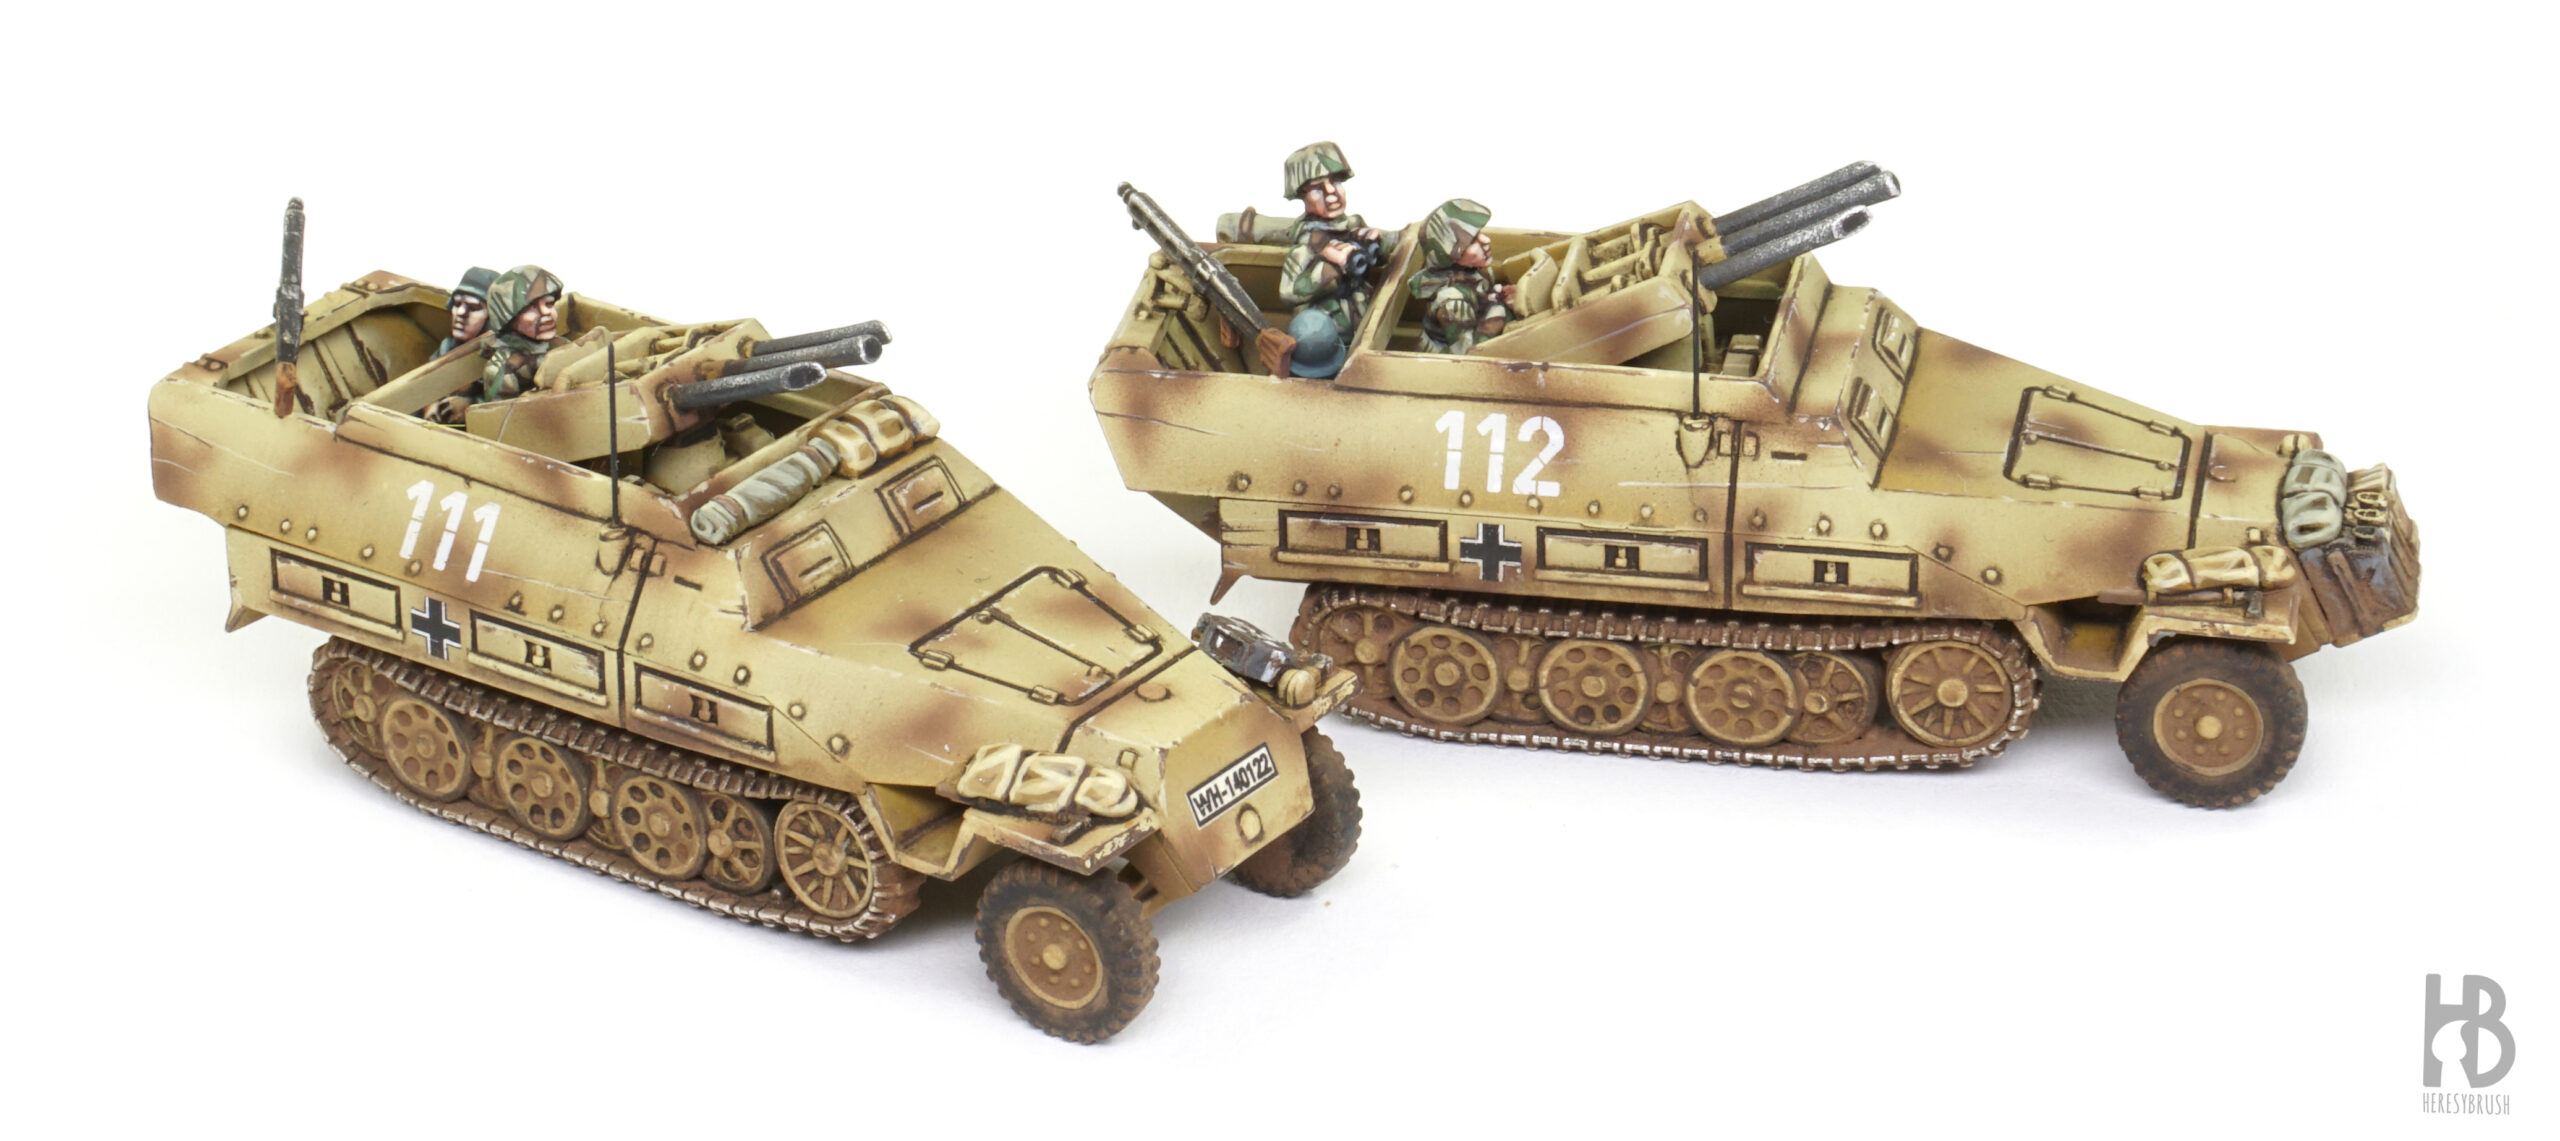
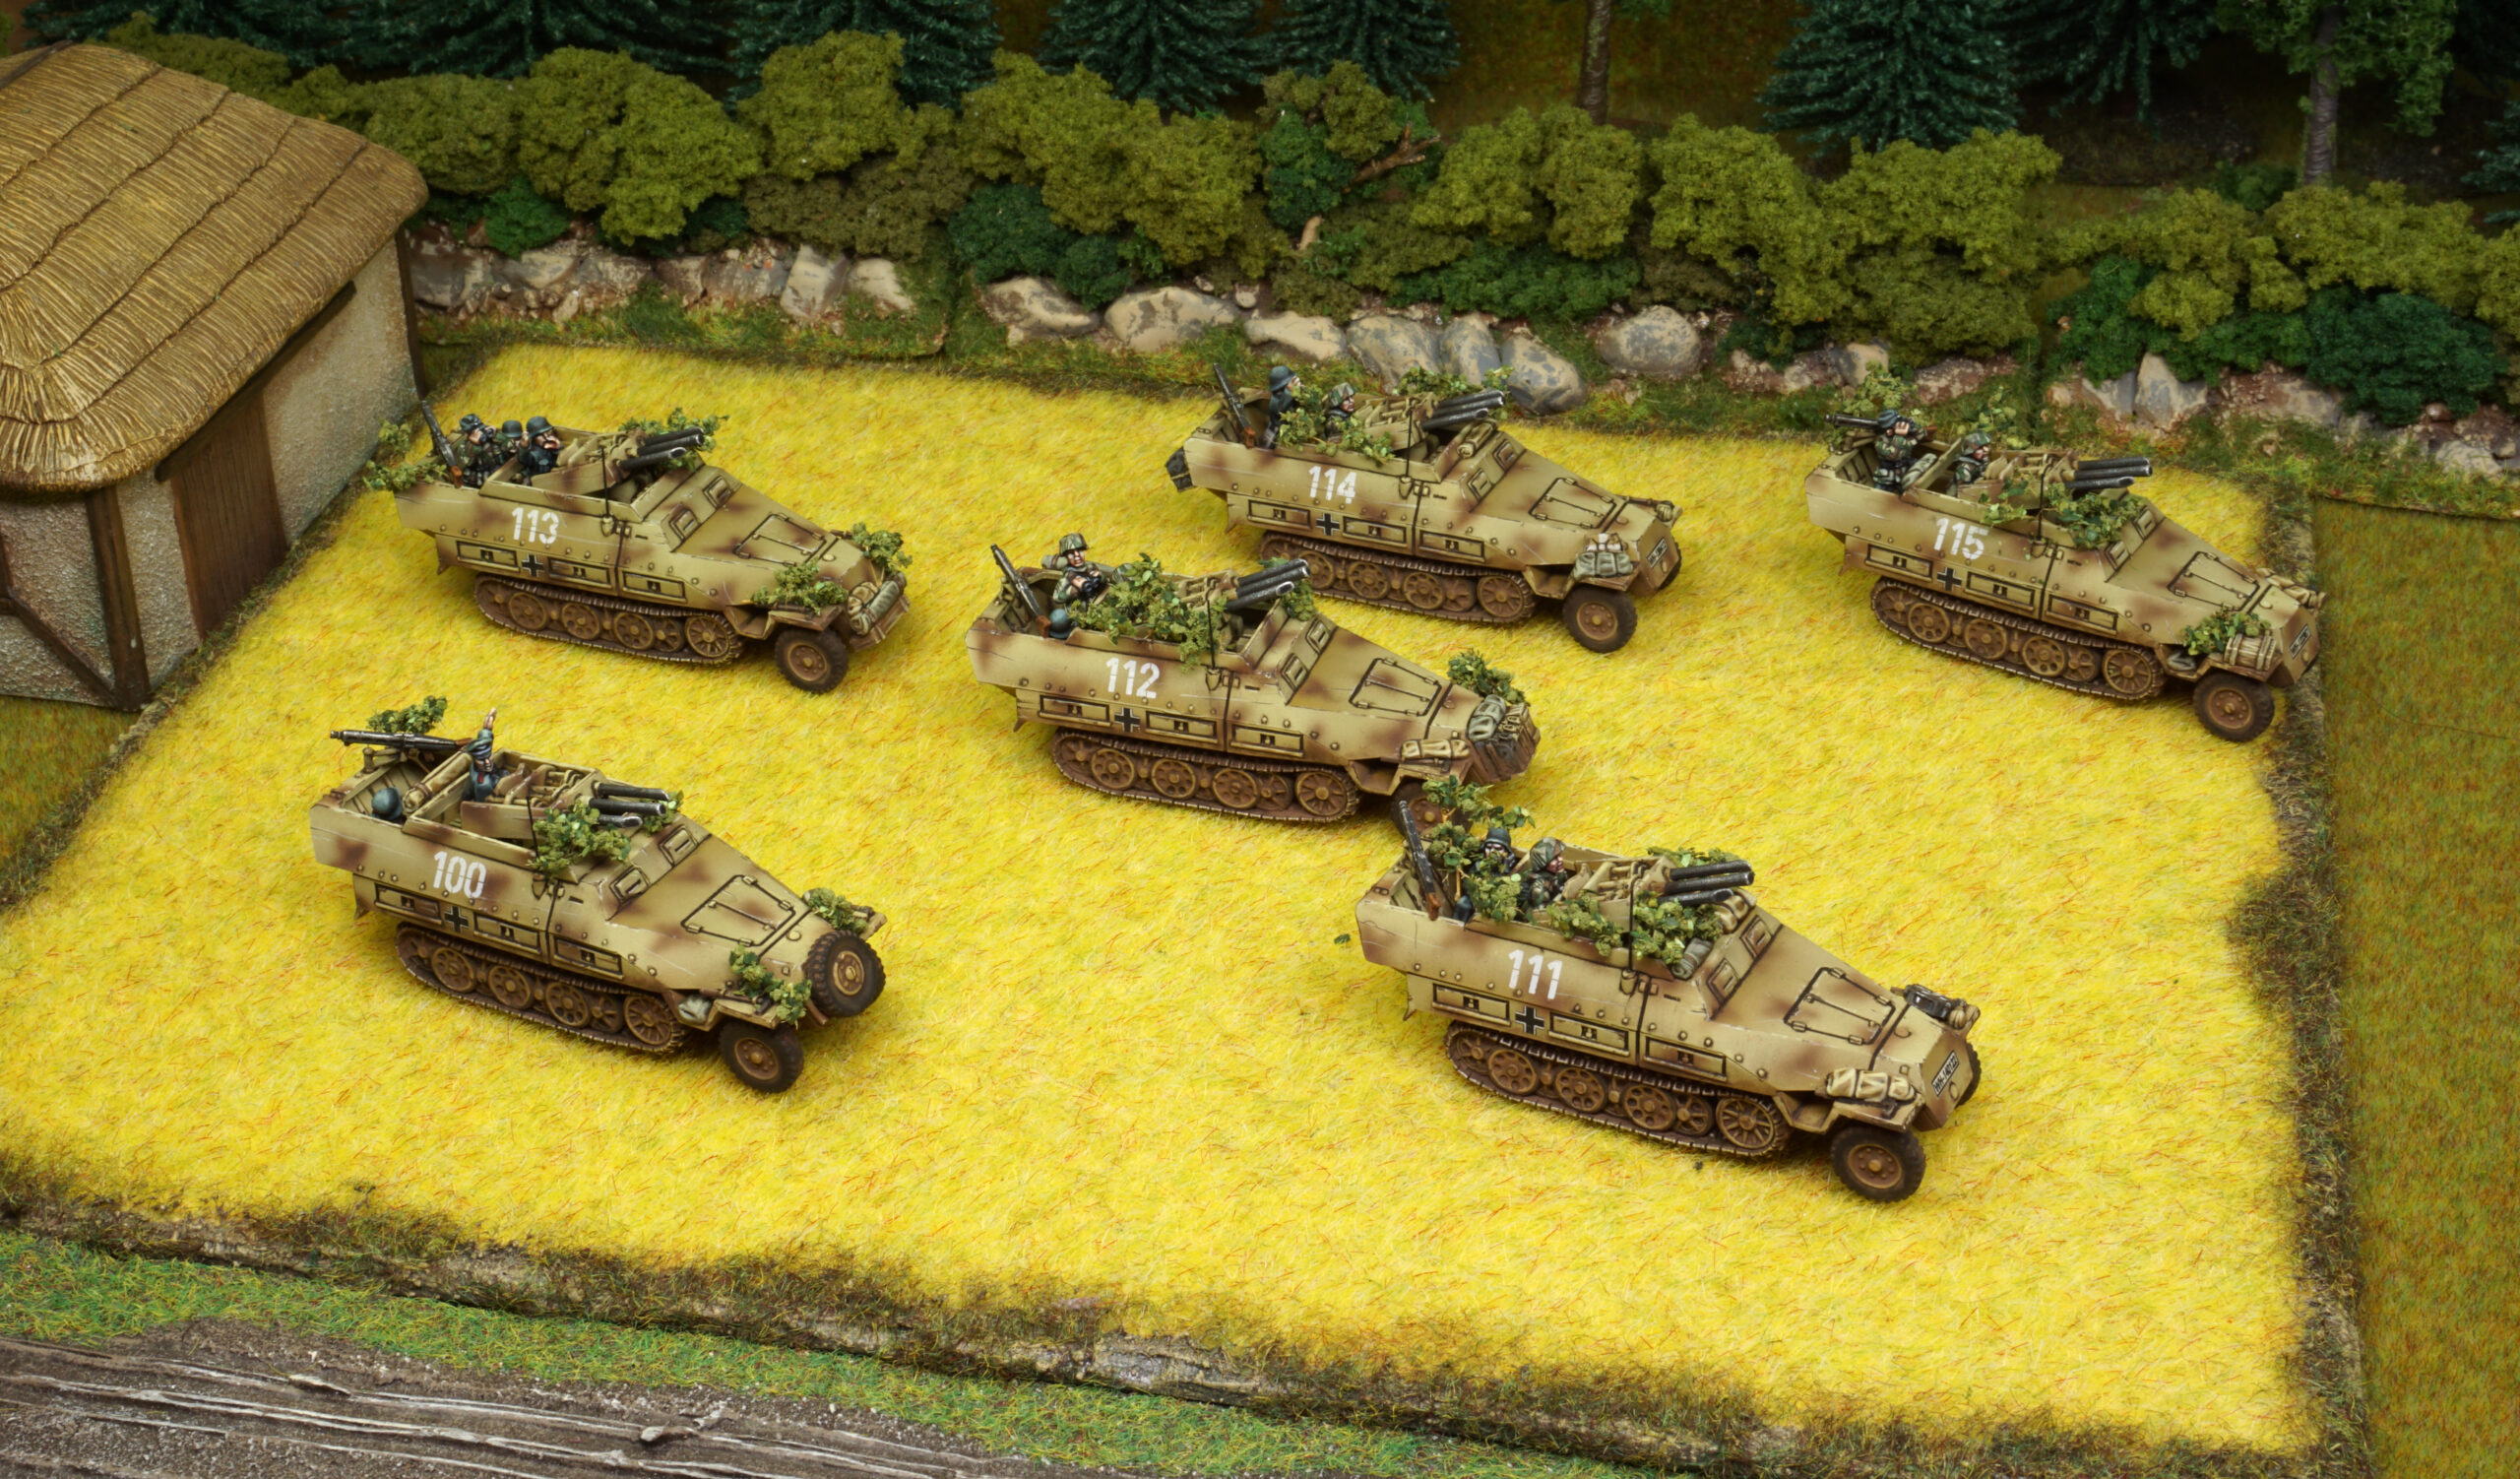
El semioruga ya está listo, y es momento de pintar la tripulación. Para ello, puedes usar tu técnica favorita para pintar figuras. Una vez listas, fijamos las figuras en su lugar utilizando pegamento instantáneo. Al pintar pelotones, es importante variar la posición de los tripulantes en cada vehículo para añadir variedad. En este caso, también añadí un tercer tripulante en algunos semiorugas, sentado en la bancada trasera.
Paso 21: Camuflaje de foliage I
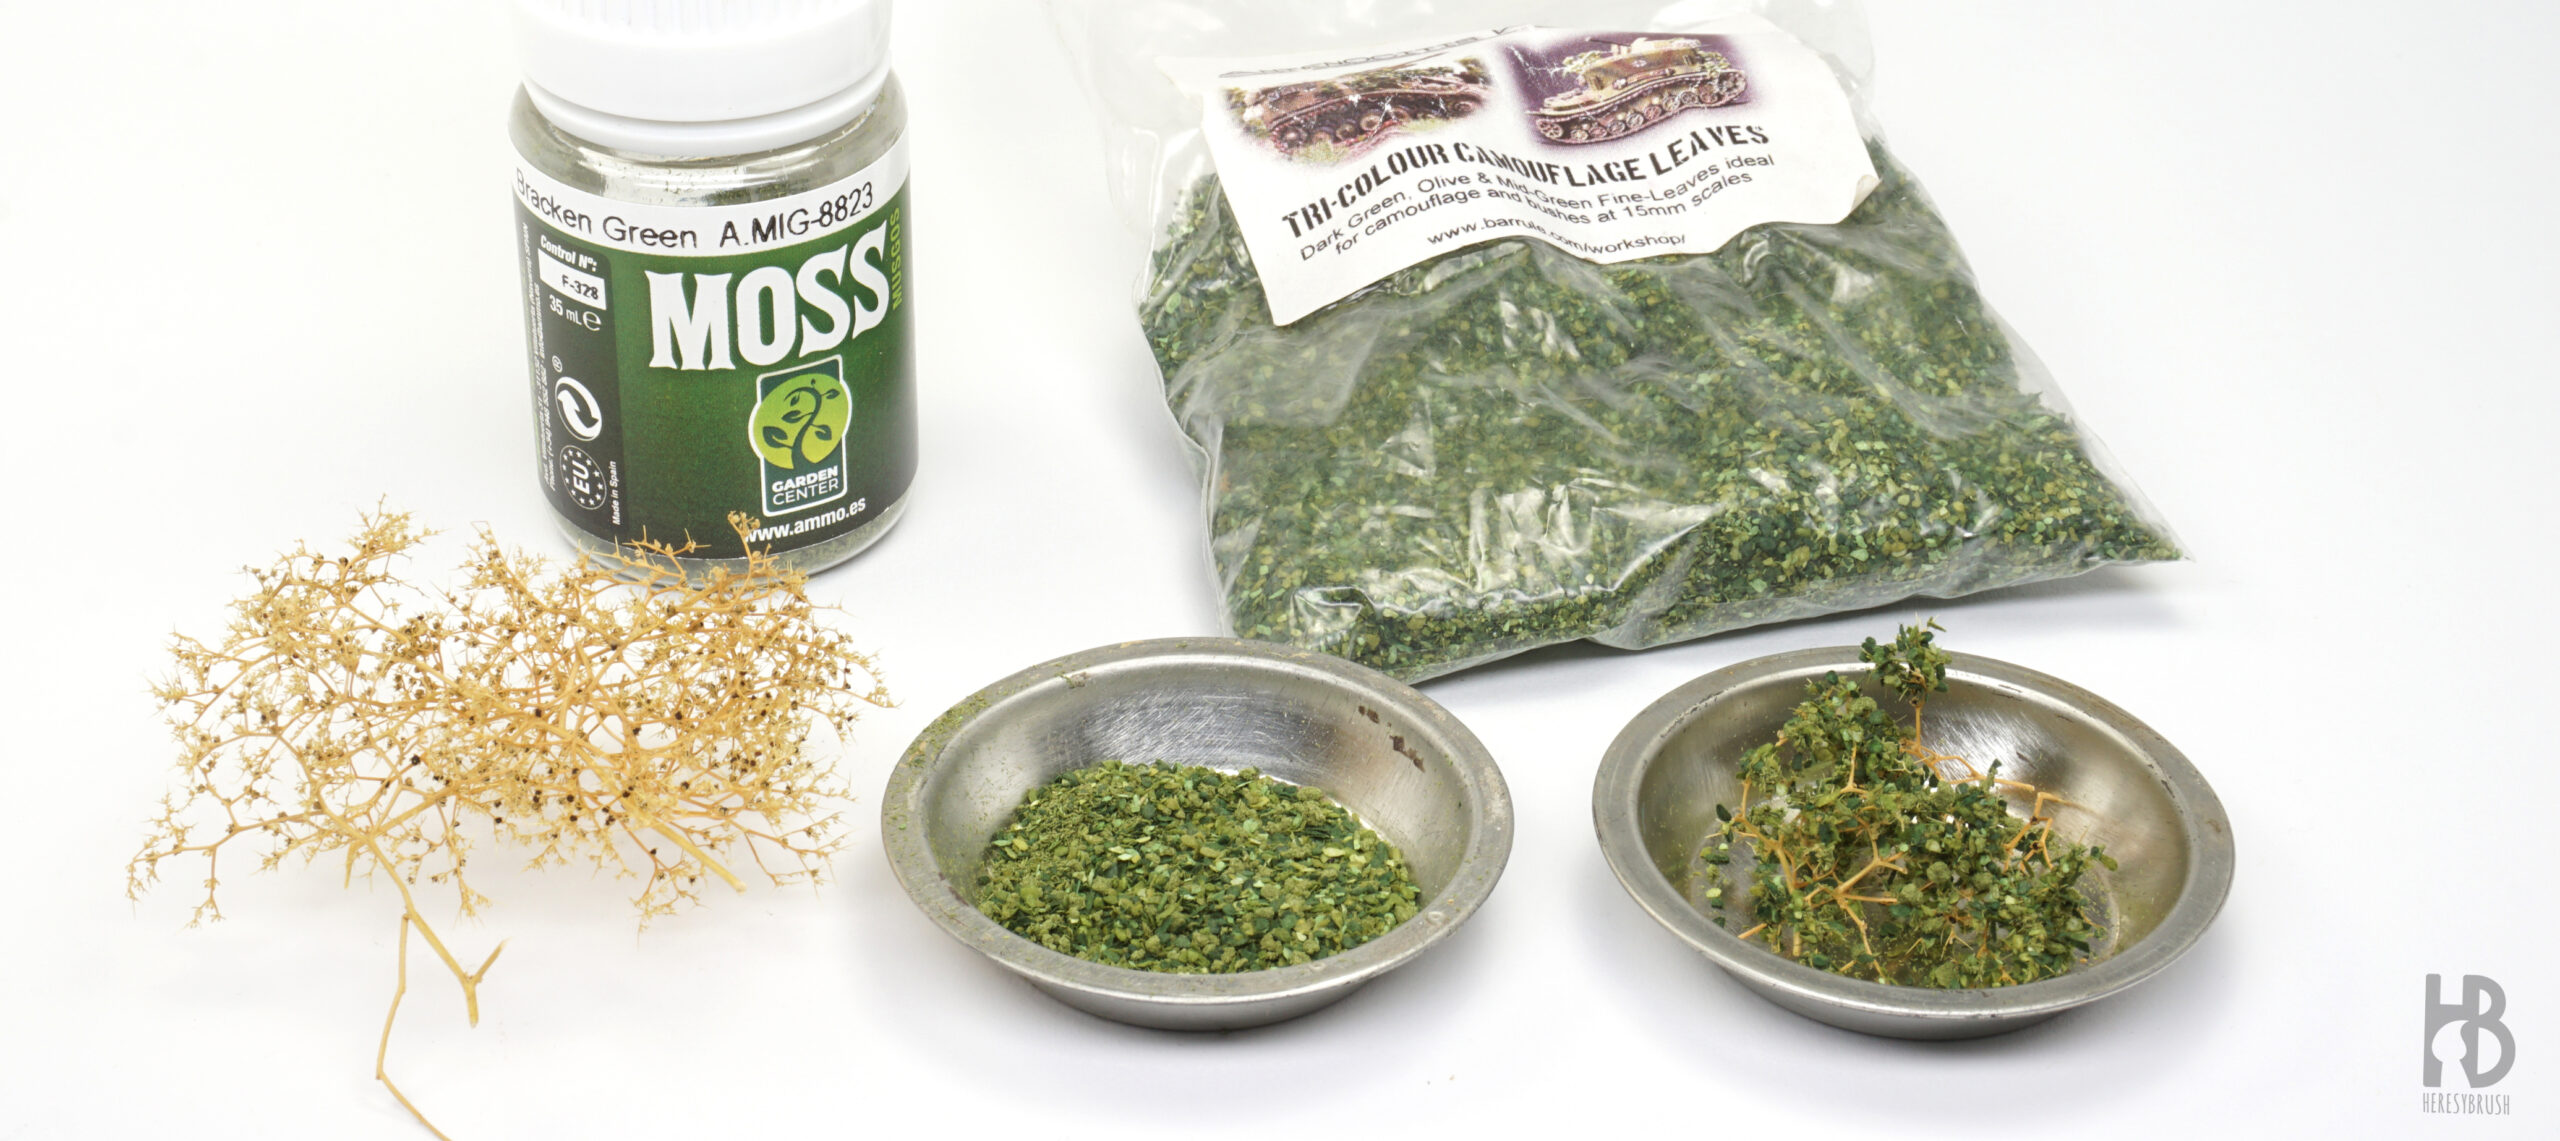
Aunque nuestros semiorugas ya están terminados, de forma opcional podemos añadir camuflaje tridimensional en forma de follaje. Este era un método común de camuflaje rápido, utilizando ramas de árboles o arbustos. Para simular esto a escala tan pequeña, necesitamos usar materiales apropiadamente diminutos. Para crear el esqueleto de las ramas, podemos usar Teloxys aristata (también conocida como sea moss o sea foam), que se utiliza comúnmente en modelismo ferroviario. Para el follaje, podemos emplear diversos productos de modelismo para simular hojitas o incluso musgo en escalas mayores. Es importante que lo que usemos como hojas o follaje sea muy pequeño y adecuado para miniaturas de 15 mm. Puedes leer más sobre este tema aquí. También preparo un kit especial con la sea moss y el follaje listo para usar, disponible en mi tienda online aquí.
Paso 21: Camuflaje de foliage II
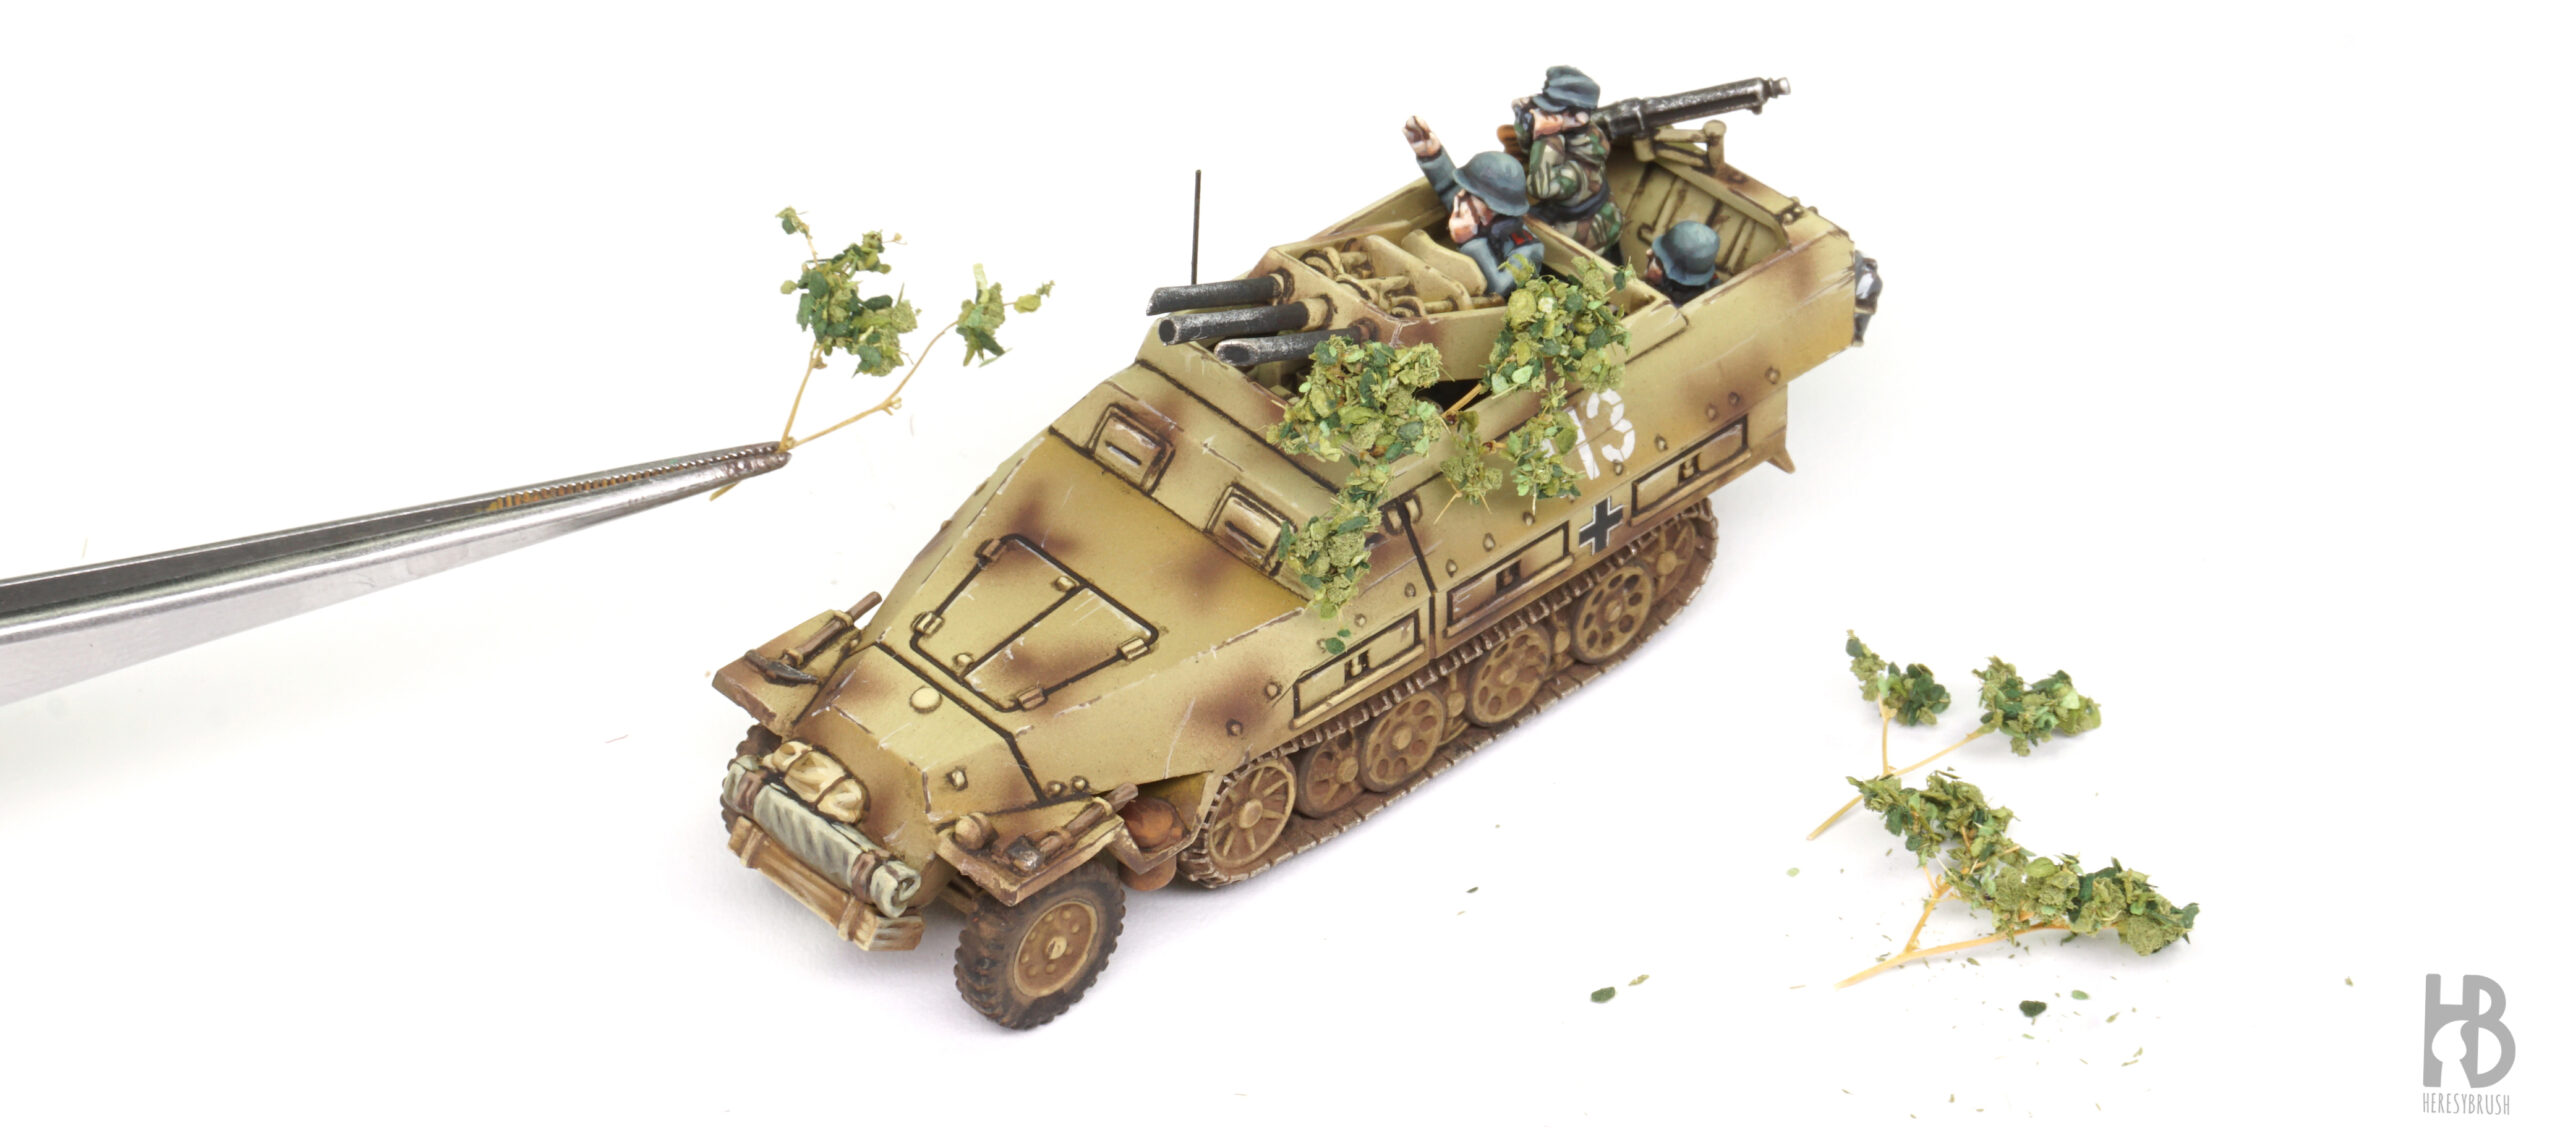
Primero, aplicamos un poco de cola blanca a una pequeña rama de Teloxys aristata, y luego espolvoreamos el follaje por encima. Hacemos unas cuantas y las dejamos secar. Una vez secas, seleccionamos las ramas y, si es necesario, las recortamos a la forma o tamaño deseado usando unos alicates. Poco a poco, vamos construyendo el camuflaje de follaje sobre el vehículo, utilizando cola blanca para fijar las ramas en su lugar. Como ya hicimos antes, procuraremos crear patrones diferentes en cada vehículo para añadir variedad y mantener la individualidad de cada equipo dentro del pelotón.
Esta es la lista de pintura sutilizadas en esta guía:
Acrílicos
- IONIC-1201 – DunkelgelbWWII German Tanks 1943 – 45 (12 acrylic IONIC paints)
- A.MIG-2503 – Aqua Gloss Clear
- A.MIG-2054 – Ultra-Matte Lucky Varnish
Esmaltes & pigmentos
- A.MIG-1005 – Dark Brown Wash for Green Vehicles
- A.MIG-2019 – Odorless Enamel Thinner
- A.MIG-3004 – Europe Earth
- A.MIG-3029 – Winter Soil
- A.MIG-3008 – Track Rust
Puedes conseguir todas las pinturas mencionadas anteriormente (y cualquier otro producto) en el sitio web de AMMO by Mig Jimenez con un 10 % de descuento usando el código de afiliado: Heresy10Ionic


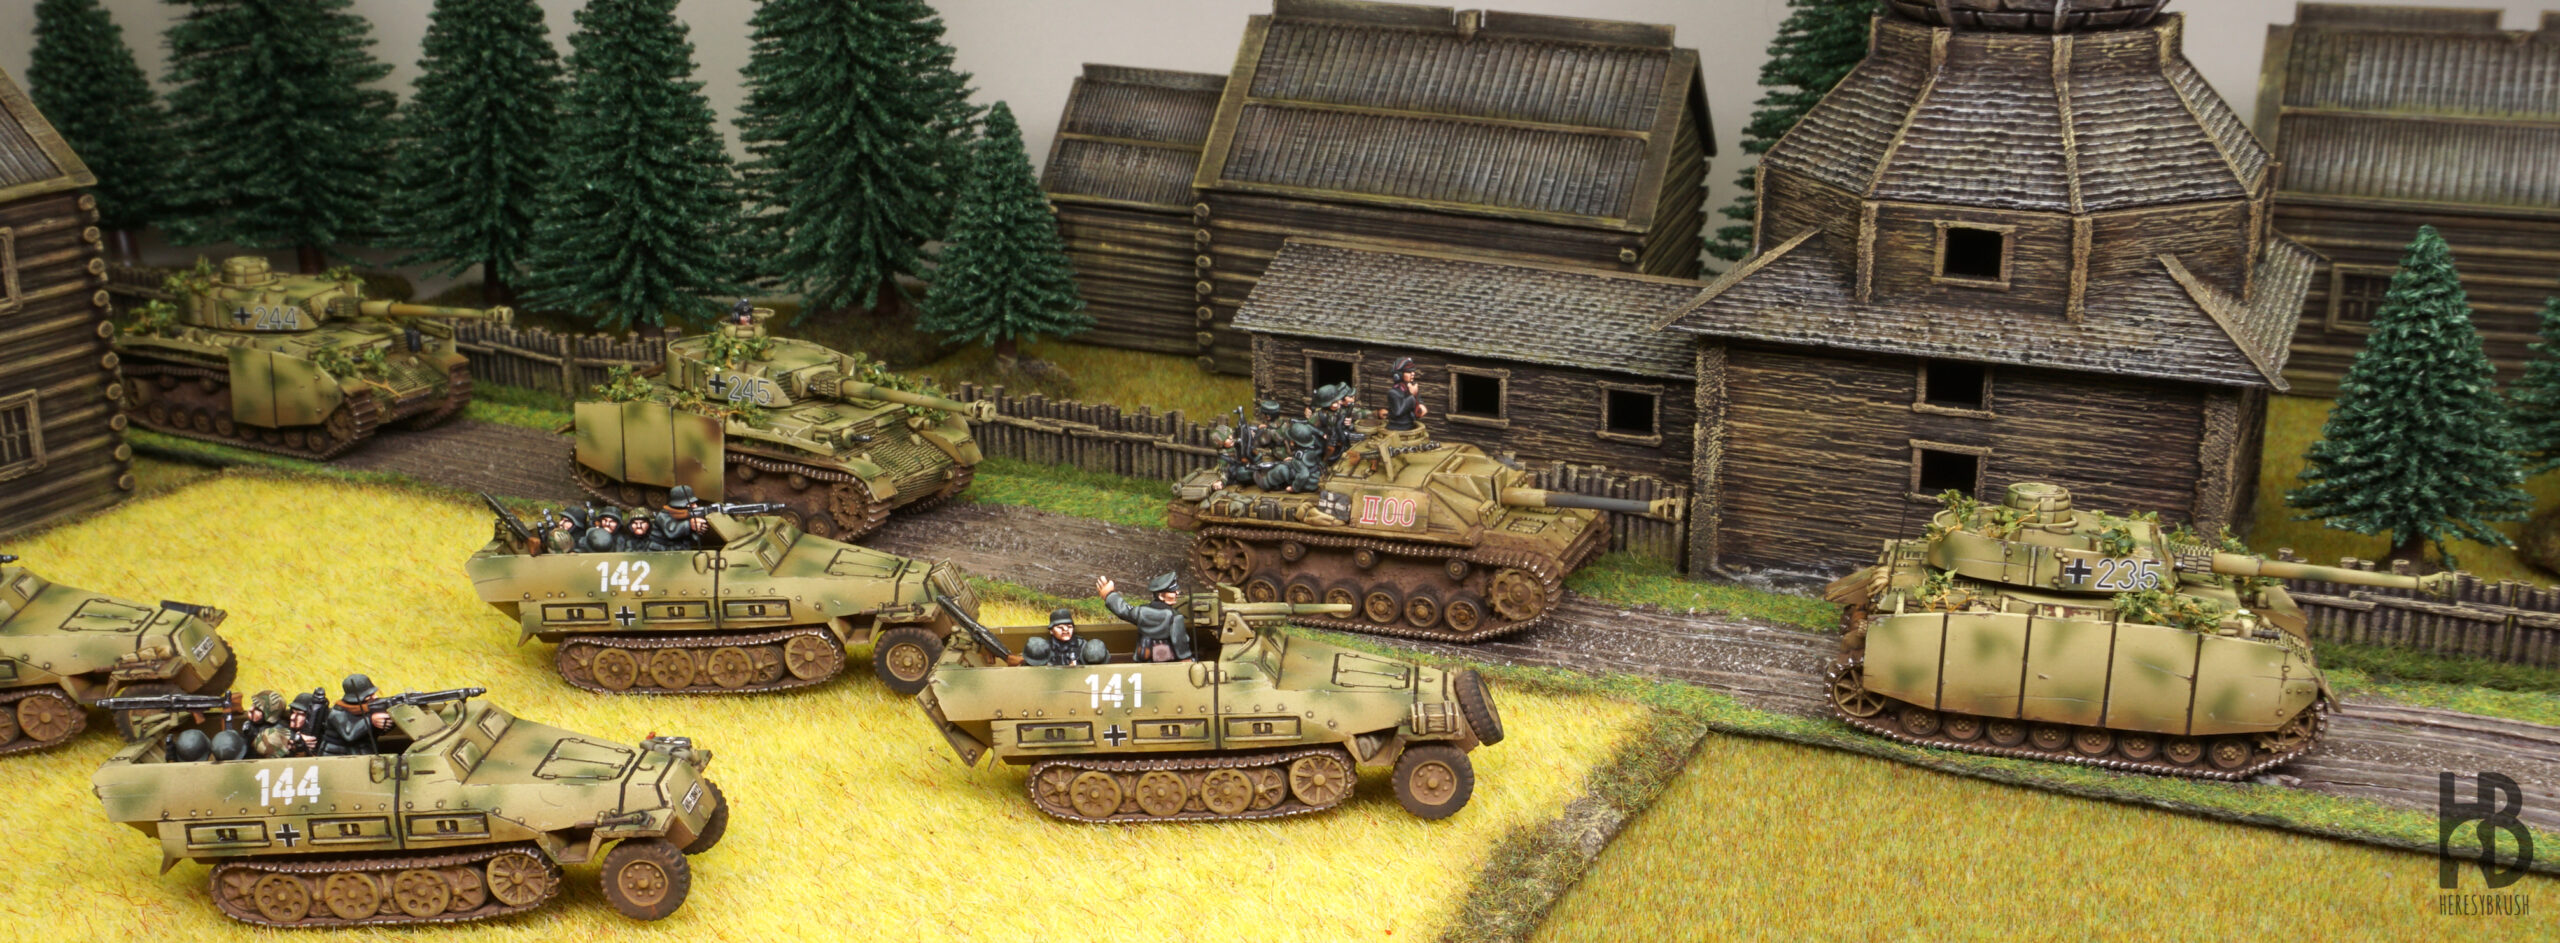
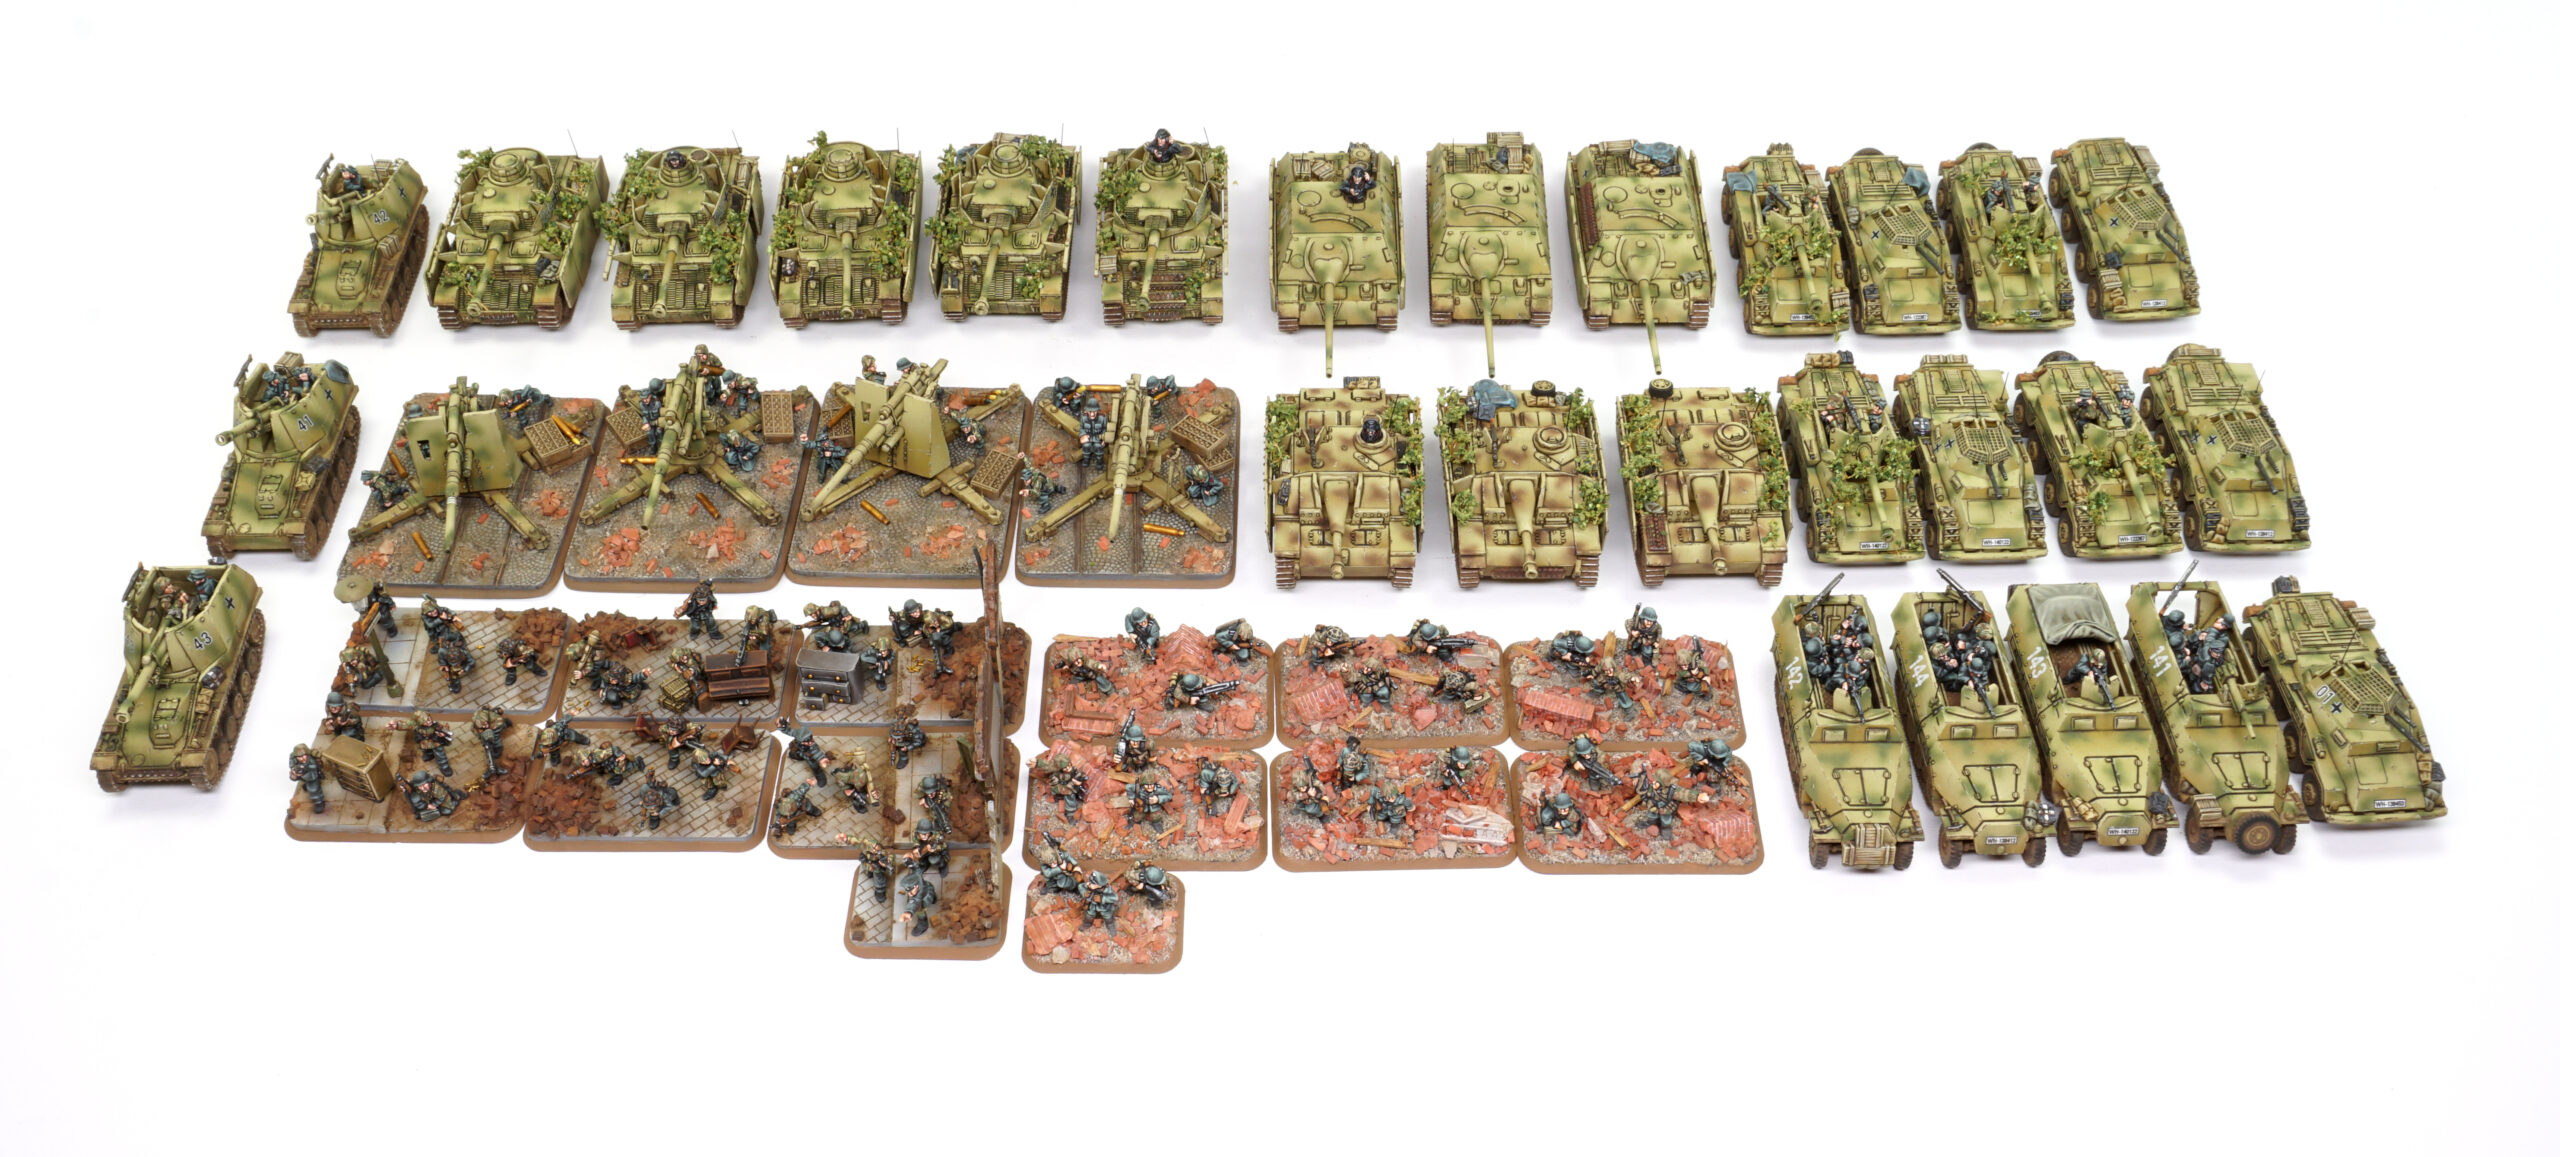
Pelotón
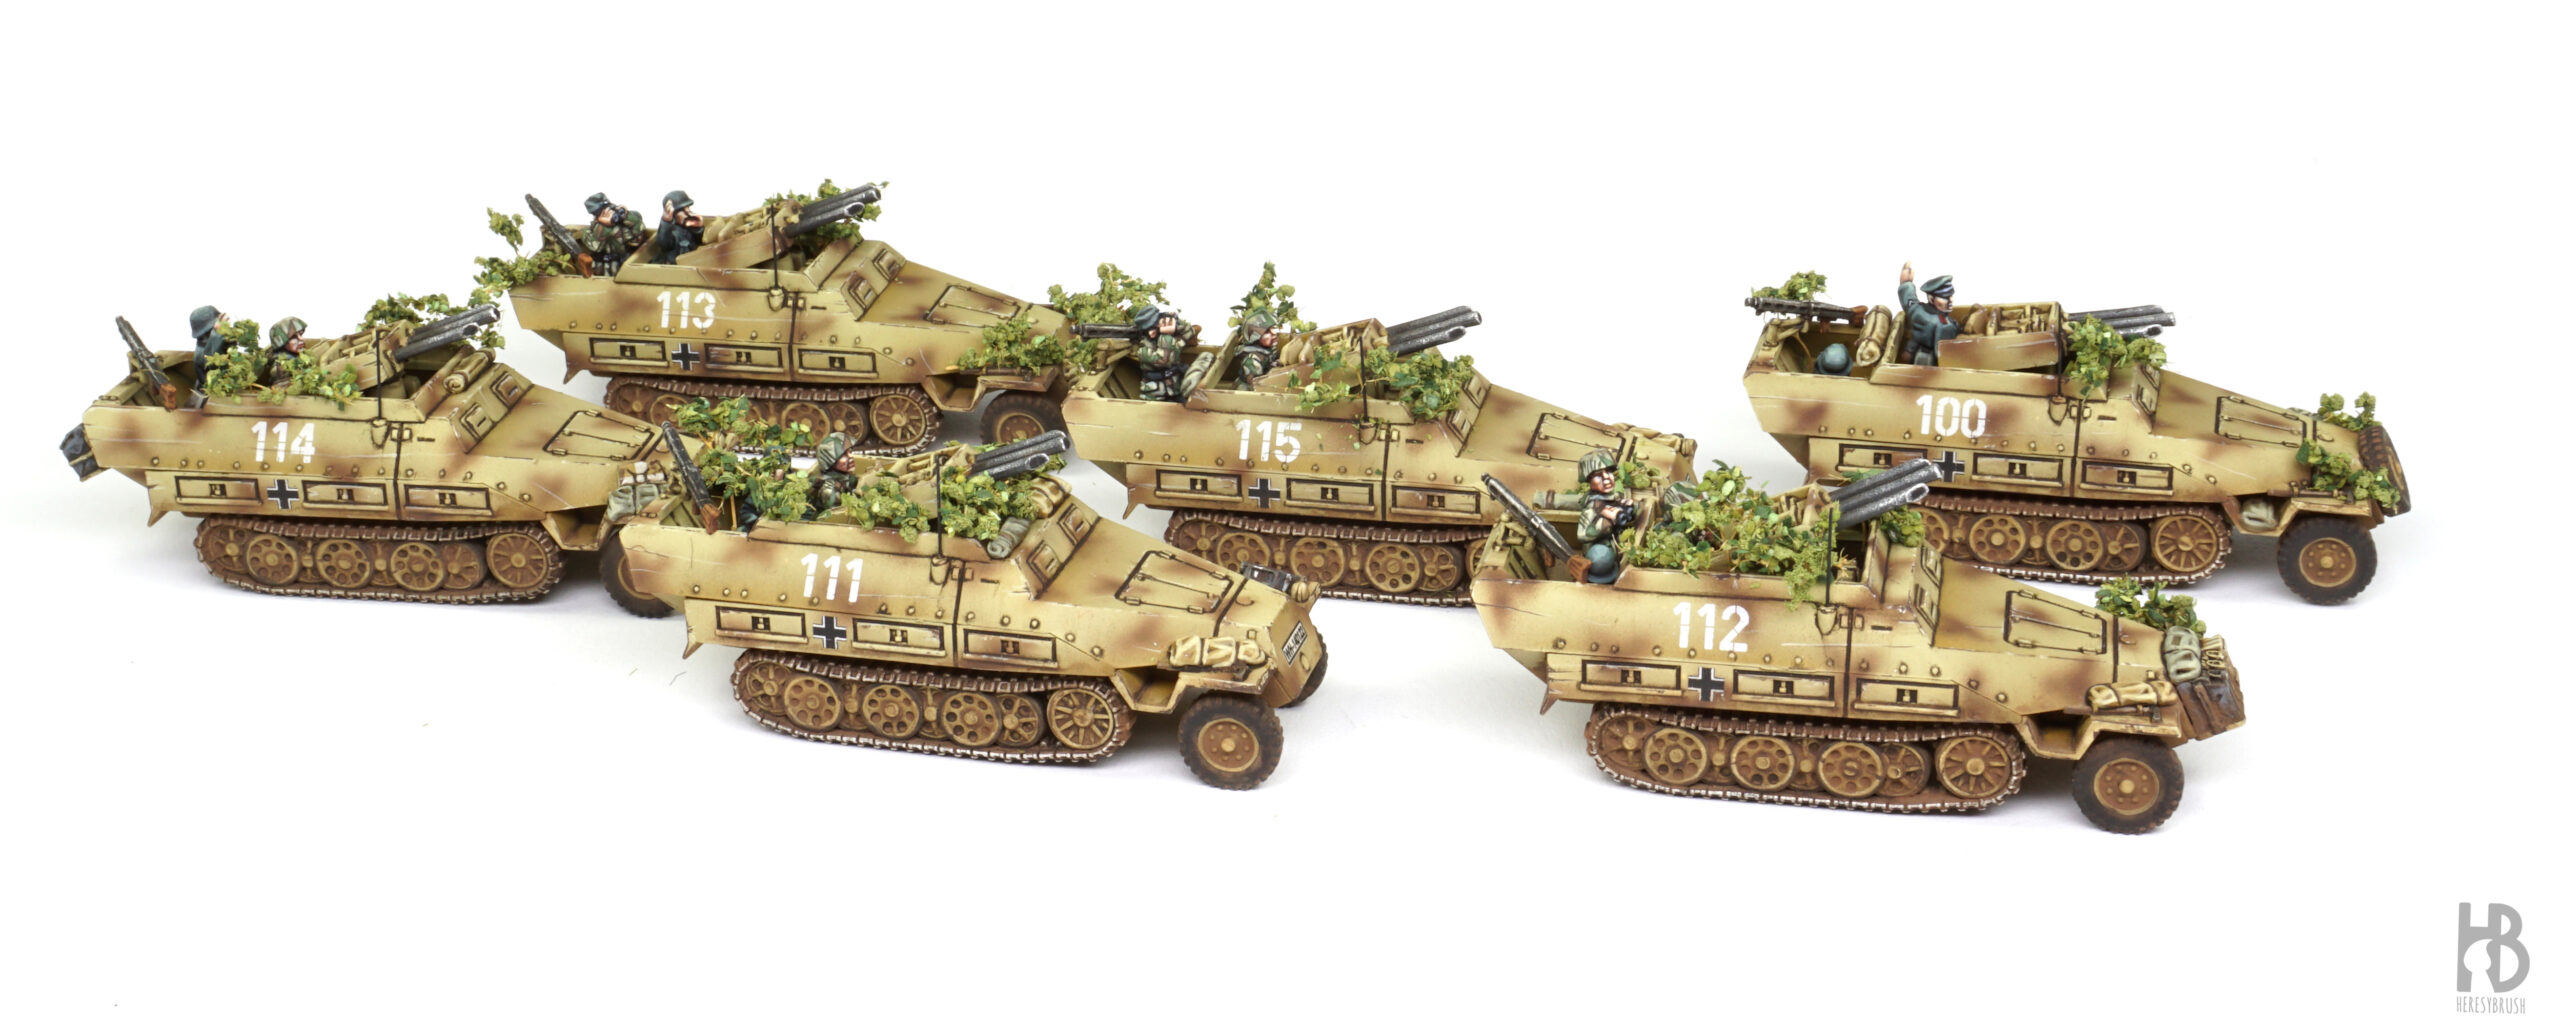
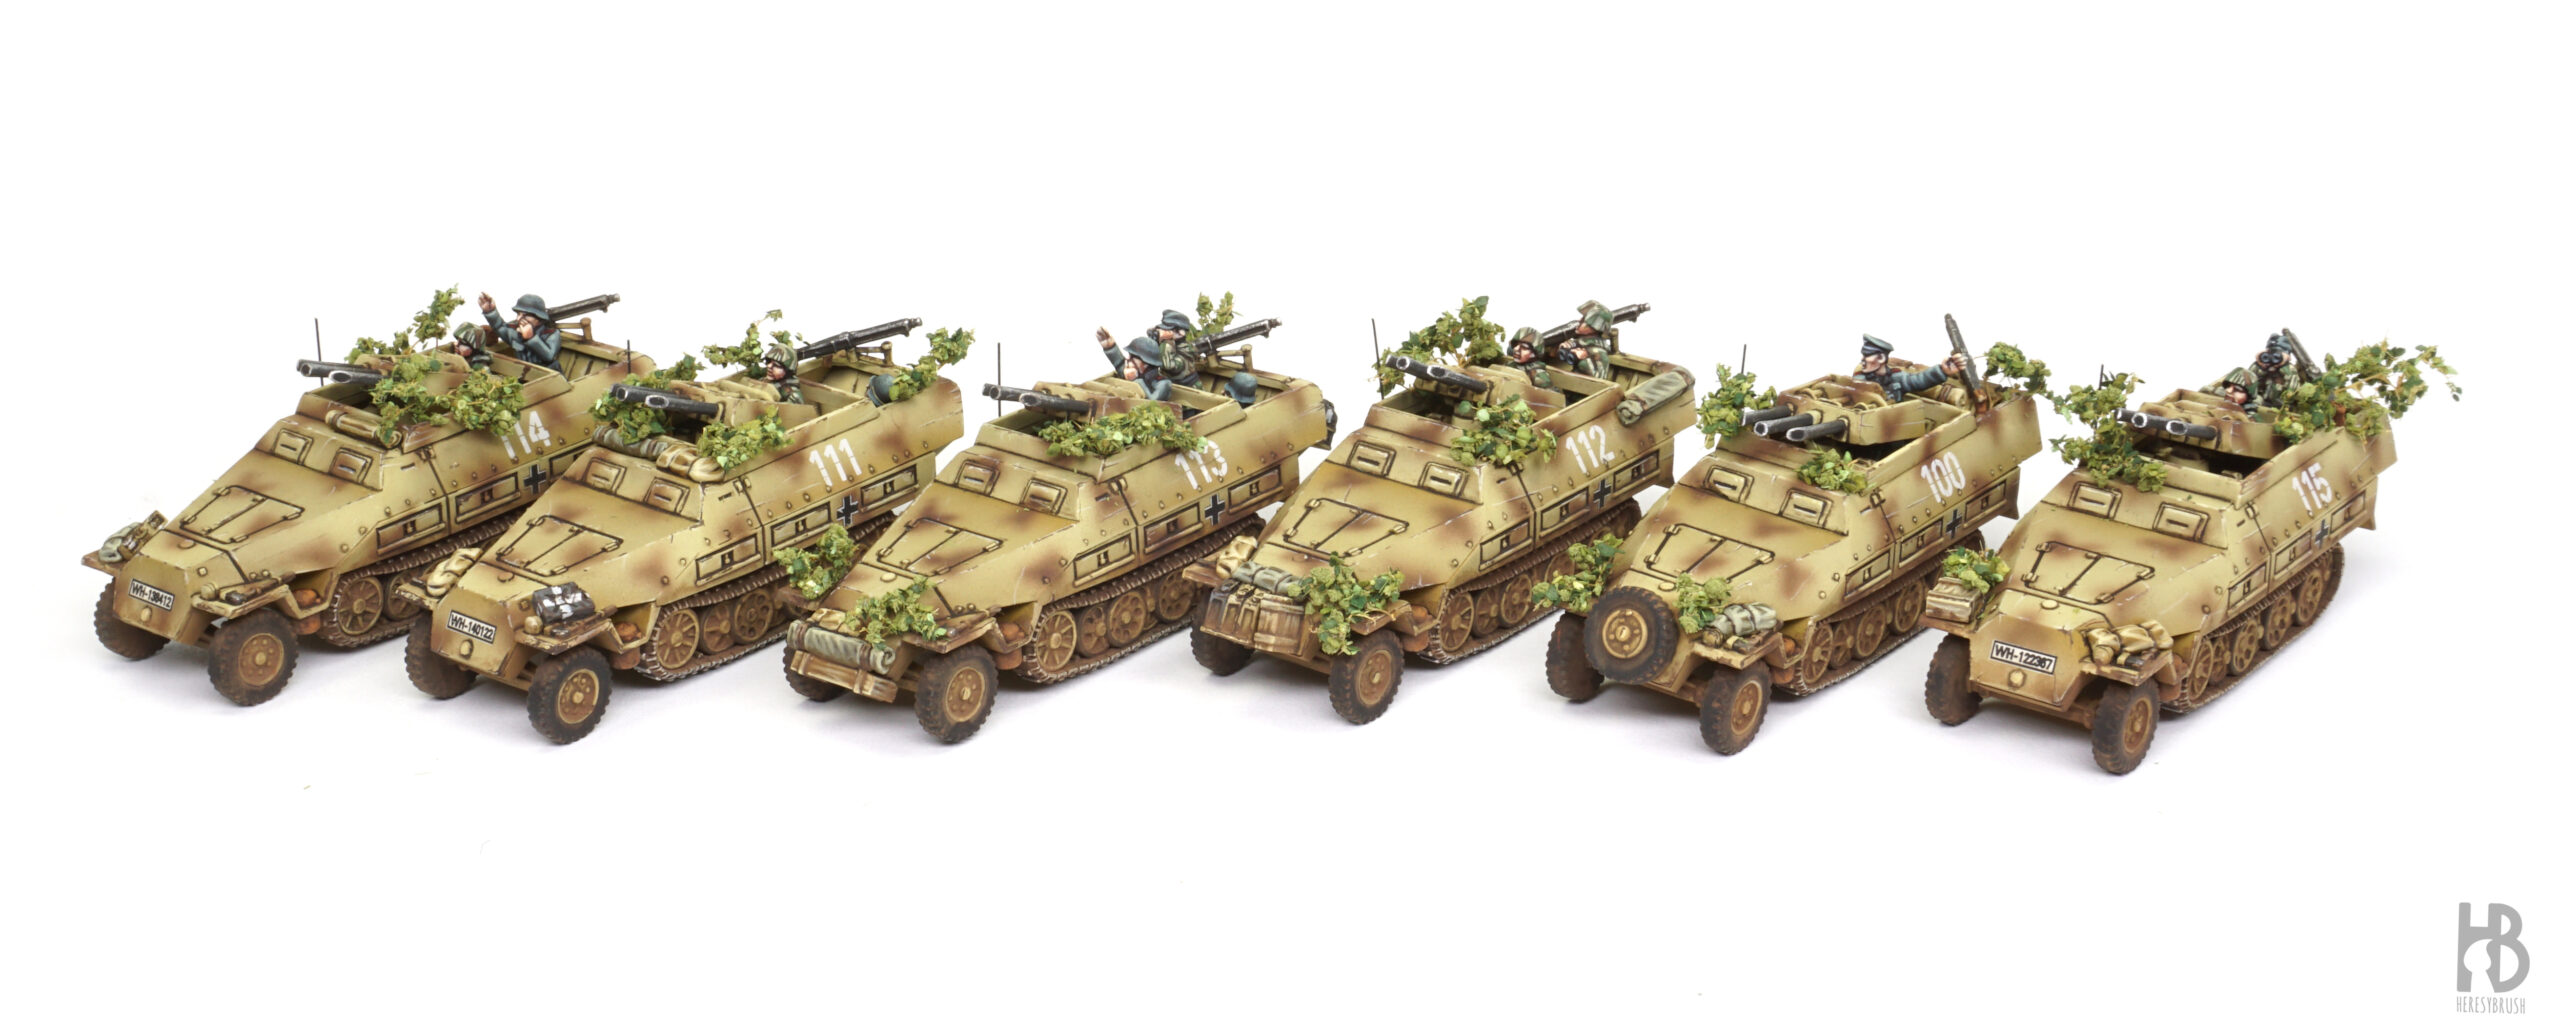
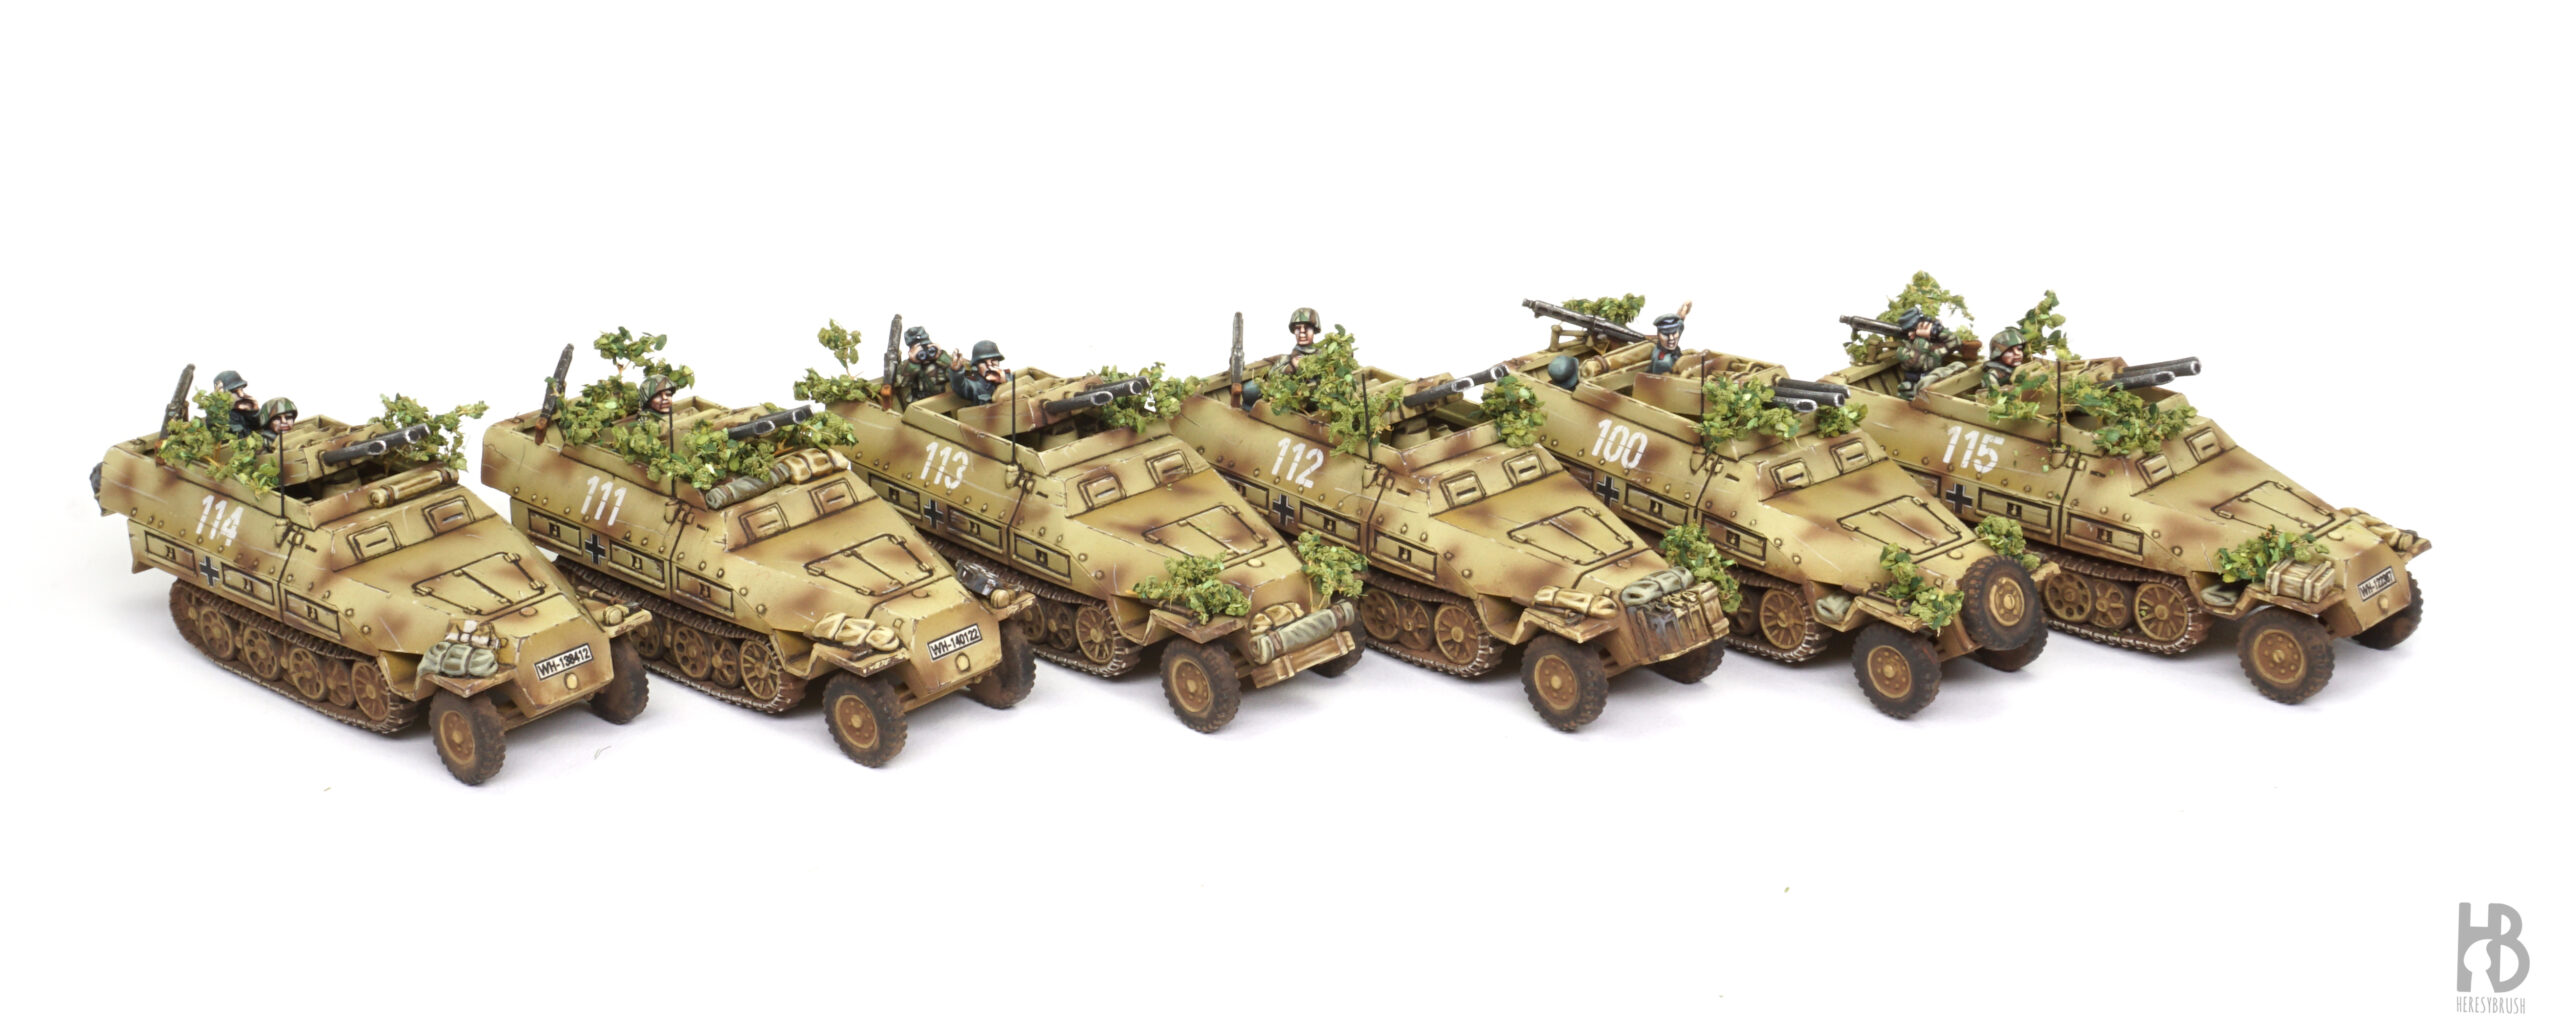
Los ejércitos pintados siguiendo esta técnica:

Un trabajo magnifico y muy didactico. Queria preguntar si es aconsejable o posible dar una capa de barniz mate al final del todo para fijar los pigmentos.
Gracias por tu comentario.
No, no aplicaria barniz al final para fijar los pigmentos. El barniz te va a humedecer el pigmento, cambiando su color y texture al secar. Para fijar pigmentos es mejor utilizar productos especificos, como un Pigment Fixer. O incluso agua.