
This article was originally published on the Battlefront website.
In previous tutorials, we explored different methods for painting camouflage on tanks using soft- or (this, for example) hard-edge patterns (this and this, for example), with or without masking. These techniques typically involved the use of an airbrush, a tool that can seem intimidating to many hobbyists. In reality, however, airbrushing is quite easy, and I highly recommend giving it a try if you have not already. The most critical aspect is cleaning the airbrush properly after each session, and always remember to thin your paints. That said, in this tutorial we will focus on painting a tritonal camouflage using only a brush. The main drawback of brush painting is the limited depth, as the tank surfaces are rendered in flat tones. However, we will go over several tricks or techniques to overcome this limitation, including highlighting certain details and using oil paints to enhance shadows and add depth.
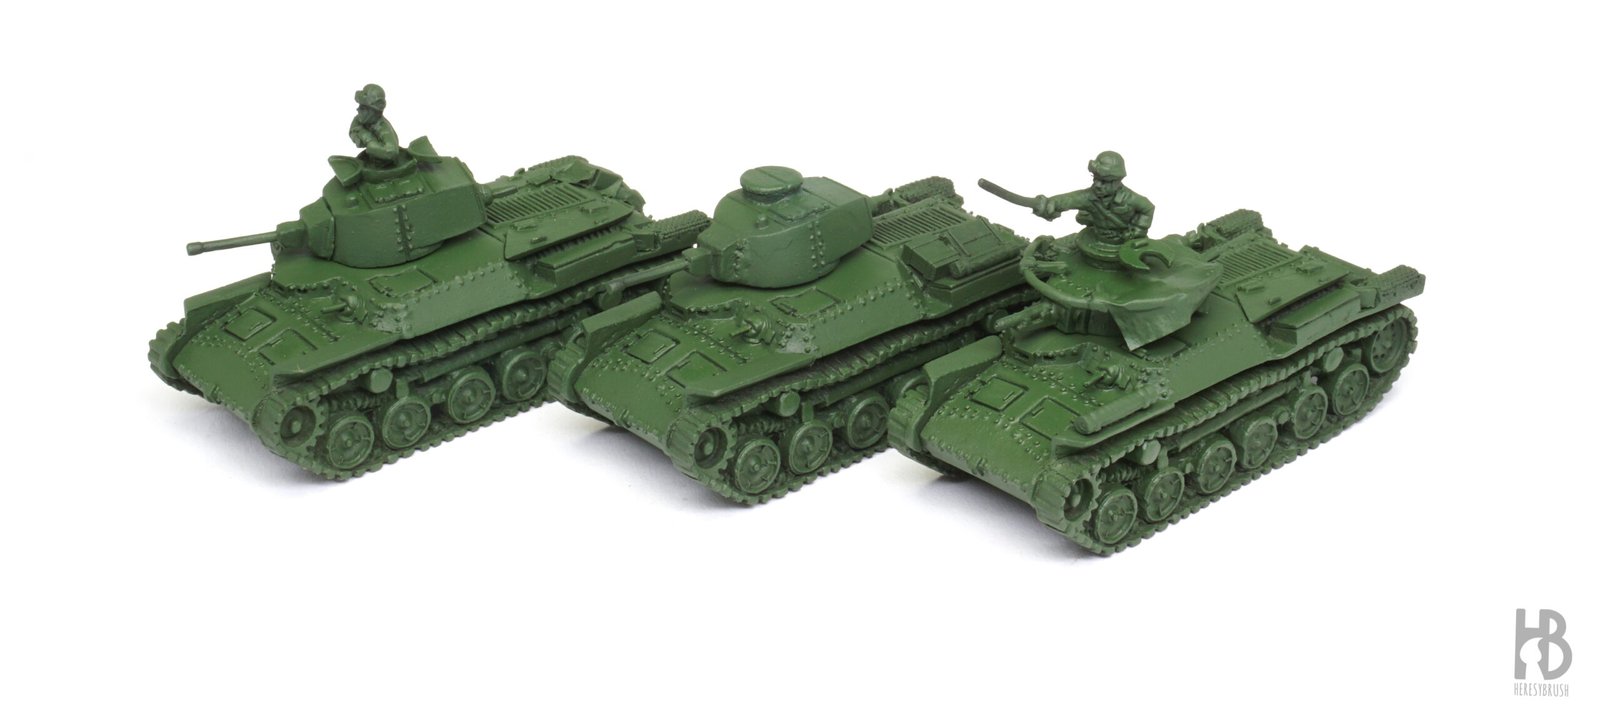
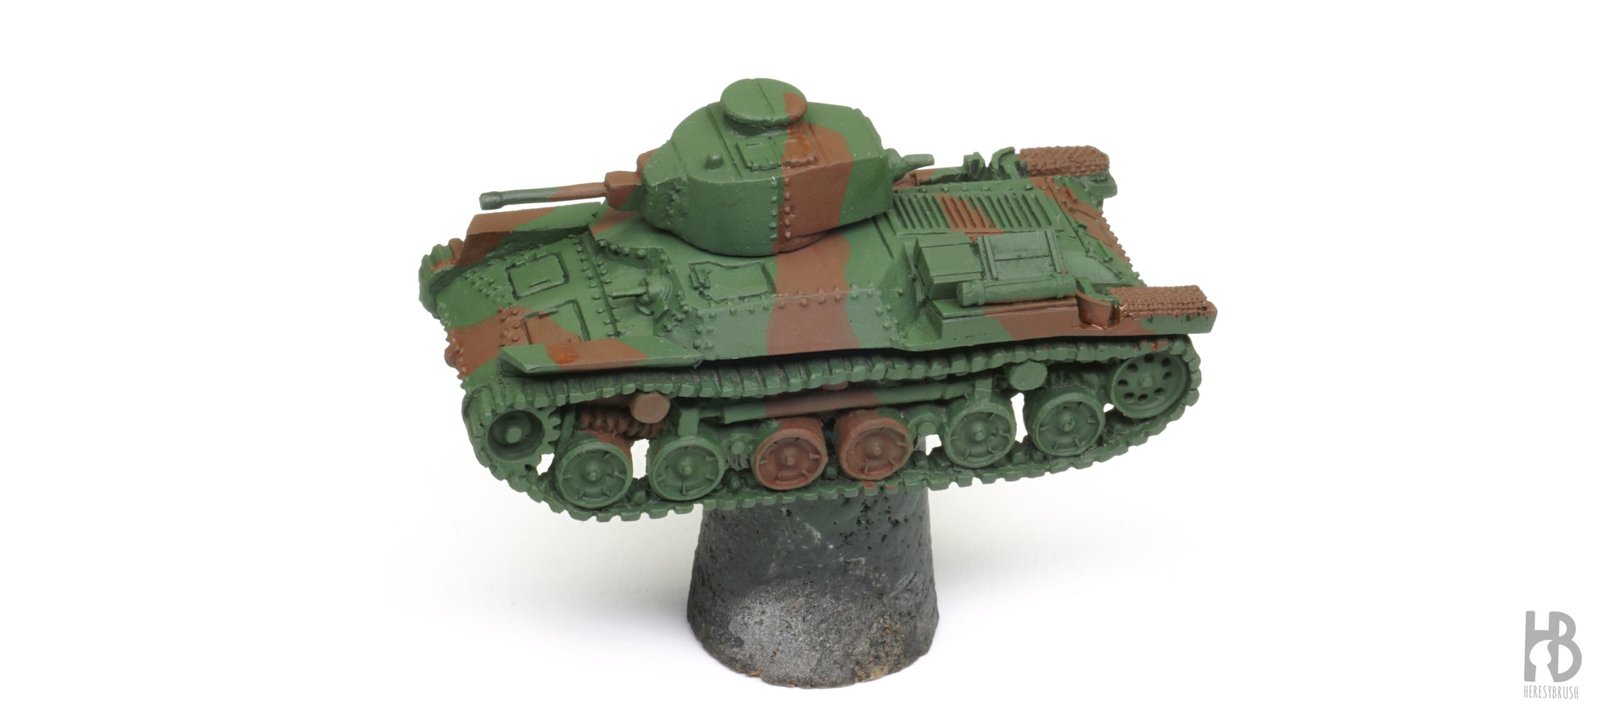
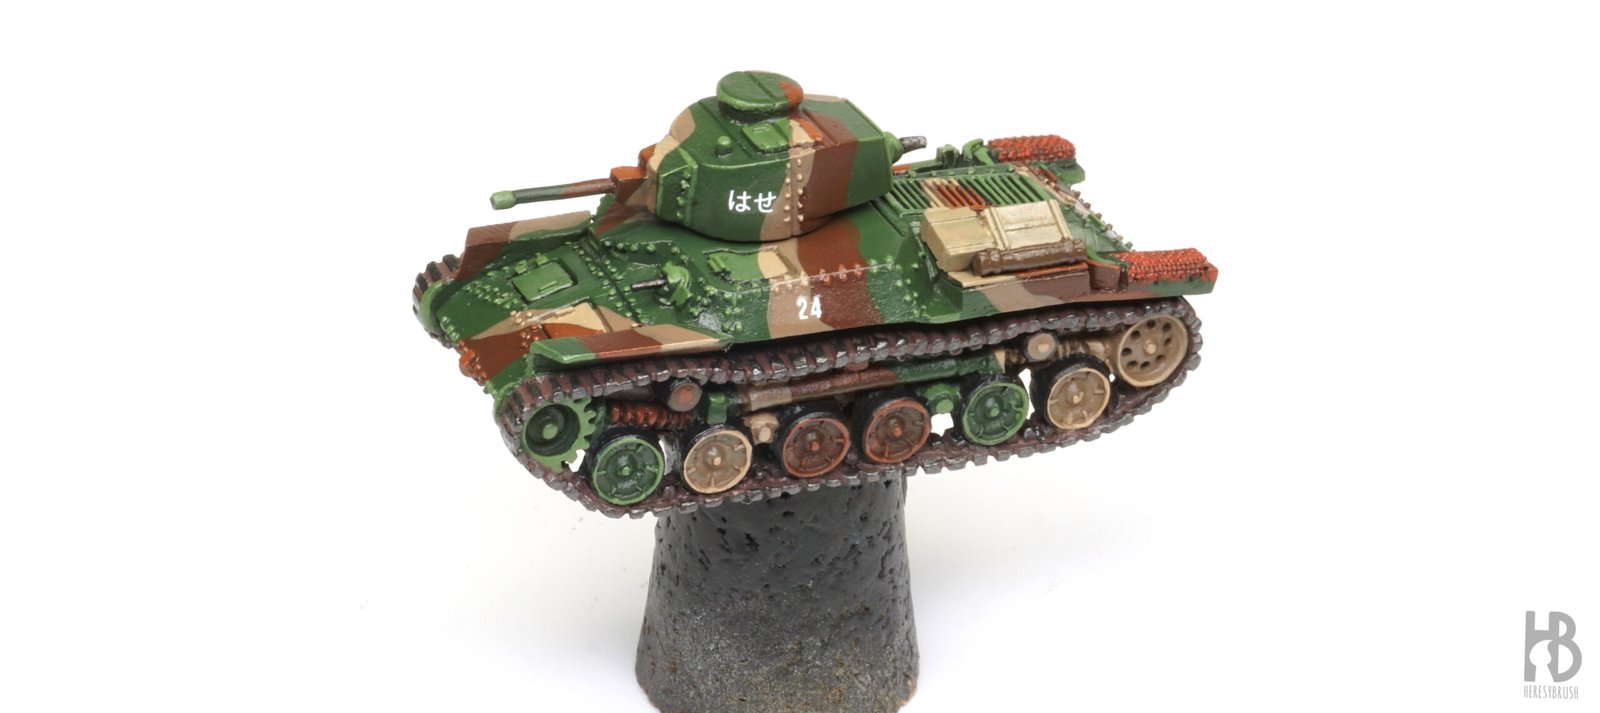
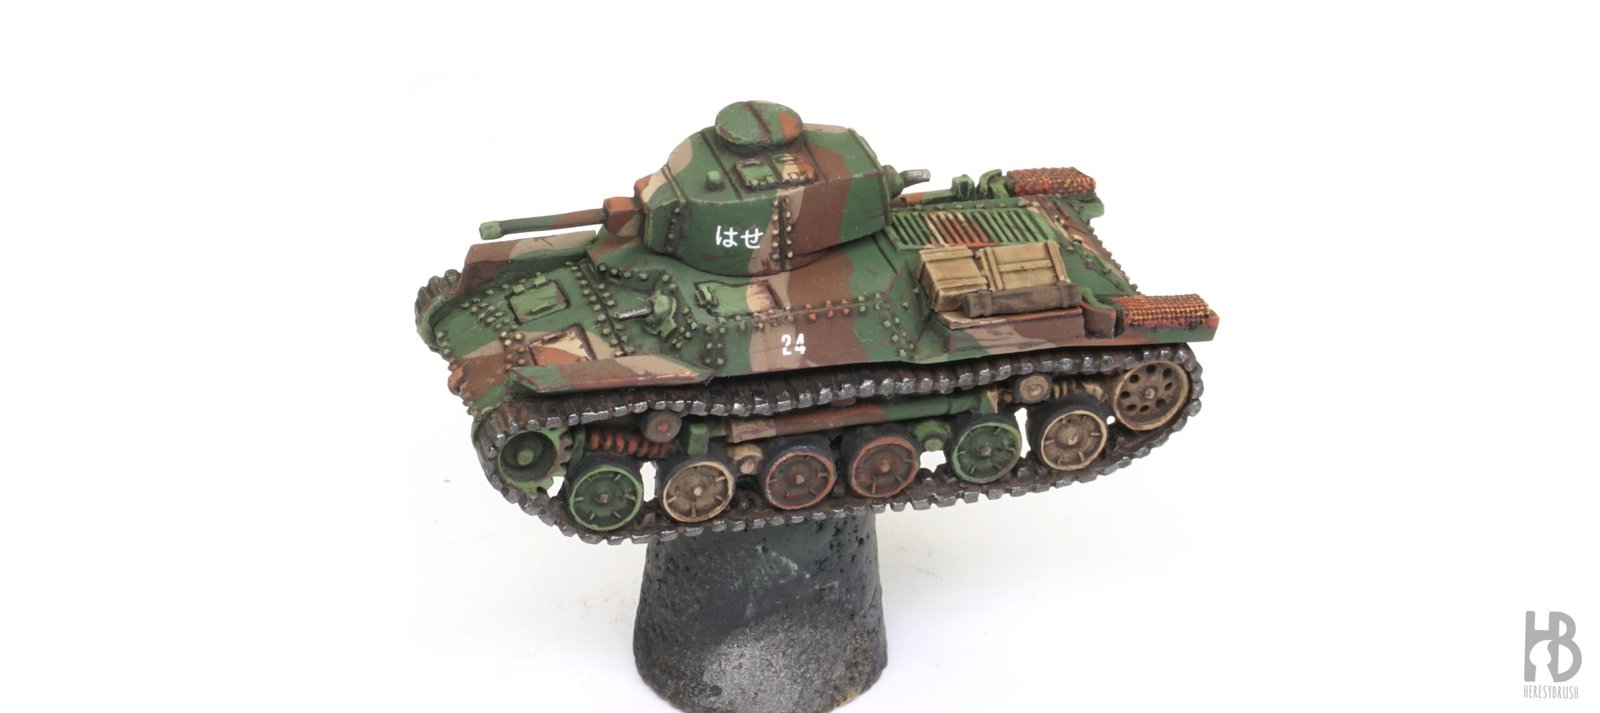
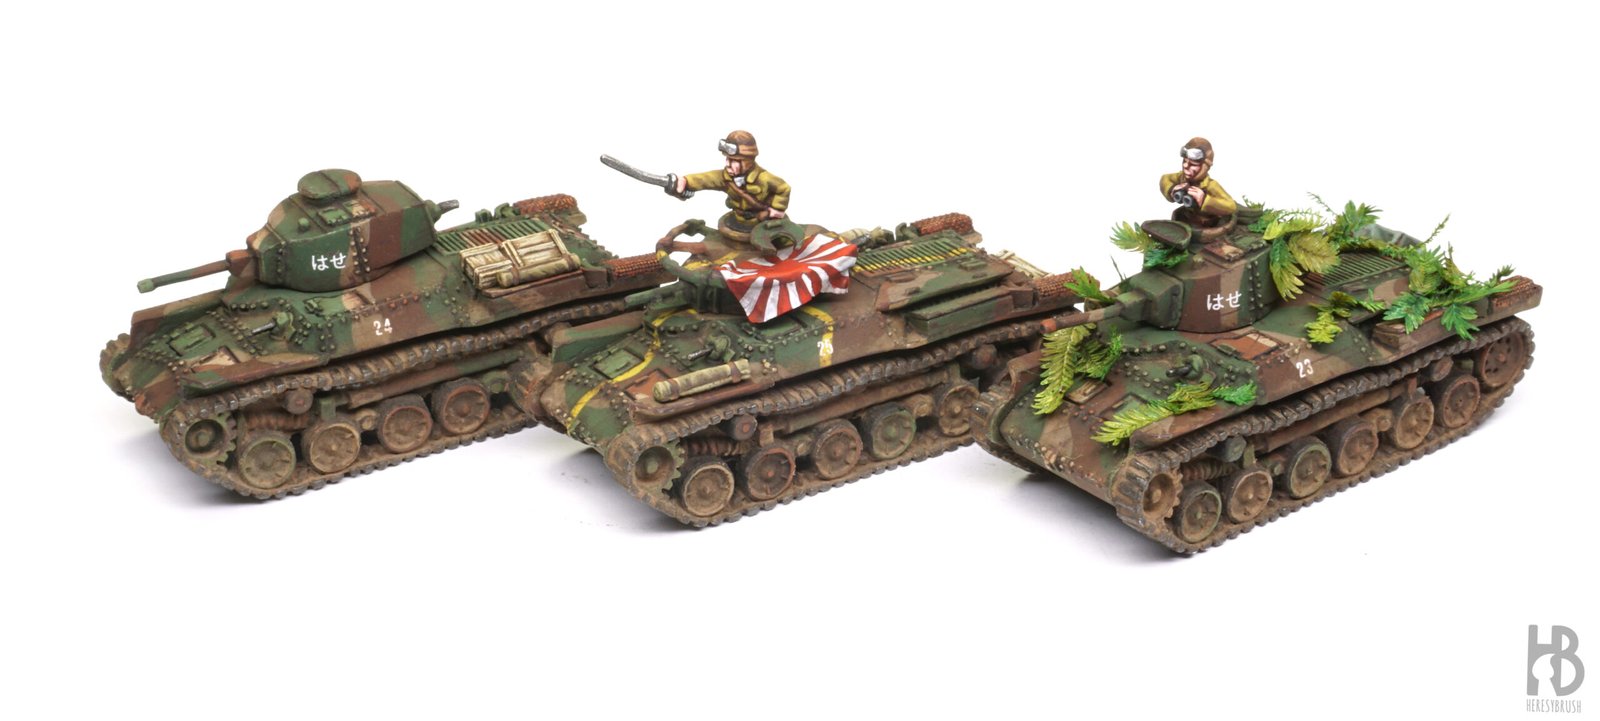
For this tutorial, we will be using one of the newly released Japanese tanks by Battlefront Miniatures in 15mm (scale 1:100), the Type 97 Chi-Ha, the workhorse of the Imperial Japanese Army during World War II. In the early years of the war, Japanese tanks were typically painted in khaki or yellow-brown, but as jungle combat intensified the army adopted a tritonal camouflage scheme. This pattern featured grass green (kusa iro), earth brown (tsuchi iro), and sand yellow (tsuchi kusa iro). As the war progressed, green became the standard base color, with camouflage patterns applied by individual units rather than at the factory and normally following hard-edge shapes. This led to a wide variety of unique, non-standardized patterns across different vehicles. In the early war period, it was also common to see hand-painted yellow stripes, often arranged in intersecting “+” or “X” shapes, adding a distinctive and stylized element to Japanese tank camouflage. These vehicles were not typically repainted, so such early camouflage patterns remained visible on older tanks right up until the end of the war.
Step 1 – Preparation and green base color
We begin by cleaning the resin and metal parts using a modelling knife and files, paying close attention to mold lines and casting imperfections. After assembling all the parts using instant glue, we can add stowage to bring some variety and individuality to our platoon. For this build, I used a mix of 3D printed accessories and also made a flag and tarpaulin using smoking paper soaked in a mix of PVA glue and water. Once fully dry, we move on to priming.
Priming is an important step, as it improves paint adhesion and increases the durability of the finish. To speed up the process, you can use a spray can in the desired base color. For Japanese tanks, a suitable choice is a dark green, such as TTH108 Titans Hobby Military Green Matt Primer. Alternatively, you can use a neutral primer like grey or black, and then apply the base color with a brush and an acrylic paint. Lizard Green Ionic-0123 is a good option for this.
Step 2 – Earth brown camouflage – outlining
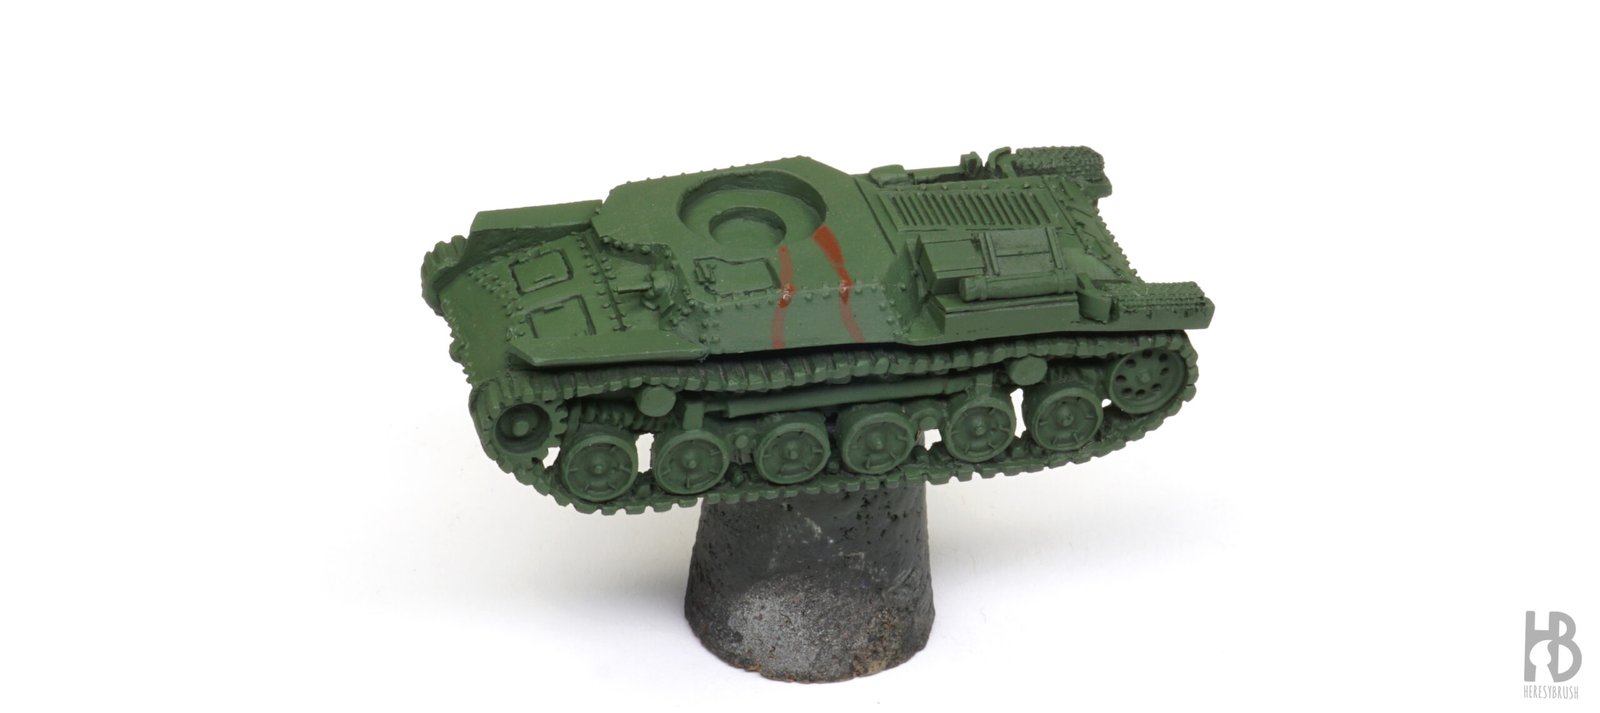
Next, we move on to the first color of the camouflage: earth brown (tsuchi iro), using Burnt Umber IONIC-0161. With a brush, we begin by outlining the shape of each camouflage patch. Be sure to thin the paint with about 20% water to help it flow better and avoid brush marks.
Step 3 – Earth brown camouflage – filling
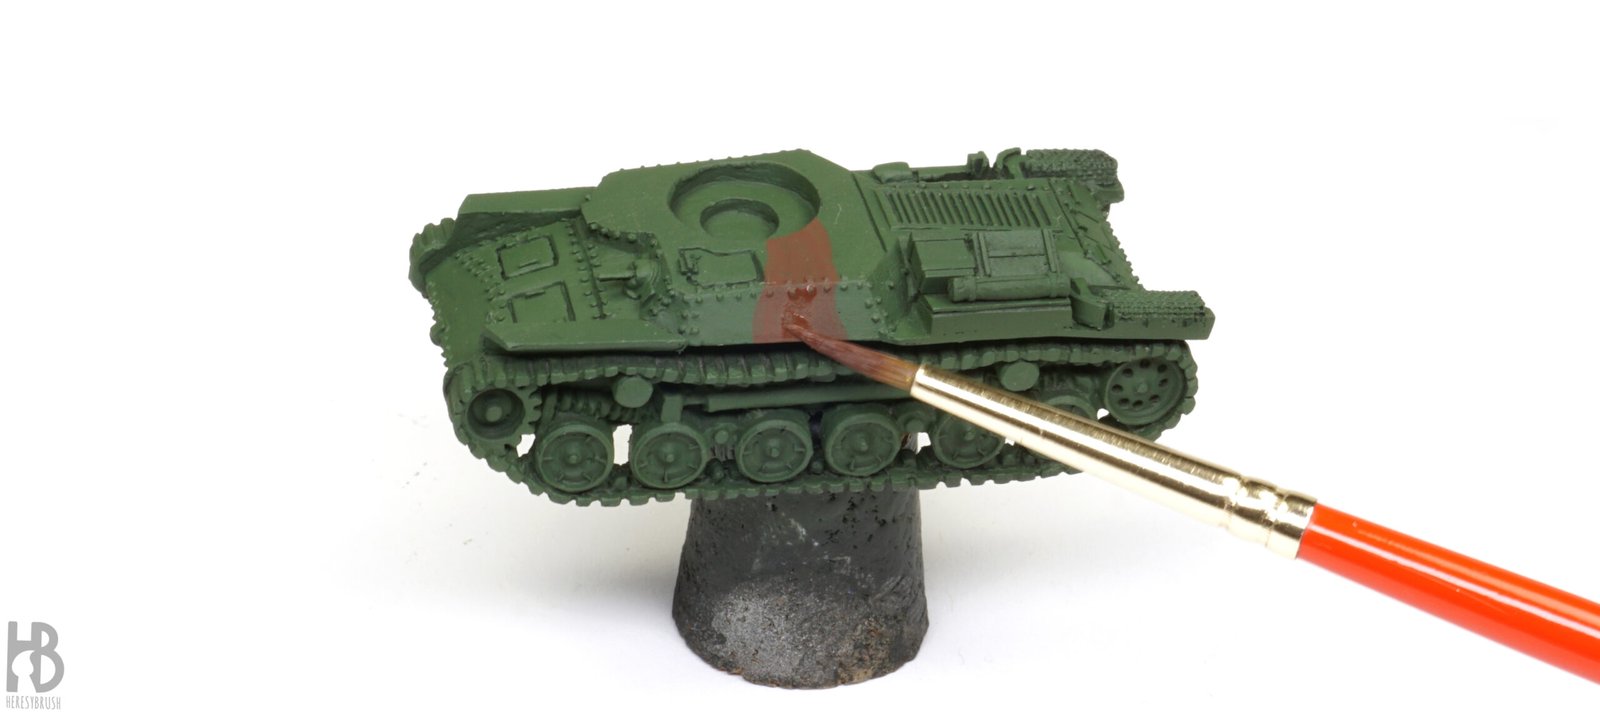
Then, we fill in the camouflage spot using the same paint. These paints offer excellent coverage, and in most cases, a single coat is enough to achieve an even and opaque finish.
Step 4 – Earth brown camouflage – Turret I
Camouflage spots often extended naturally over the turret. To position them correctly, we place the turret on the tank and mark the edges of the spot where it continues from the hull. Then, we outline the shape of the patch on the turret as before.
Step 5 – Earth brown camouflage – Turret II
After that, we fill in the outlined area and complete the first round of camouflage. We can also extend the pattern over the tracks and suspension, and optionally paint some of the road wheels to blend them into the overall scheme.
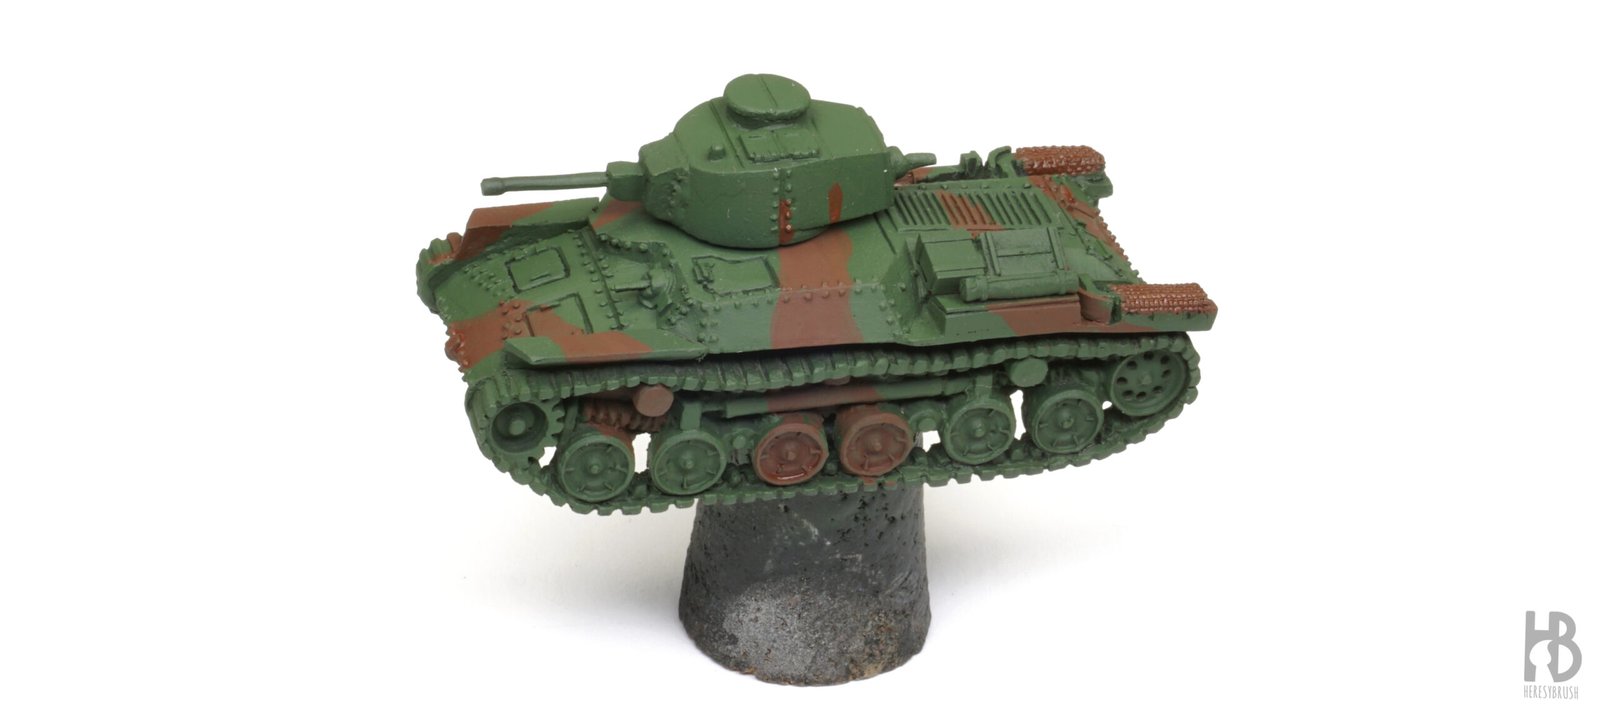
Step 6 – Sand yellow camouflage
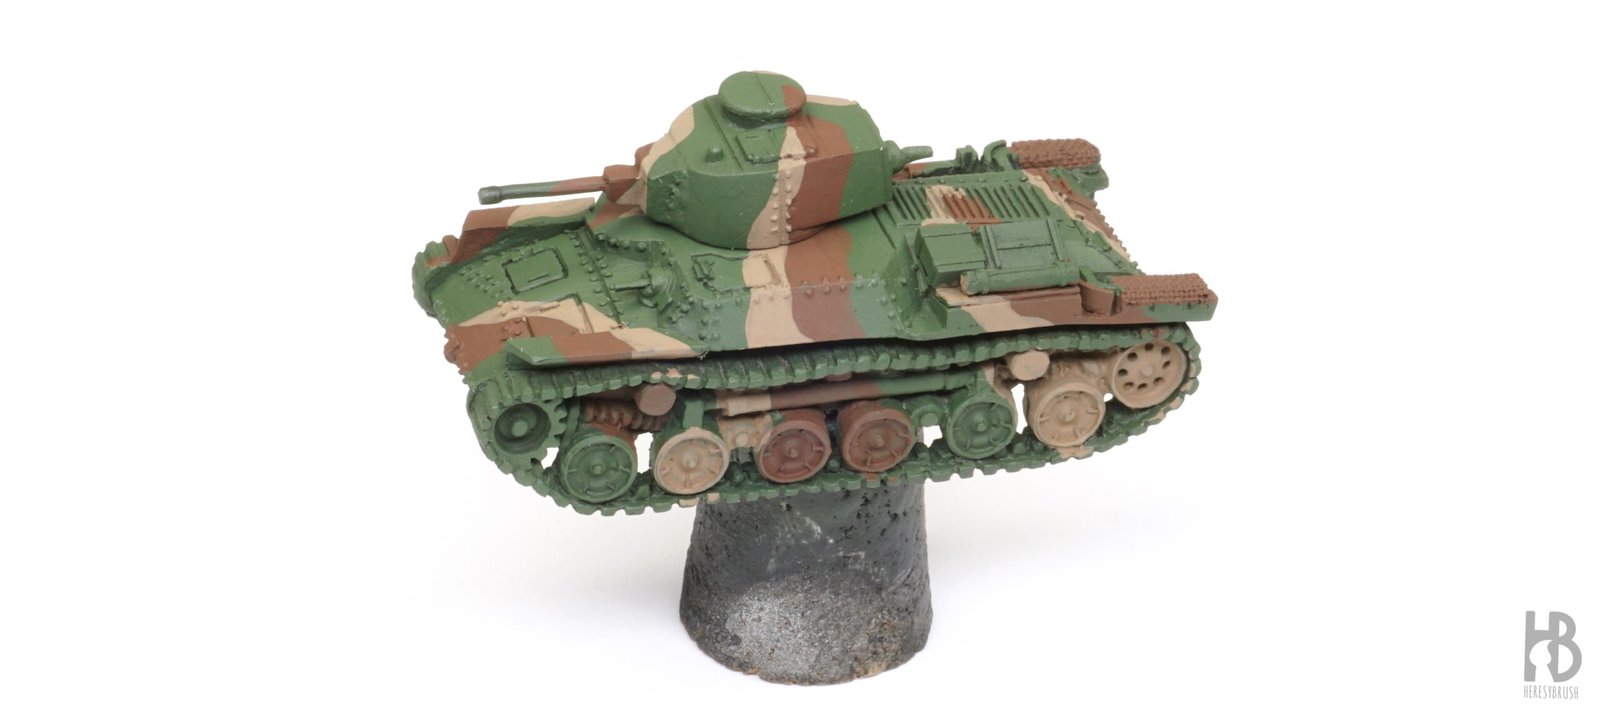
We repeat the same process with the third color of the camouflage, sand yellow (tsuchi kusa iro), using a pale khaki such as Graveyard Earth IONIC-0148. This color is applied next to the dark brown spots, following a similar irregular and random pattern to maintain a natural, disrupted look.
Step 7 – Painting camouflage

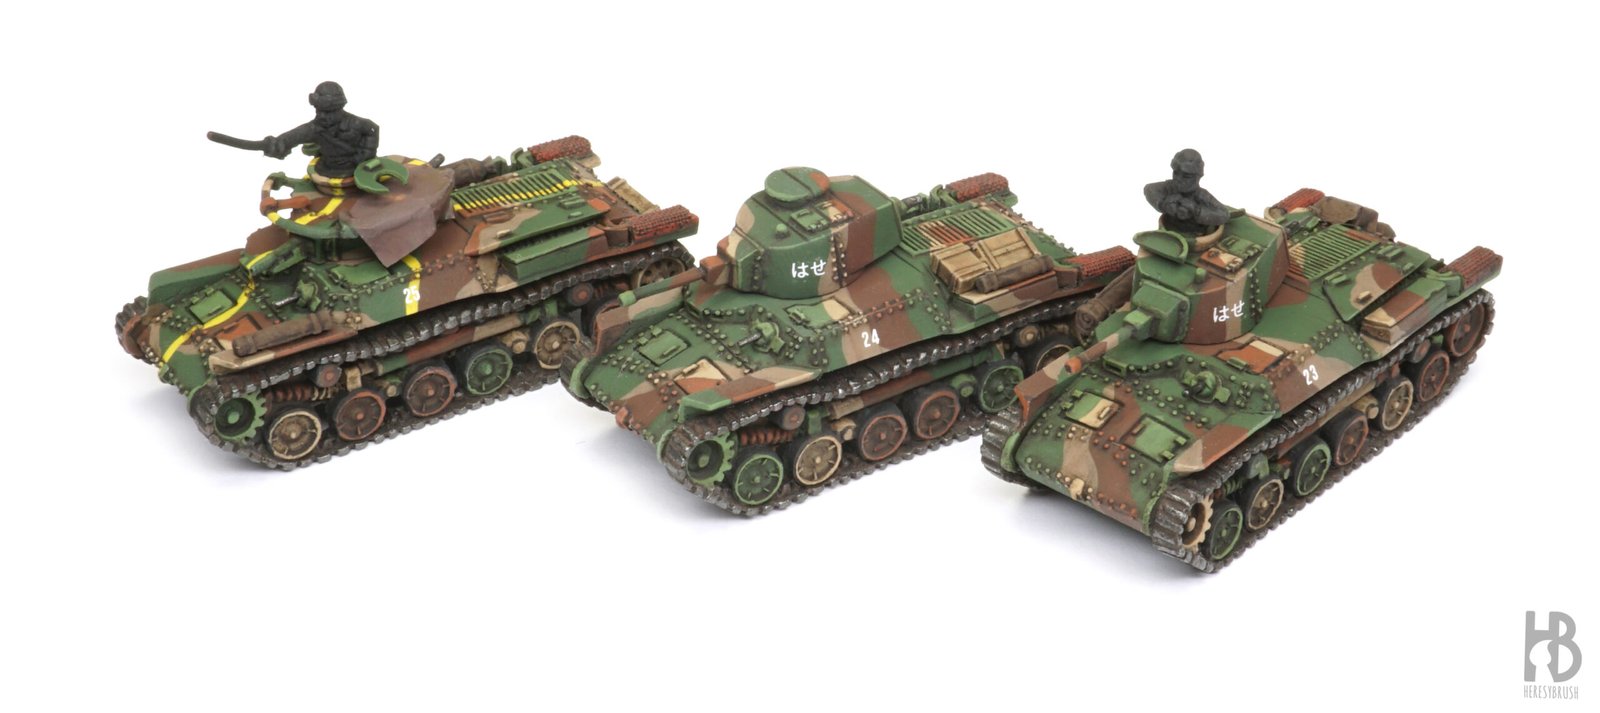
When painting camouflage on a group of tanks it is important to vary the location and shape of the spots on each vehicle to avoid repetition. In reality, each crew or unit would have painted their tanks slightly differently. A helpful approach is to keep the previously painted tanks nearby as reference, and consciously alter the location and form of the camo patches as you work through the unit.
Additionally, you can add the classic yellow “X” or intersecting stripes to some of the tanks. Yellow can be a challenging color to work with due to its typically poor coverage. To improve opacity, you can mix Yellow IONIC-0019 with about 15% Khaki IONIC-0024; or directly use a faded yellow such as Poison Yellow IONIC-0016. Using a fine brush, we paint the intersecting stripes in a loose, non-linear pattern, weaving them around the existing camouflage spots for a more organic and authentic look.
Step 8 – Contrast! (optional)
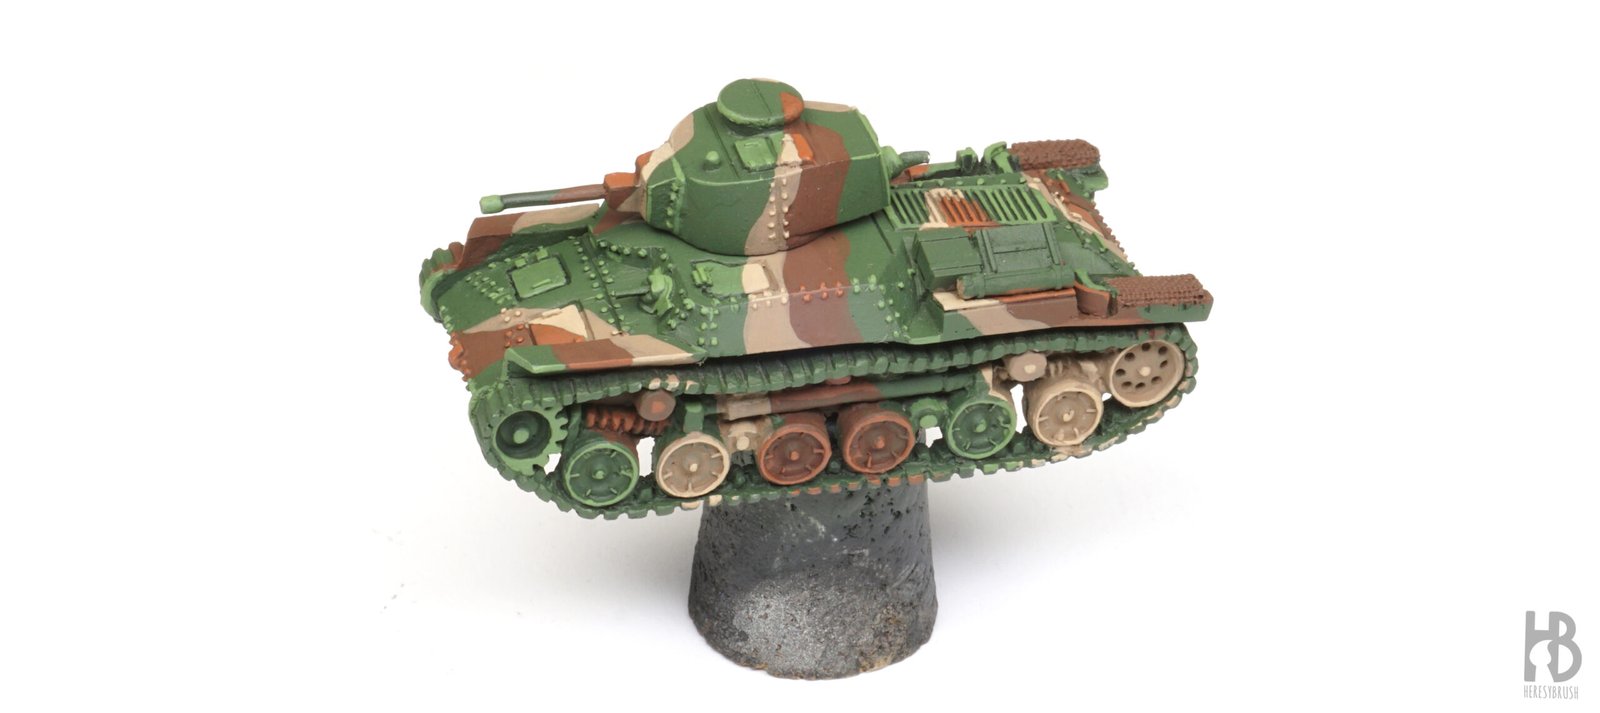
As mentioned in the introduction, painting a tank by hand with a brush often results in a uniform tone across the surfaces, lacking natural shadows and highlights. This can make the finish look a bit flat. However, we can still use the brush to create contrast and visually suggest depth and detail. The key is to apply slightly lighter shades of the base colors to highlight raised features like rivets, panel lines, and edges. You can also repaint certain parts, such as hatches or access panels, in a lighter tone to make them stand out more clearly. This simple technique breaks up large flat areas and adds visual interest, helping to bring the model to life even without an airbrush.
For this step, we can use Ogre Green IONIC-0140, Brown IONIC-0154, and Sand IONIC-0149 to highlight the dark green, earth brown, and sand yellow areas respectively. If the highlight colors appear too light or create too much contrast, you can mix them with the original base colors to create an intermediate shade.
Step 9 – Blocking accessories
Once the camouflage is complete, we can move on to painting the tracks, rubber sections, stowage, and tools. For this stage, we continue using acrylic paints, thinned with around 20% water as usual. To paint the tracks, we start by blocking in a base coat using a mid-tone brown like Graveyard Earth IONIC-0148 mixed with 30% Burnt Umber IONIC-0161. Once dry, we apply a drybrush of a metallic tone, such as Black Metal IONIC-0173, which can also be used for the machine guns and tools. The rubber parts of the wheels are painted in pure black, while the exhaust (often rusted on real vehicles) is painted with Rust IONIC-0156. For stowage like boxes and blankets, we can introduce variation by using different browns, such as Brown Green IONIC-0147 and Tombstone Yellow IONIC-0143.
Step 10 – Glossy varnish and decals
We are now ready to apply the decals. We have discussed this before (How to apply decals). It is essential to apply a layer of gloss varnish both before and after applying decals to prevent the “icing” effect, where the transparent film becomes visible and turns slightly opaque. The gloss varnish creates a smooth surface that helps the decal blend in seamlessly. Additionally, this varnish layer prepares the model for the next step: applying a wash. A glossy surface allows the wash to flow more evenly across the model, helping it settle into recesses while preventing the paint from being absorbed unevenly by the surface. For this, we can use a spray can such as TITANS HOBBY Gloss Transparent Varnish TTH114.
Step 11 – Dark wash
To bring out all the recesses and surface details, we apply a dark wash. Instead of using an acrylic wash, we are going to use an enamel-based one. Enamel paints, like oils, dry slowly (over several hours) and are worked with an organic solvent, whereas acrylics dry in seconds and are thinned with water. Despite the longer drying time, enamel and oil washes offer a significant advantage: the excess can be easily removed, leaving the wash precisely where we want it: settled in the recesses and panel lines.
For this step, we can use a ready-made enamel wash in a dark brown tone that contrasts well with the tank’s dark green base. A good example is A.MIG-1005 Dark Brown Wash for Green Vehicles. We apply it carefully only in the panel lines, rivets, and around details, rather than covering the entire surface (as we might do for infantry models). This technique is called a “pin wash.” After application, let it dry for 30 to 60 minutes before proceeding.
Step 12 – Remove excess of wash
We let it dry partly for 30 minutes, and then, using a brush or a cotton swab moistened with enamel thinner (such as white spirit, turpentine, or Enamel Odourless Thinner A.MIG-2019) we gently remove the excess wash. Work carefully, dragging the thinner in the direction of gravity or wear, so that the wash remains only in the recesses and around details. We let it dry completely for another 30 minutes.
Step 13 – Sealing in mat varnish
We no longer need the glossy surface, so at this stage we can seal the previous work with a matt varnish. This not only removes unwanted shine but also helps fully integrate the decals into the surface for a more realistic finish. A spray can such as TITANS HOBBY Transparent Matt Varnish TTH110 will speed up the process. Apply it in light, even passes to avoid pooling or frosting.
Step 14 – Chipping
One of the most common weathering effects is chipping, which simulates paint wear and small surface damage. For this, we use a single color, a dark brown such as Black Brown IONIC-0160, and apply it with a fine brush. Focus primarily on edges and high-contact areas, dabbing the paint on in a random manner. For this, it is often more effective to use the side of the brush rather than the tip to create natural-looking chips along the edge. Using the tip of the brush, you can also add a few fine scratches across flat surfaces. There is no need to overdo it: when it comes to chipping, less is more.
Step 15 – Oils application (optional)
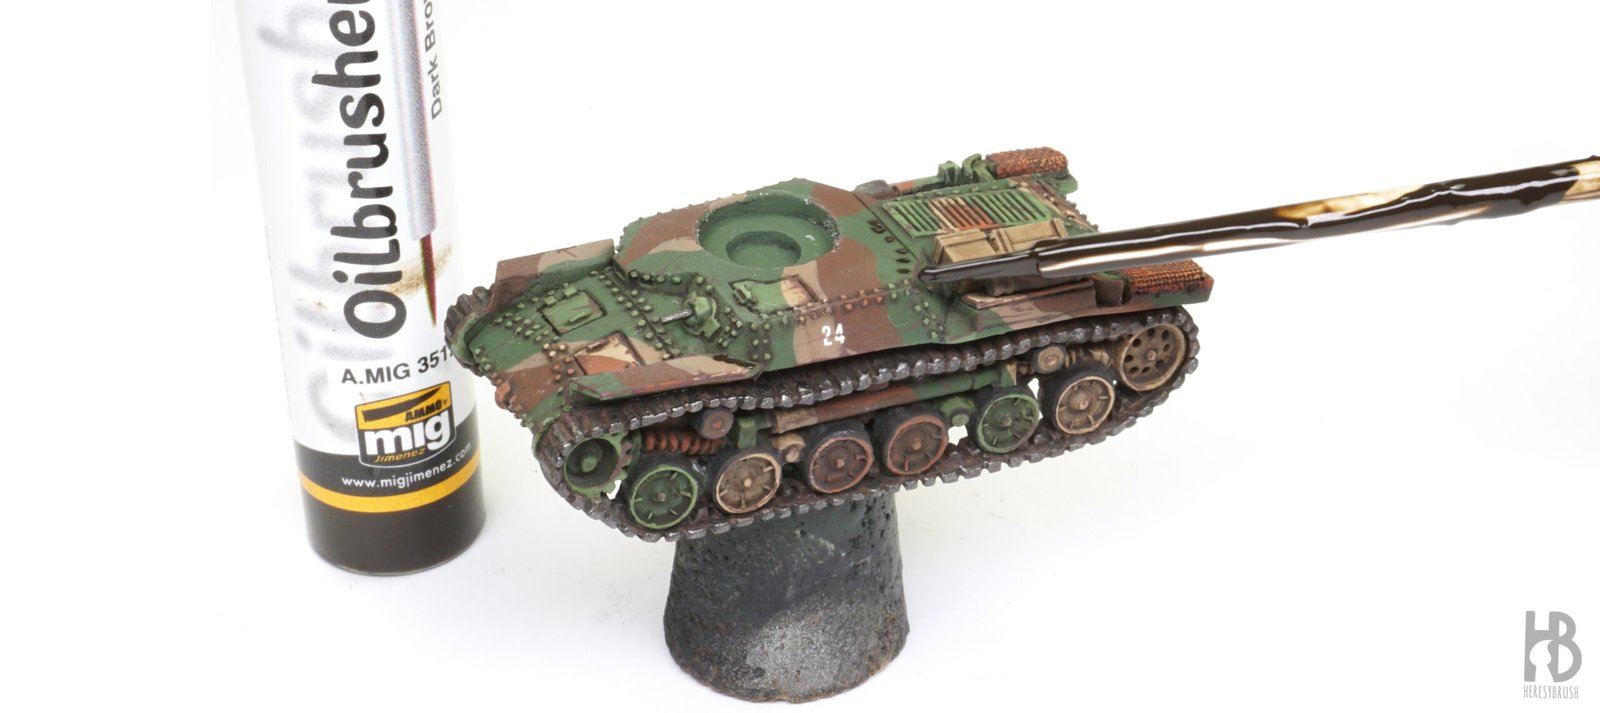
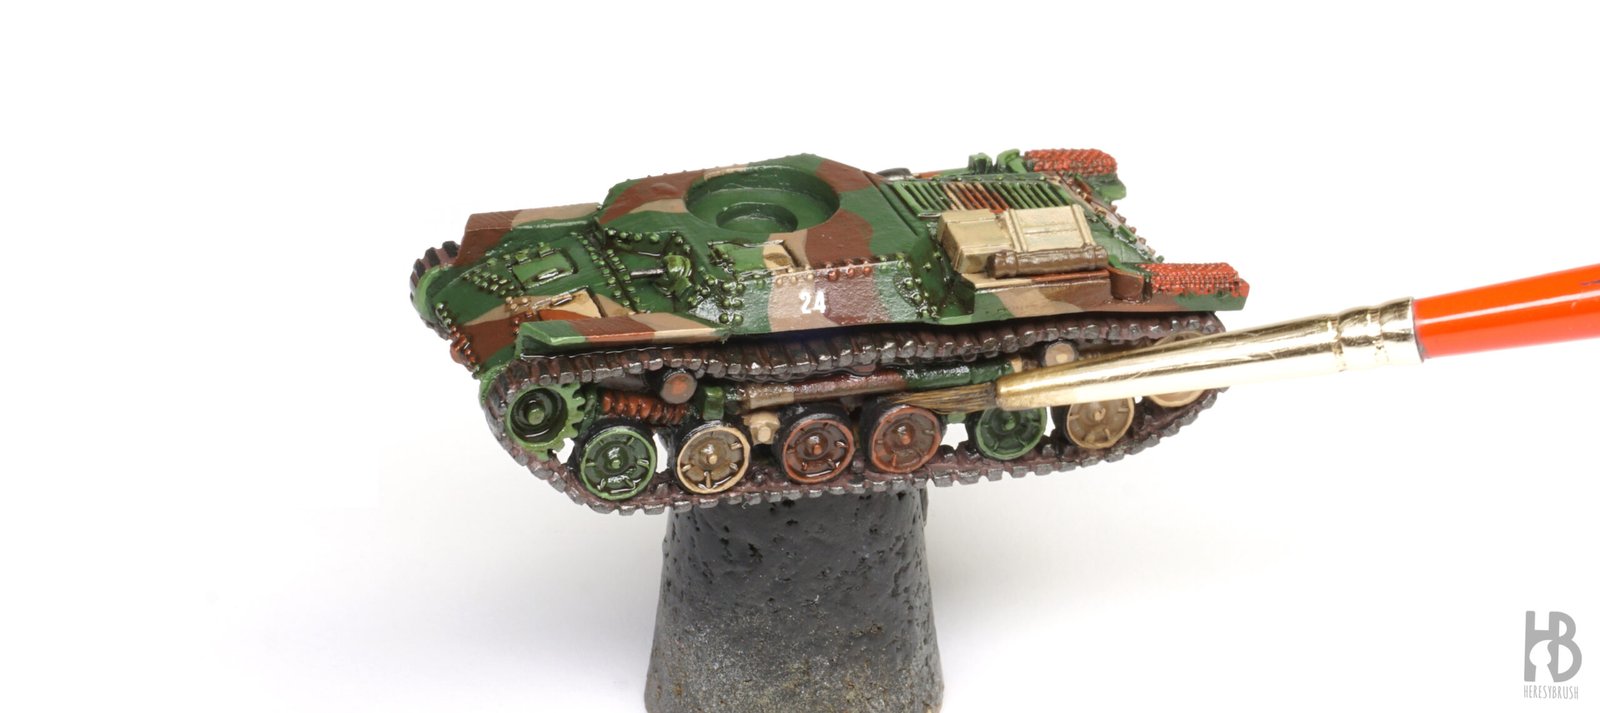
The second technique we are going to use to add depth to brush-painted or single-color tanks is oil painting. As mentioned earlier, oils dry very slowly, which makes them ideal for blending and creating smooth color transitions. This property allows us to build up subtle shading and variation in tone with great control. We can take advantage of this by applying a dark brown oil paint, such as Dark Brown A.MIG 3512, to specific areas where we want to simulate shadows or darken/deepen the color, such as the lower or rear sections of certain panels, around hatches, or along recesses.
Step 16 – Oils blending
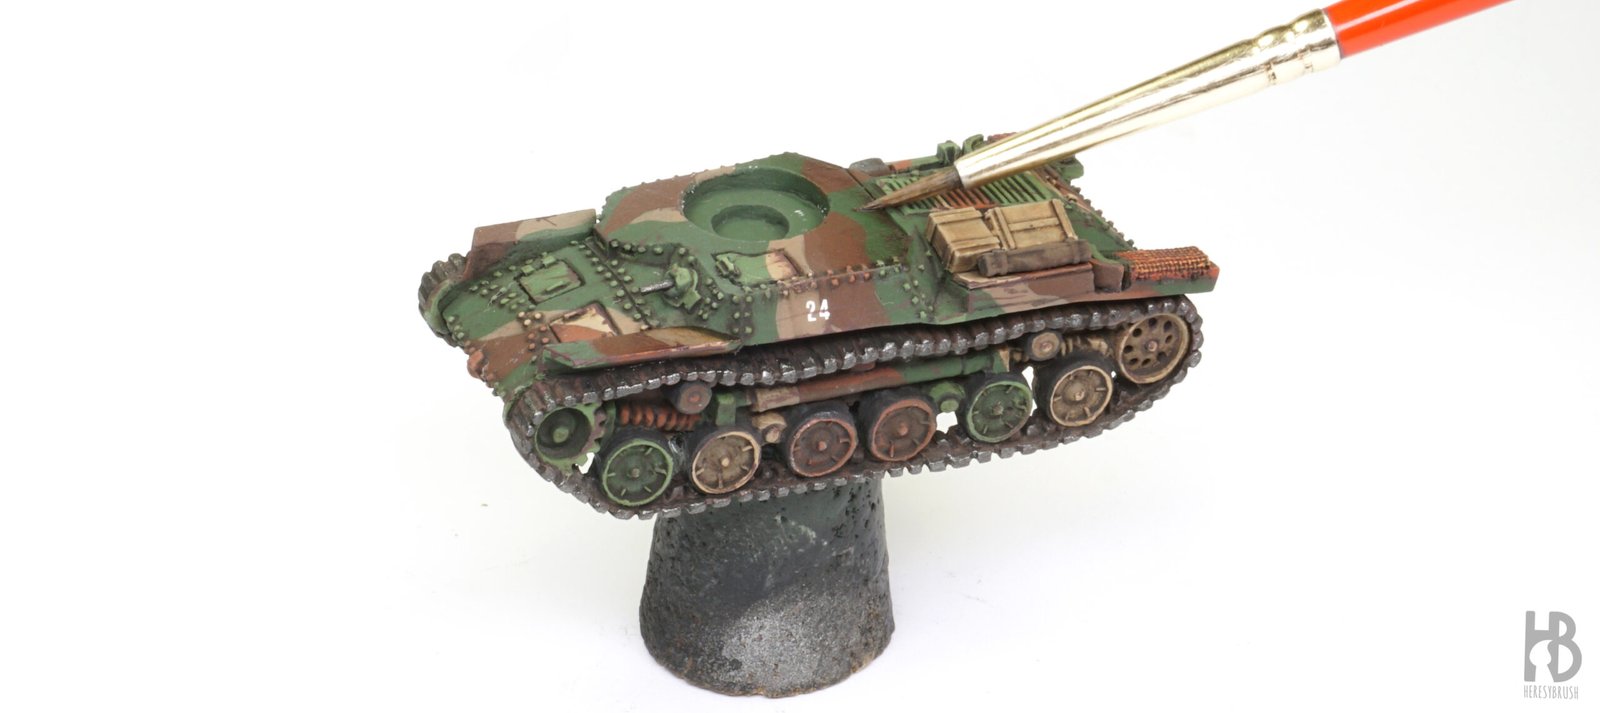
Then, we use a brush moistened with enamel thinner to blend the oil paint. As soon as the brush touches the edge of the oil, the color will begin to soften, allowing us to move and control it easily. It is important not to place the brush directly on top of the oil spot, but rather on its edge, gently dragging it outward to create a smooth transition. This technique lets us build up subtle shading and tonal variation, enhancing the overall depth and realism of the model.
Step 17 – Oils, evaluation
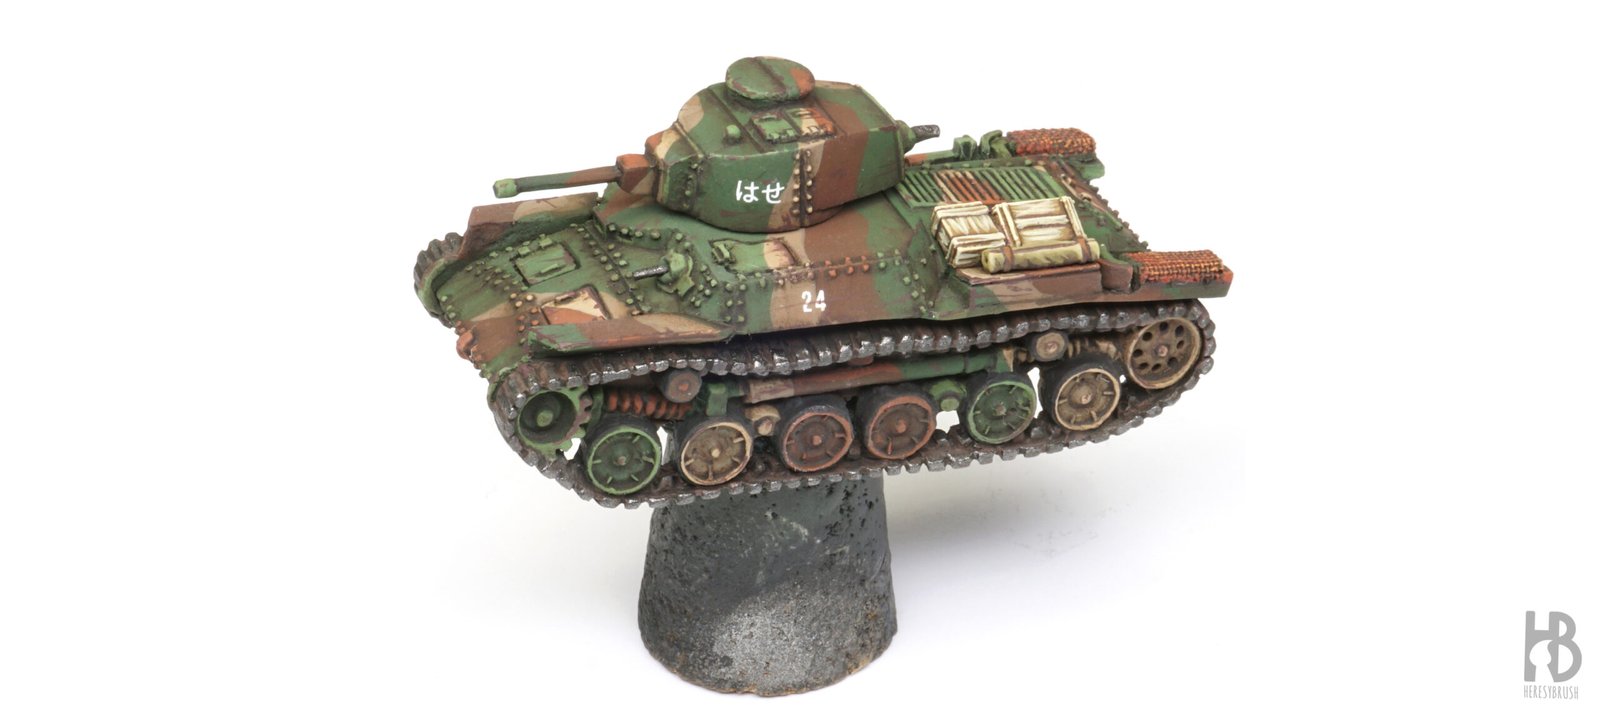
We continue working around the tank, applying oils and blending them as needed. In some areas, we might repeat the process to intensify the effect or adjust the transitions. Once we are satisfied with the results, we let the oils dry for about 30 minutes. It is a good idea to pause occasionally and evaluate the model, deciding whether further work is needed or if the finish is already convincing. This simple and relatively quick process can significantly change the overall look of the model. It helps transform a flat, toy-like appearance into something far more realistic. That is the magic (one of many) of working with oils.
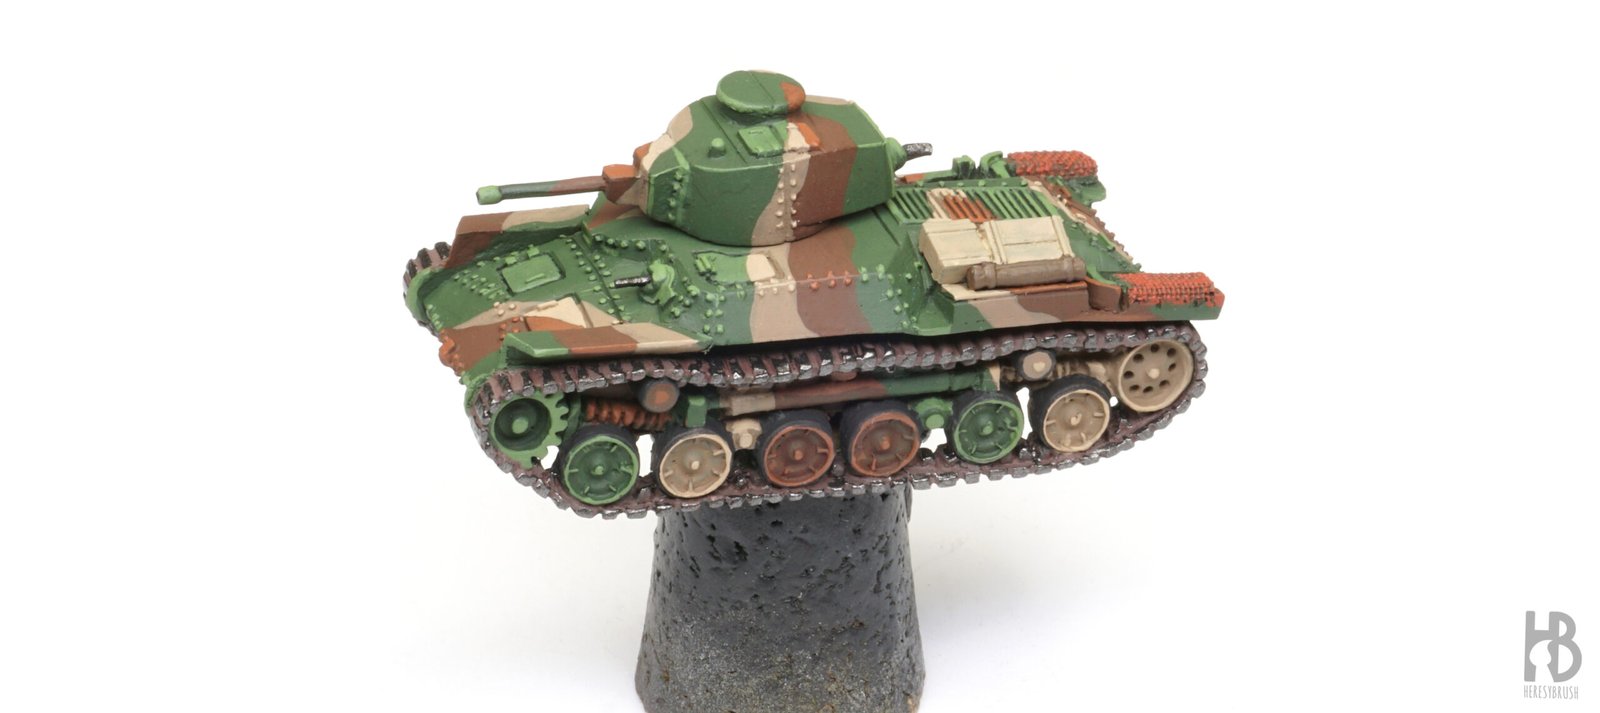
Step 18 – Pigments I
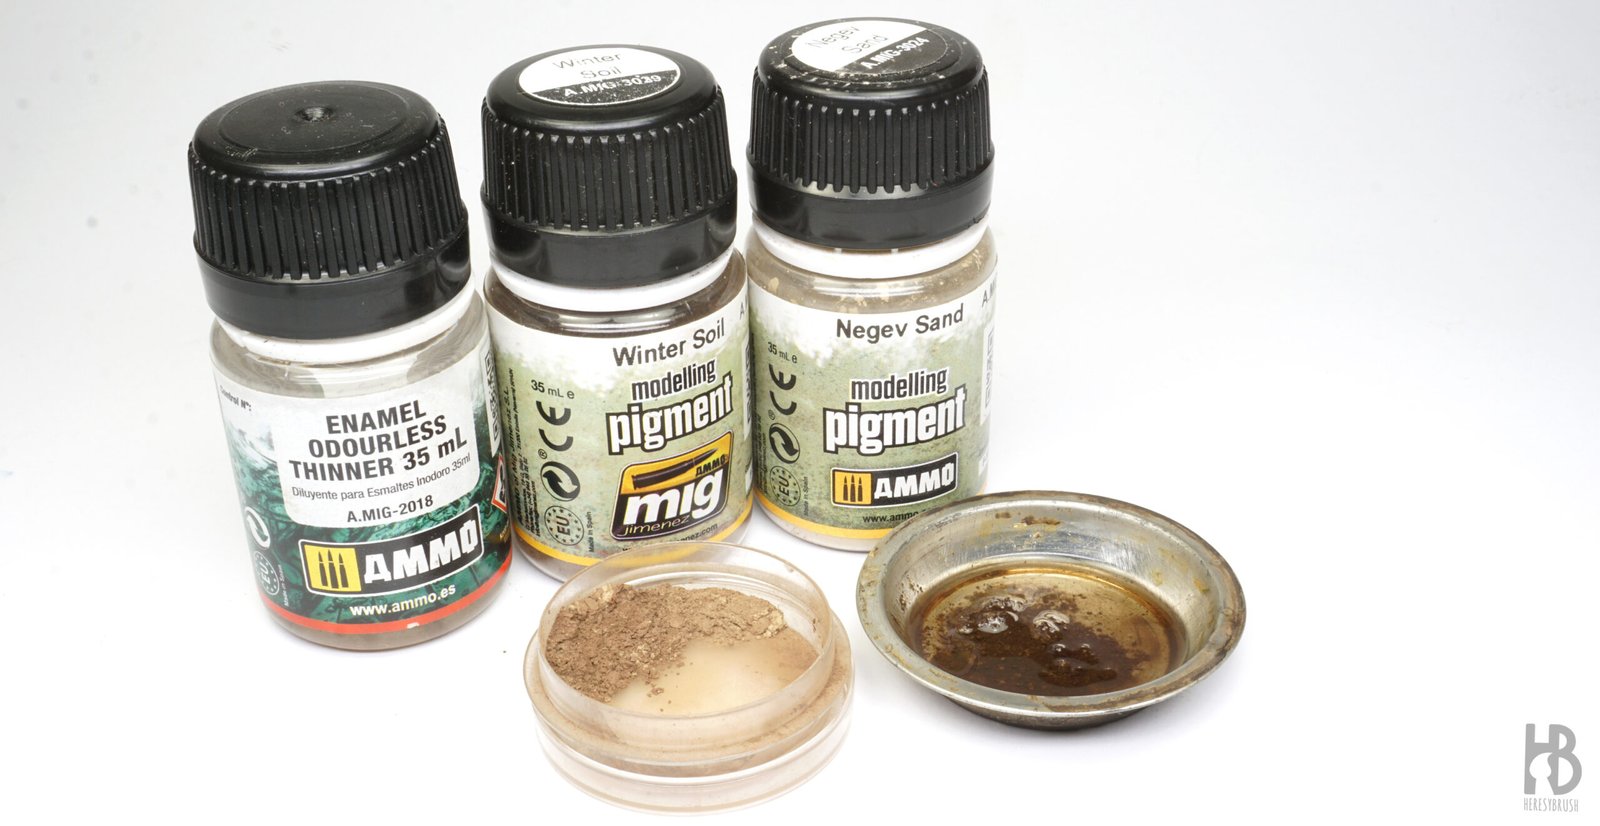
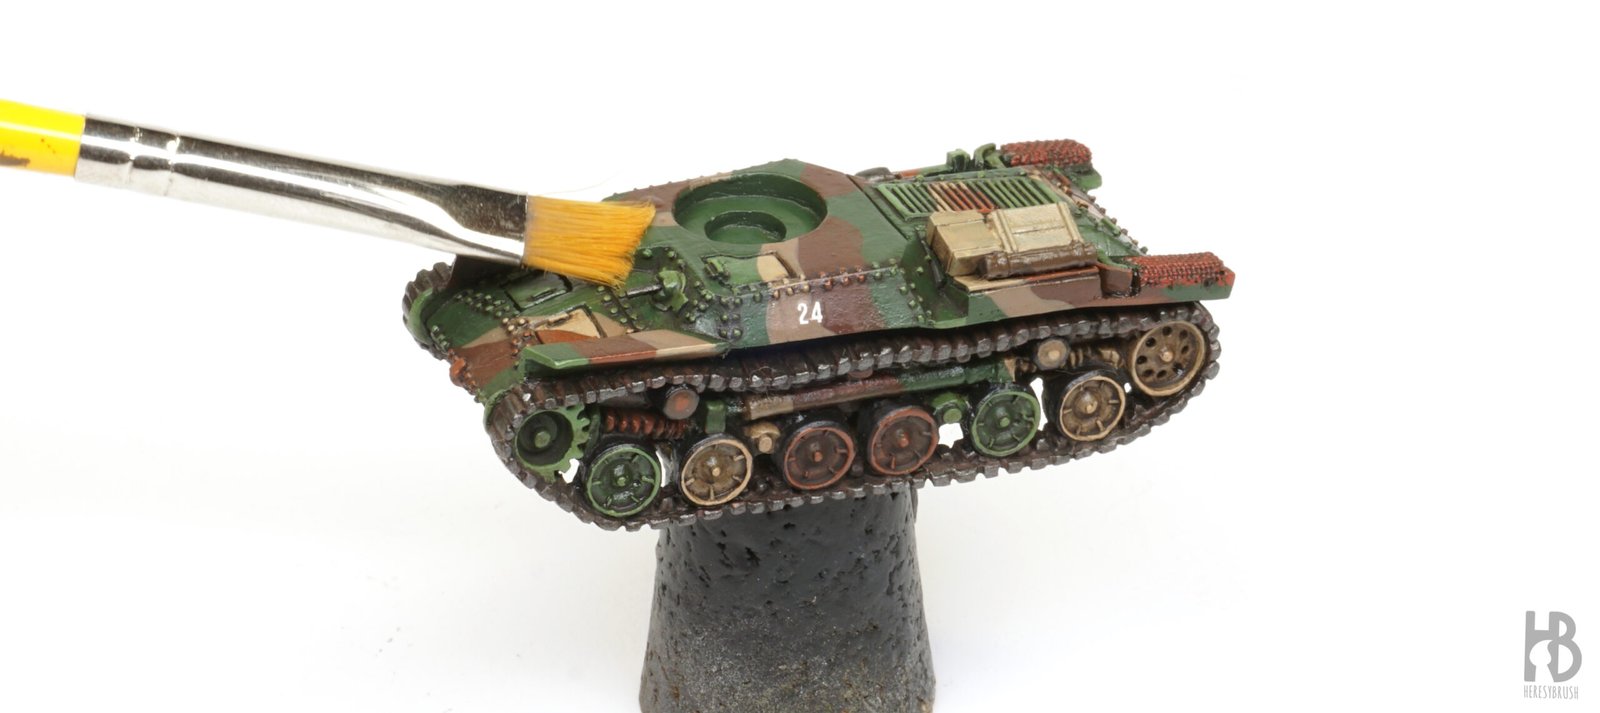
The next weathering effect is dust on the tracks. The easiest and most effective way to achieve this is by using pigments. These are essentially colored powders. To apply them, we can resuspend (not dissolve) them in 50% enamel thinner to create a wash-like consistency. Because the pigments remain as solid particles in suspension, it is a good idea to use at least two different tones to add depth and variation to the effect: each color will retain its individual characteristics, resulting in a more natural and realistic appearance.
Step 19 – Pigments II
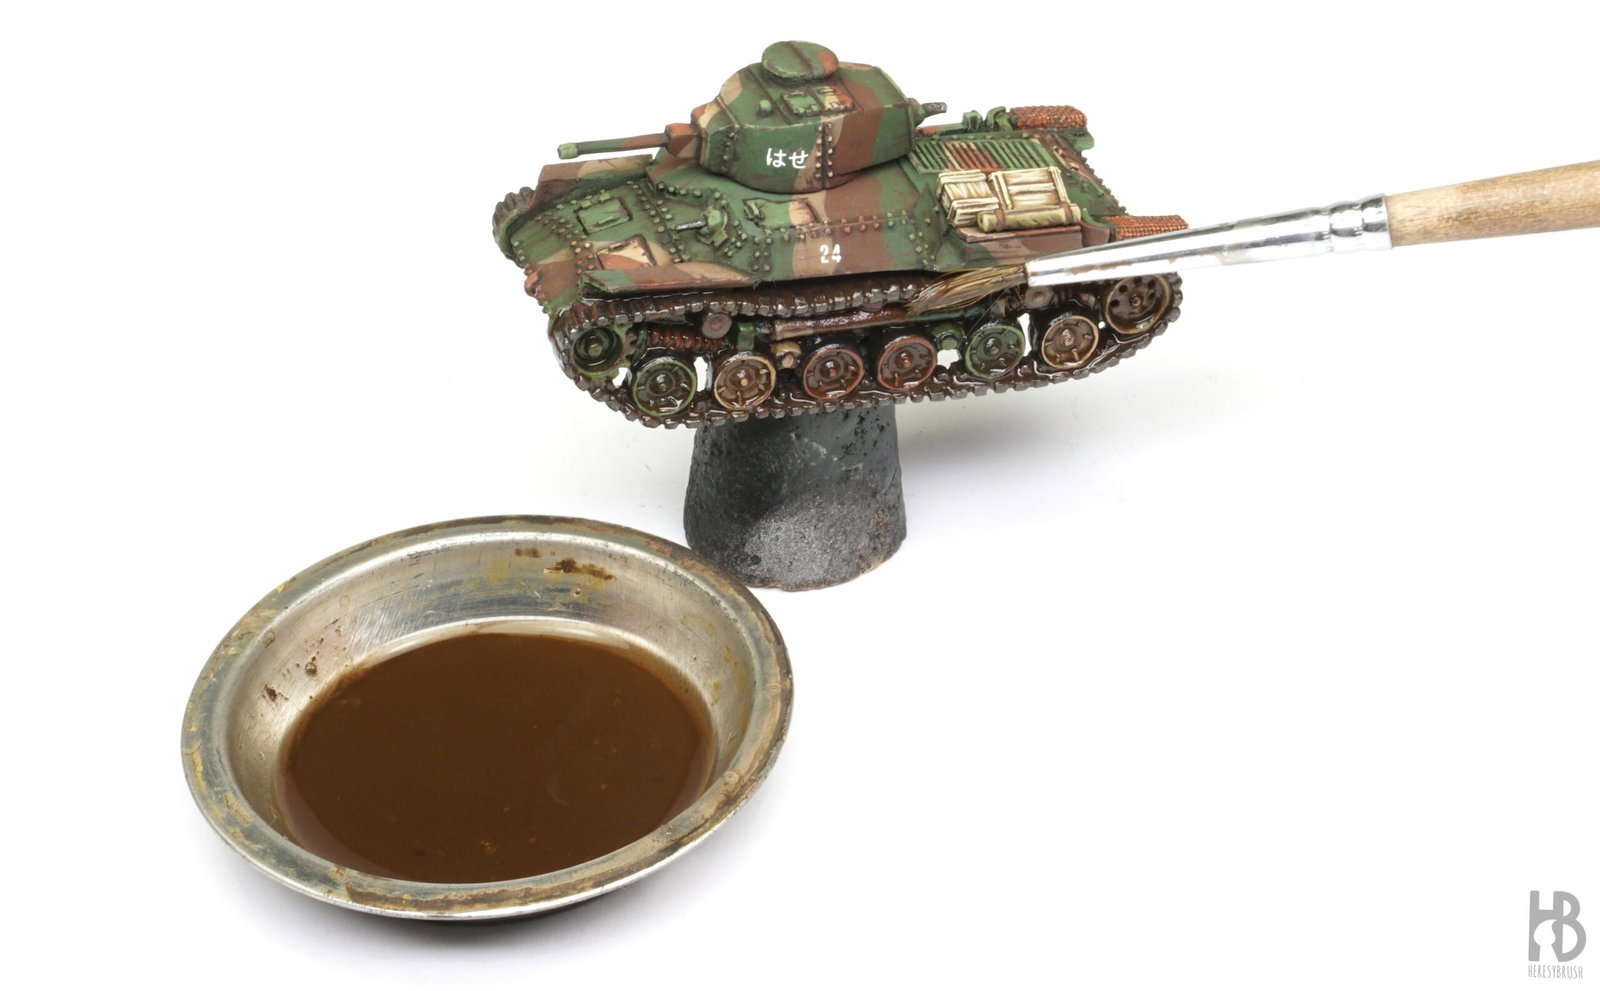
We then apply the pigment wash generously over the tracks and the lower part of the tank. Let the suspension flow naturally into the details to create a realistic dust buildup. A slightly irregular application will actually enhance the overall realism.
Step 20 – Pigments III
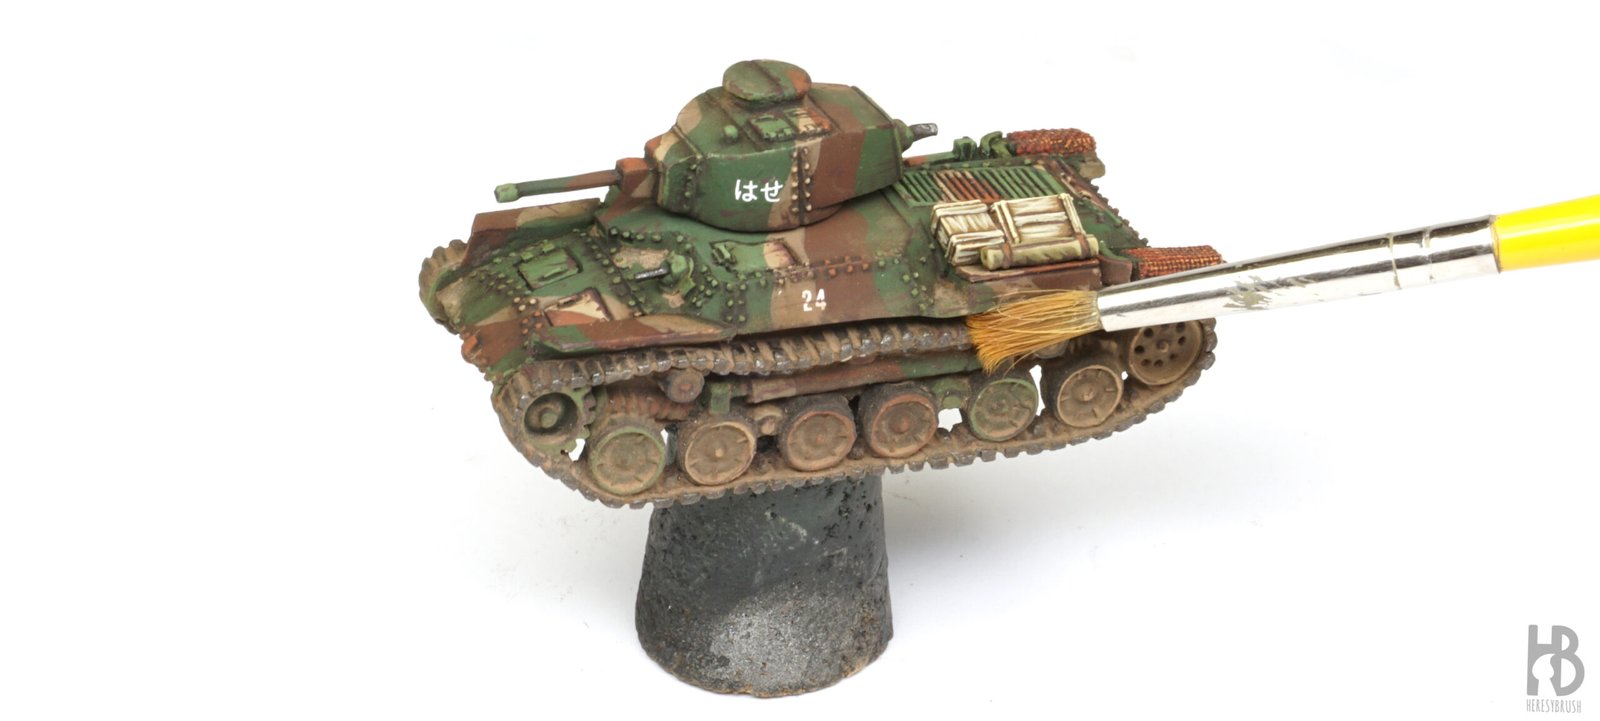
We let the pigments dry completely overnight, or we can speed up the process using a hair dryer. Once the pigments are dry, they regain their natural dusty appearance. Using a cotton swab or an old brush, we gently remove the excess and blend the remaining pigment into the surrounding surfaces for a more natural and integrated effect.
Step 21 – Dirt effects
The final weathering effect is “dirt,” which we will apply in the form of splashes. These are mainly focused on the lower parts of the tank, layered over the dust to add natural variation in color and texture. This creates a more convincing and dynamic finish. A small amount can also be added to other areas of the vehicle, but it is important to apply this effect with caution.
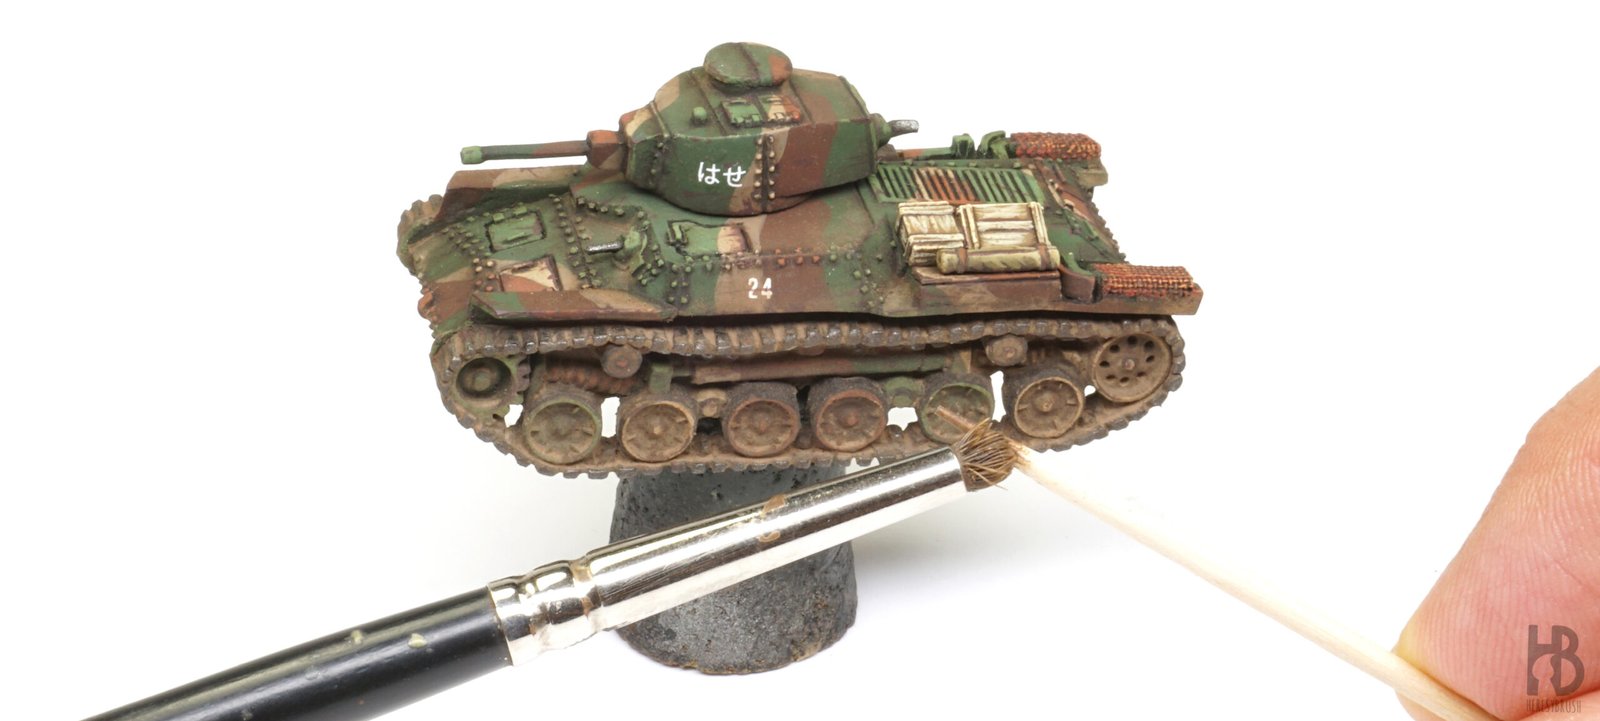
We can explain before how to apply splashes effects (here and here). We will use a single dark brown enamel, such as Nature Effects Dark Mud A.MIG-1405. It is applied using a brush with short, stiff bristles, like the Citadel stippling brush or an old worn-out brush of similar properties. After loading the brush with the enamel, we pull back the bristles with a toothpick to create tension, then release them to flick the paint onto the surface. We aim carefully at the areas where you want the effect to appear, mainly the tracks and lower hull.
Additional information
To paint the Japanese uniform, we can use a yellow khaki such as Khaki IONIC-0024, applied over a base coat of a darker brown like Burnt Umber IONIC-0161 to create depth through shading.
For the flag, we begin by painting the surface in an ivory tone rather than pure white (ivory provides better coverage) over a darker tone, such as Warm Grey IONIC-0163. To paint the rising sun emblem, we first sketch the basic pattern using a dark red. We make corrections with ivory as needed until the shape is clean. Once satisfied, we apply pure red over the emblem, following the same light and shadow logic used for the flag itself.
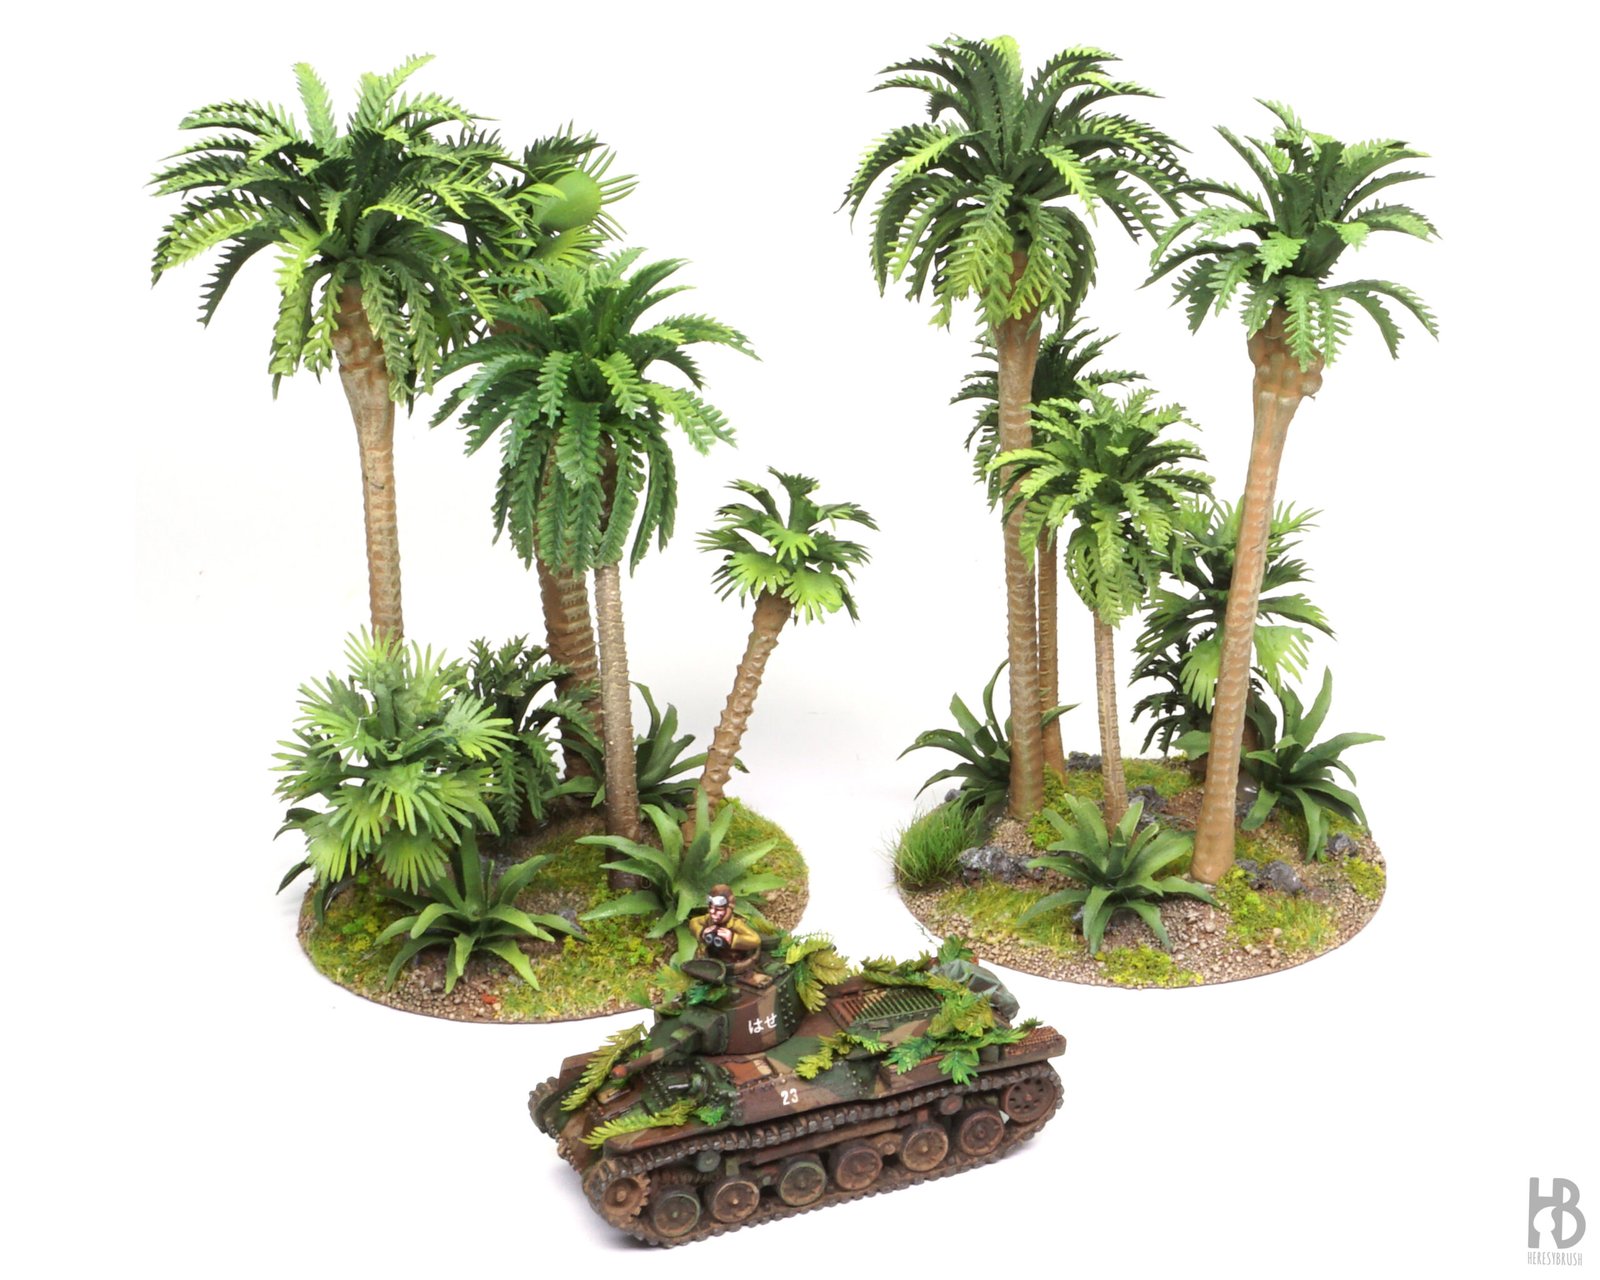
For the vegetation or foliage camouflage, I used natural treated and stained plants from Dioramas Presepe (Mini Jungle). These were fixed in place with a small amount of PVA glue.

This is the list of paints used in the tutorial:
Acrylic paints
Primer and Varnishes
- Titans Hobby Military Green Matt Primer TTH108
- Gloss Transparent Varnish TTH114
- Matt Transparent Varnish TTH110
Camouflage and other parts
- Black IONIC-0172
- Black Brown IONIC-0160
- Black Metal IONIC-0173
- Brown IONIC-0154 (camouflage highlight)
- Brown Green IONIC-0147
- Burnt Umber IONIC-0161 (camouflage)
- Graveyard Earth IONIC-148 (camouflage)
- Lizard Green IONIC-0123 (camouflage)
- Ogre Green IONIC-0140 (camouflage highlight)
- Poison Yellow IONIC-0016 (camouflage)
- Rust IONIC-0156
- Sand IONIC-0149 (camouflage highlight)
- Tombstone Yellow IONIC-0143
- Warm Grey IONIC-0163
Enamels & Weathering Products
- Enamel Odourless Thinner A.MIG-2019
- Dark Brown Enamel Wash A.MIG-1005
- Nature Effects Dark Mud A.MIG-1405
- Dark Brown Oil Paint A.MIG-3512
- Nevged Sand A.MIG-3024
- Winter Soil A.MIG-3029
You can get all the paints mentioned above (and any other product) at AMMO by Mig Jimenez website with 10% off using the affiliate code: Heresy10Ionic
