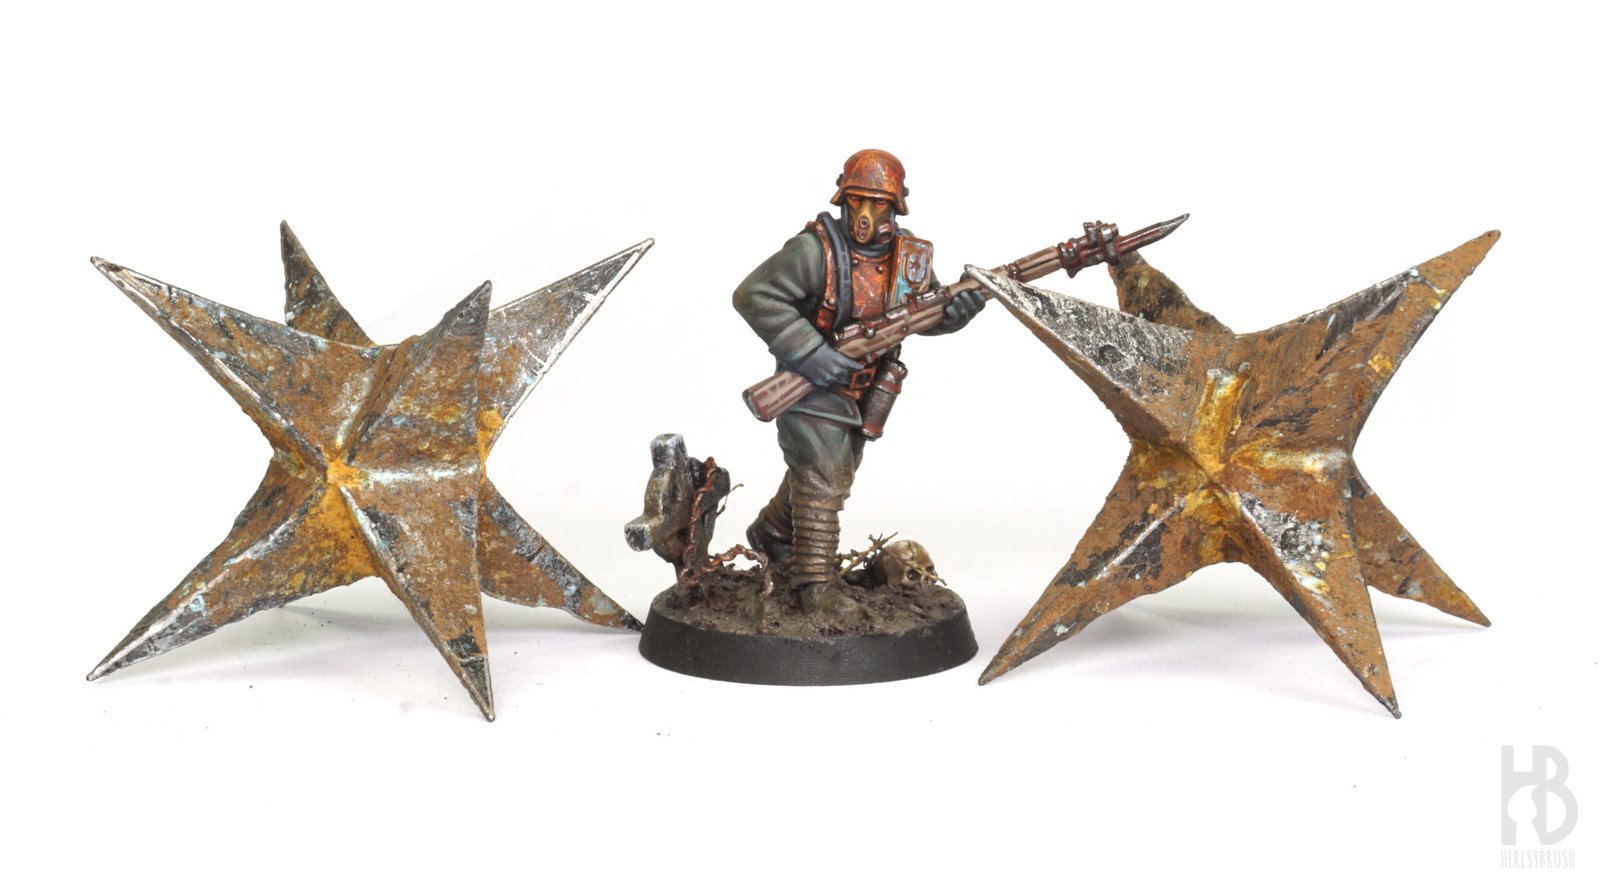
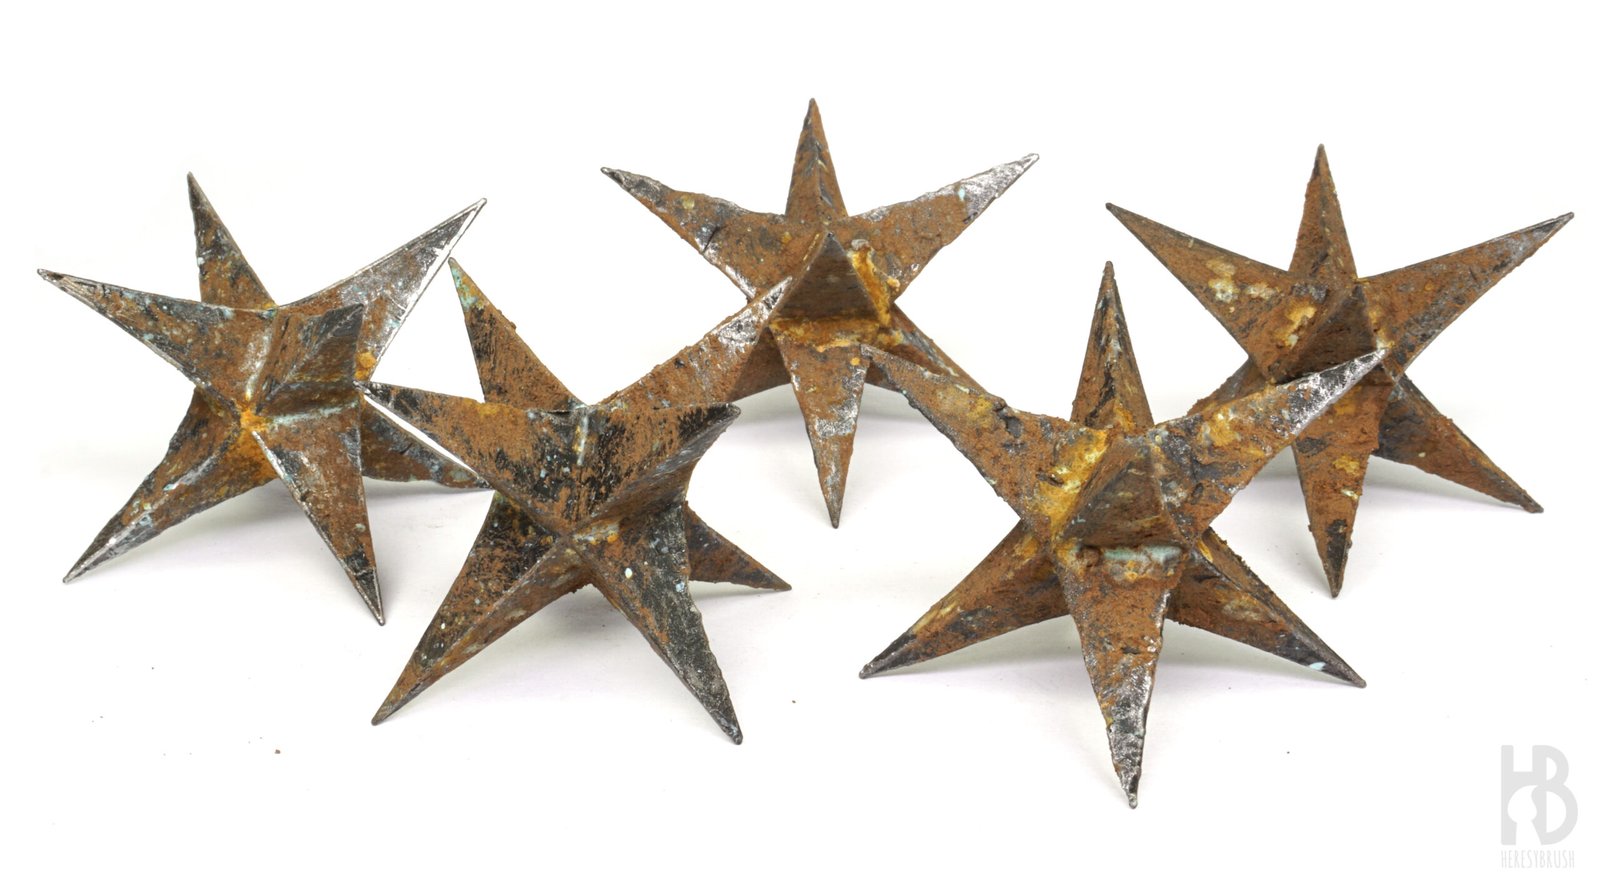
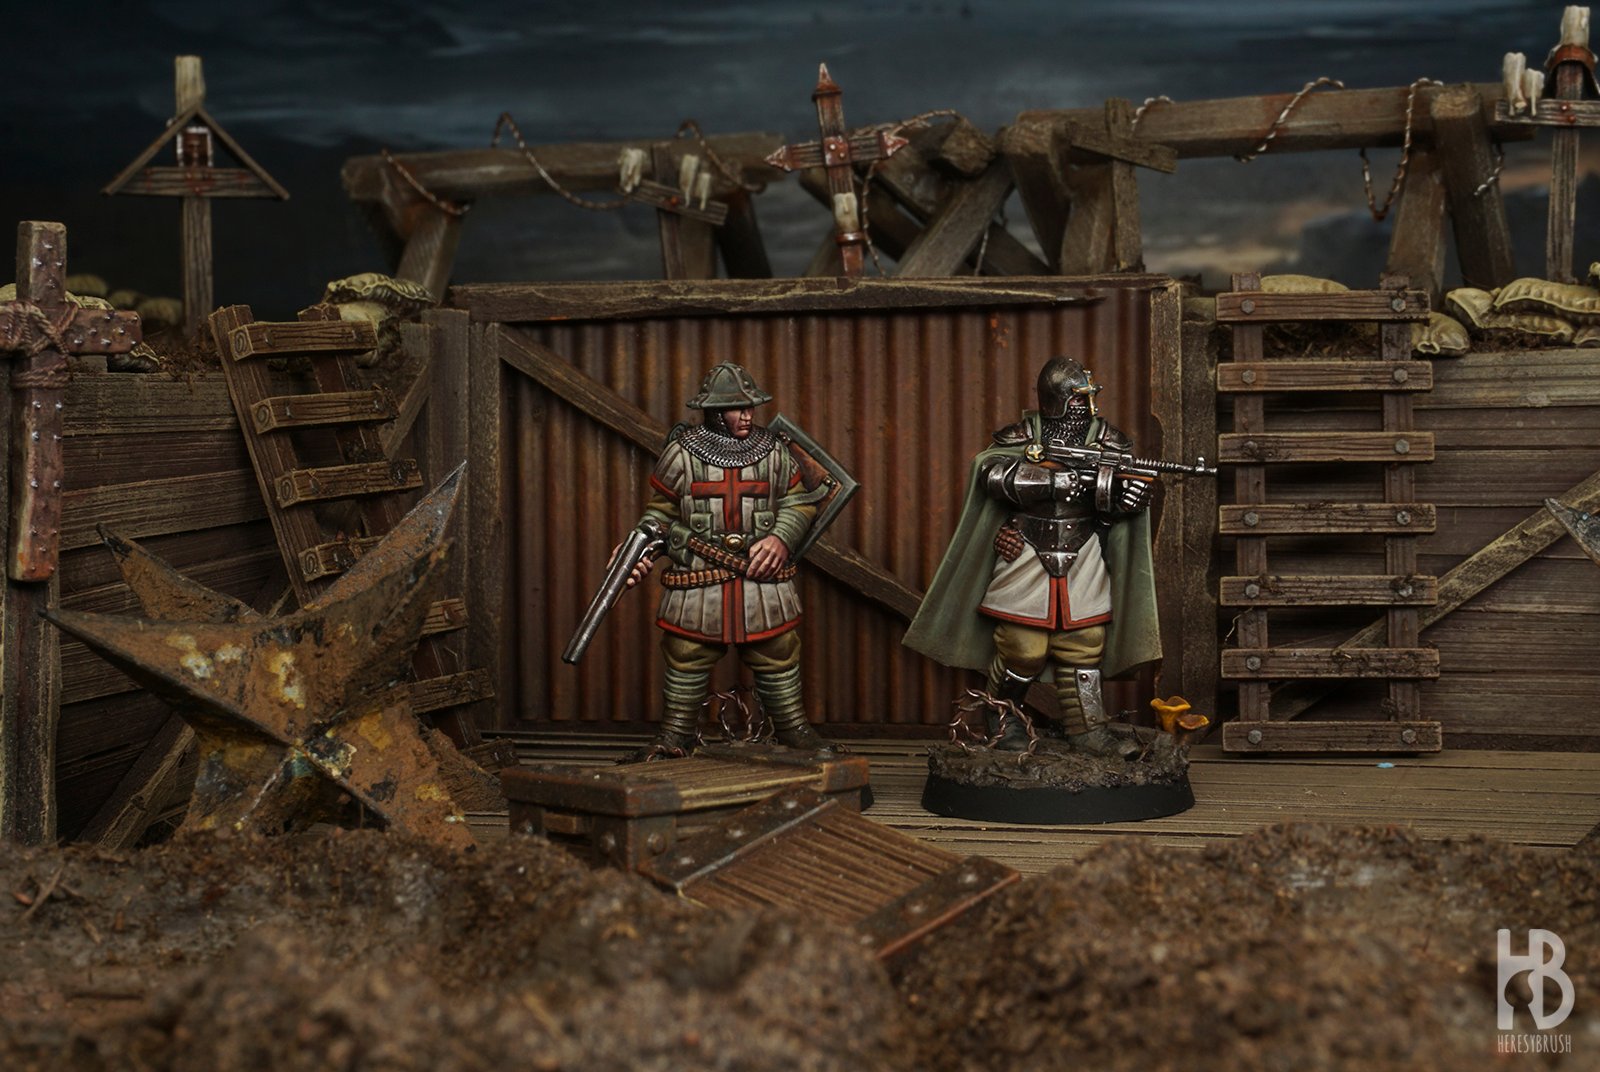
Following my first post about concrete fortifications, this second entry in the Trench Crusade scenery series focuses on creating simple and effective rust effects on anti-tank obstacle or barricade by Vargasminiatures. Today we have a wide range of products that replicate realistic rust by mimicking real metal oxidation, which makes our work much easier. These dramatic, chaotic, and naturally random effects fit perfectly with the grimdark atmosphere of Trench Crusade. In this tutorial, I will be using the U-RUST set by AMMO, which I have previously applied on infantry models (here).
Step 1
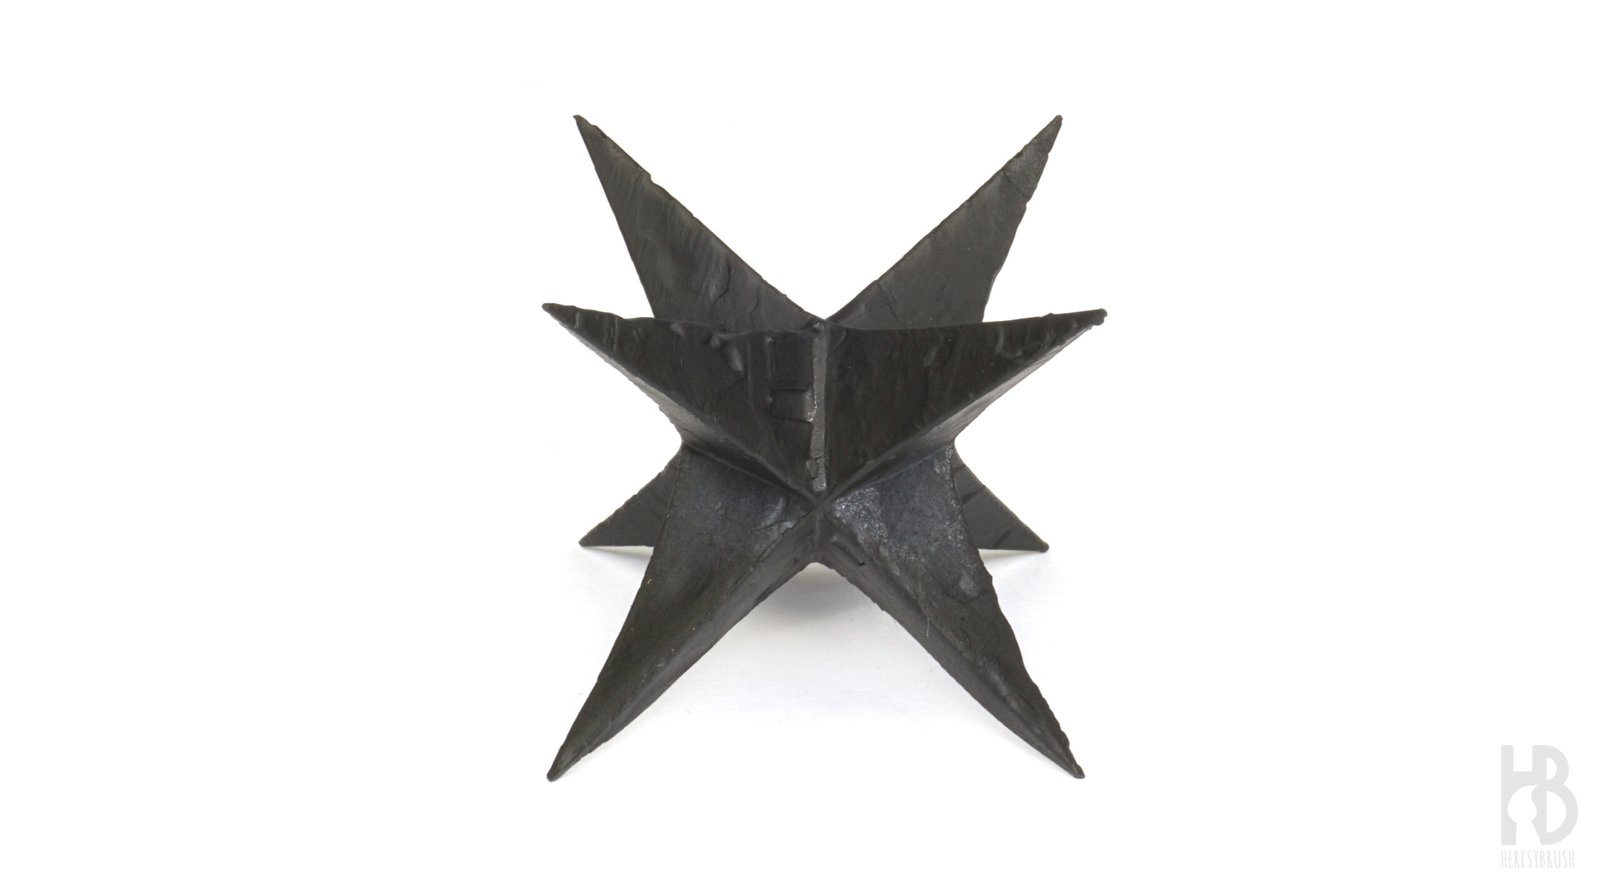
Using a modelling knife and fine files we remove support marks and smooth the printing lines. Once the surface is ready, we apply an even and consistent undercoat of black primer, for example TITANS HOBBY Black Matt Primer TTH100. This dark base is essential: it provides excellent adhesion and creates the right foundation for building the layered oxidation effects later on.
Step 2
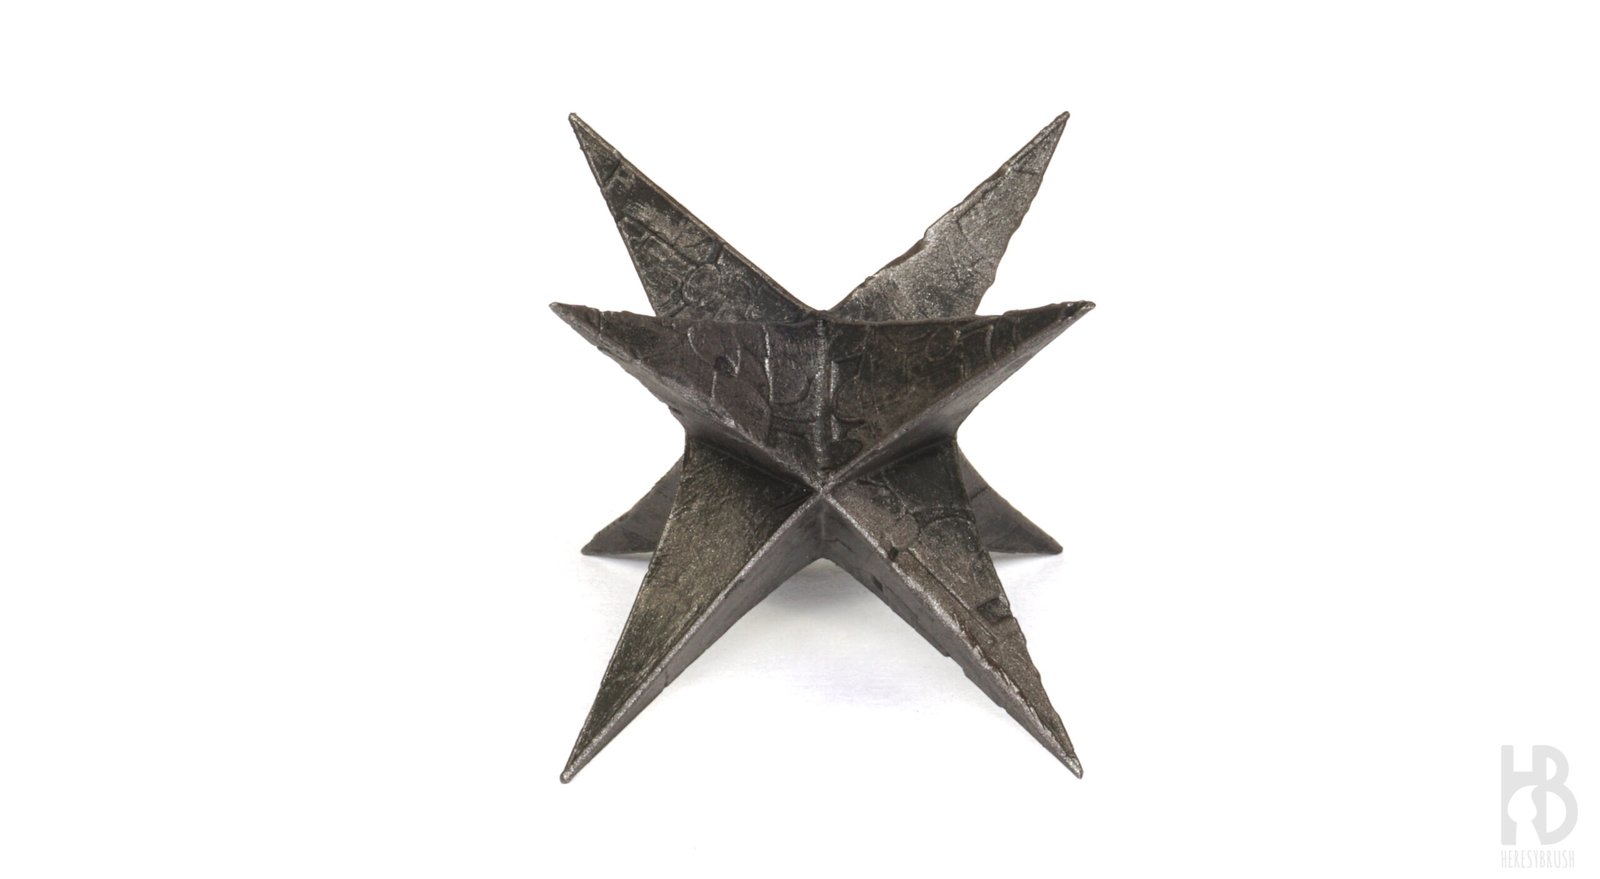
With the undercoat fully dry, we begin establishing the metallic structure of the anti-tank obstacle using the classic drybrush technique. After loading the brush and removing most of the paint on a paper towel or paper, we gently sweep the surface with a broad, controlled motion. For this initial and general pass, we use a dark metallic tone such as DIO Drybrush Gun Metal A.MIG-0622.
Step 3
We refine the volume by applying a second drybrush using a lighter tone, such as DIO Drybrush Light Metal A.MIG-0621. This time, the application is more selective: we focus mainly on the edges and corners.
Step 4
With the metallic base established, we can now move to the rust effects. Applying a varnish layer at this stage is optional, but I typically skip it when the piece has been primed properly, as the undercoat already provides enough stability for the weathering products.
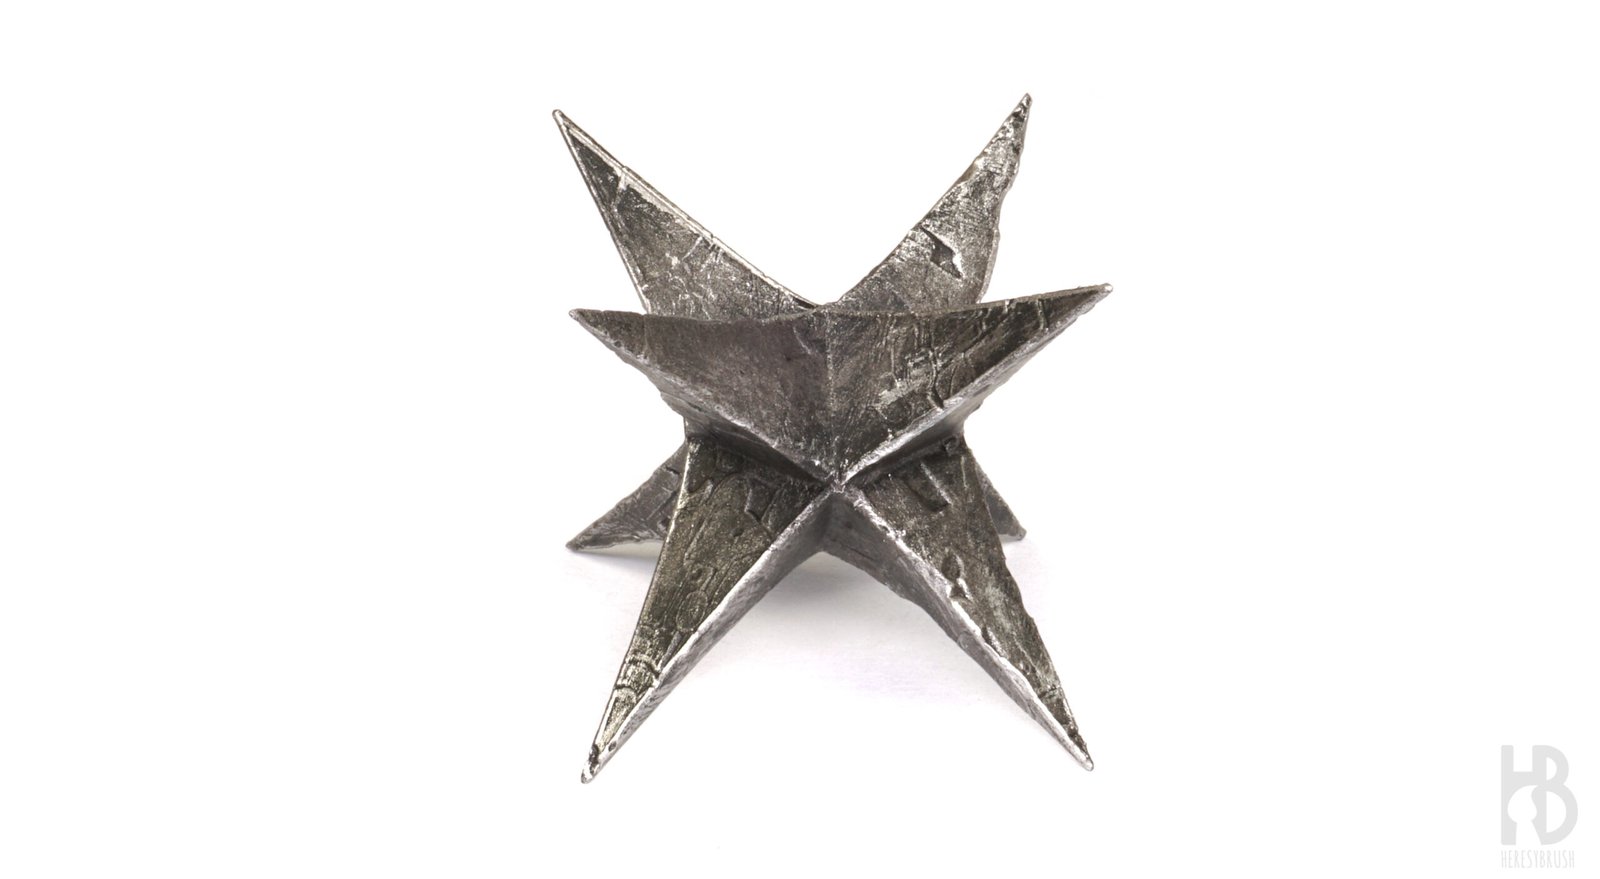
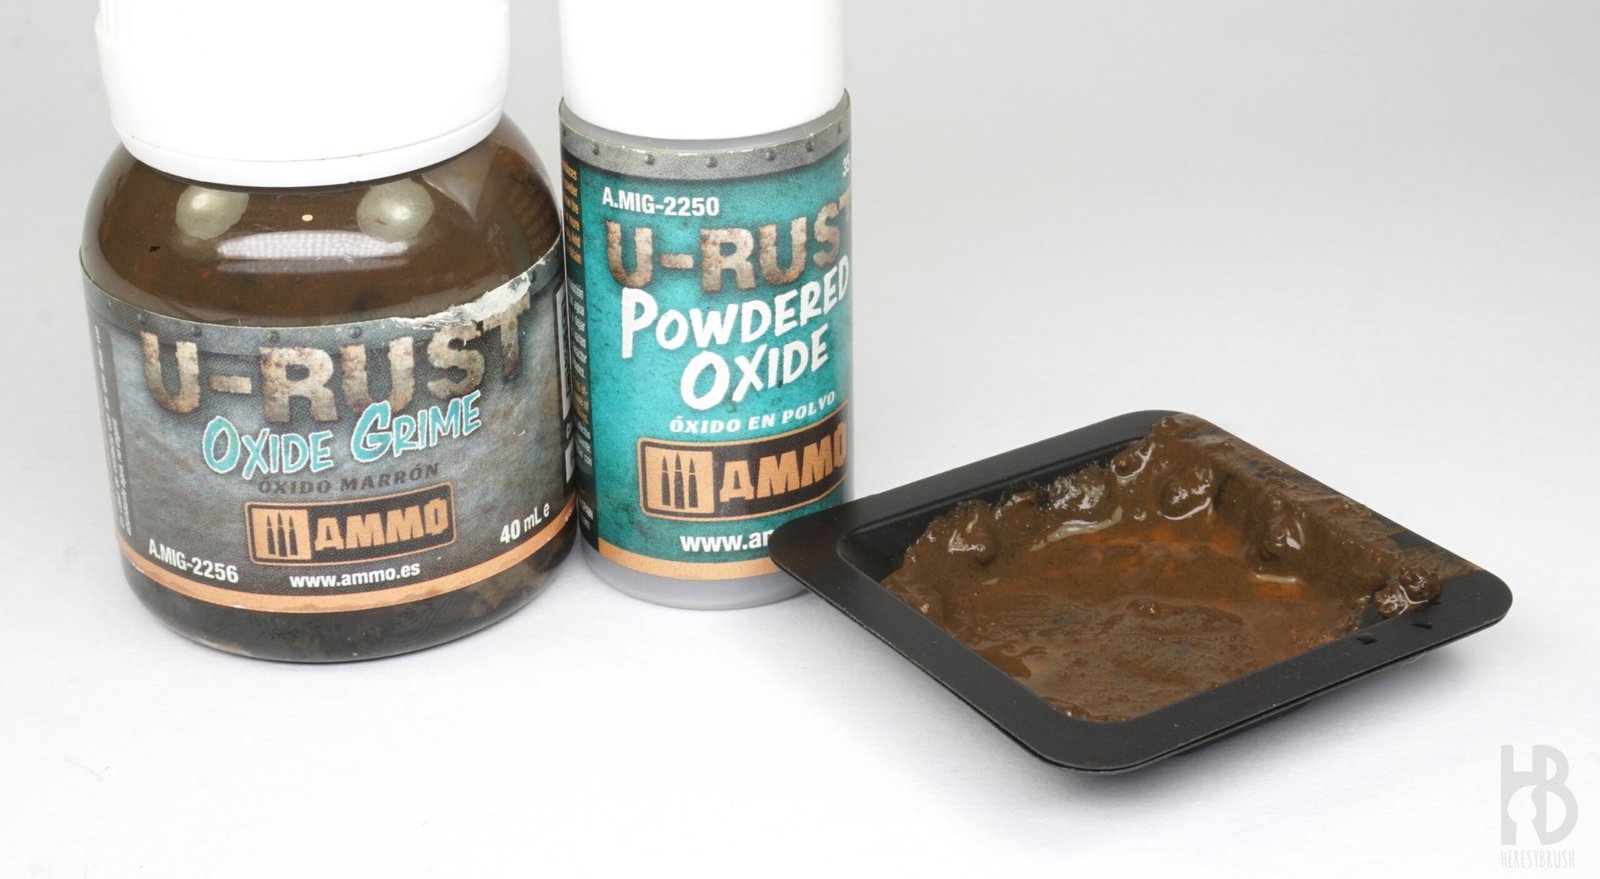
For the oxidation, we will use two products from the U-RUST range: U-RUST Oxide Grime A.MIG-2256, a semi-liquid rust medium that spreads easily with a brush, and U-RUST Powdered Oxide A.MIG-2250, a fine pigment-like powder that must be dissolved in water before use. By combining the two, we can create a richer and more complex rust texture, simulating different stages of corrosion. The U-Rust series includes different products to create different effects of rust depending on our needs.
In this case, I prepared a mix of 70% Oxide Grime and 30% Powdered Oxide, adding just a few drops of water to achieve a smooth, workable consistency. I mixed the products and water using a brush. These two colors will create a very interesting contrast between ochre rust effects from the Powdered Oxide and more blueish and dark from the Oxide Grime.
Step 5
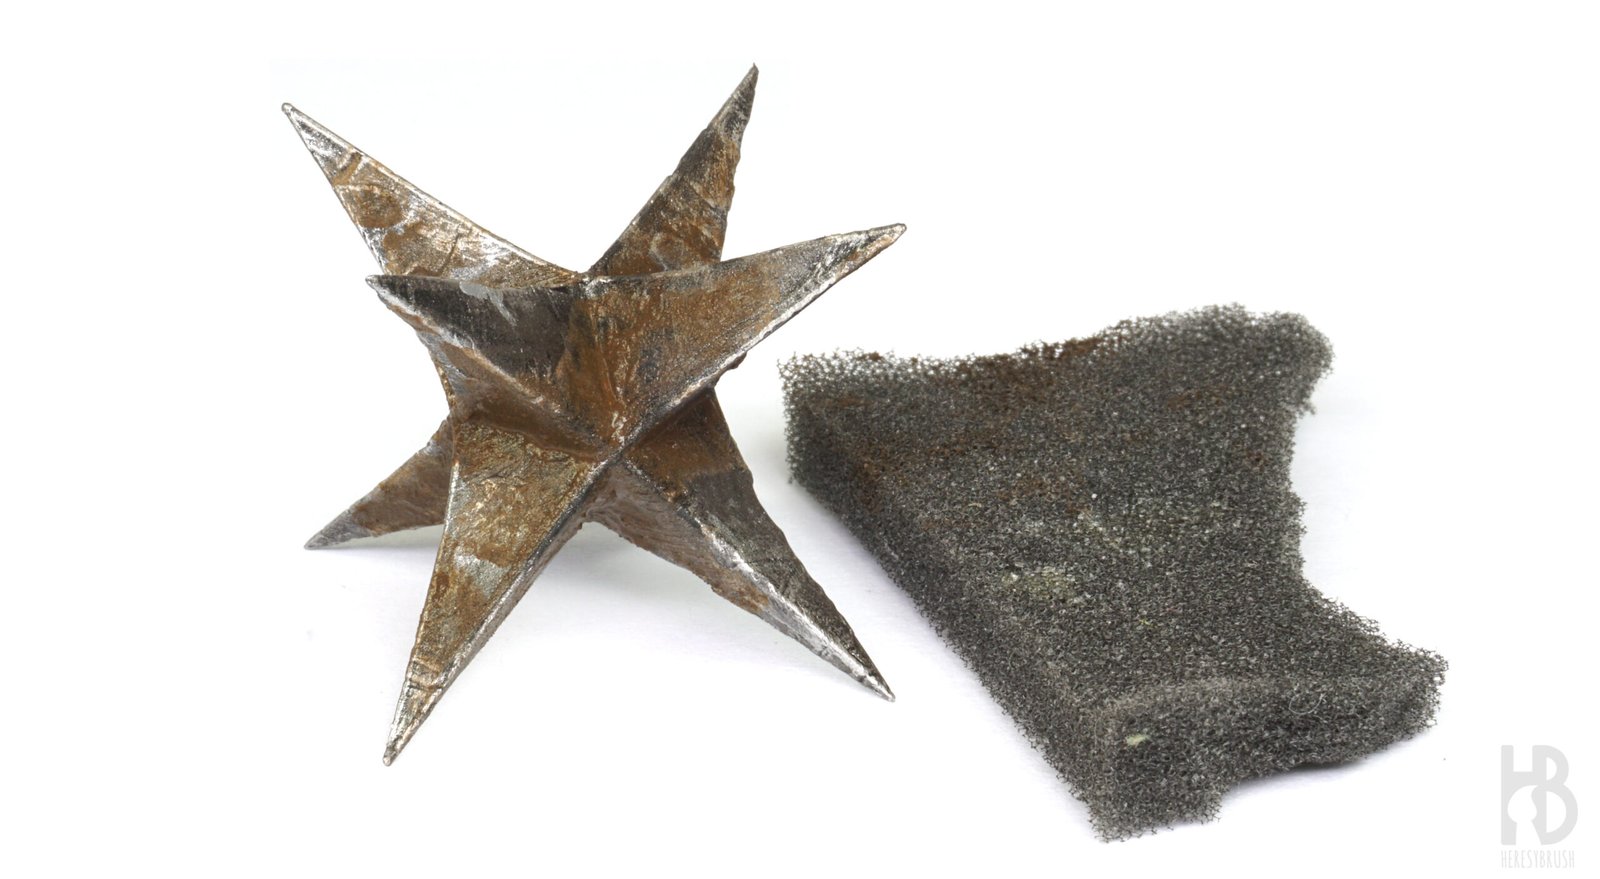
Using an old, worn brush we begin applying the rust mixture unevenly across the surface. The goal is to create variation, so we deliberately build both thin and thick deposits. We concentrate the heaviest accumulation in the recesses, joints, and any areas where moisture would logically collect; these zones are the first to oxidize and help anchor the realism of the effect. On the flatter or more exposed surfaces, we apply the mix more lightly, letting the darker metallic layers peek through. This irregular application creates a convincing interplay of fresh and older rust, enhancing the depth and complexity of the weathering.

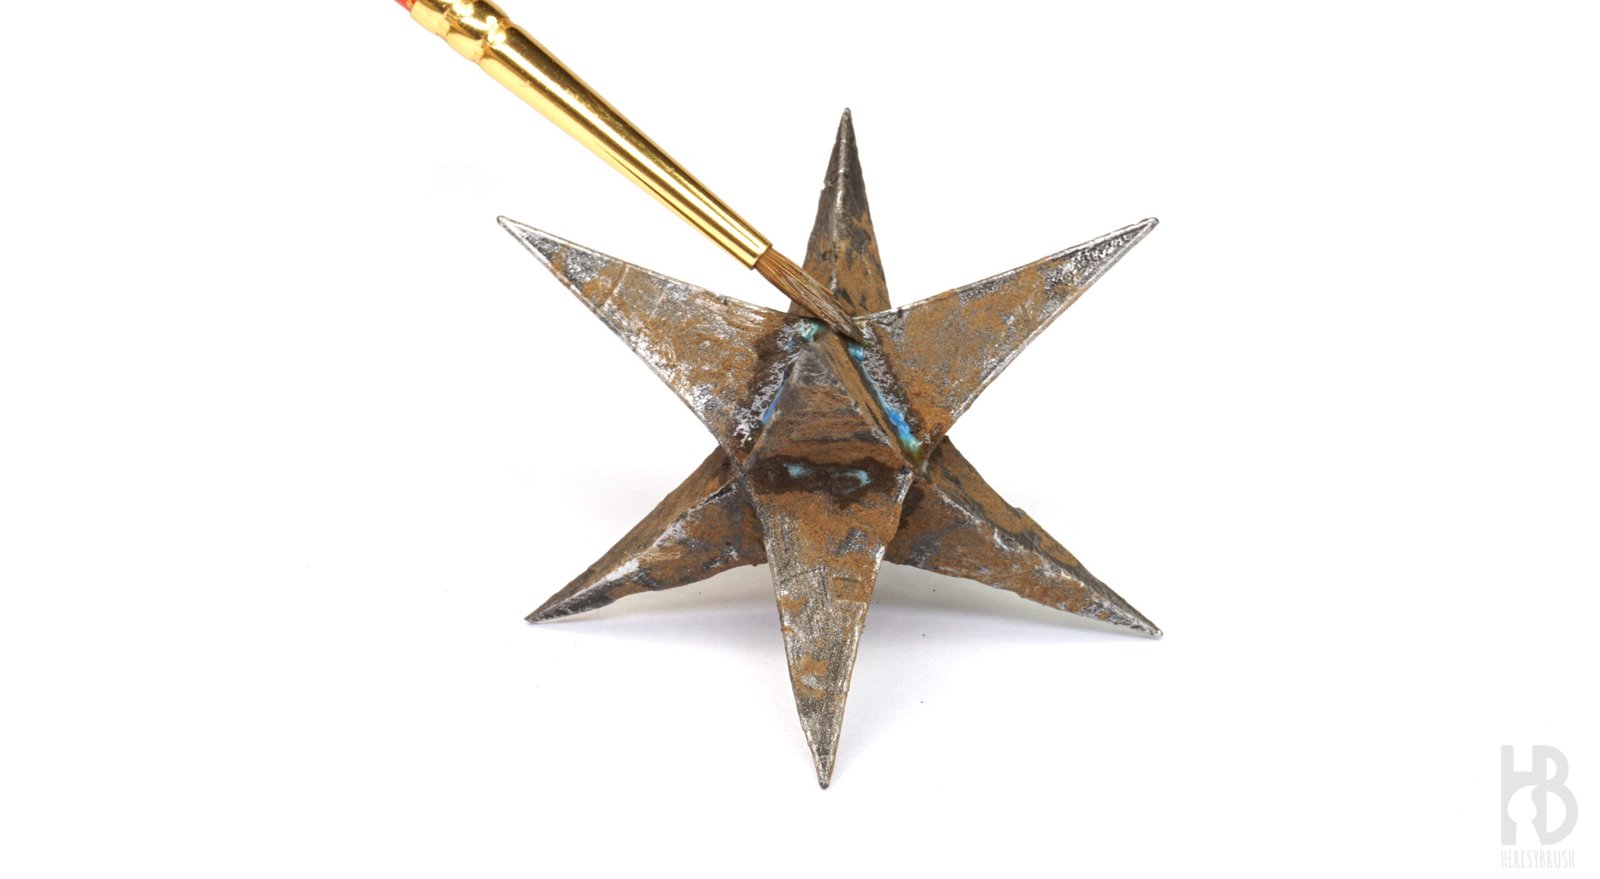
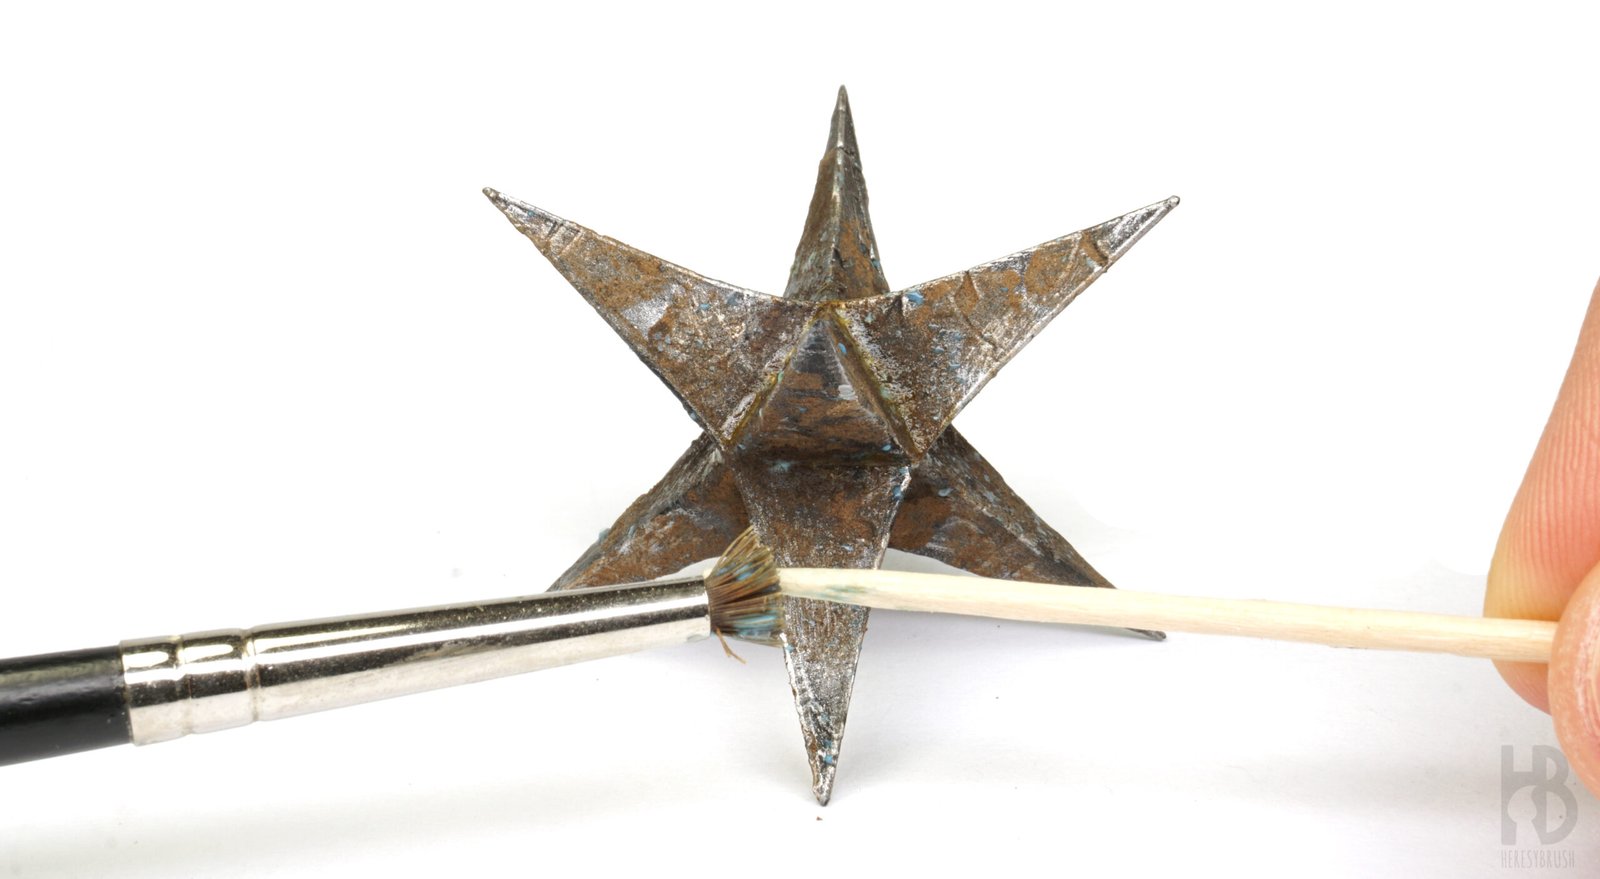
Step 6
While the rust mixture is still fresh, we use a small piece of sponge to gently remove the excess from the most exposed edges. By dabbing and lightly dragging the sponge across the sharp edges, we allow the underlying metallic drybrush to reappear.
Step 7
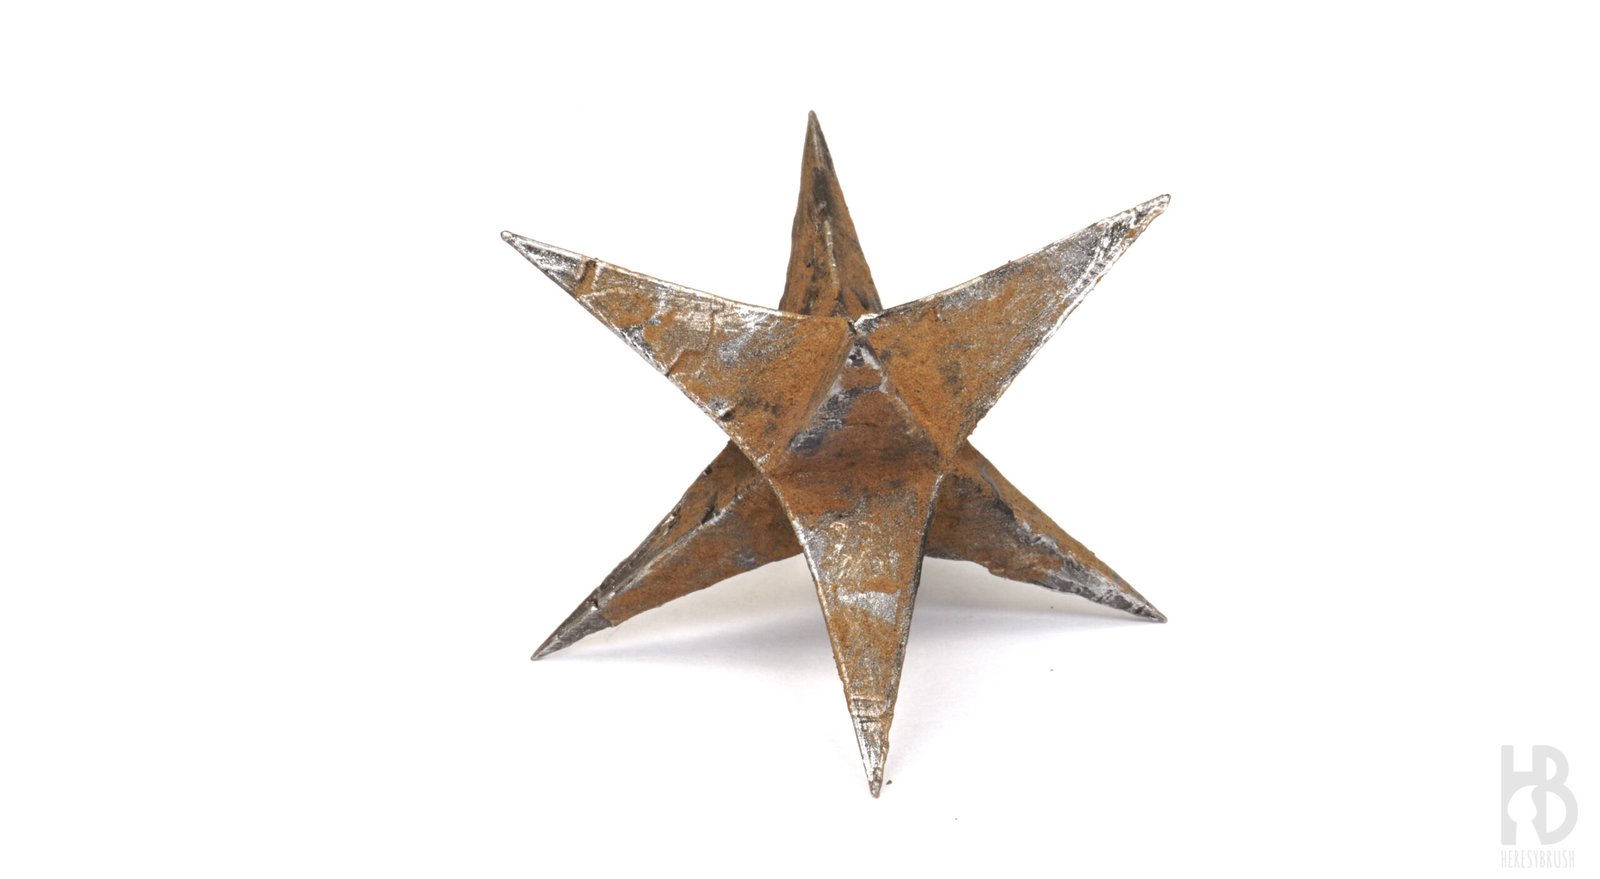
We now let the rust mixture dry completely, about 15 minute . As it cures, the oxidation begins to reveal its true character, developing rich red-toned rust thanks to the specific U-RUST products we selected. At this stage, the effect already looks remarkably authentic: textured, varied, and naturally distributed across the surface. In fact, you could perfectly stop here if you wish, as the piece already displays a highly convincing early–mid stage rust finish.
Step 8
Step 9