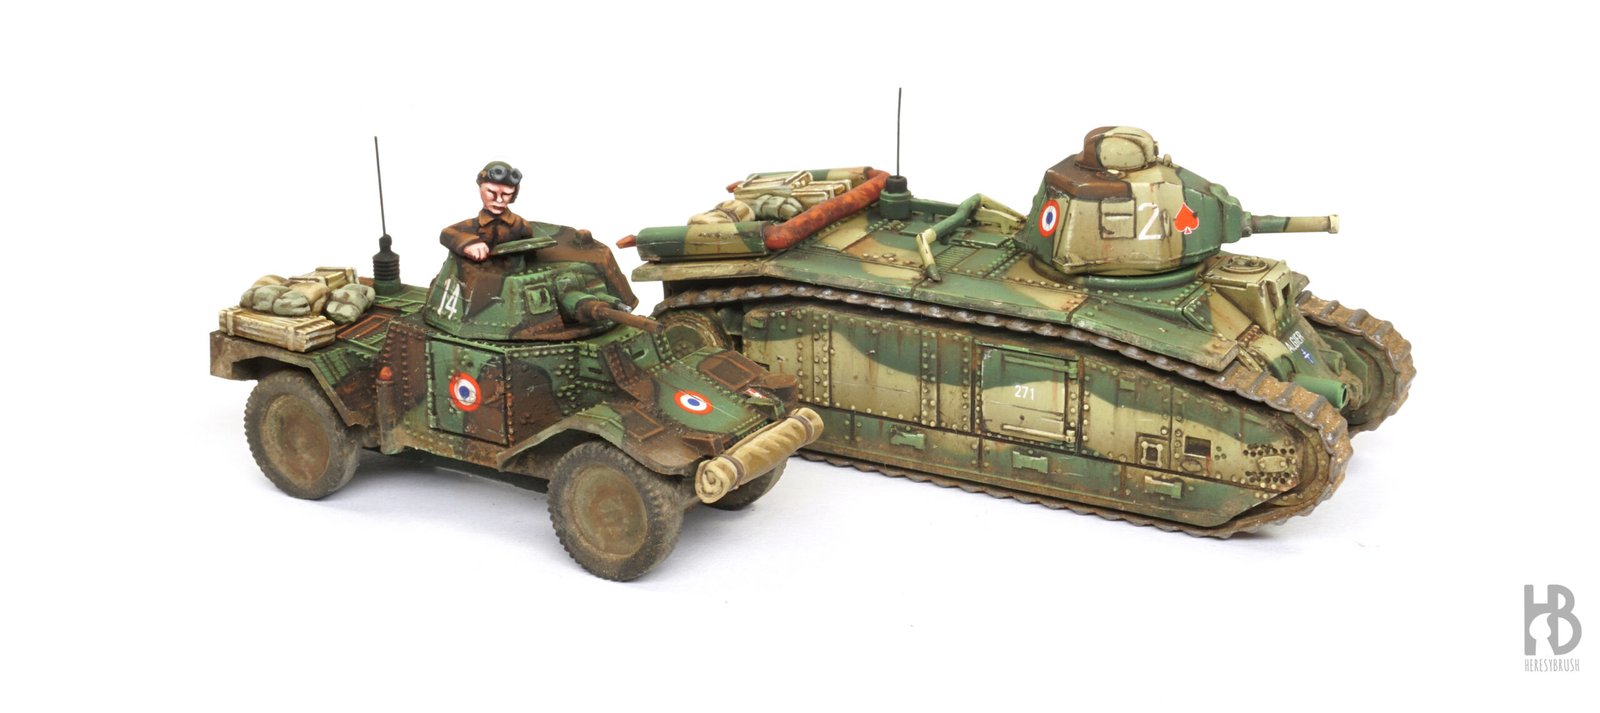
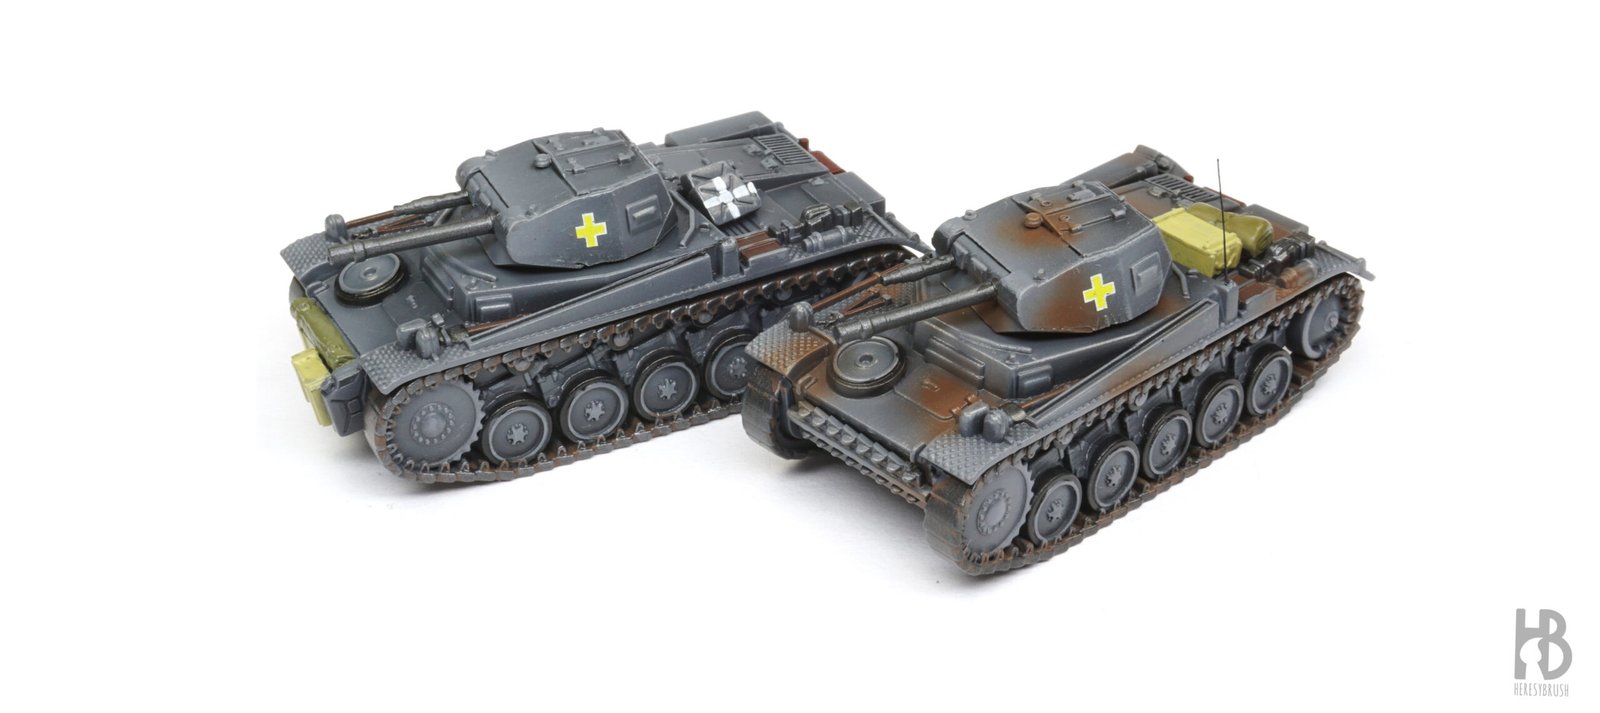
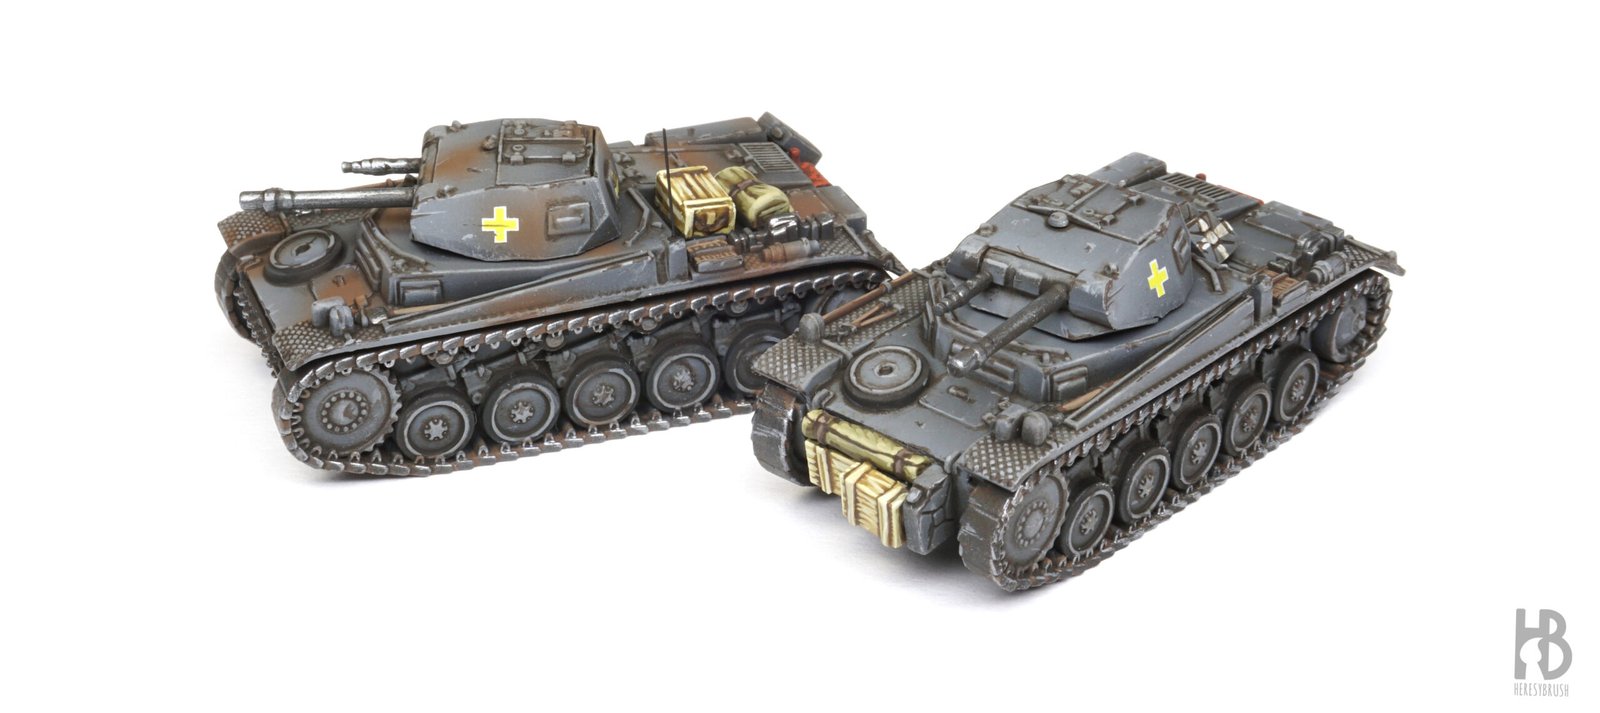
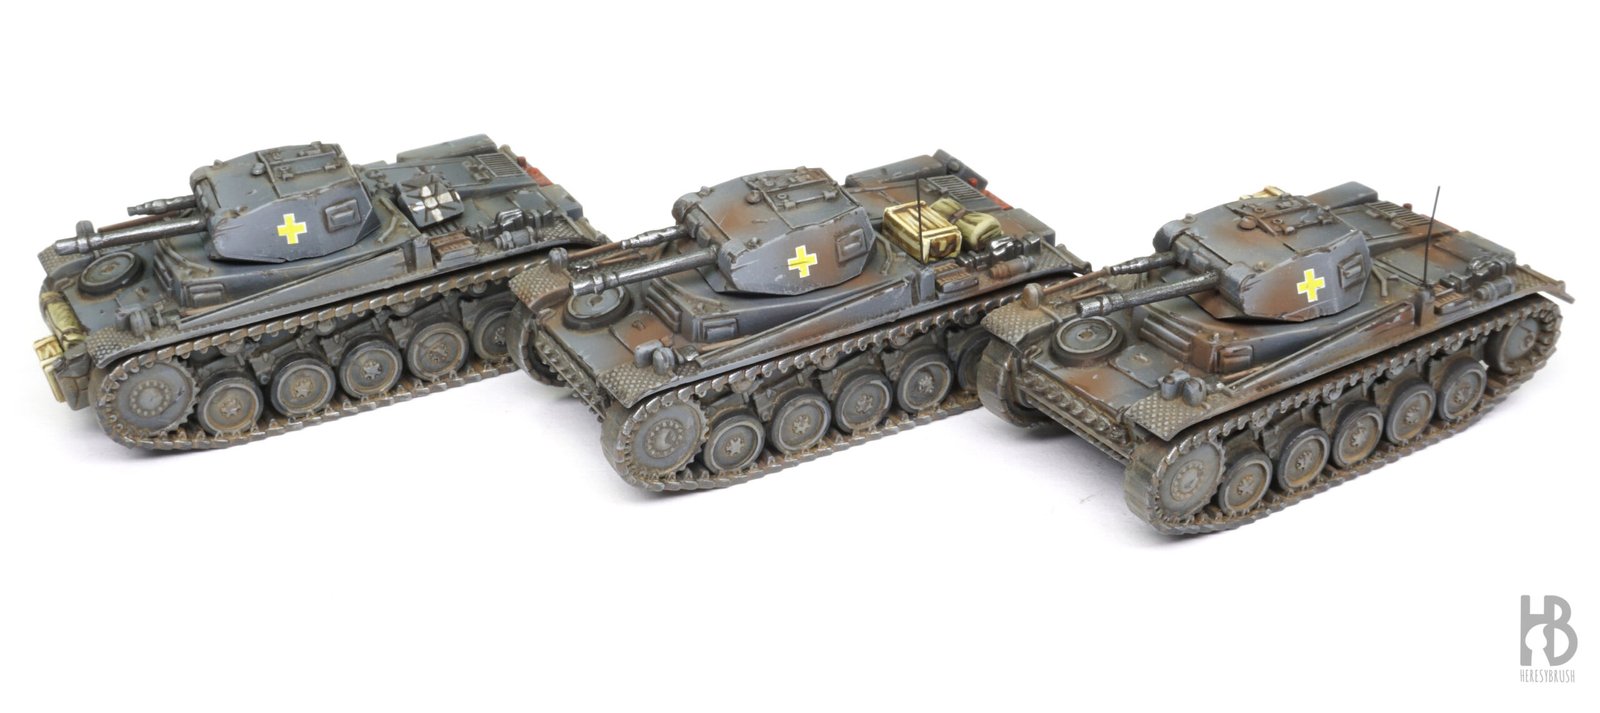
En este tutorial vamos a pintar el clásico esquema alemán de principios de la guerra: el Dunkelgrau (gris oscuro), con la opción de añadir manchas de camuflaje marrón. Este patrón fue muy común durante los primeros años del conflicto, aunque el tono marrón suele pasar casi desapercibido en las fotografías en blanco y negro de la época.
Seguiremos un enfoque híbrido, combinando acrílicos, esmaltes y óleos. El proceso incluye luces controladas con aerógrafo, refinado mediante pincel seco y un envejecido sencillo pero efectivo para conseguir un acabado por encima del nivel habitual de juego. Esta guía es modular, así que puedes seguir el tutorial paso a paso o simplemente incorporar las técnicas que te resulten más útiles.
Este artículo fue publicado originalmente en la web de Battlefront , aquí.
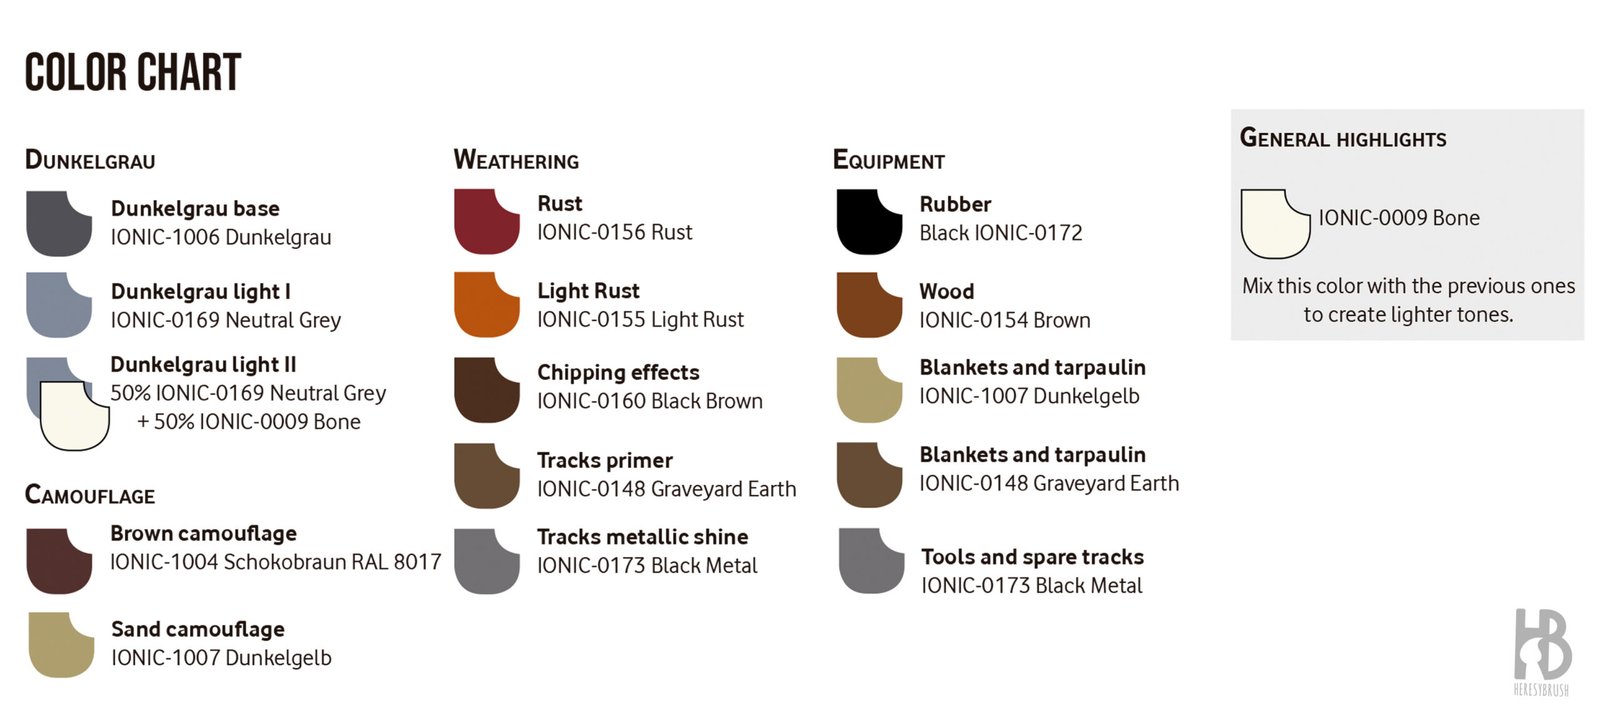
Esta es una carta de colores para pintar tanques alemanes de comienzos de guerra (1939-1942):
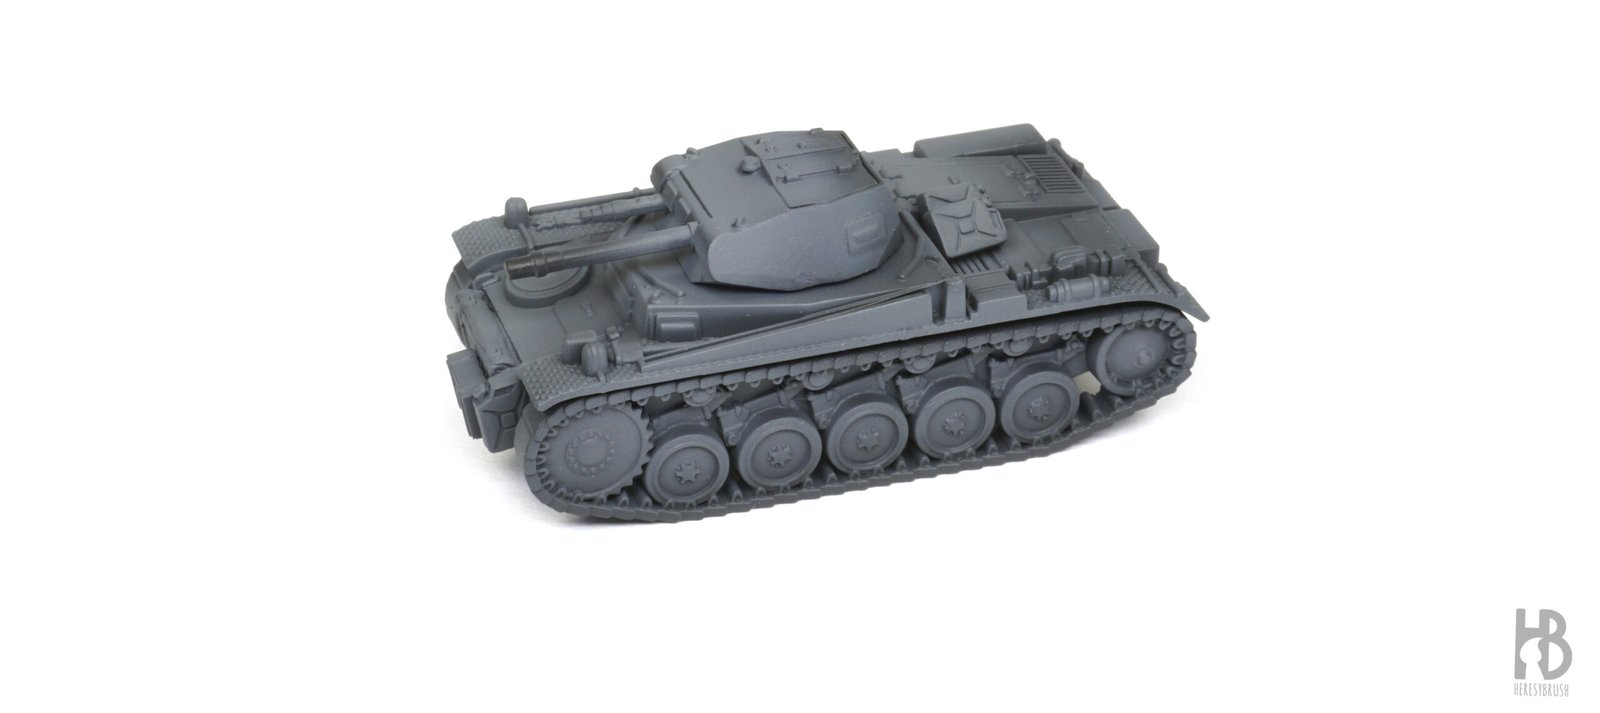
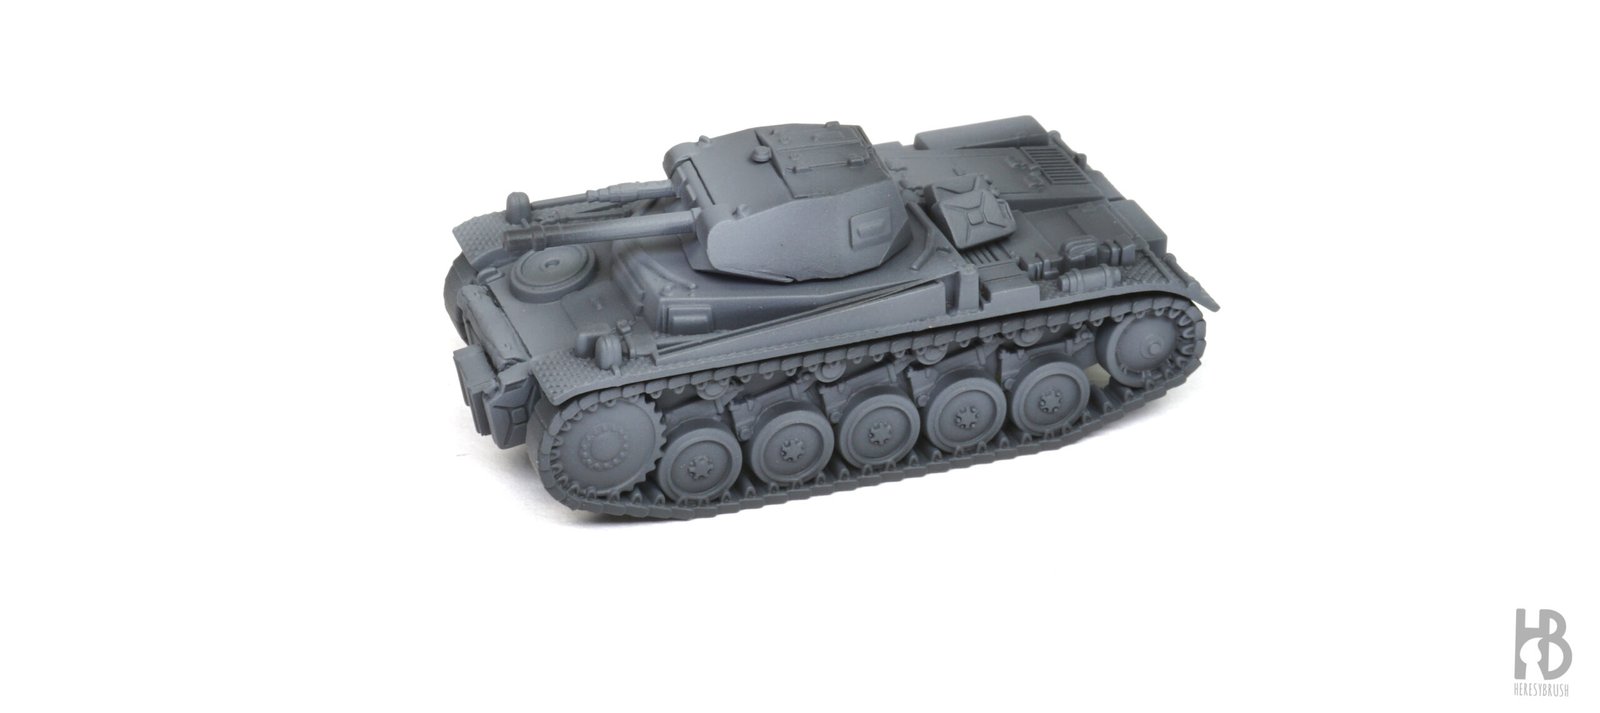
Paso 1 Preparación e imprimación
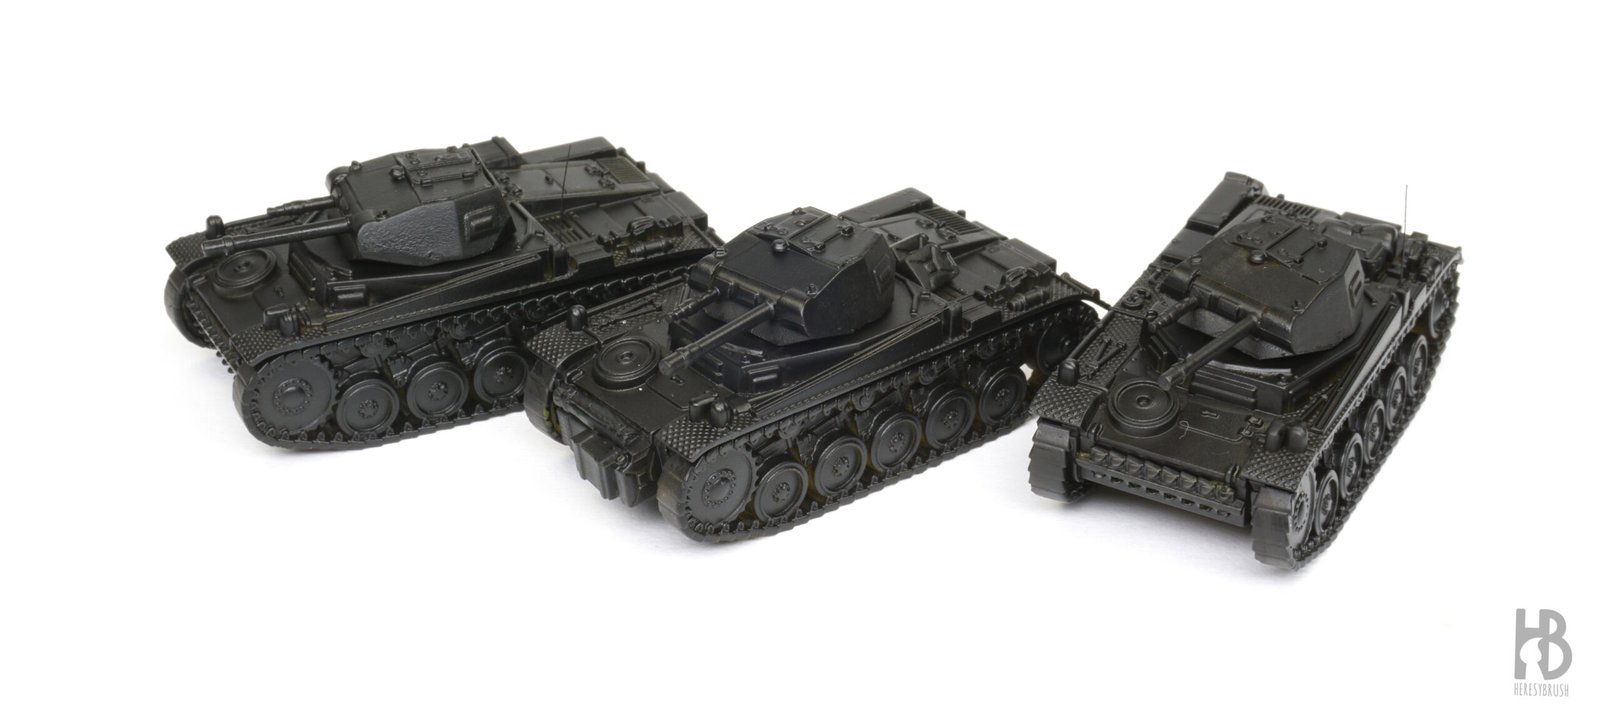
Comenzamos limpiando cuidadosamente todas las piezas, eliminando las líneas de molde y cualquier imperfección antes de montar el tanque de plástico con pegamento para plástico. De forma opcional, podemos añadir equipo y pertrechos para aportar variedad y personalizar cada vehículo del pelotón. En este caso he utilizado accesorios impresos en 3D, salvo los bidones de combustible incluidos en el kit. También podemos fabricar las antenas con varillas de níquel de 0,2 mm, fijándolas con cianoacrilato. Una vez montado por completo, aplicamos una imprimación negra sobre todo el vehículo, ya sea con aerógrafo o con espray. Este paso mejora la adherencia de la pintura y aumenta su resistencia.
Paso 2 Dunkelgrau sombra
Aplicamos el primer color utilizando una mezcla de Dunkelgrau IONIC-1006 con un 50 % de Negro IONIC-0172. Este tono más oscuro actuará como color de sombra y se aplica de forma uniforme sobre todo el vehículo con el aerógrafo, diluyendo la pintura aproximadamente con un 40 % de diluyente acrílico. Es preferible aplicar dos capas finas en lugar de una única más gruesa, ya que así preservaremos mejor el detalle de las superficies, y conseguiremos un acabado más uniforme.
Paso 3 Dunkelgrau base
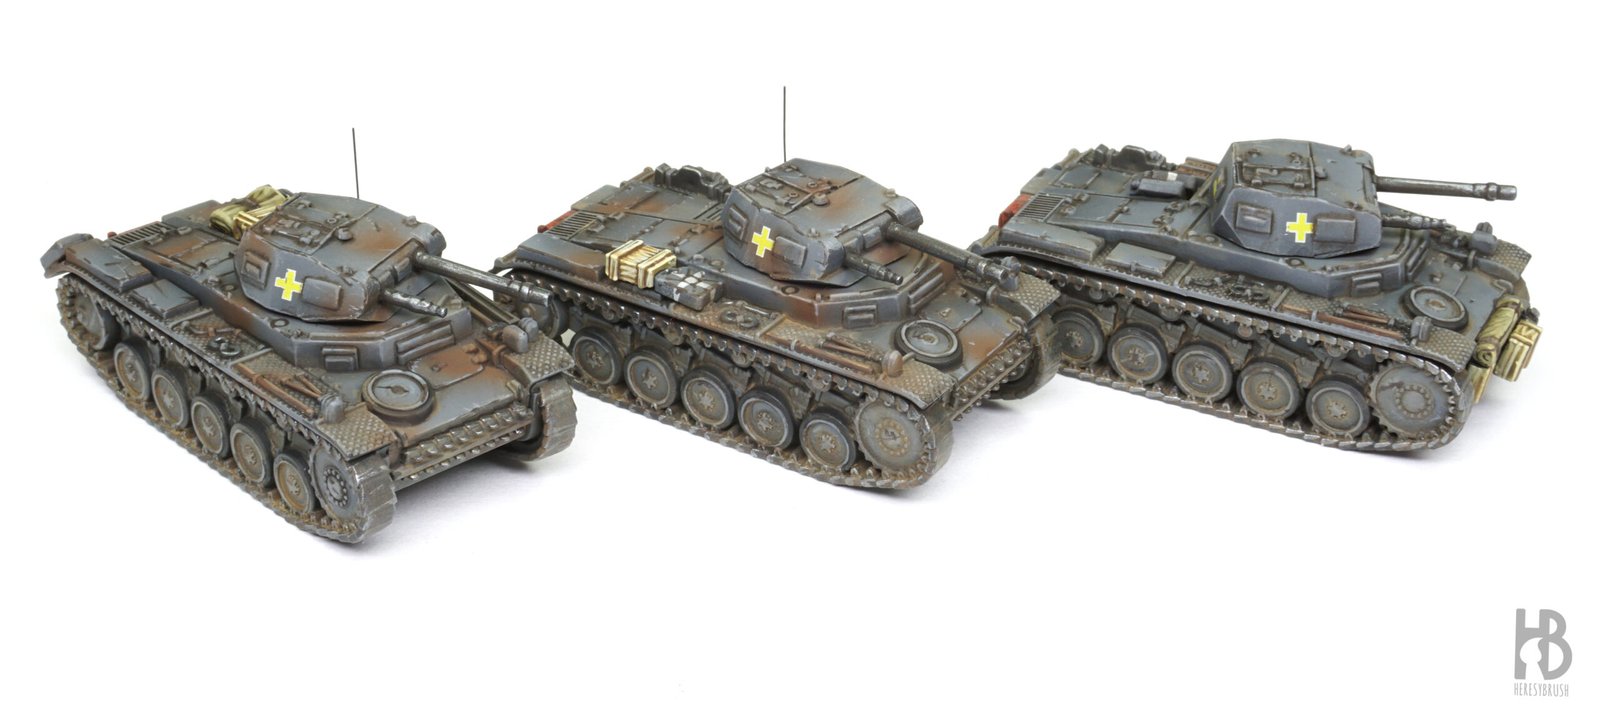
A continuación aplicamos Dunkelgrau IONIC-1006 puro como color base. Manteniendo la misma dilución en el aerógrafo, comenzamos a definir los volúmenes dejando visible el tono más oscuro en ciertas zonas. No se trata de realizar una iluminación cenital general, sino de seleccionar determinados paneles, como la parte frontal de la torre o del casco. A esto le llamamos «modulación del color» (más aquí). Para conseguir un contraste marcado entre paneles basta con inclinar el carro mientras pulverizamos la pintura, controlando con precisión dónde incide la luz sin afectar a las superficies adyacentes.
Paso 4 Dunkelgrau luz
Para aumentar el contraste, utilizamos un gris azulado más claro, como Neutral Grey IONIC-0169. Seguimos aplicando las luces con la misma lógica que en el paso anterior, pero reduciendo progresivamente la superficie pintada para concentrar la iluminación en áreas cada vez más pequeñas. El objetivo es obtener una definición de volúmenes sencilla pero efectiva. No hace falta que sea perfecta.
Paso 5 Luz a pincel seco
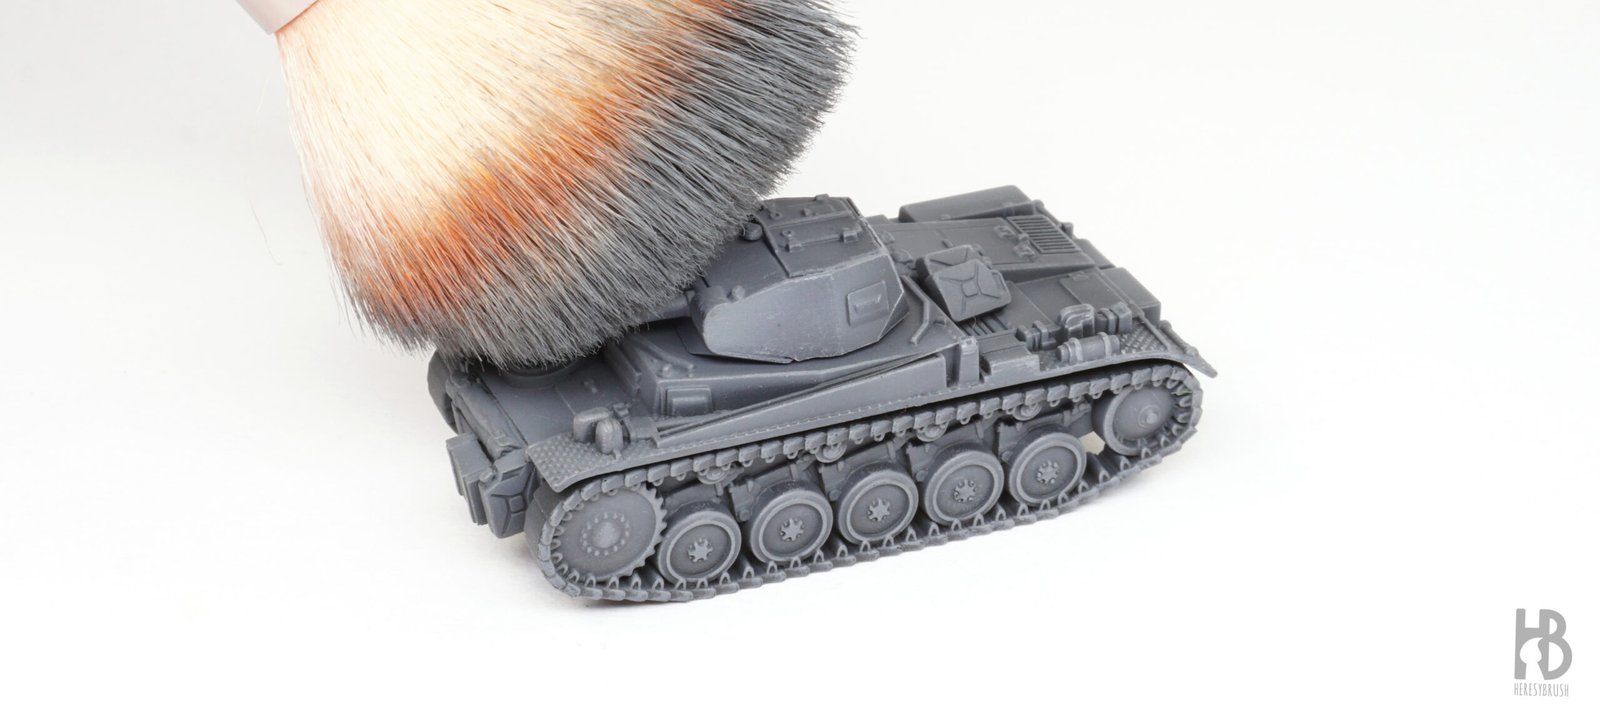
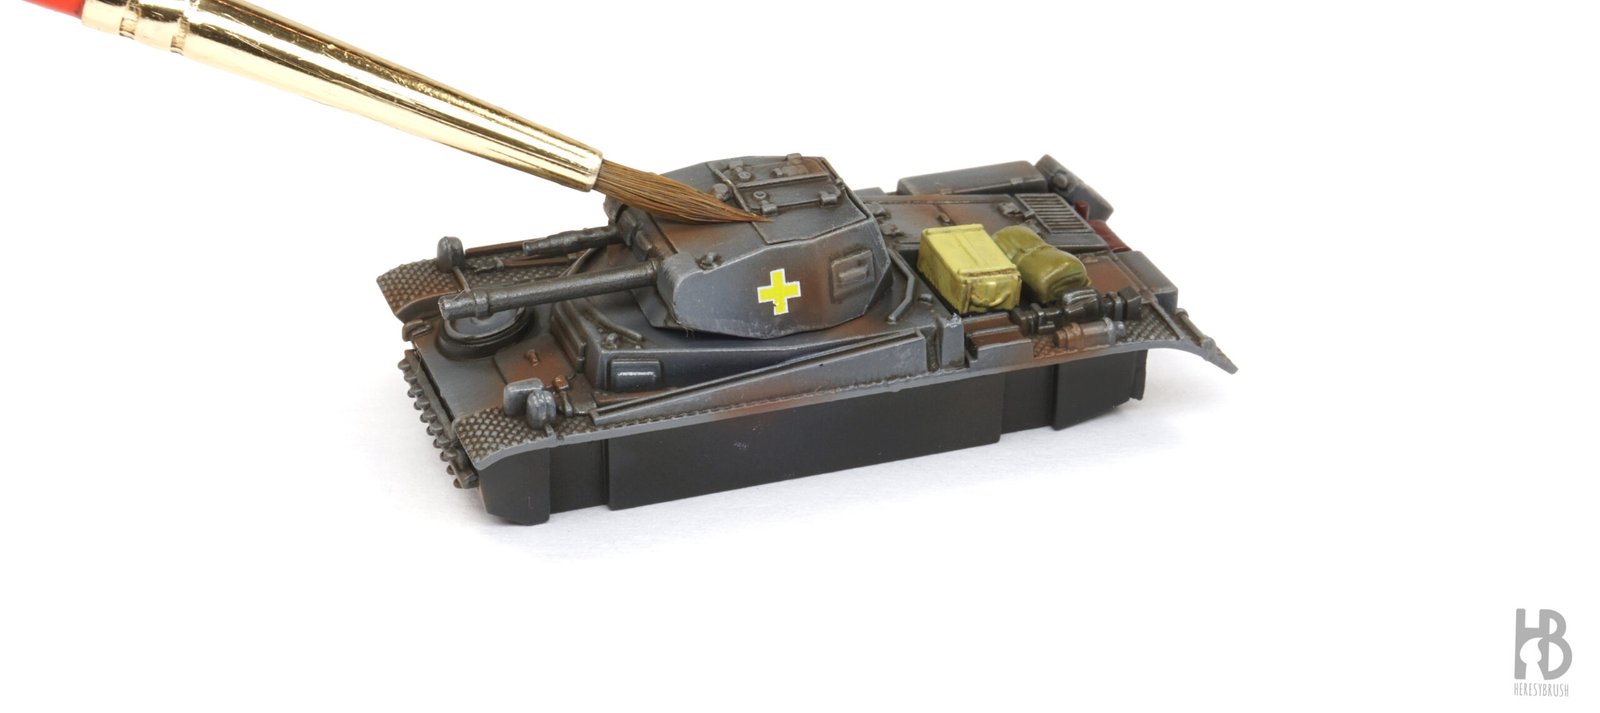
Reforzamos las luces utilizando la técnica del pincel seco con el mismo gris claro empleado anteriormente. Aplicado con pincel, el efecto resulta más intenso que con el aerógrafo y actúa como una iluminación adicional. Utilizamos un pincel grande y muy suave, similar a los empleados para maquillaje. Tras descargar casi toda la pintura sobre un papel, frotamos suavemente la superficie del vehículo para resaltar las texturas y las aristas.Es un paso muy rápido, aunque deja un acabado algo basto que refinaremos más adelante.
Paso 6 Perfilado de detalles
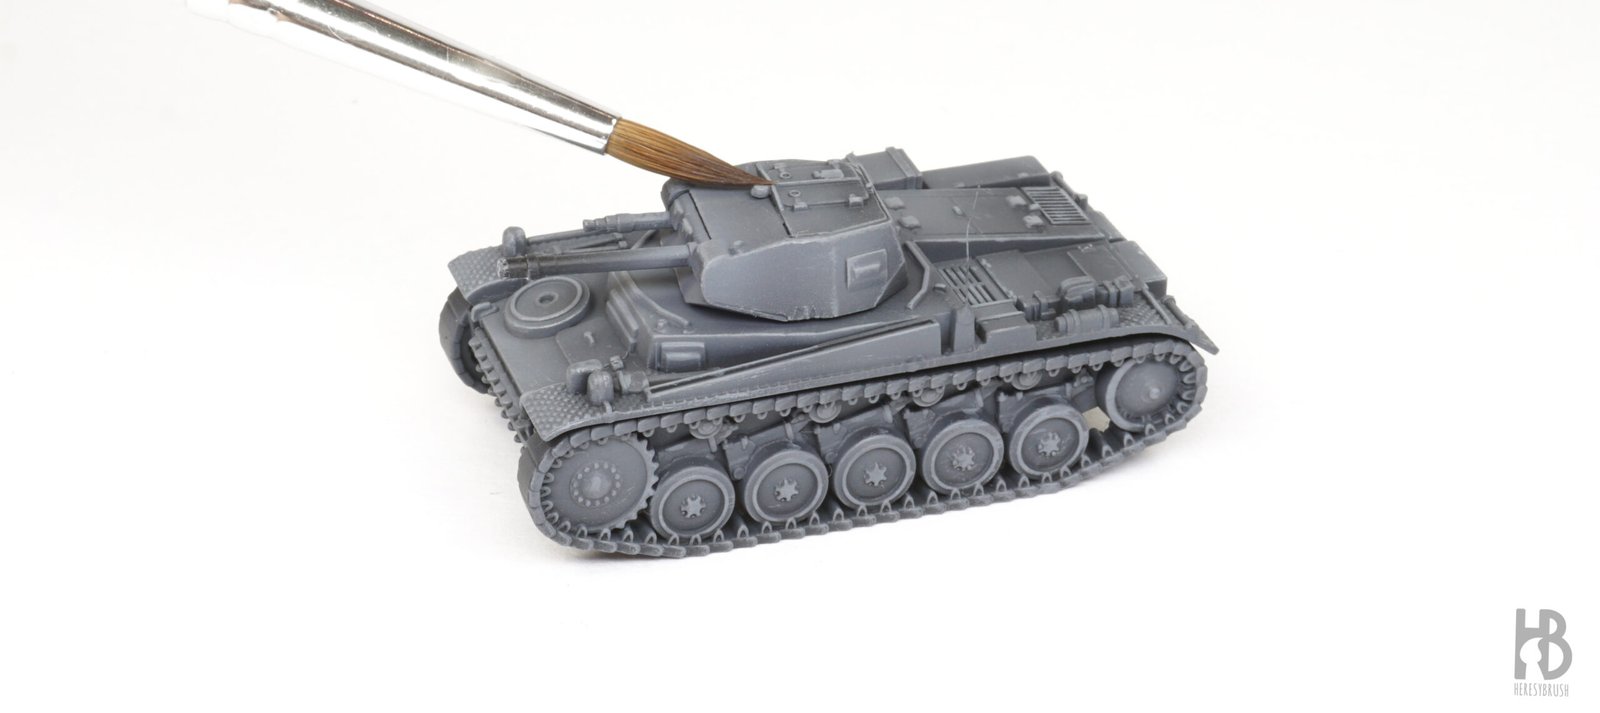
Con un pincel fino repasamos ahora las luces sobre escotillas, remaches y pequeños detalles utilizando el mismo gris claro que empleamos para el pincel seco. Este paso recupera la definición que puede haberse perdido durante el pincel seco y mejora la legibilidad de la miniatura a distancia de juego.
Paso 7 Otros detalles
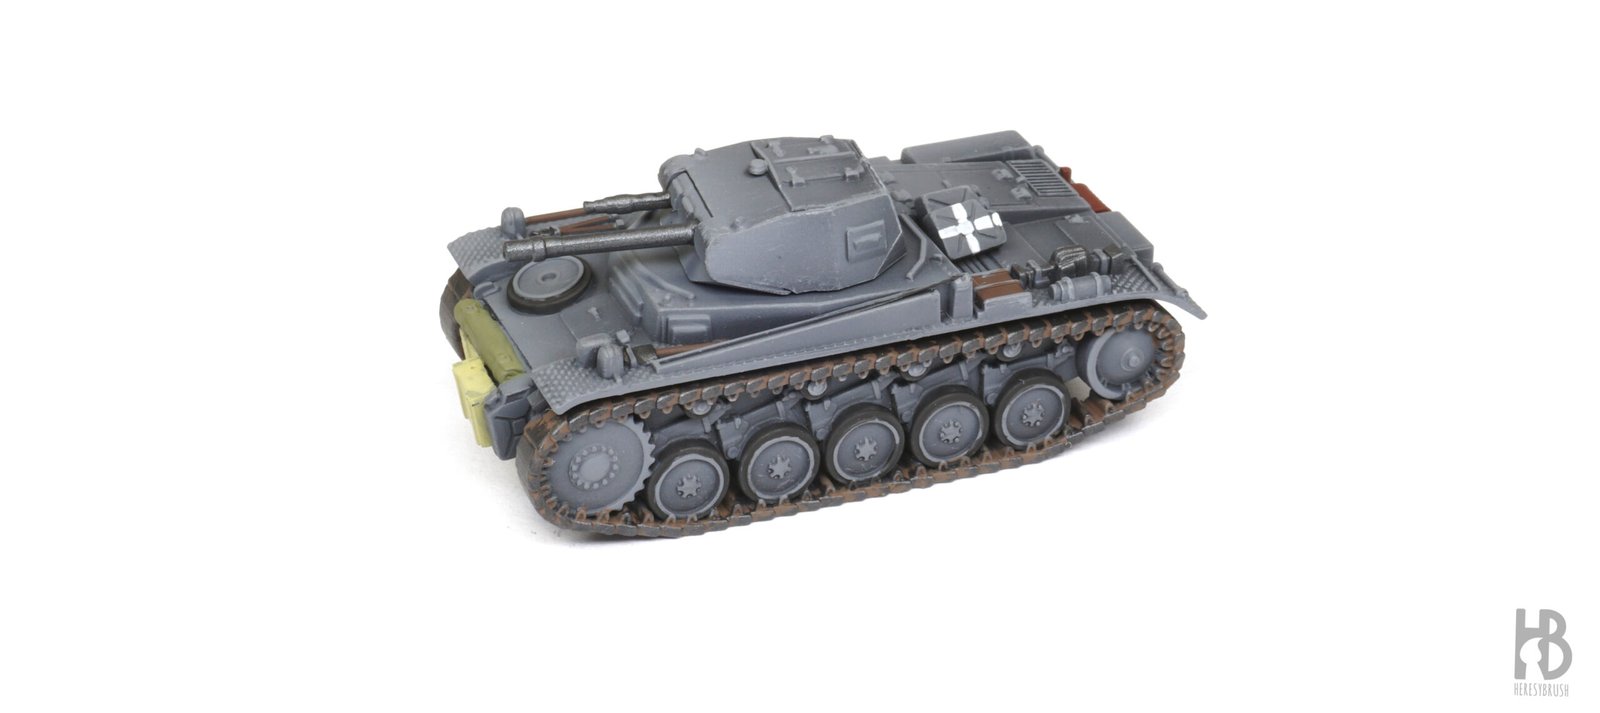
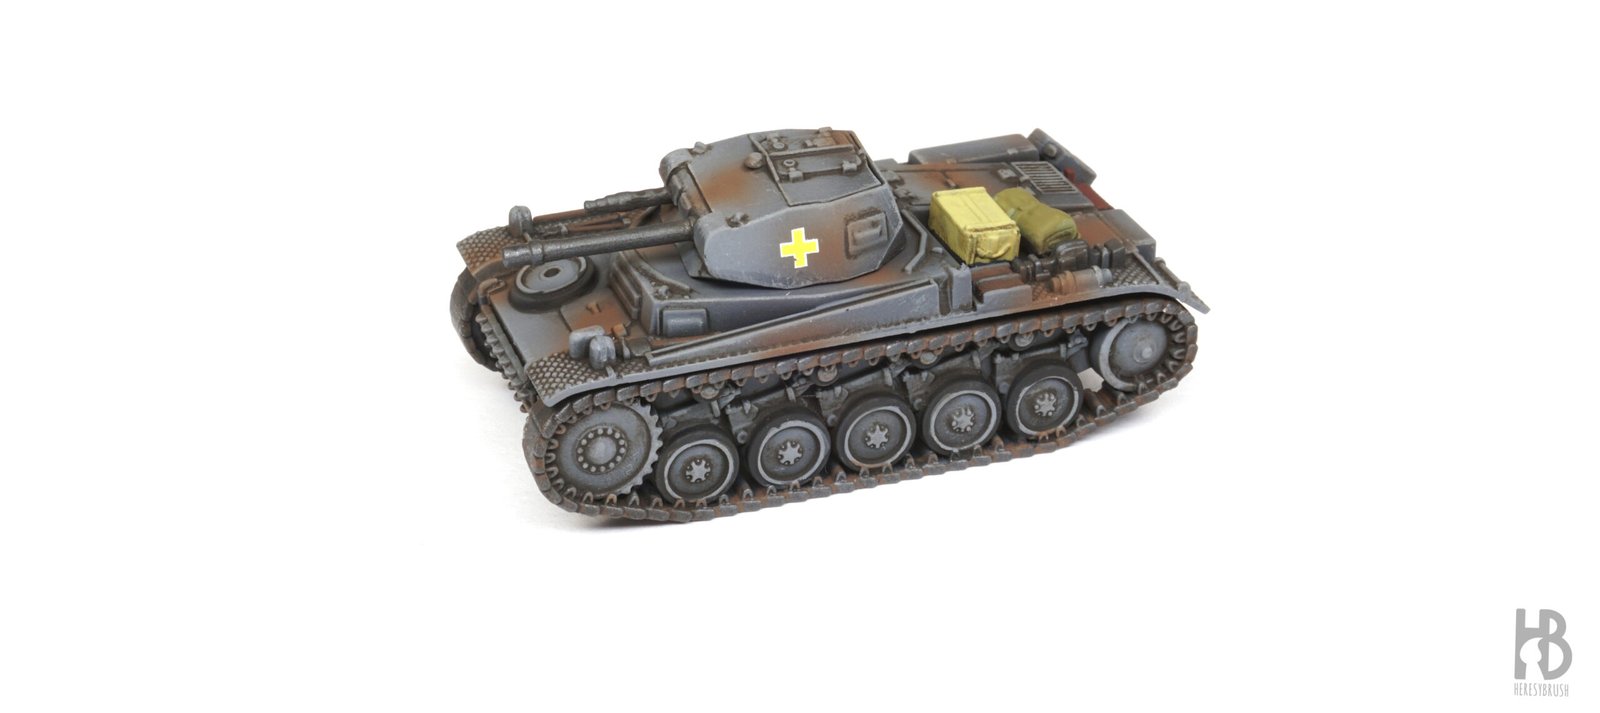
Con pinturas acrílicas y un pincel fino pintamos el resto de elementos del carro: herramientas, cadenas, tubos de escape y cualquier equipo adicional. Para las cadenas podemos utilizar una mezcla de Graveyard Earth IONIC-0148 y Black Brown IONIC-0160, seguida de un ligero pincel seco con Burnished Metal IONIC-0819. Este mismo tono metálico sirve para pintar las herramientas y el armamento. Las piezas de goma se pintan con Black IONIC-0172, mientras que los mangos de madera pueden partir de una base de Burnt Umber IONIC-0161. Para los tubos de escape utilizamos Dark Red IONIC-0058, simulando el óxido. Las mantas pueden pintarse en cualquier tono caqui o marrón, y algunos bidones pueden decorarse con una cruz blanca para indicar que contienen agua. El objetivo es añadir variedad visual sin romper la armonía general del vehículo.
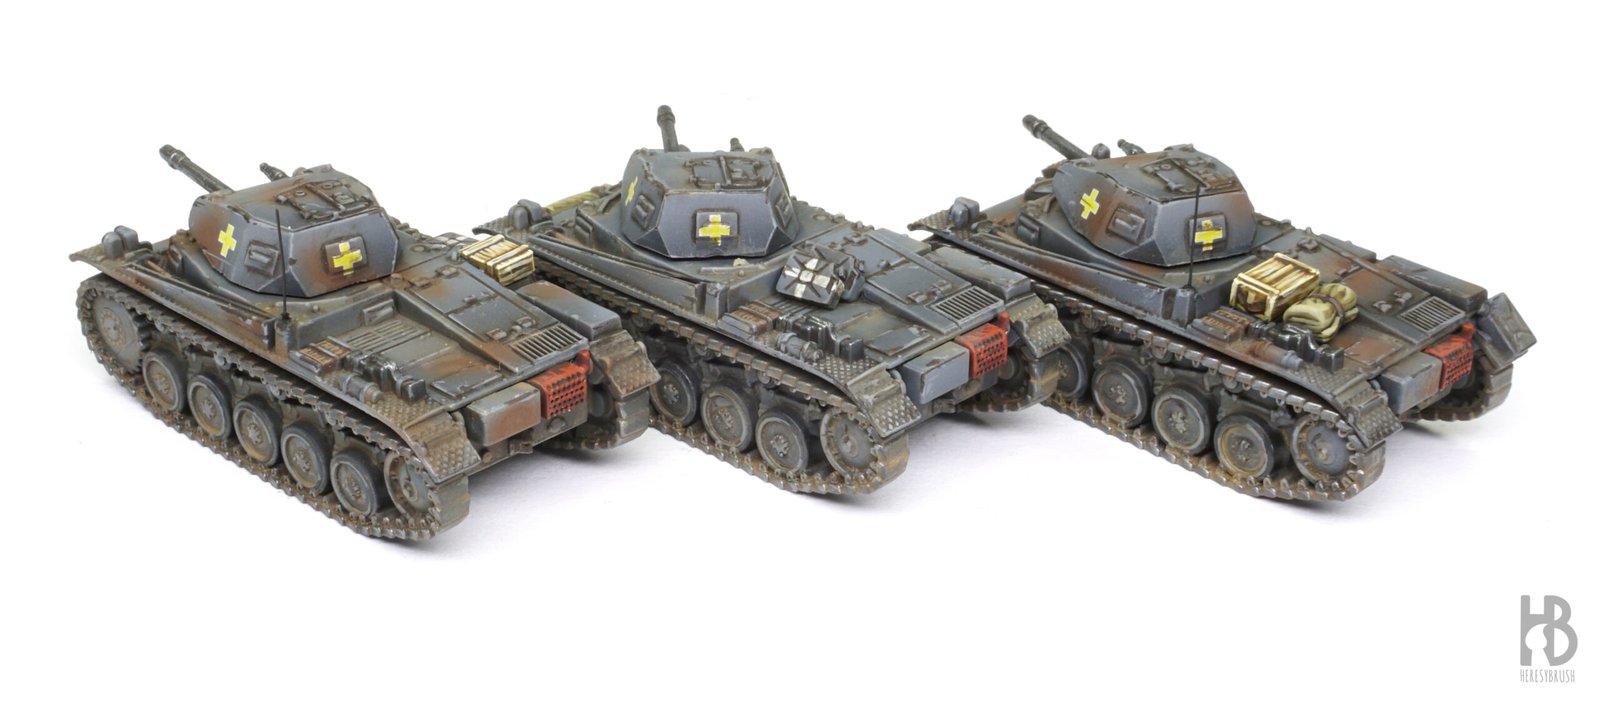
Paso 8 Manchas de camuflaje marrones
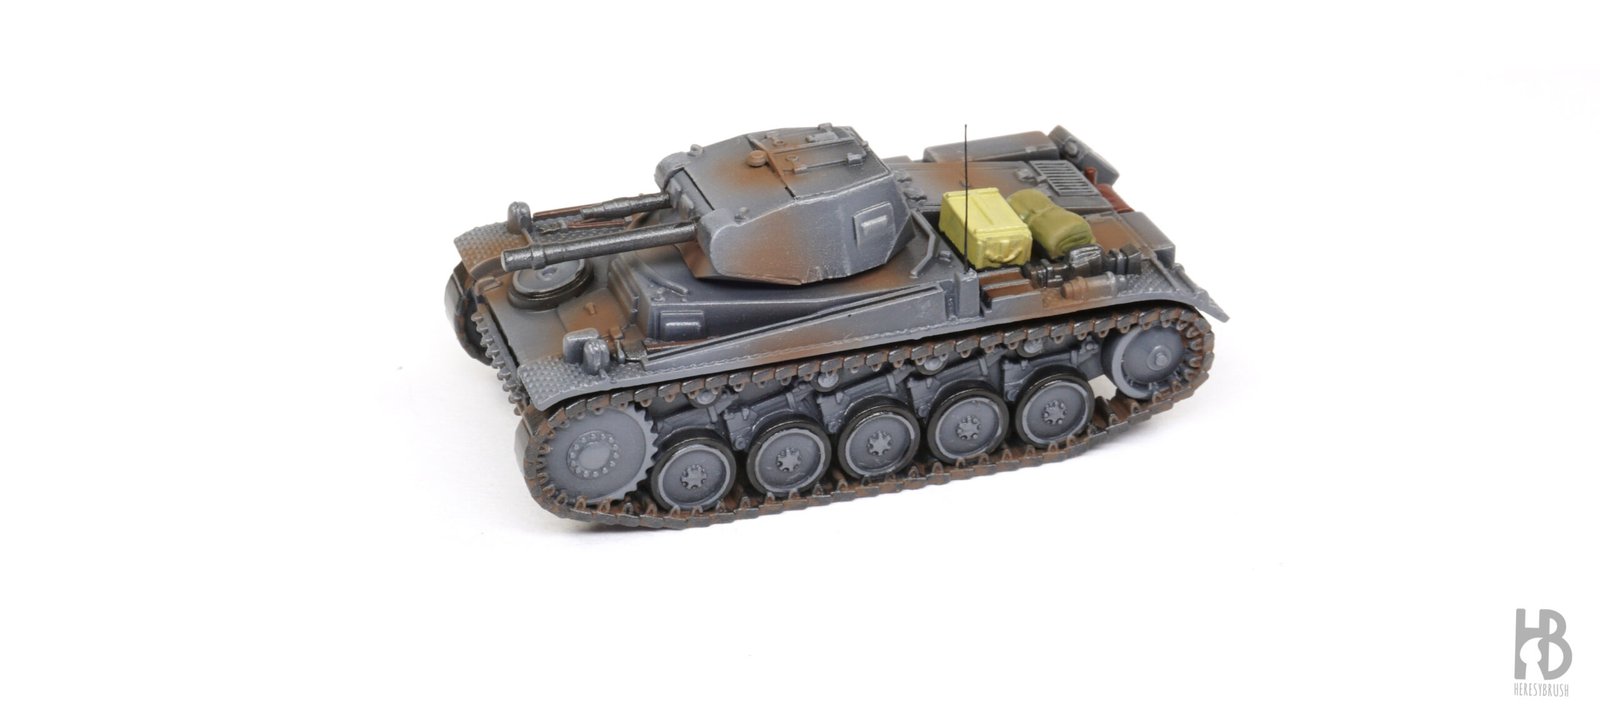
Como alternativa al acabado completamente gris, podemos aplicar un patrón de camuflaje utilizando Schokobraun RAL 8017 IONIC-0004 con el aerógrafo. La pintura debe ir bastante diluida (aproximadamente entre un 50 y un 60 % de diluyente), algo más que en los pasos anteriores, para conseguir una aplicación suave y semitransparente. Realizamos manchas irregulares, evitando formas demasiado uniformes o circulares. Es preferible crear patrones orgánicos, como pequeñas formas en «X» o en «Y», que rompan la silueta del vehículo y aporten mayor interés visual.
Paso 9 Barniz brillante y calcomanías
Antes de comenzar el proceso de envejecimiento aplicamos una fina capa de barniz brillante para proteger la pintura y preparar la superficie para las calcas. Una vez colocadas (explicado aquí), aplicamos otra capa fina de barniz brillante para sellarlas e integrarlas completamente en la superficie del vehículo.
Paso 10 Lavado tipo esmalte
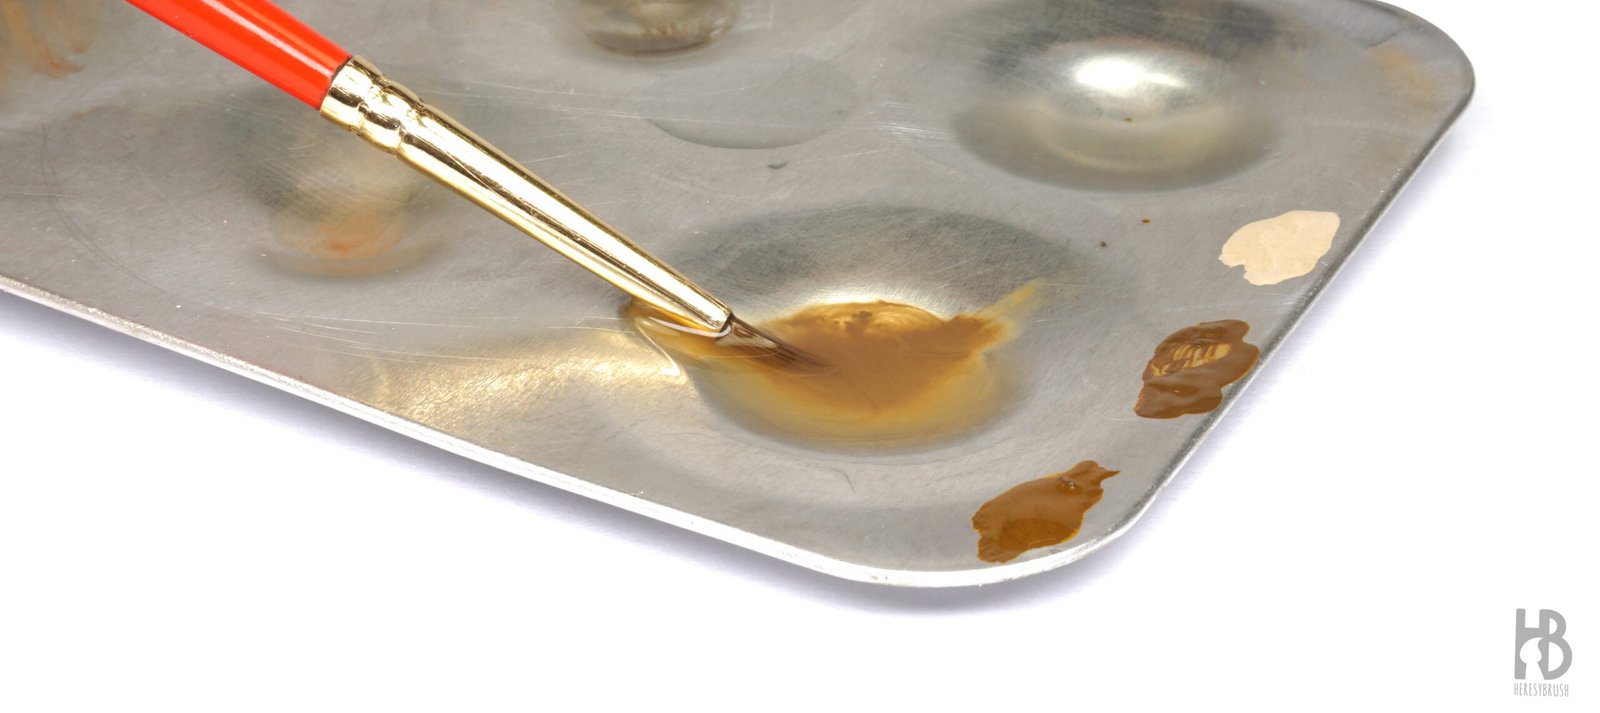
Aplicamos un lavado selectivo utilizando un producto esmalte, como Dark Brown Wash for Green Vehicles A.MIG-1005. Tras agitar bien el bote, depositamos el lavado con un pincel fino en las líneas de panel, remaches y demás recovecos, aumentando así el contraste y la definición.
¿Por qué utilizar un lavado de esmalte en lugar de uno acrílico? La principal ventaja es su versatilidad. Los esmaltes tardan mucho más en secar y pueden reactivarse fácilmente con disolventes como White Spirit o aguarrás. Esto nos permite difuminar, corregir o incluso eliminar completamente el producto si es necesario. En este paso resulta fundamental aprovechar esta propiedad, ya que buscamos que el lavado permanezca únicamente en los recovecos sin teñir el resto de superficies.
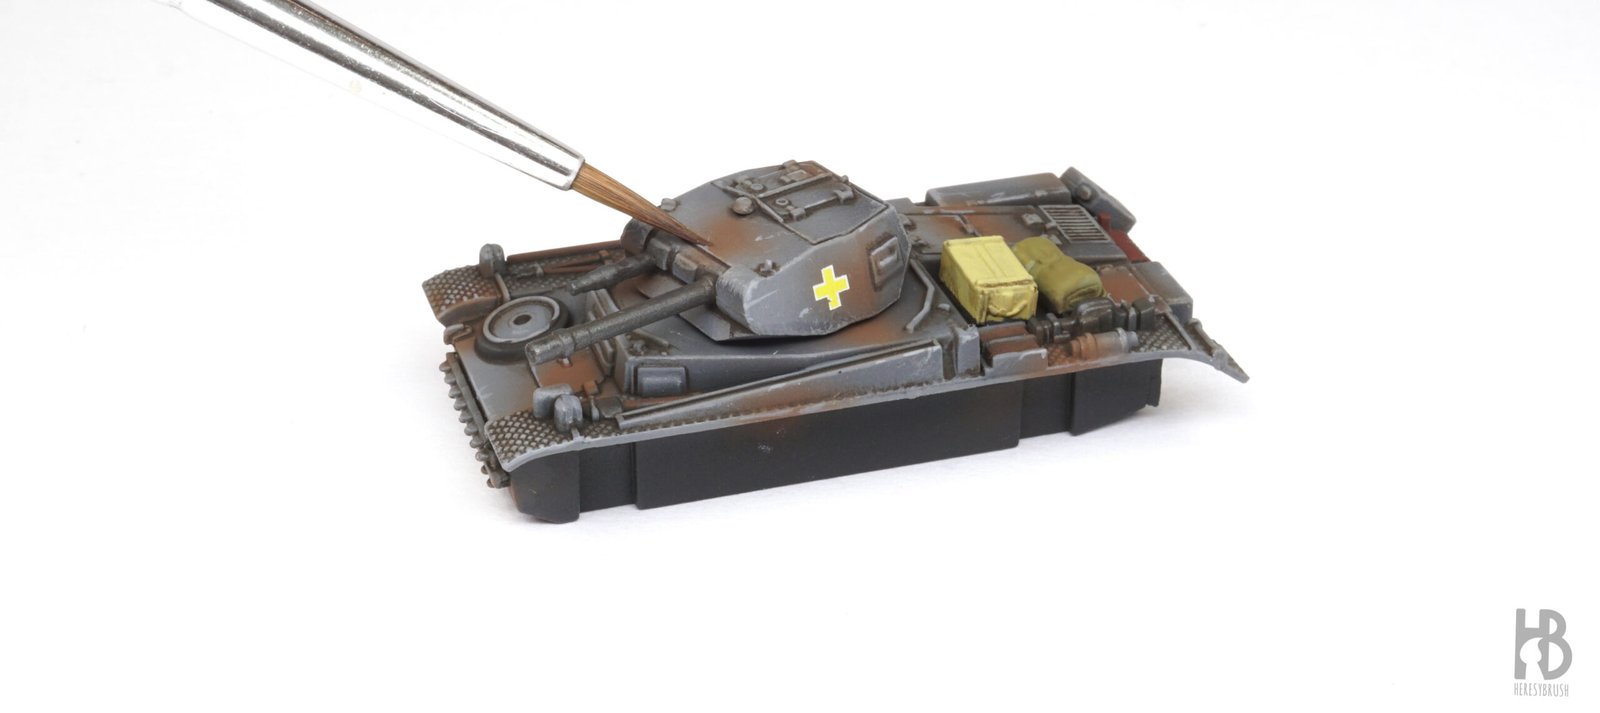
Paso 11 Eliminar exceso de lavado
Después de dejar secar el lavado durante unos 30-60 minutos, retiramos el exceso utilizando un pincel limpio o un bastoncillo de algodón ligeramente humedecido con disolvente. Limpiamos suavemente las superficies, dejando el esmalte únicamente en las líneas de panel y zonas hundidas. De esta forma recuperamos la limpieza del color base mientras reforzamos la definición de todos los detalles.
Paso 12 Barniz brillante
Esperamos unos 10 minutos para que el disolvente se evapore por completo. A continuación aplicamos un barniz mate, cuyo objetivo es eliminar el brillo dejado por los esmaltes y unificar el acabado de todo el vehículo. Podemos aplicarlo tanto con espray como con aerógrafo, aunque este último ofrece un resultado más fino y un mayor control sobre la cantidad de producto aplicada.
Paso 13 Efectos de desconchones superficiales
Comenzamos el proceso de desgaste añadiendo pequeños desconchones superficiales con un gris claro, por ejemplo mezclando Neutral Grey IONIC-0169 con un 25 % de Ivory IONIC-0002. Con un pincel fino pintamos pequeños puntos y arañazos sobre las aristas y las zonas de mayor desgaste. La forma más sencilla de hacerlo es utilizar el lateral del pincel para perfilar los bordes de los paneles, en lugar de la punta.
No es necesario cubrir todo el vehículo con desconchones. Personalmente prefiero trabajar con pincel en lugar de esponja, ya que ofrece un control mucho mayor sobre el efecto. Unos pocos desconchones bien colocados bastarán para aportar interés visual.
Paso 14 Efectos de desconchones más profundos
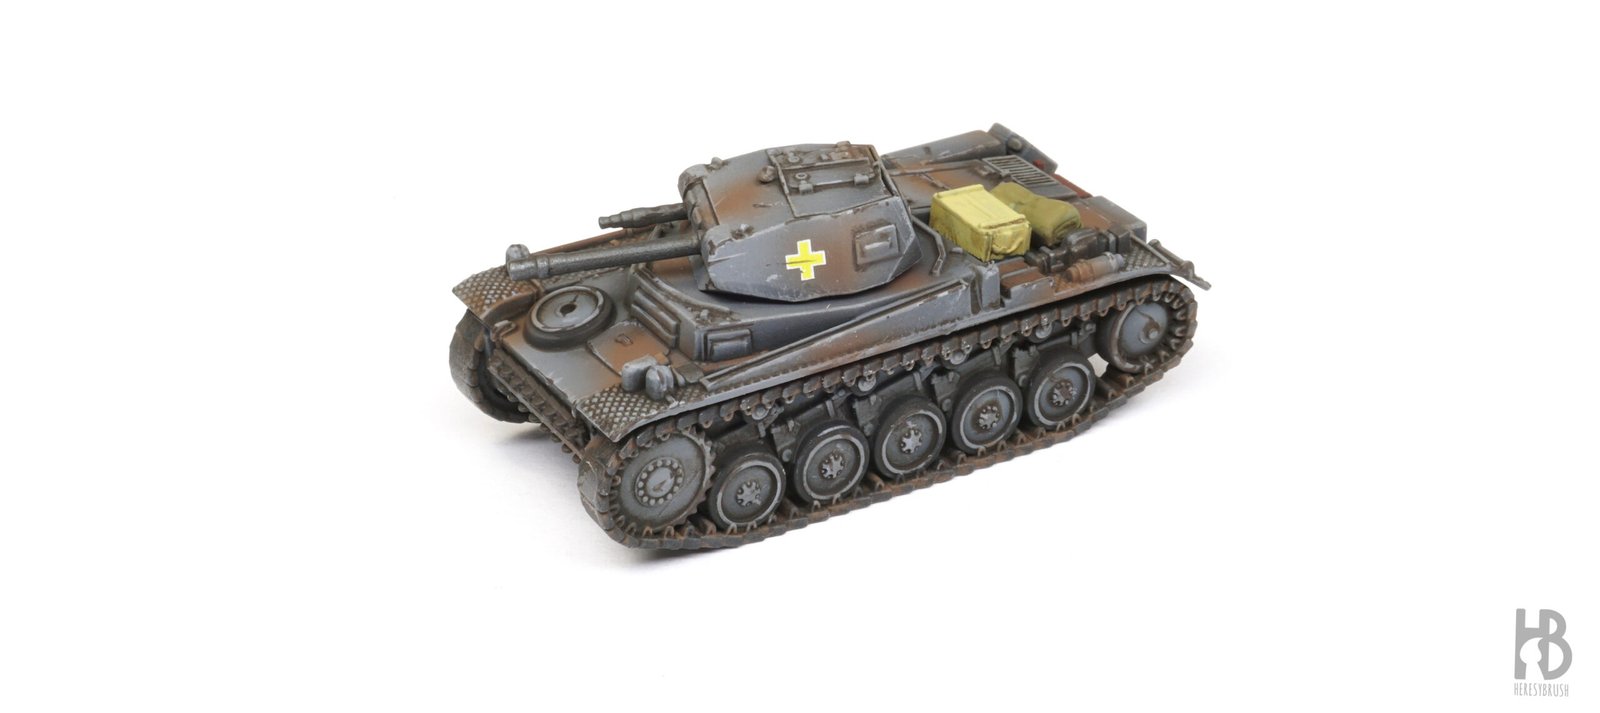
Para dar mayor profundidad a los desconchones añadimos un marrón muy oscuro que represente el metal expuesto, por ejemplo una mezcla al 50 % de Black IONIC-0172 y 50 % de Burnt Umber IONIC-0161. Este color se aplica dentro o junto a los desconchones claros para crear un efecto de capas que simule la pintura levantada. También podemos añadir algún arañazo fino de forma puntual, siempre con moderación.
Este paso es especialmente importante y, para que resulte convincente, debemos controlar cuidadosamente tanto el tamaño como la cantidad de los desconchones. Cuanto más pequeños y menos numerosos sean, más realista será el resultado final.
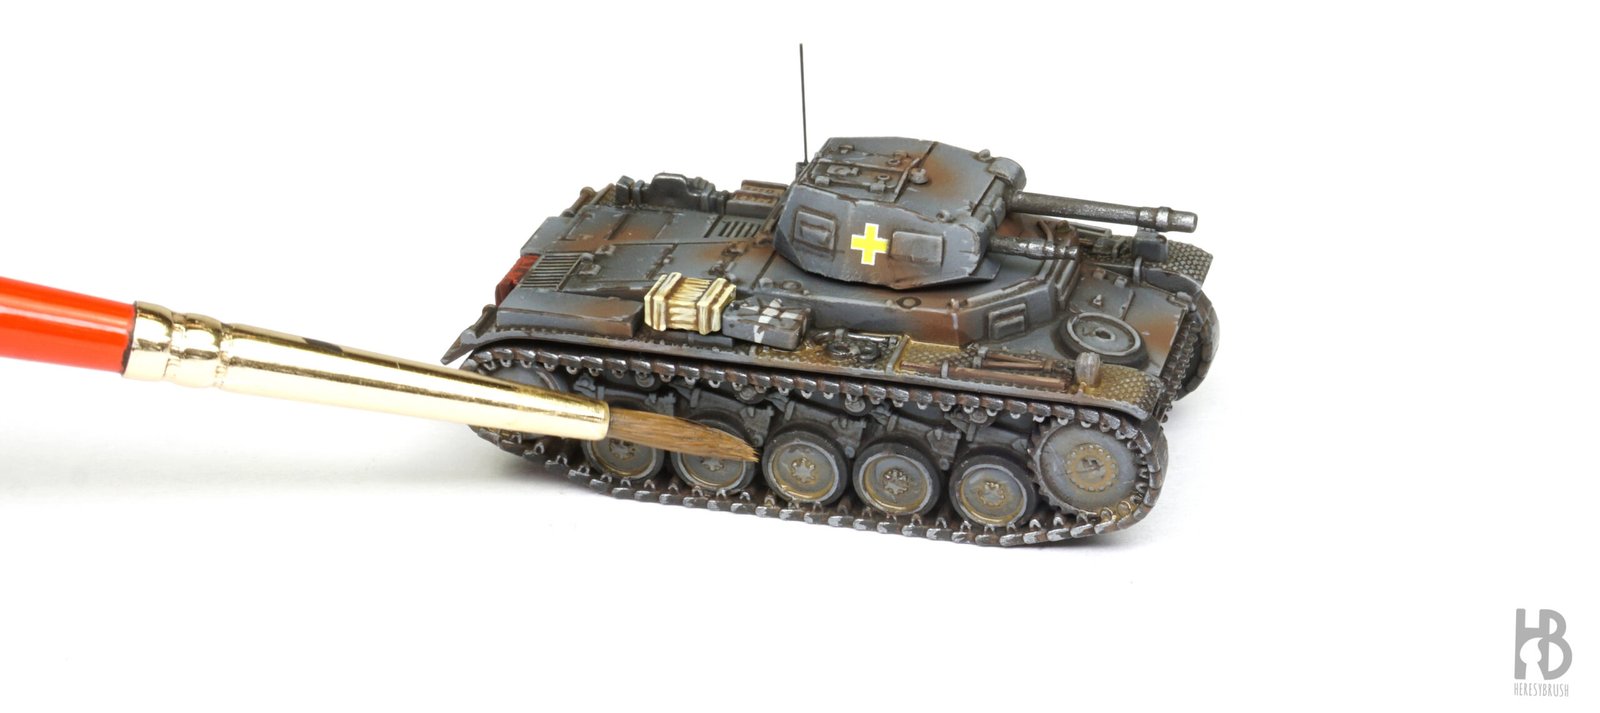
Paso 15 Equipo y accesorios
Ahora terminamos de trabajar el equipo y los accesorios utilizando pinturas acrílicas y un pincel fino. El objetivo es aumentar el contraste y dar vida a estos pequeños elementos, algo especialmente importante en esta escala.
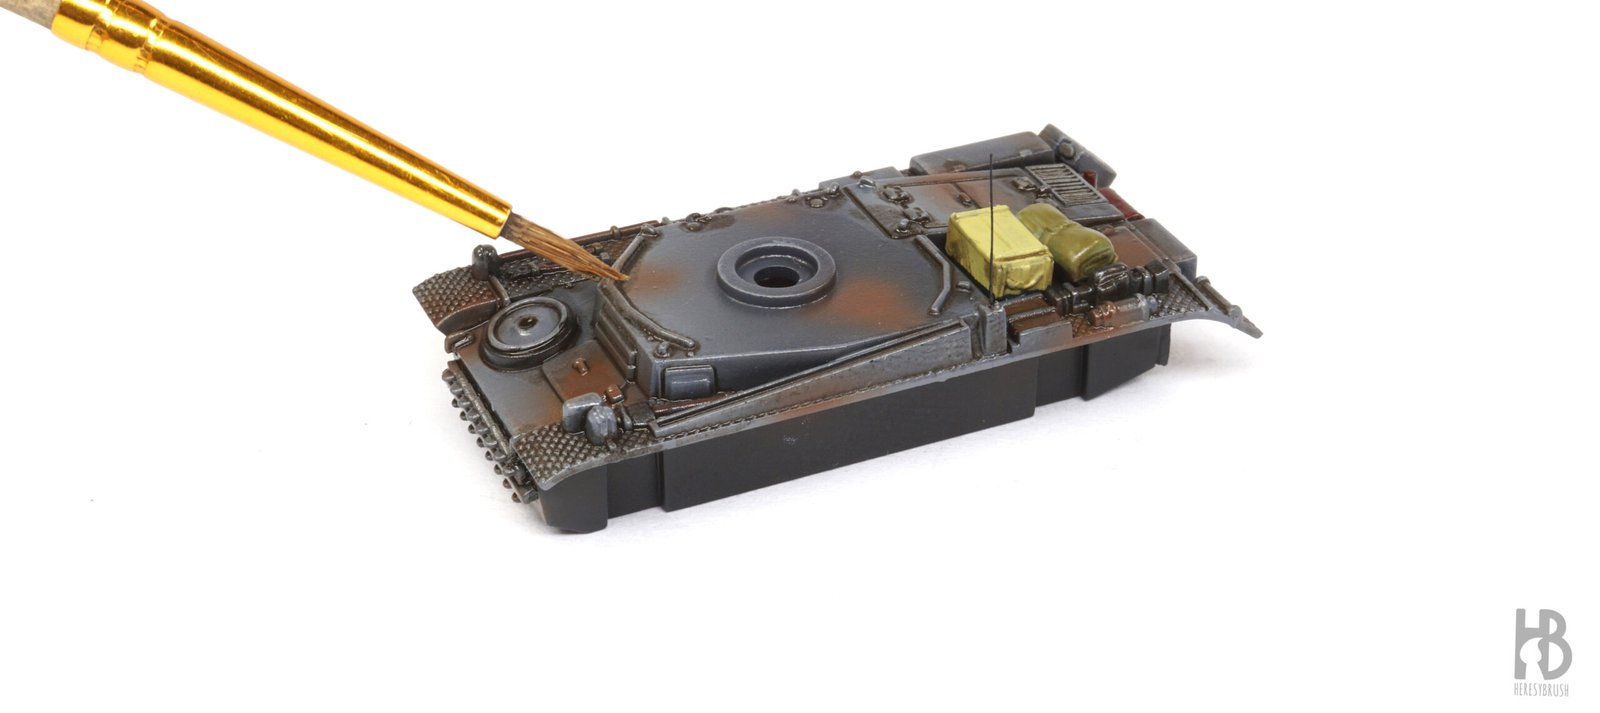
Comenzamos aplicando un lavado oscuro sobre las cajas de madera y las mantas, mezclando Burnt Umber IONIC-0161 con aproximadamente un 50 % de agua. Una vez seco, iluminamos progresivamente mezclando los colores base con un amarillo muy pálido, como Ice Yellow IONIC-0013, aplicando varias capas sucesivas. Los mangos de madera reciben un perfilado con Graveyard Earth IONIC-0148, mientras que en las cajas podemos simular la veta de la madera pintando finas líneas con un tono caqui claro. Para terminar, reforzamos la definición repasando las juntas y recovecos con un marrón oscuro. También podemos enriquecer el aspecto de los tubos de escape añadiendo más tonos de óxido mediante aplicaciones irregulares de Rust IONIC-0156. Por último, recuperamos parte del brillo metálico perdido tras el lavado y el barniz mate aplicando un ligero pincel seco o un perfilado con Burnished Metal IONIC-0819 sobre las cadenas, herramientas y armamento. Este pequeño detalle devuelve contraste y aporta un brillo metálico muy natural.
Paso 16 Óleos
Llegados a este punto, comenzamos a trabajar con pinturas al óleo para refinar todo el proceso anterior. Al igual que los esmaltes, los óleos secan lentamente, lo que nos permite mezclarlos y manipularlos con facilidad. Son ideales para introducir variaciones tonales, reforzar las sombras y suavizar el acabado ligeramente áspero que puede haber dejado el pincel seco.
Dado el color oscuro de estos carros, centraremos el trabajo principalmente en los efectos de polvo, ya que aportan contraste y ayudan a contar una historia (más info aquí). Para ello seleccionamos dos o tres tonos adecuados, como Oilbrusher Dust A.MIG-3516, Dark Mud A.MIG-3508 y Earth A.MIG-3514.
Existen muchas formas de trabajar con óleos, pero una de las más sencillas consiste en diluirlos generosamente con un disolvente orgánico (White Spirit o aguarrás, el mismo que se utiliza con los esmaltes) hasta obtener una mezcla muy fluida. En este caso utilizamos aproximadamente un 50 % de disolvente.
Paso 17 Efectos de polvo con óleos
Aplicamos pequeñas cantidades de óleo en la parte inferior del vehículo y en los recovecos. Podemos dejar que sequen unos minutos o acelerar el proceso con un secador de pelo. Si es necesario, repetimos la operación varias veces para ir construyendo el efecto de forma gradual. Después, con un pincel ligeramente humedecido con disolvente, difuminamos la pintura para crear transiciones suaves que simulen la acumulación natural de polvo. Este paso ayuda a integrar todos los efectos anteriores y aporta un mayor grado de realismo, manteniendo al mismo tiempo un proceso rápido y eficiente.
Paso 18 Evaluación
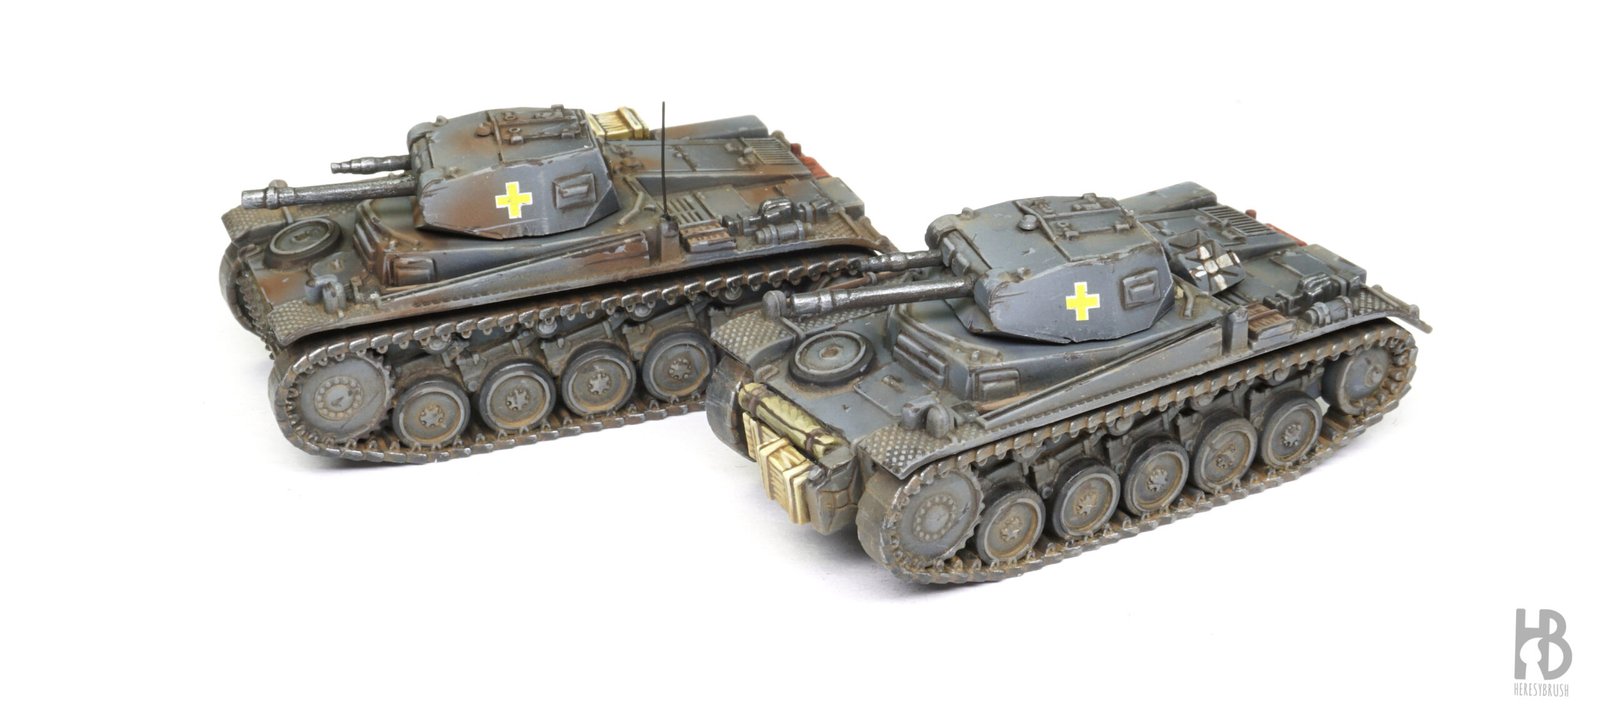
Dejamos secar completamente los óleos durante toda la noche y, al día siguiente, evaluamos el resultado con calma. Si es necesario, todavía podemos seguir trabajando en algunas zonas o reactivar los óleos con disolvente para perfeccionar el acabado. Los efectos de polvo deben ser siempre sutiles. Es preferible quedarse corto que excederse. Además, no debemos limitarlos únicamente al tren de rodaje: una ligera acumulación sobre las superficies horizontales y en los recovecos hará que el vehículo resulte mucho más creíble.
 Y pronto, más Early War: