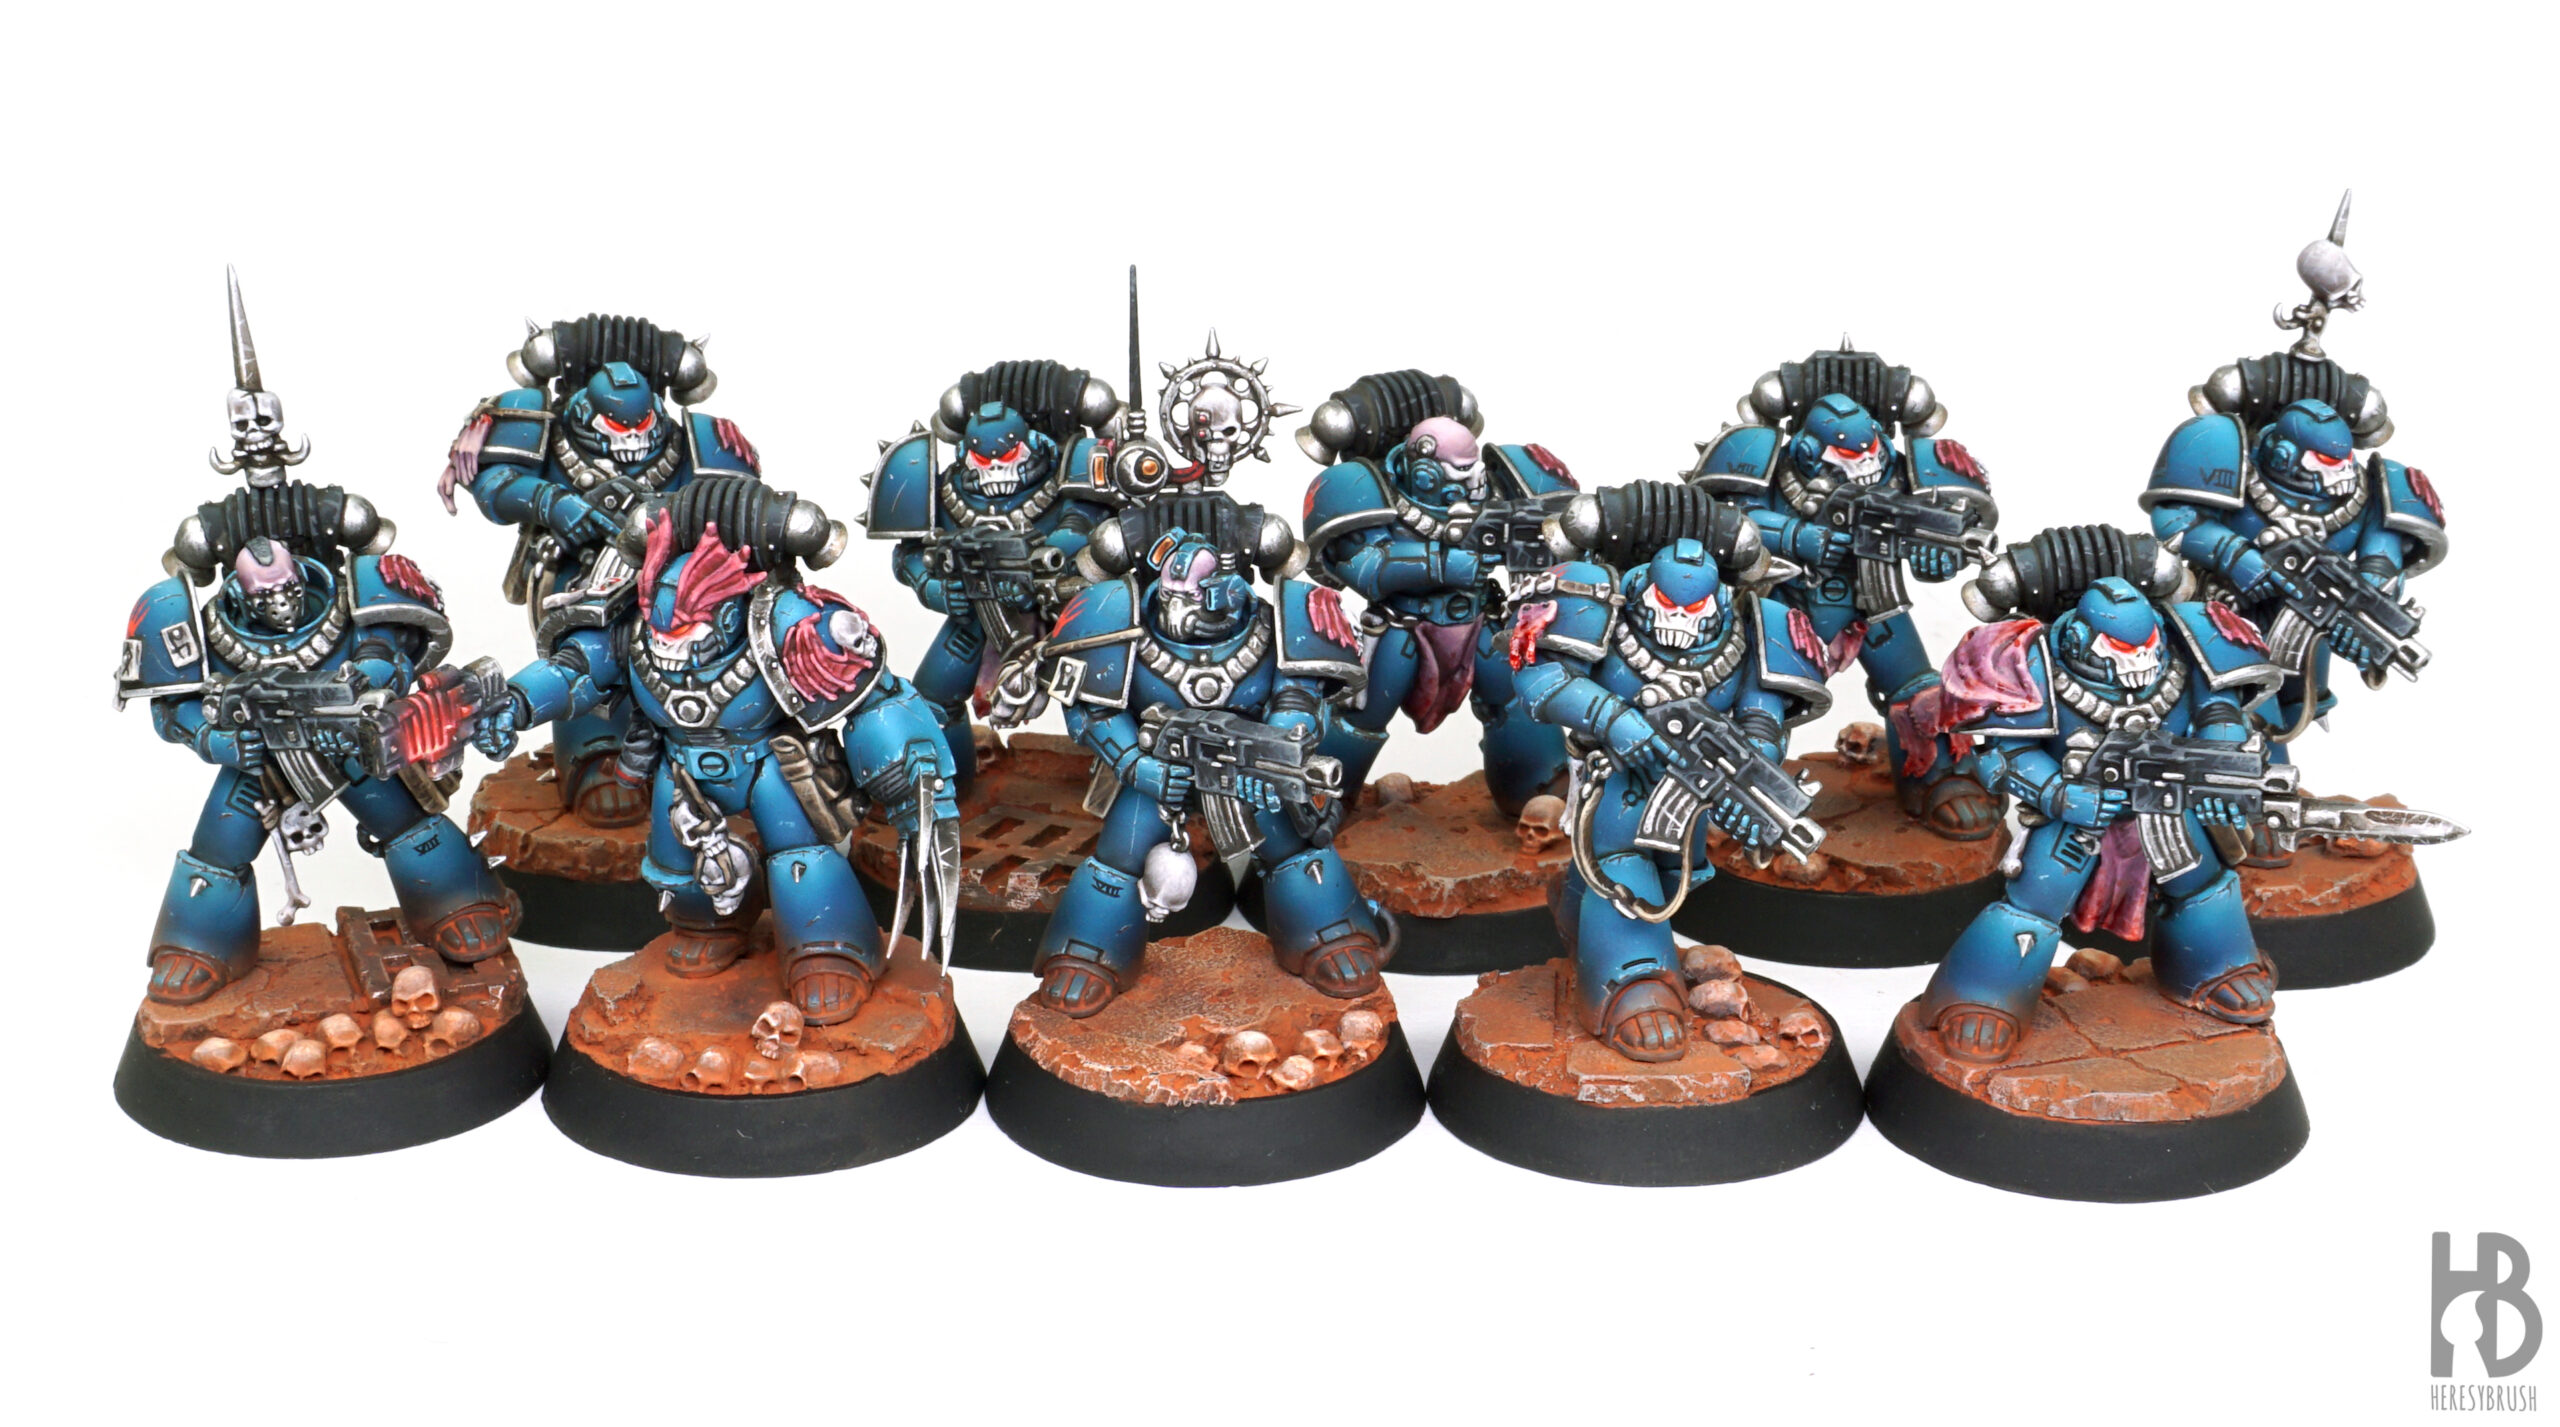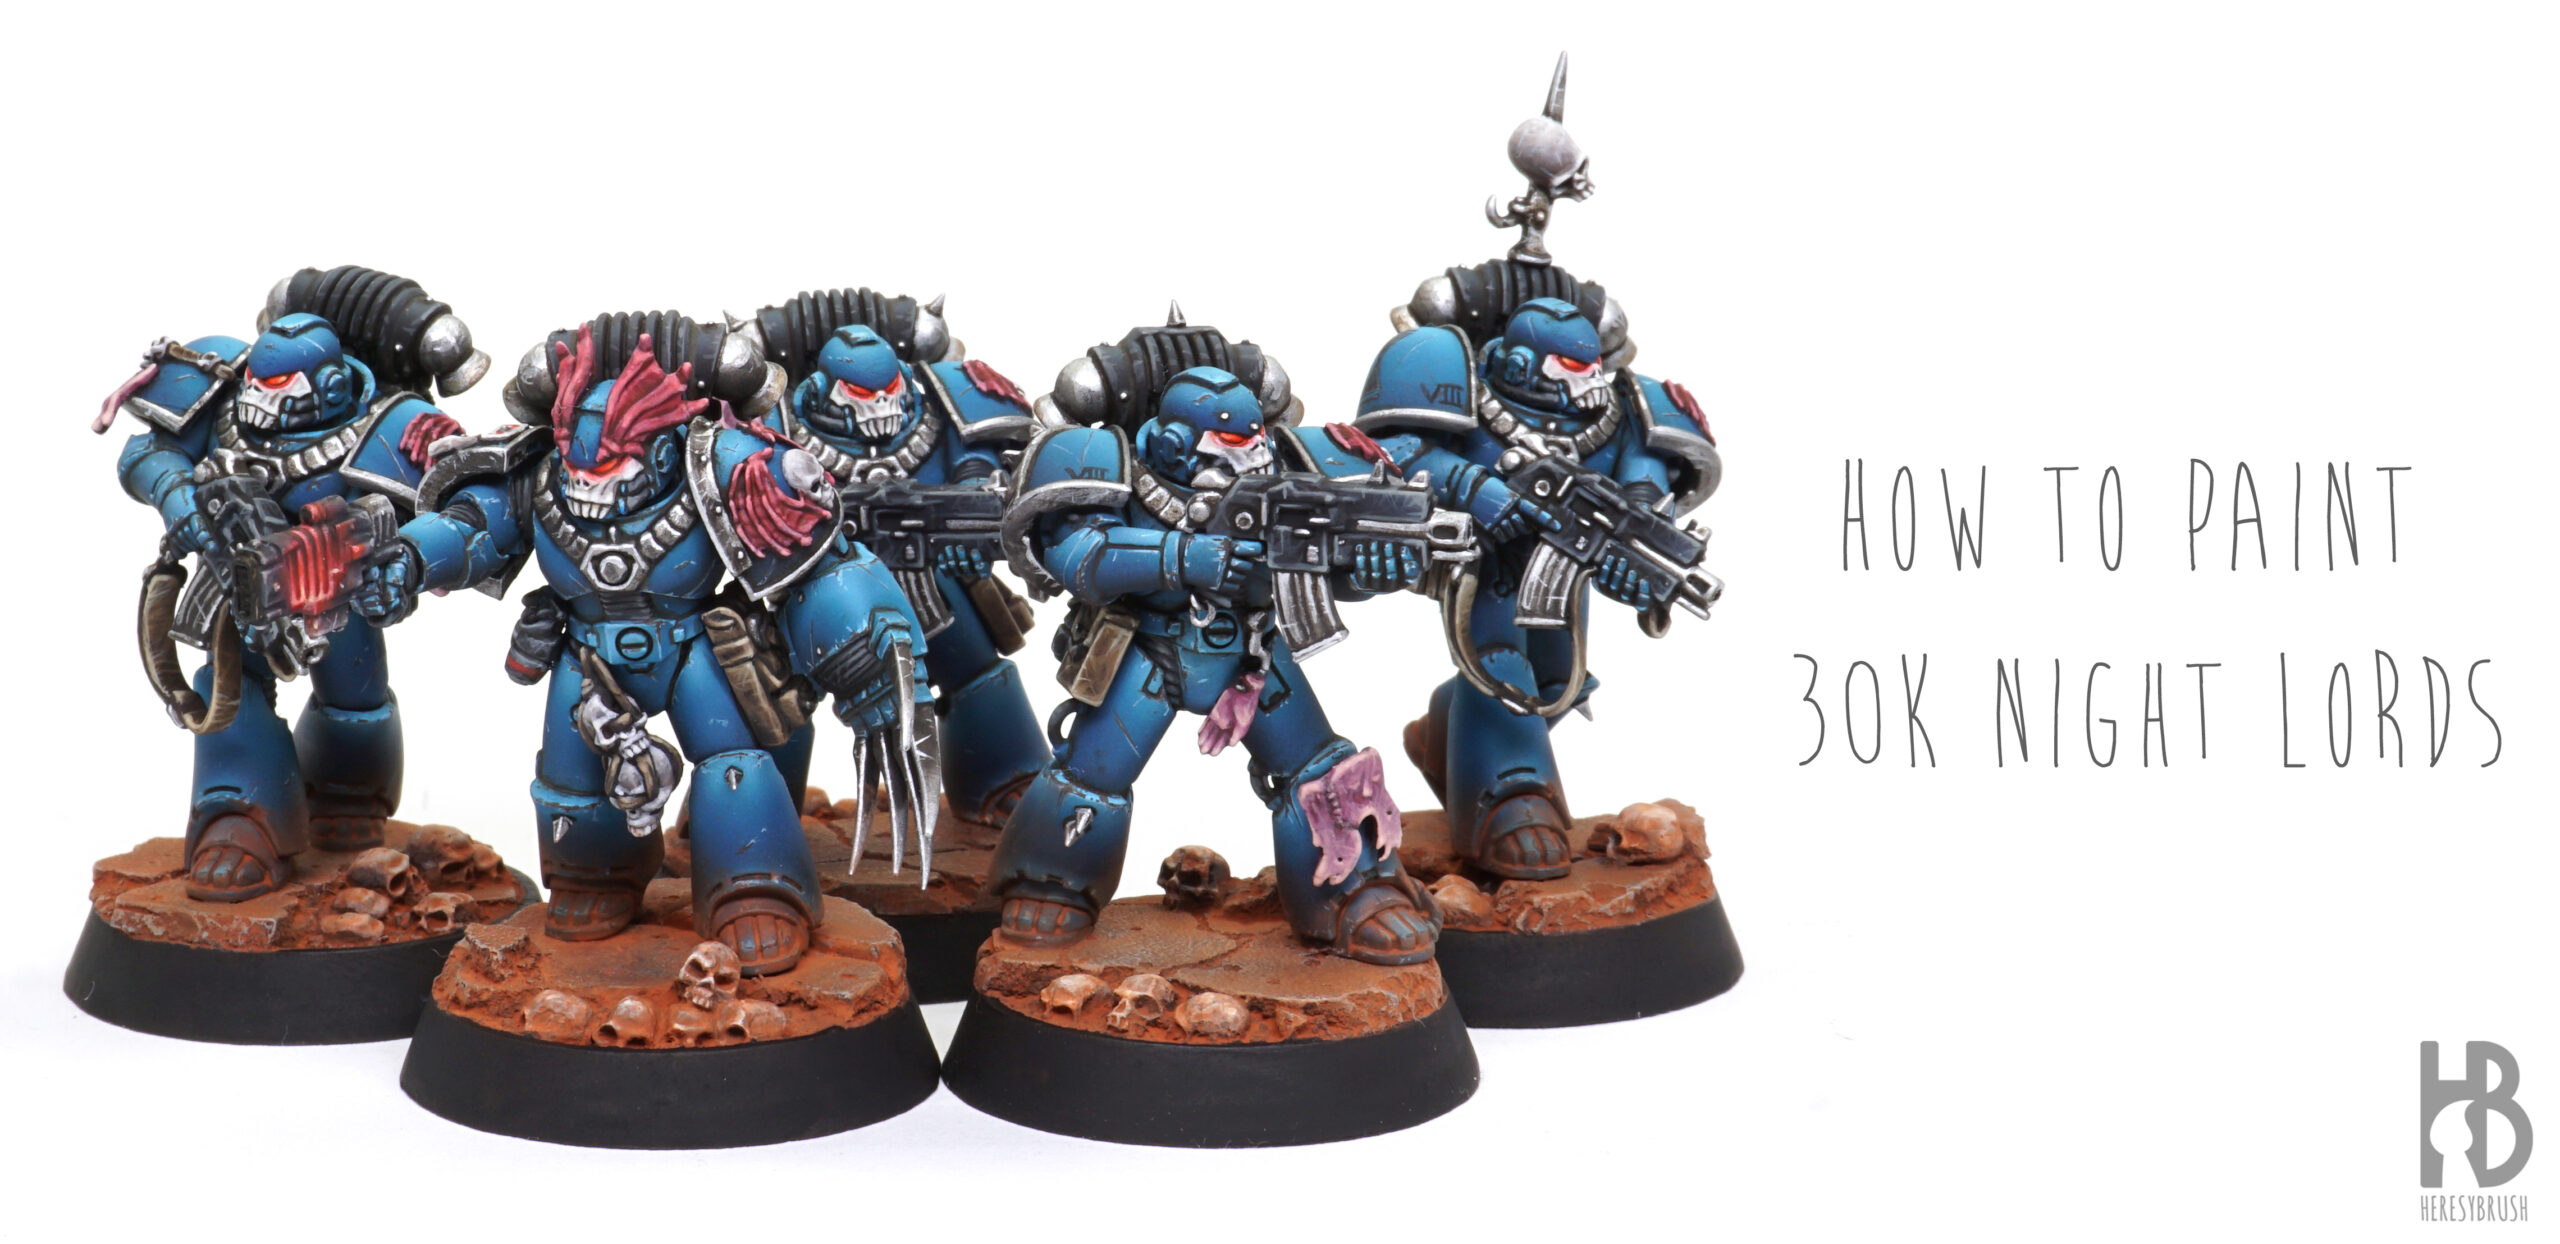
After several years of wanting to start painting a Horus Heresy Legion army, I finally had the chance to do it. I chose the Night Lords, a Legion that is perhaps a bit underrepresented compared to others but features a beautiful color scheme and rich lore. I finished painting the first squad and decided to write a tutorial using the last miniature. Instead of the official painting scheme, which is very dark blue often with lightning on the armor, I opted for a desaturated and slightly greenish blue inspired by some great painters such as @loyalistareboring and @Maybug_Games on Instagram. I used some 3D printed bits featuring the Night Lords symbology from @dms_miniatures and resin bases from Dragon Forge Design (Necrose-XIII).
To paint Space Marines, I followed the same procedures and techniques I typically use for painting tanks, since their ceramite armor resembles actual tank armor plating. In this process, I highlighted the recesses using an enamel wash, as I usually do for tanks, and then created chipping effects accordingly. For this, I used AMMO acrylics (ATOM and IONIC) and enamels.
Step 1 – Dark blue armor
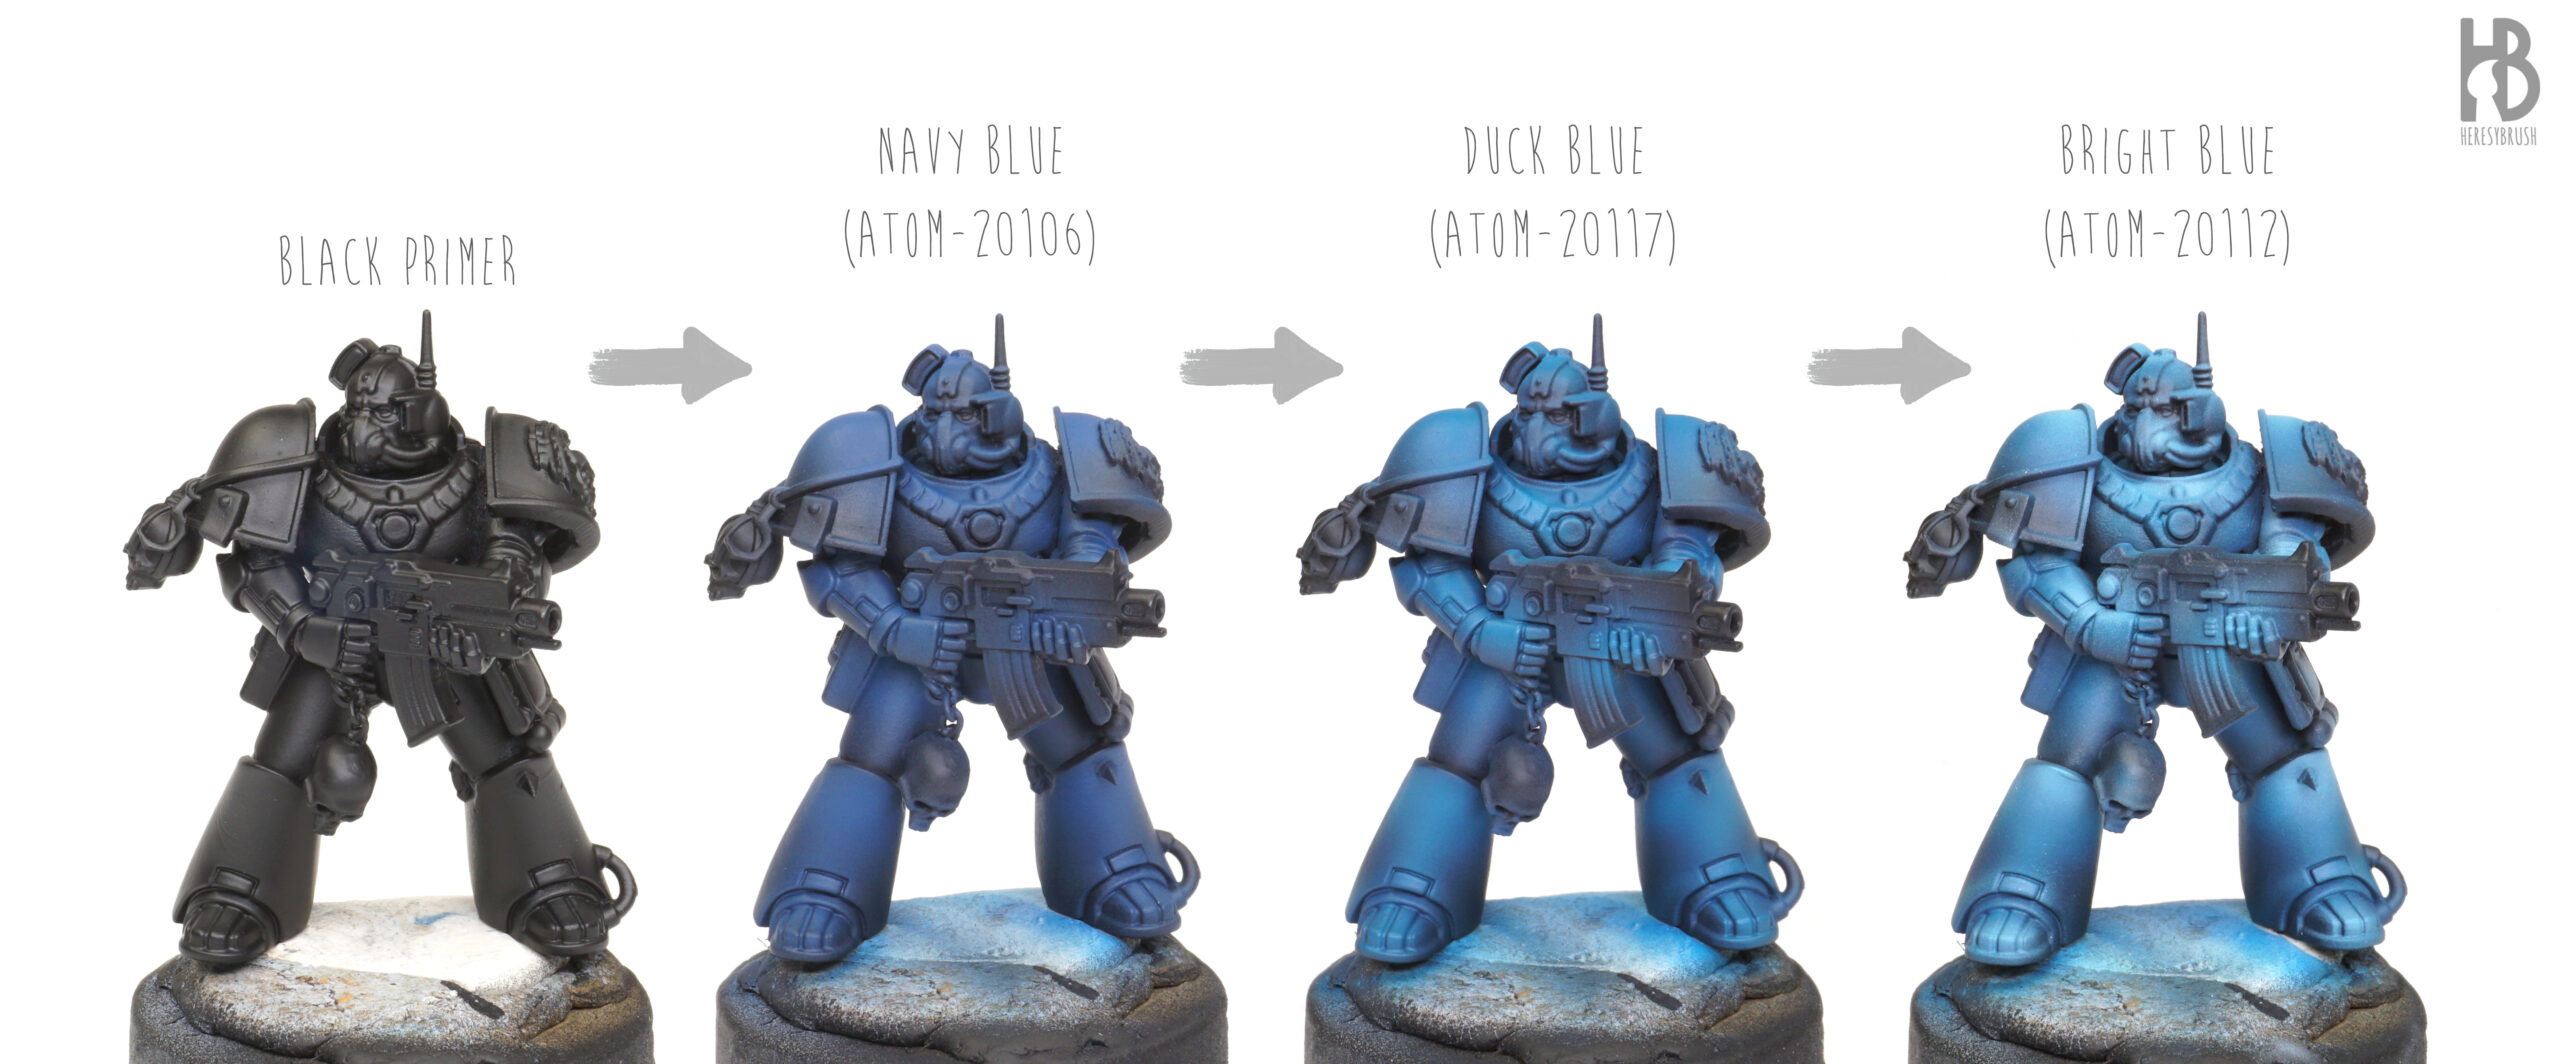
Starting with a black undercoat applied via spray, we begin building the blue hues using an airbrush. First, we apply a dark blue, such as Navy Blue ATOM-20106, diluted with 30% acrylic thinner. Instead of covering the entire armor again, we start creating highlights. I followed a zenithal lighting approach, aiming to place the lighter parts on the upper areas of each element of the miniature. We keep the black in the lower or darker areas.
Next, we move to the second highlight, a greenish blue like Duck Blue ATOM-20117. We repeat the same highlighting pattern but reduce the painting area. Finally, we apply the final highlights with a desaturated blue, such as Bright Blue ATOM-20112. This is applied to a very small area to create a strong contrast. By the end, we achieve a range of colors from pure black to bright blue.
It is crucial to always reduce the painted area with each new layer. Additionally, we increase the amount of thinner from 30% to 50% for the last two highlights, allowing for more control using semi-transparent layers of paint.
Step 2 – Blocking colors
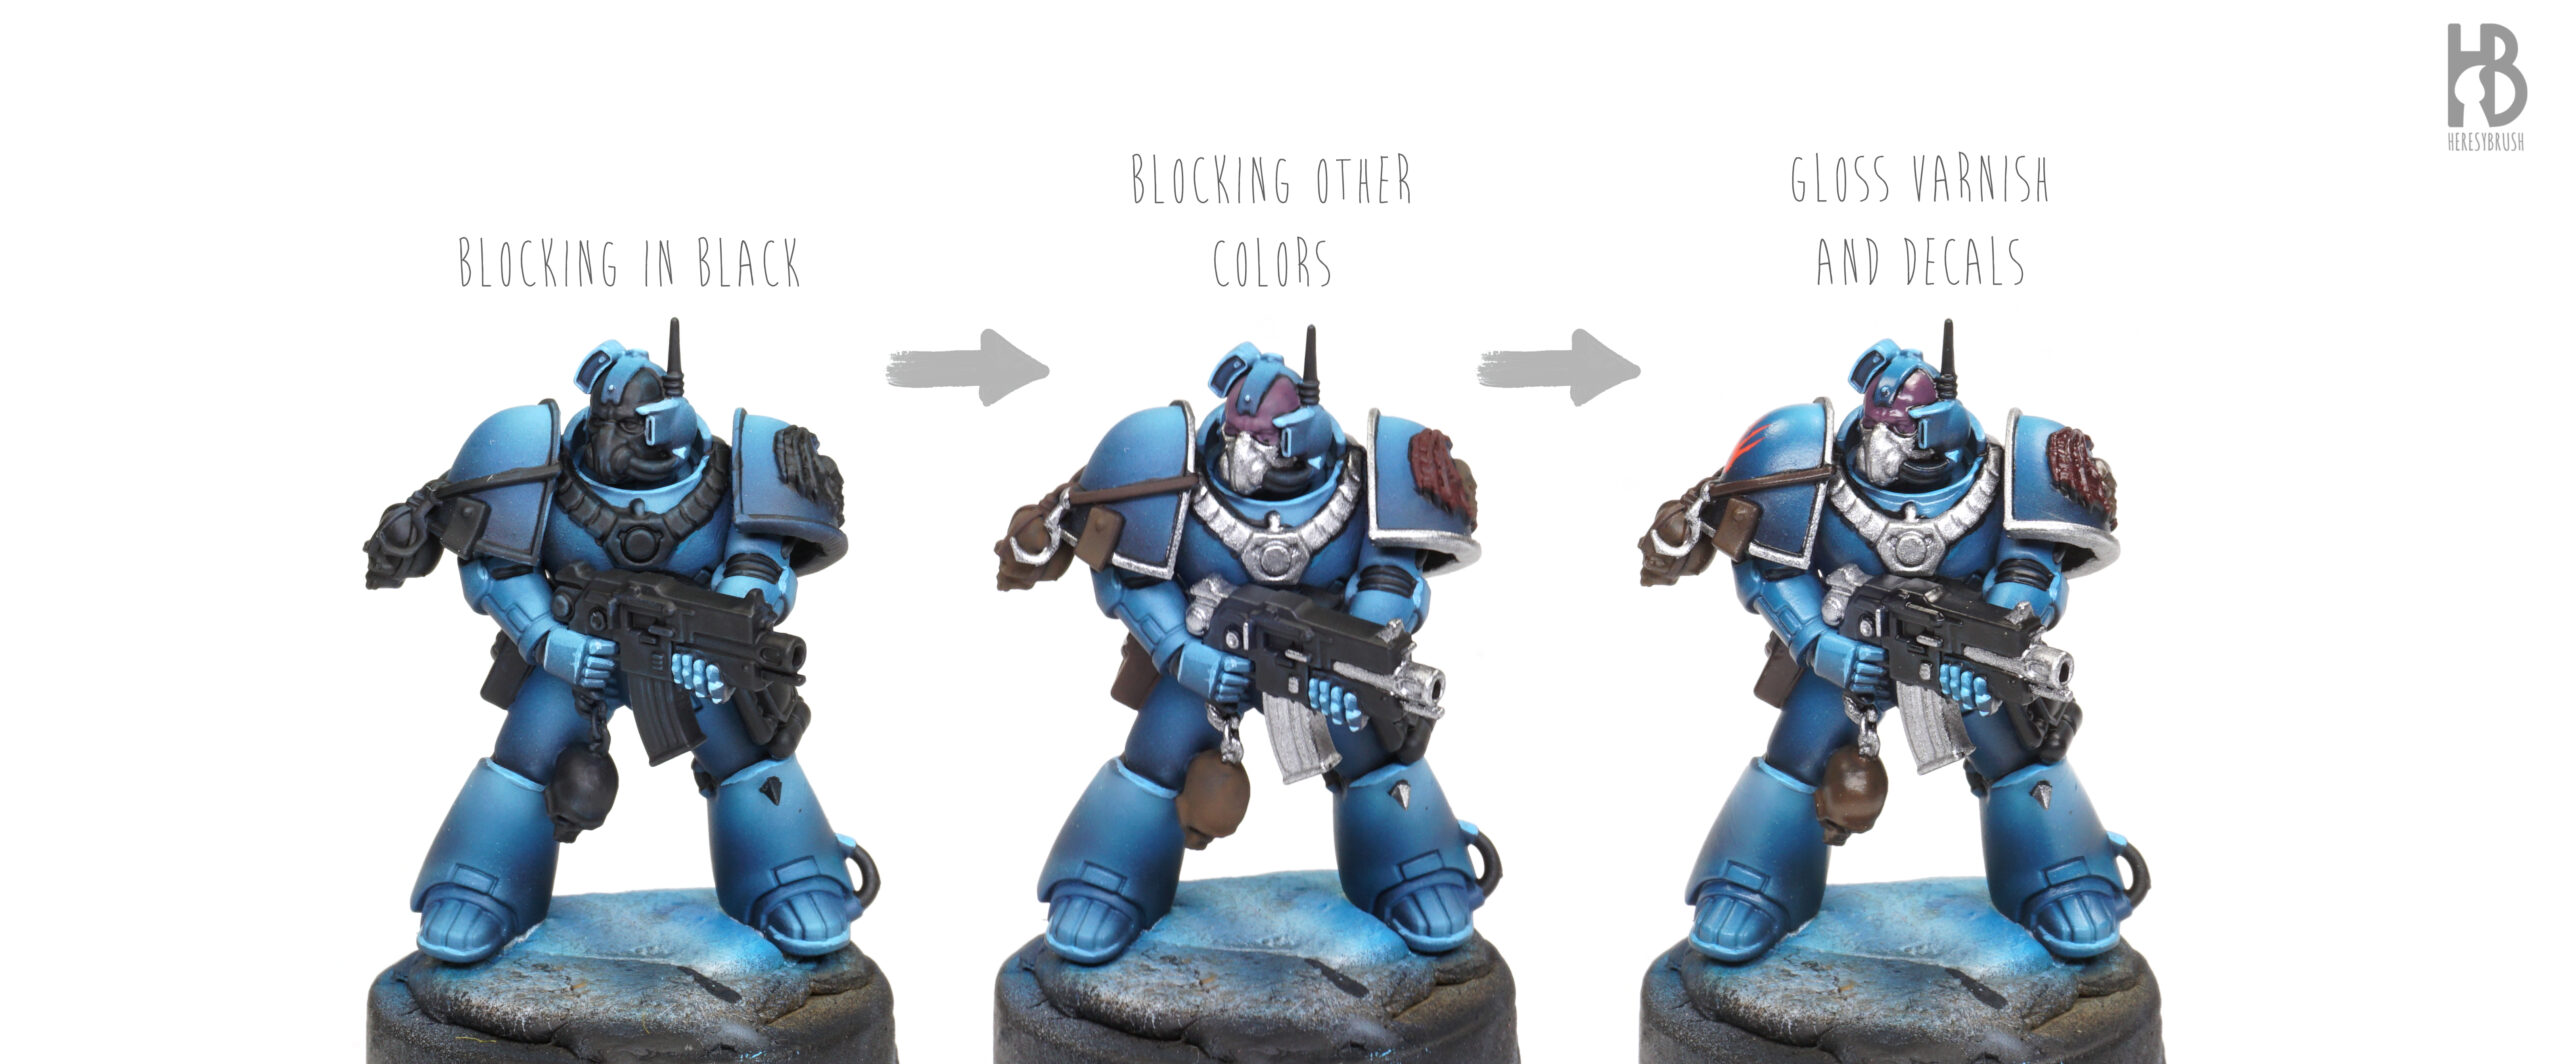
We block in all the other elements of the miniature with pure black using a thin brush. This helps to clearly distinguish all parts of the miniature. If we paint accidentally the armor with black, we can fix it using bright blue, which we will also use later for the chipping effects.
Next, we paint the base color of each material. For the metal parts, we use Steel IONIC-0174, and for the skulls and bones, we use Burnt Umber IONIC-0161. For the wings of the Night Lord heraldry, we use Dark Red IONIC-0058. Adding a bit of skin tone, such as Dwarf Skin IONIC-0032 to this color will provide a perfect base for the Nostramo skin tone.
Finally, we apply decals and seal the entire miniature with glossy varnish. This will facilitate the next step—the application of the wash—since the polished surface will allow the paint to slide easily.
Step 3 – Dark wash
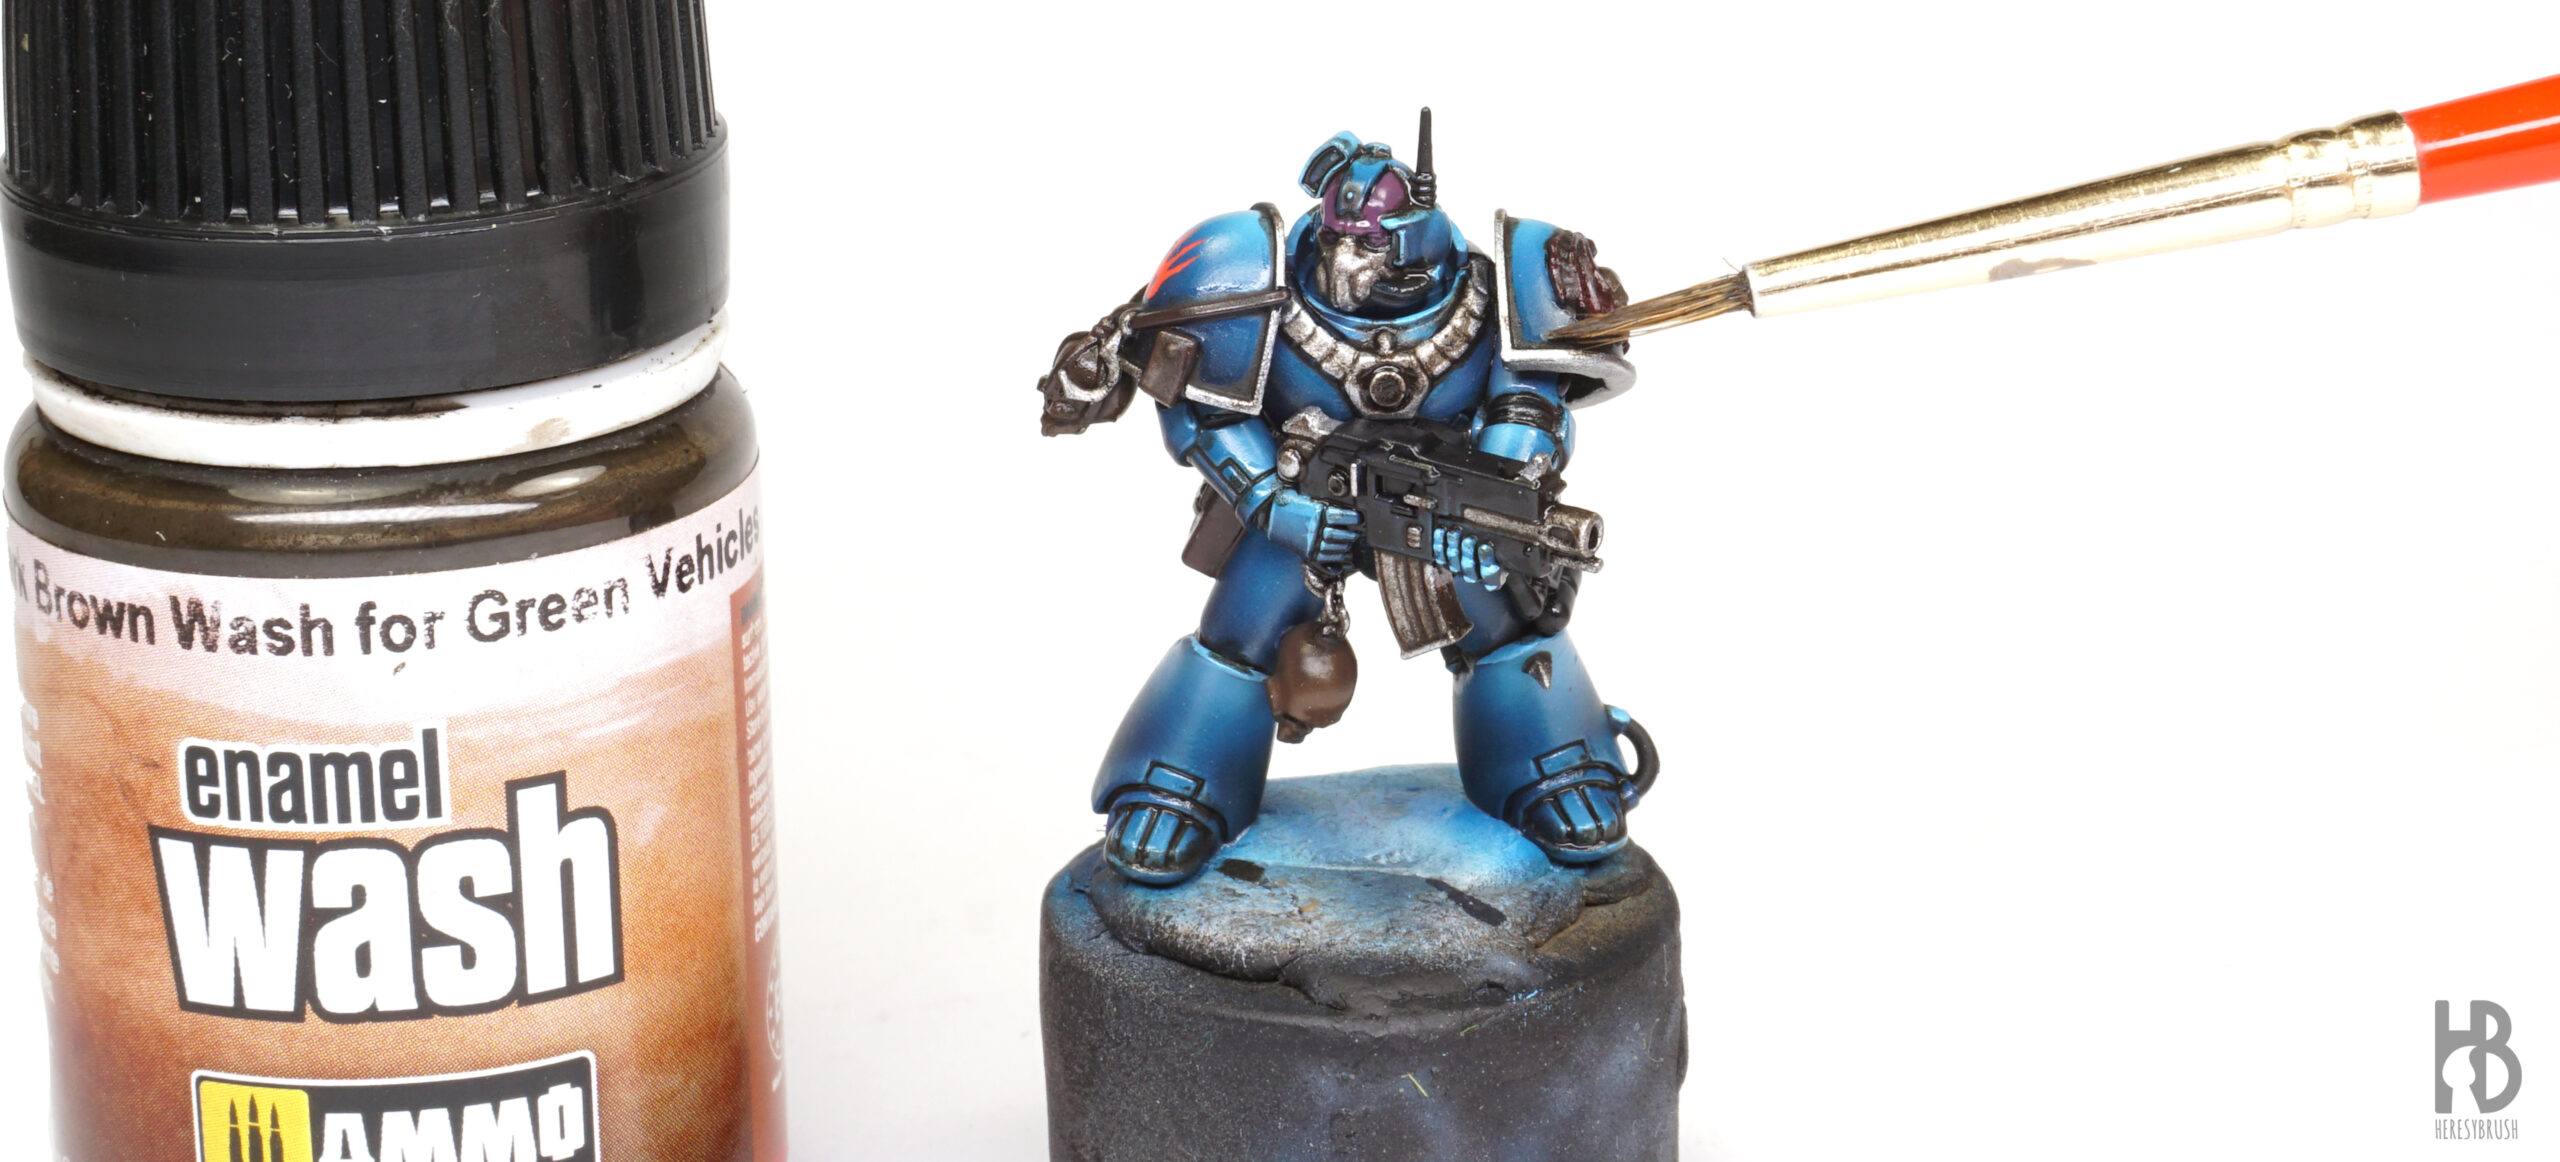
To highlight all the recesses, we apply a dark enamel wash, such as Dark Brown for Green Vehicles A.MIG-1005. We have discussed before the advantages of enamel washes over acrylic ones when painting vehicles (or armor, in this case). We apply a pin wash only on the recesses, avoiding covering everything to prevent unnecessary darkening.
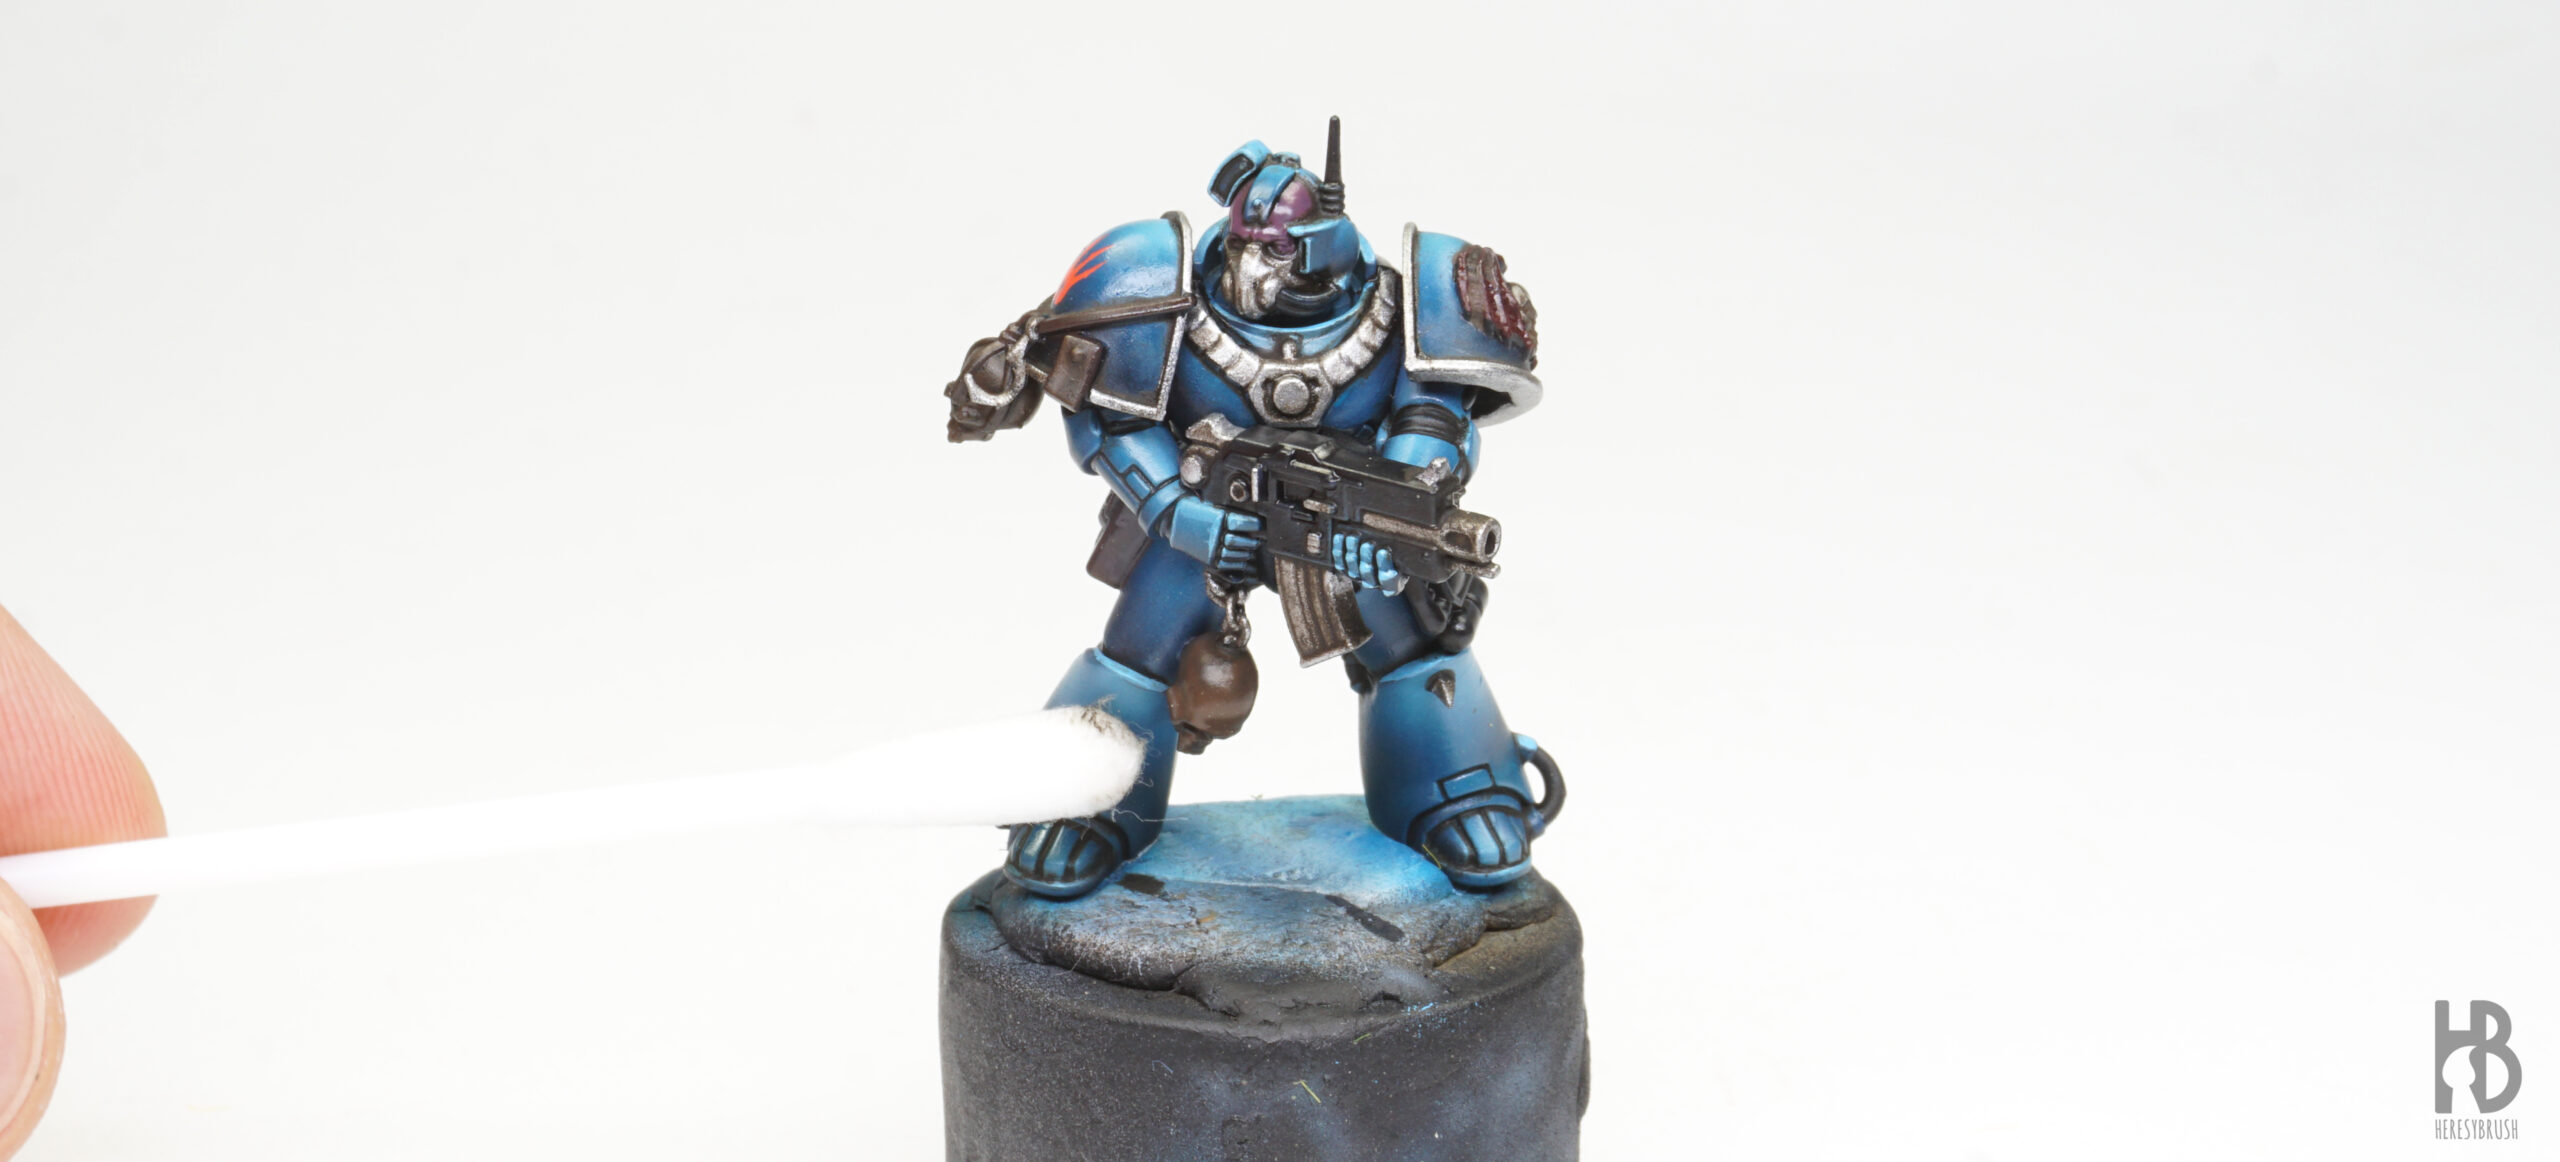
After waiting for 30 minutes, we remove the excess wash using a brush or cotton swab moistened with odorless enamel thinner. We do this carefully to prevent removing the wash from inside the recesses.
Step 4 – Chipping effects
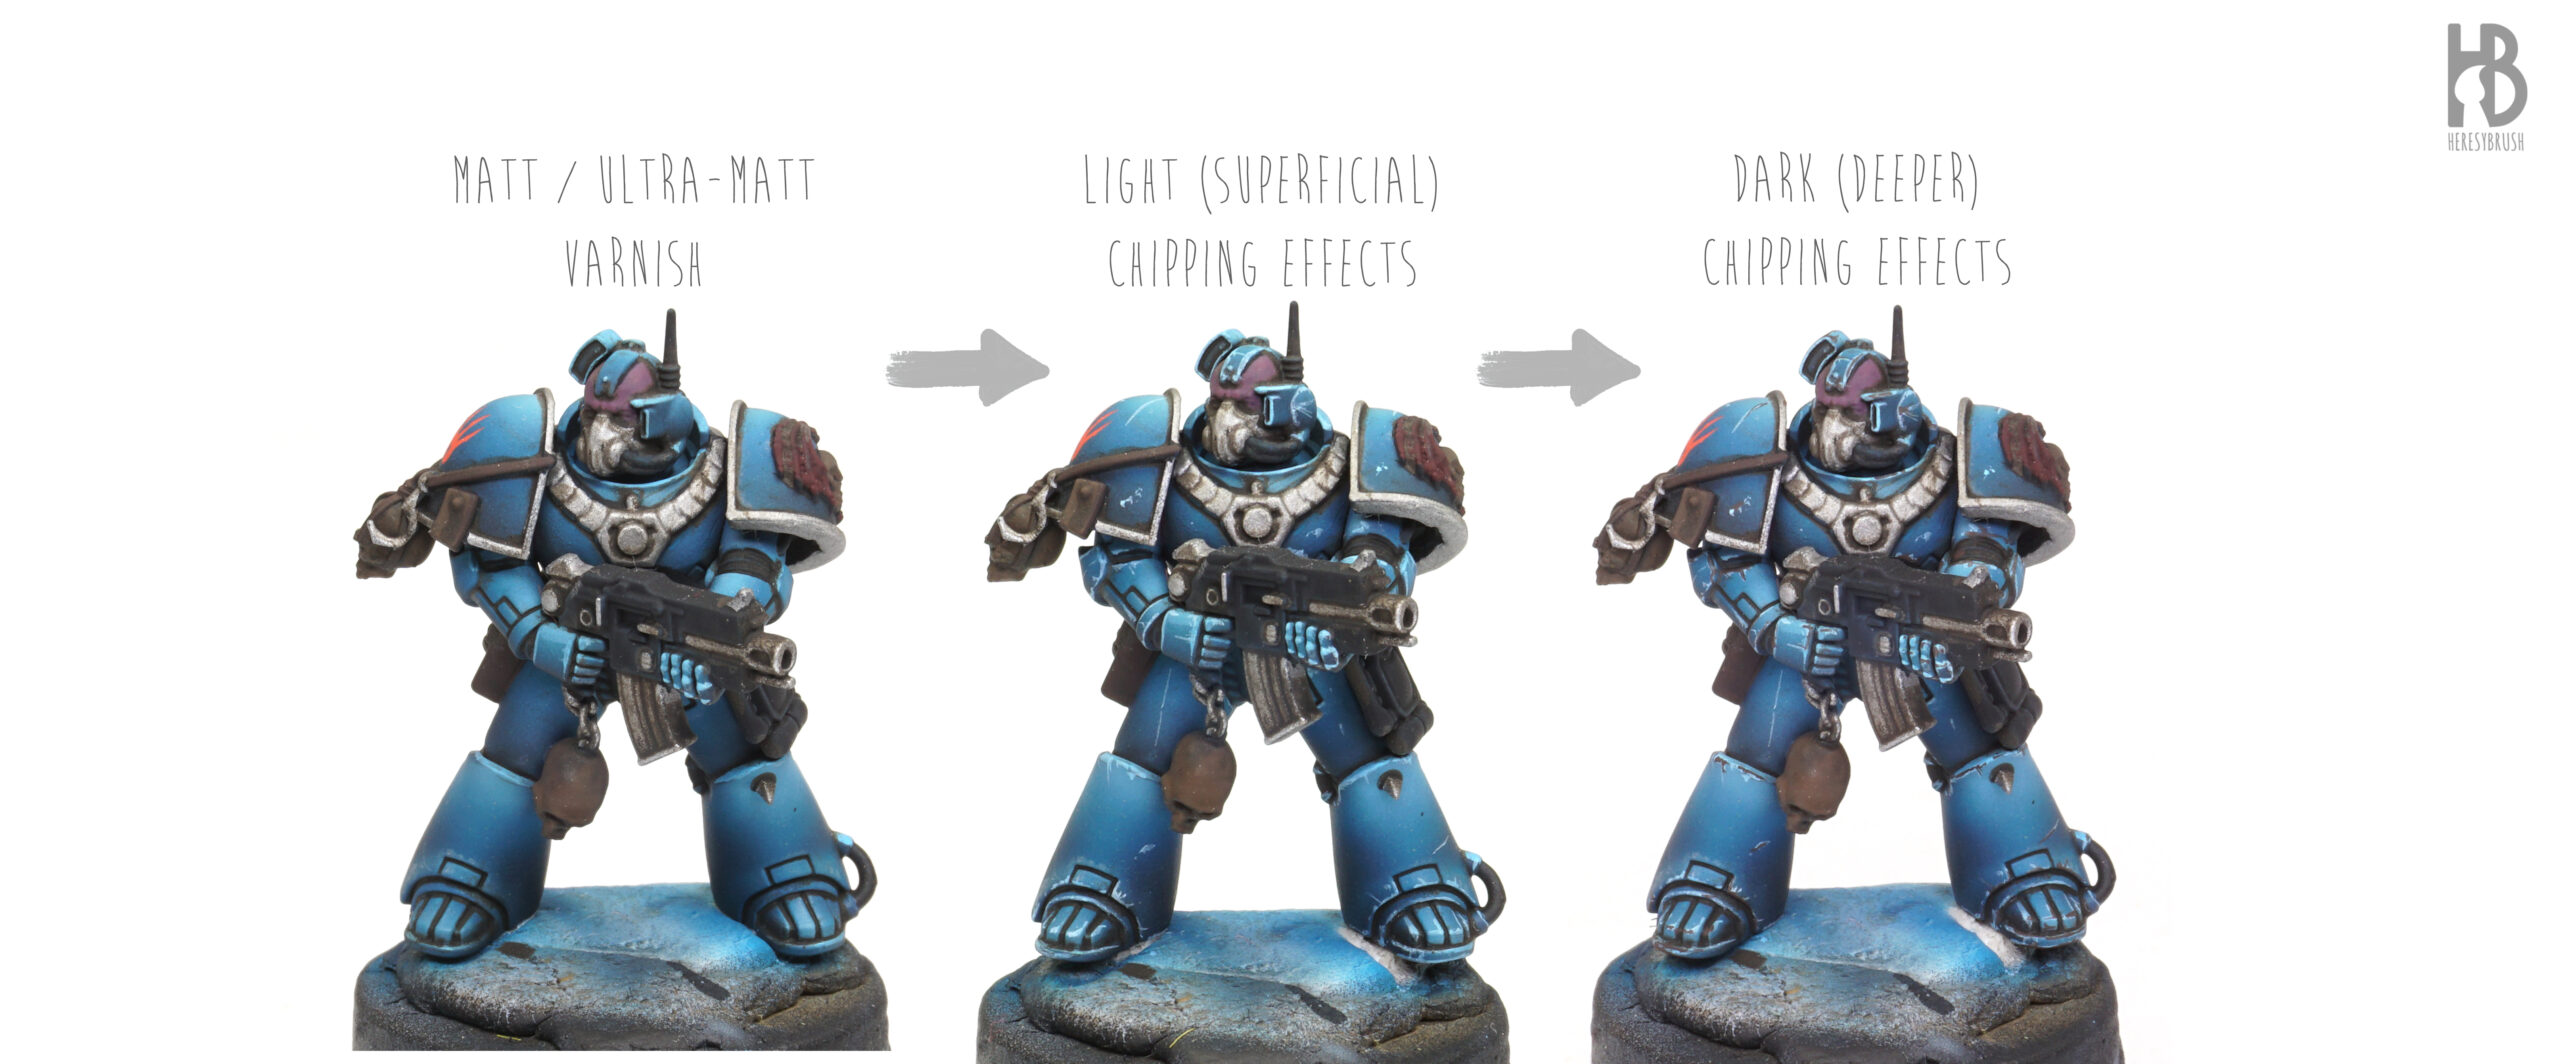
After waiting for another 30 minutes, we can eliminate the glossy effect by airbrushing with matte or ultra-matte varnish. Apply a couple of layers to achieve even coverage.
To create the chipping effects, we use two different colors to add depth and a sense of time. The lighter color will resemble superficial chipping and scratches, while the darker color will simulate deeper impacts. We begin with the light chipping effects using the lighter blue we used previously, Bright Blue. We paint small dots and thin lines here and there, mainly focusing on the edges of the armor. On the edges, we aim to break the lines using dots rather than creating a continuous edge highlight.
Next, we move to the dark chipping effects. For this, we can use a dark brown such as Black Brown IONIC-0160. We apply this color as before, placing it inside or close to the light chipping effects. We leave some chipping effects in just the light blue to add variation.
Step 5 – Gear
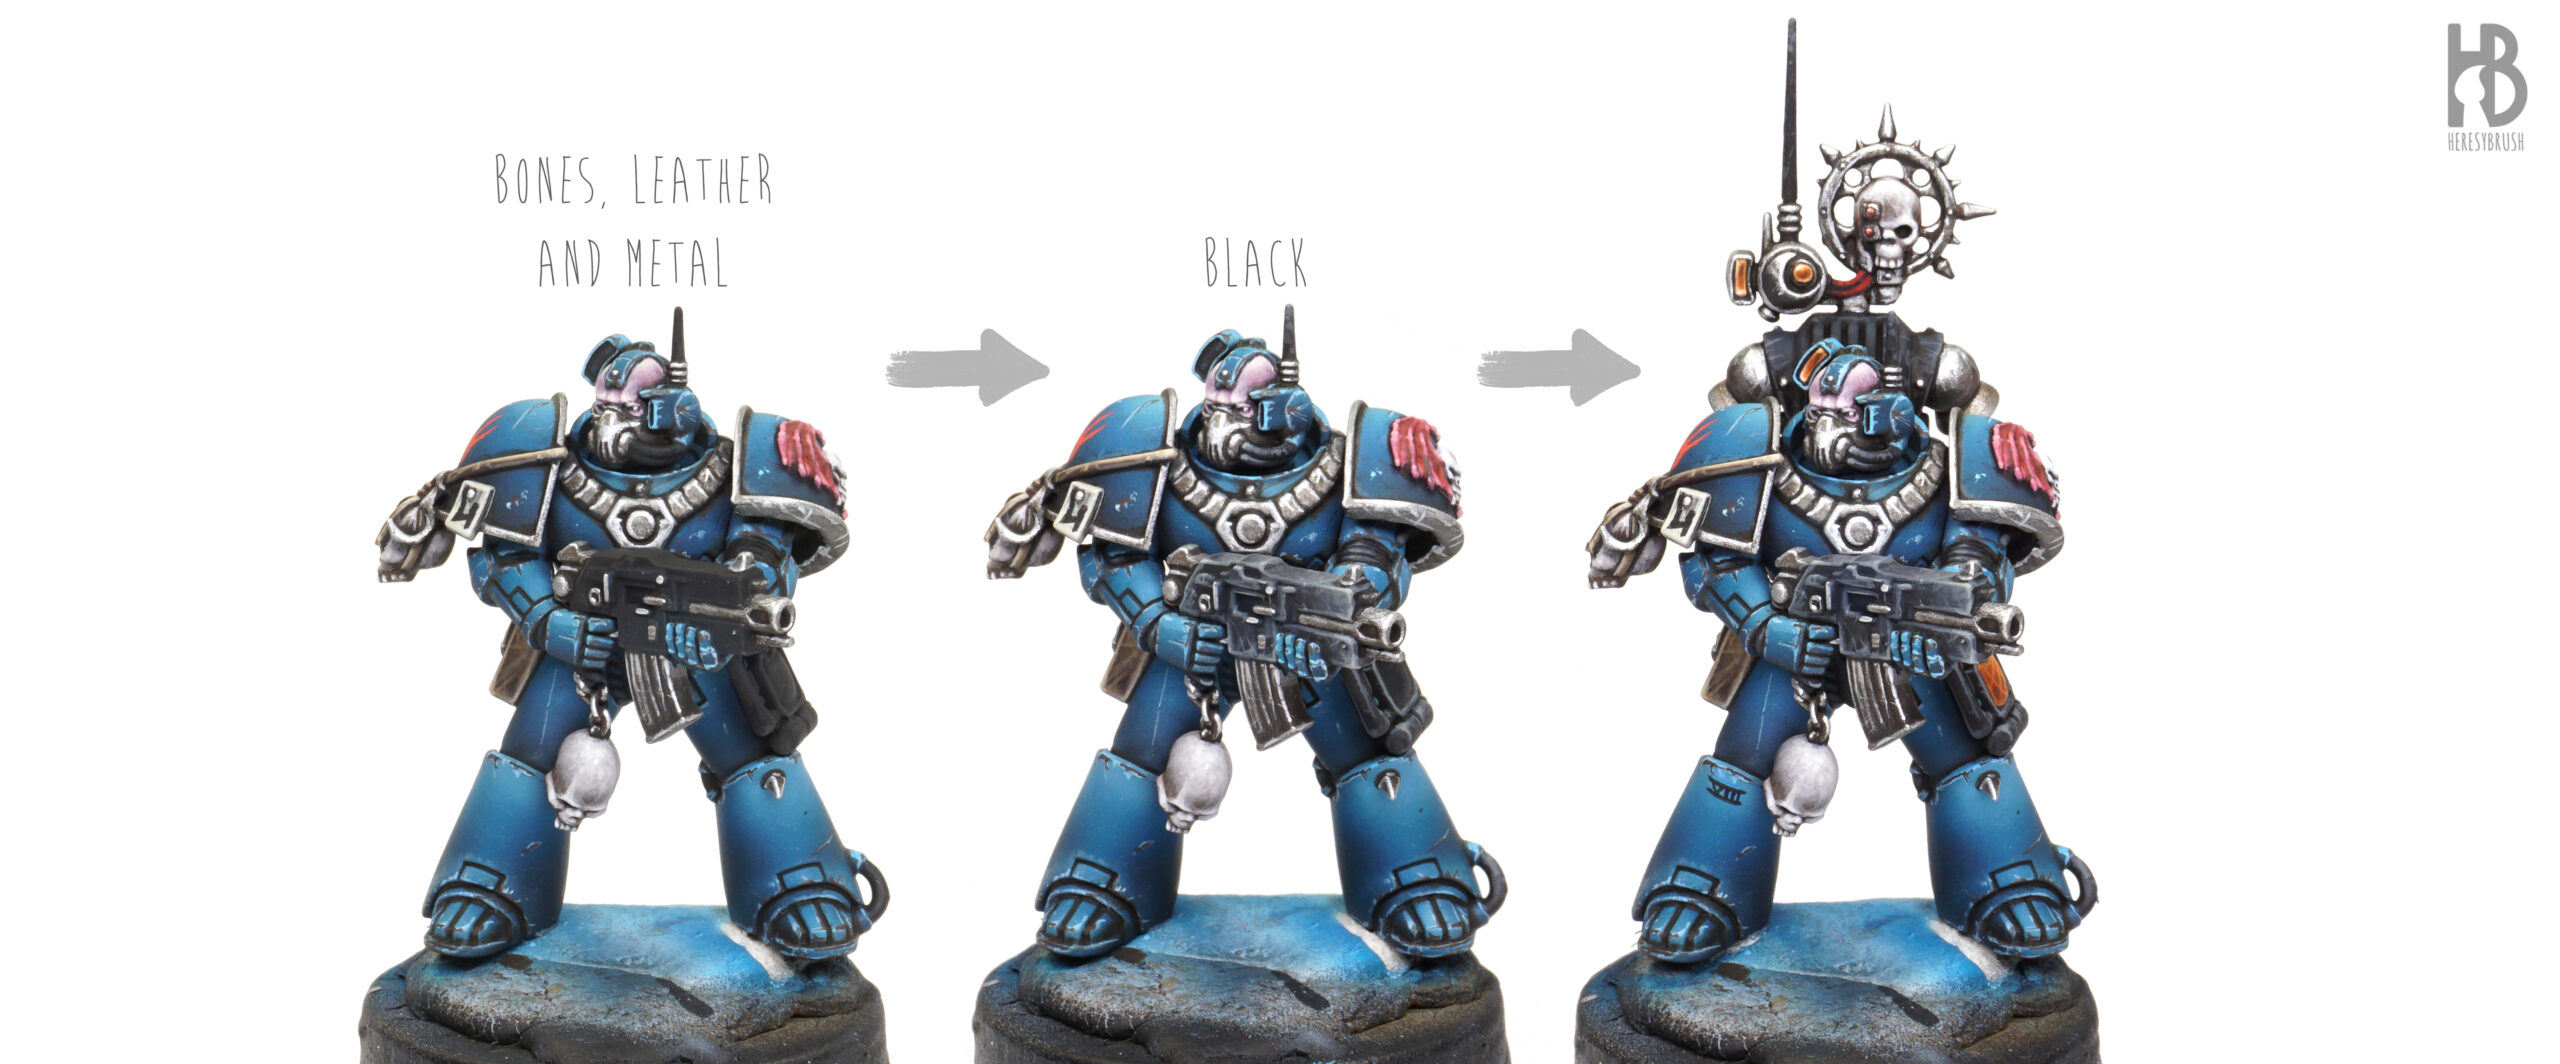
Once the armor is ready, we move on to painting the equipment and accessories of the miniature. We have previously explained how to paint metal, leather and bone. For these materials, we create texture using dots and thin lines, which can be refined and cleaned up with glazes.
To paint the black parts, including the bolter, backpack, and soft parts of the armor, we mix black with increasing amounts of Vanilla IONIC-0012, a very light yellow or cream color. We apply several highlights, reducing the painted area with each new layer. For larger surfaces, such as the bolter, we also add texture by painting scratches and use glazes to create more defined highlights, leading them toward the end of the bolter.
To paint the wings of the heraldry, we initially add more red to the initial mix and then start adding small bits of skin tone to create a desaturated red. We focus on the upper parts and reliefs of the wings.
For the skin, we mix the base skin tone with increasing amounts of pink to create a pale skin tone. We can use glazes with magenta and violet to add tone to the lower parts of the skin.
Finally, we paint the lenses using a palette of orange. We start with a dark reddish brown, such as Dark Red IONIC-0058, and then continue with Light Orange IONIC-0046. We mix orange with increasing amounts of Golden Yellow IONIC-0021 until we use this color directly, then mix it with a bit of white. We place the maximum highlight in the upper part of the lens and also apply an edge highlight at the bottom.
Step 6 – Base
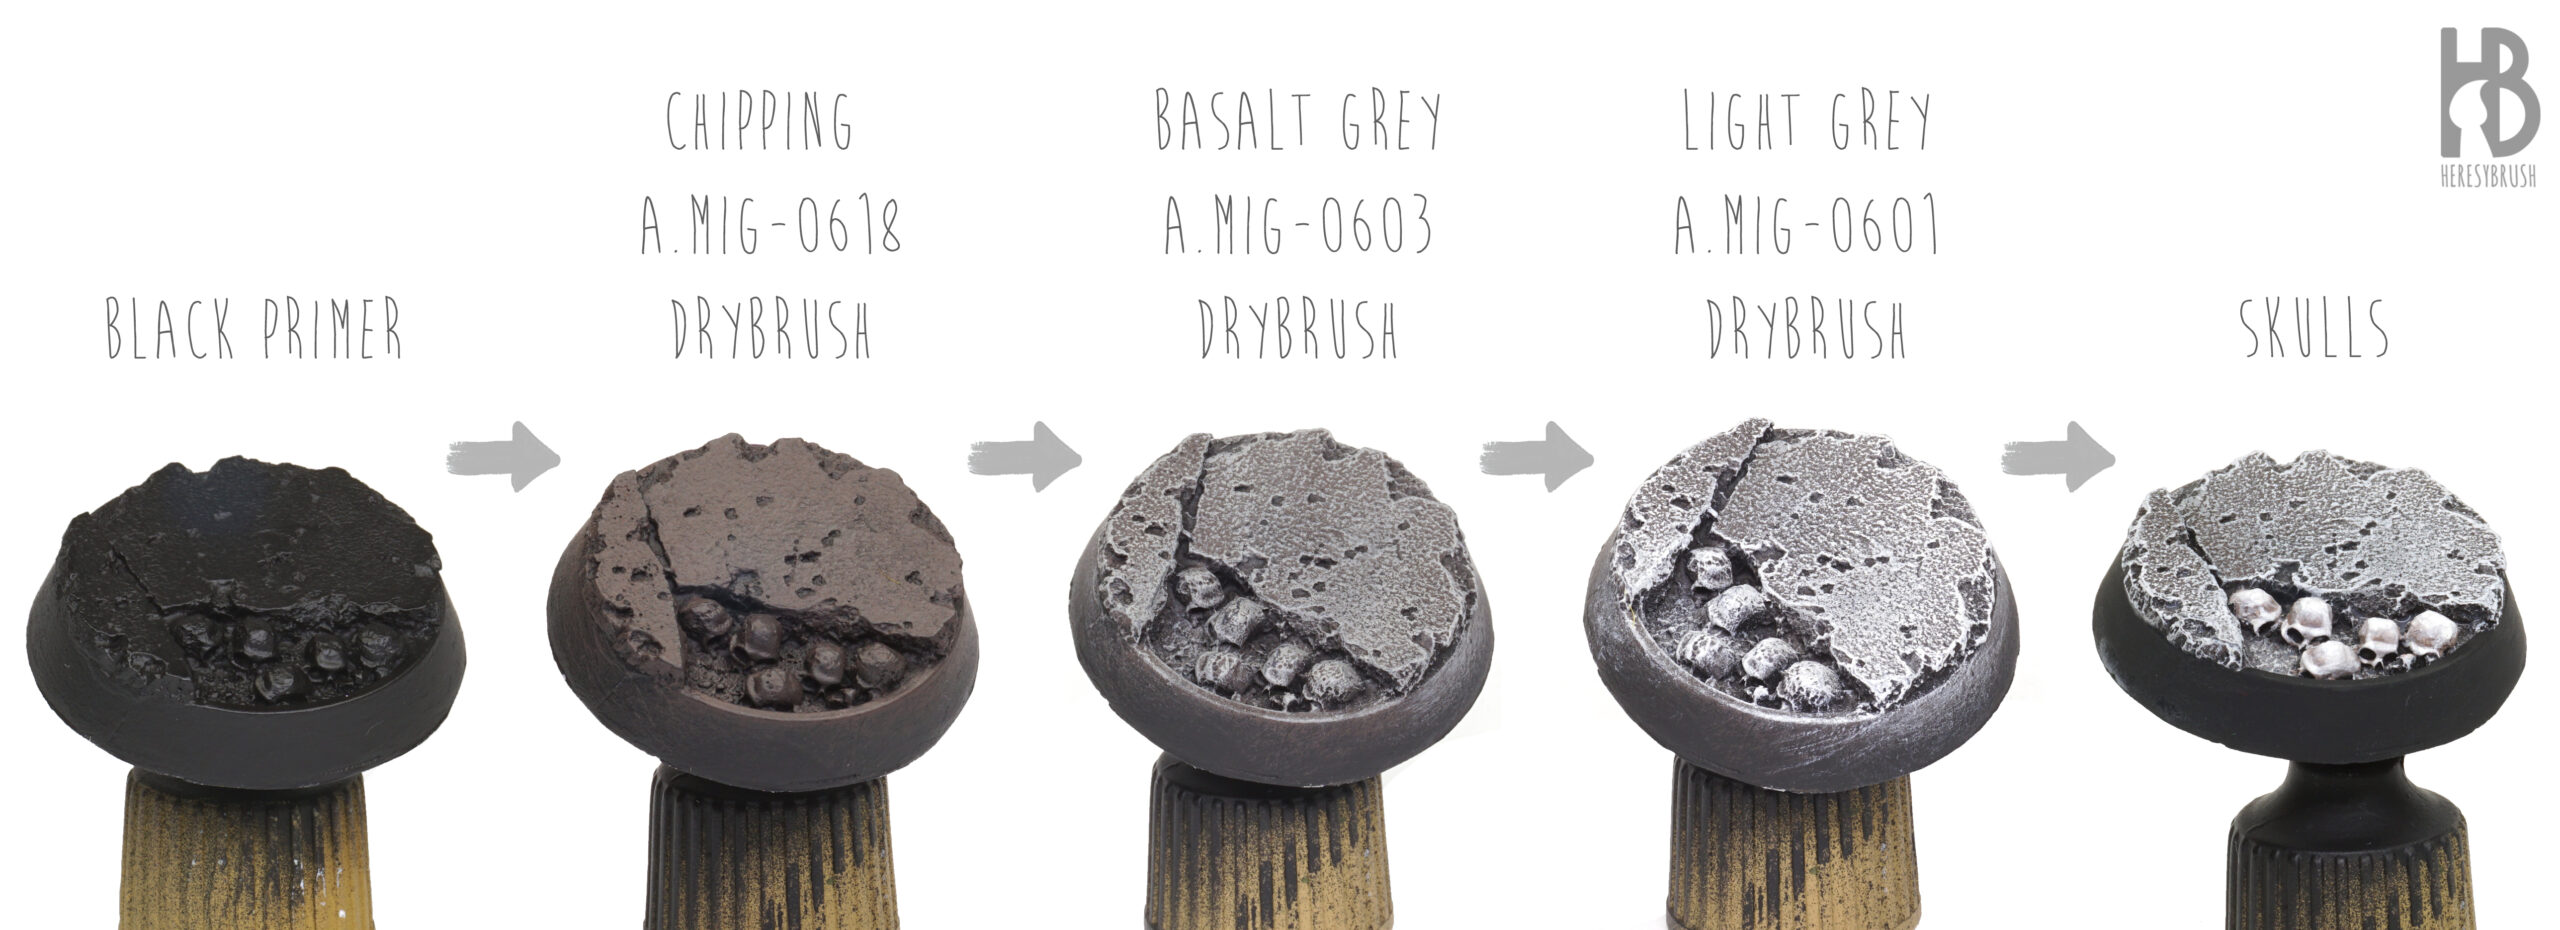
The easiest way to have a nice looking texture is to buy some textured resin bases, as these from Dragon Forge Design (Necrose-XIII). The idea is to add some pigments later, but first, we need to add some color to the stone. For this, we will use the classic dry-brush technique. Starting with a dark brown, we move to a medium grey and then a very light grey. Finally, we paint the skulls as we did on the accessories of the miniature and paint the ribbon in black. Once it is ready, we can fix the painted miniature using a bit of instant glue.
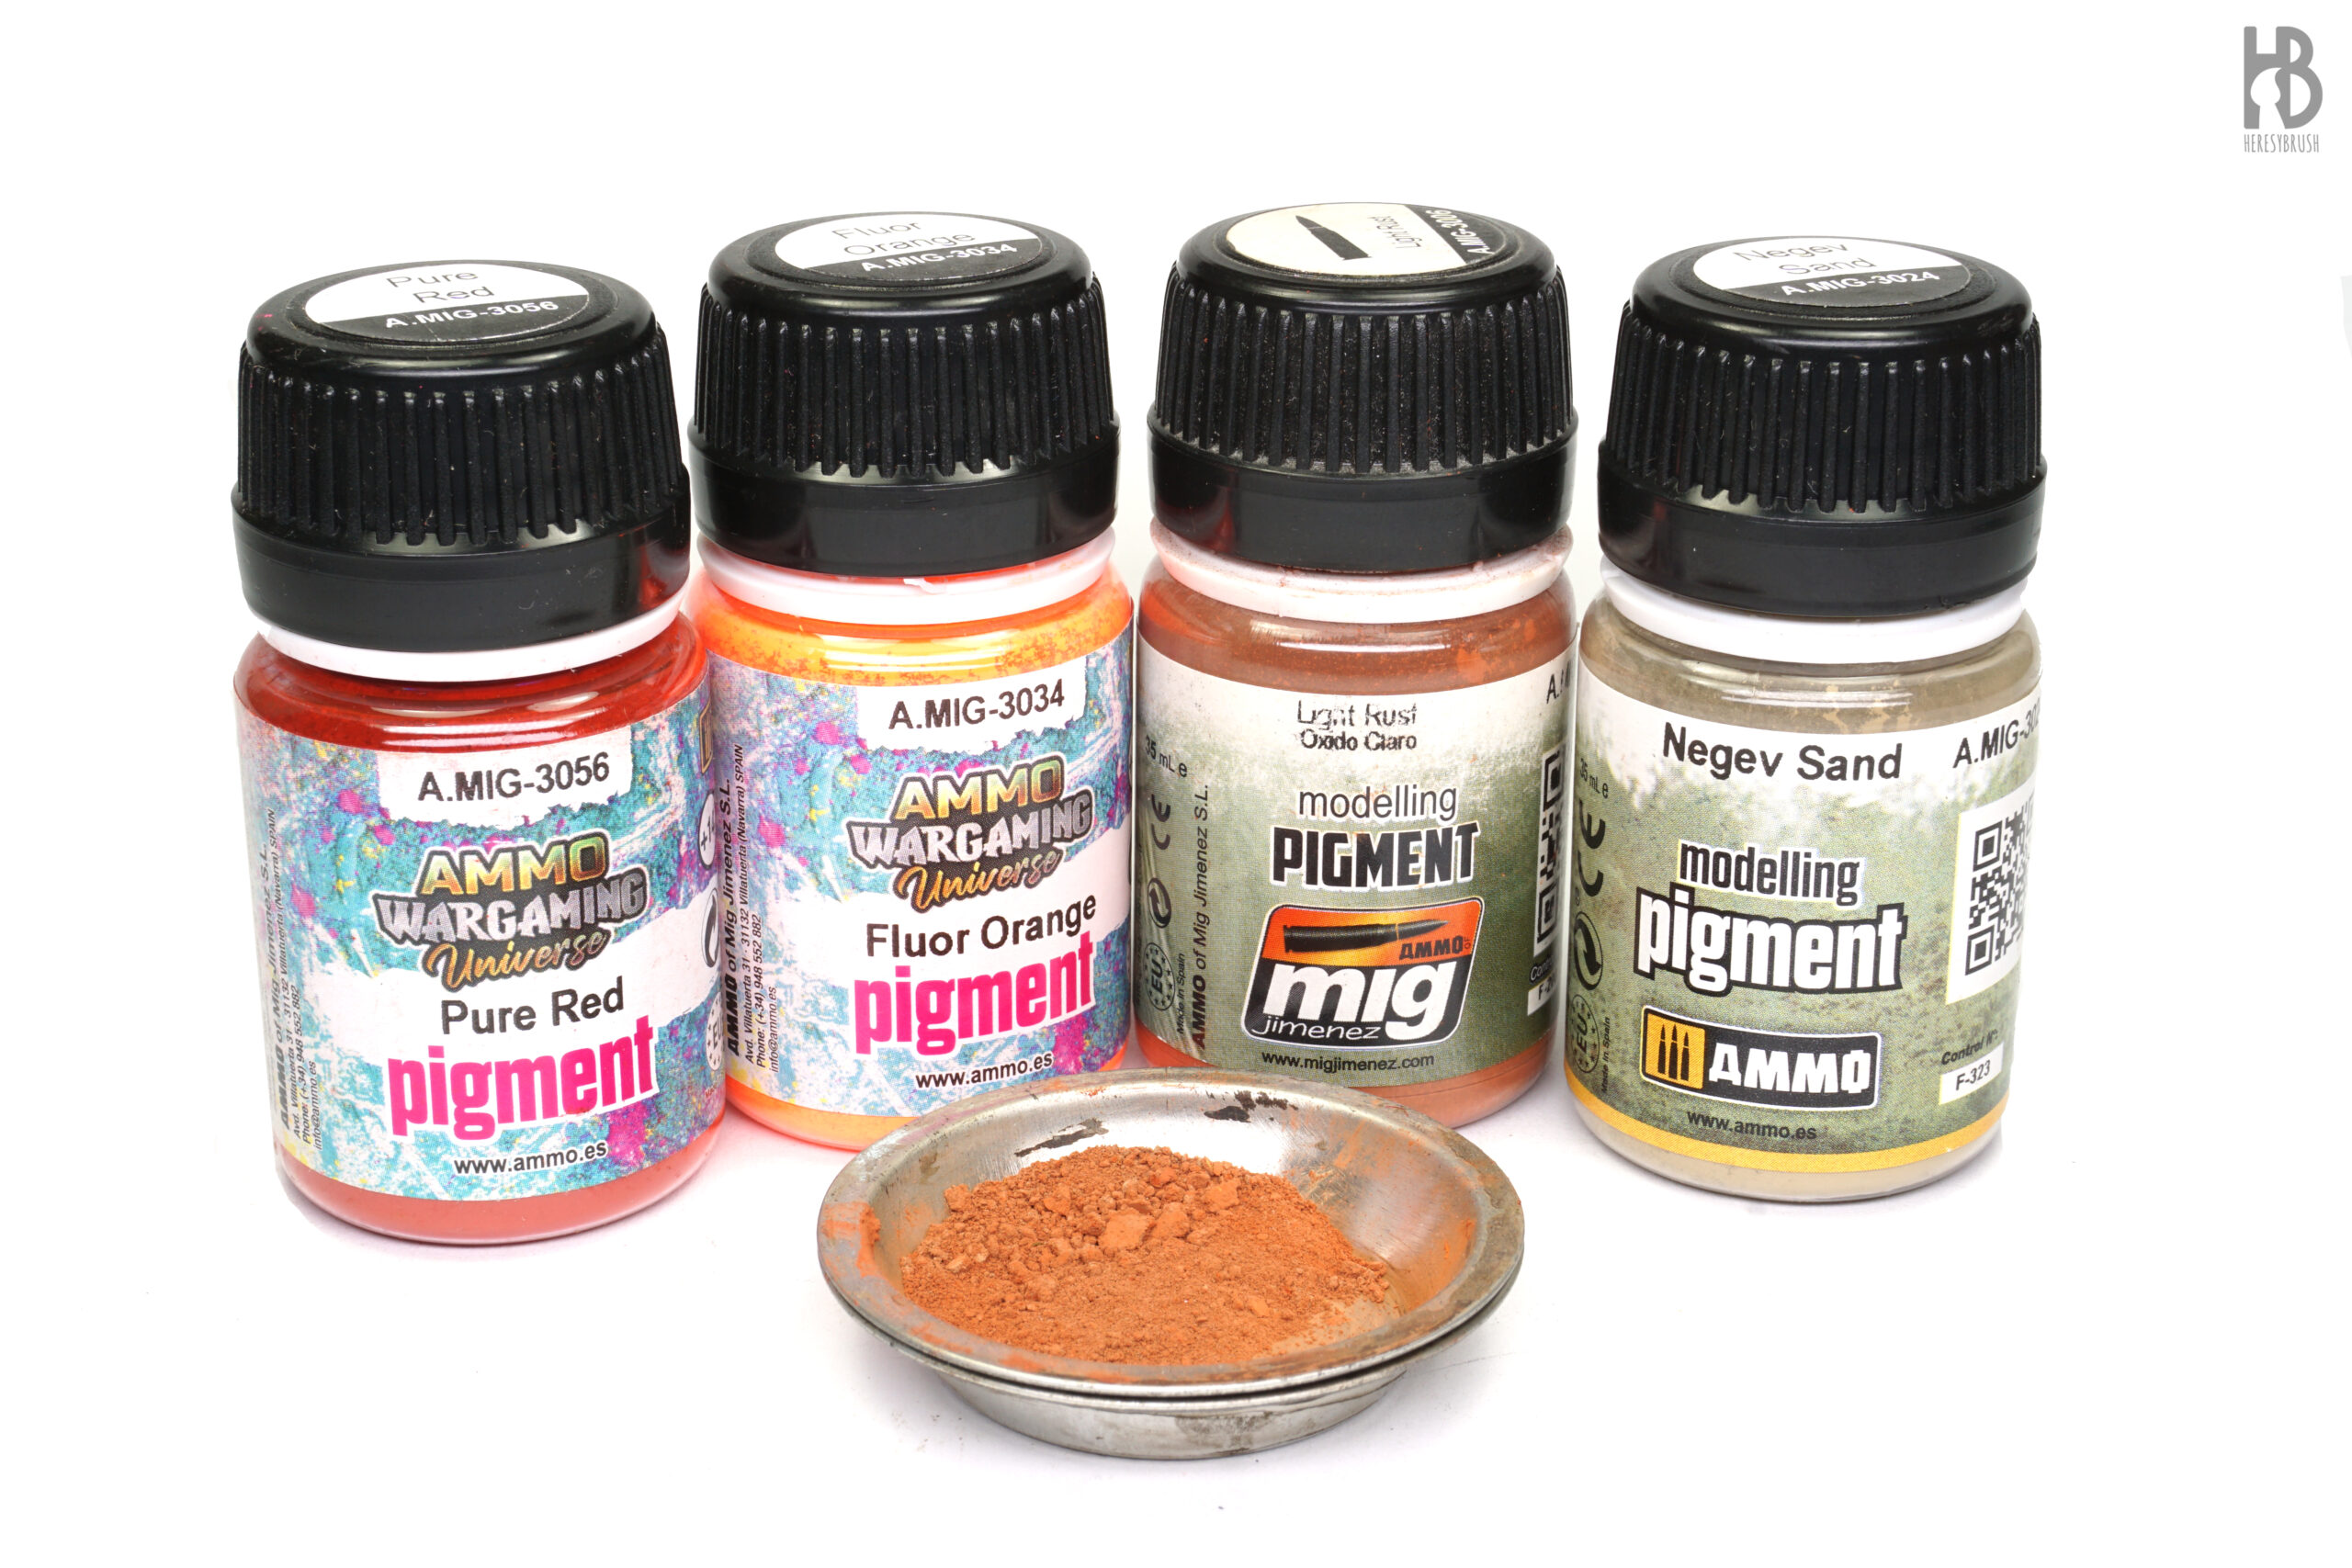 We start by creating a proper mix of pigments. We aim for an orange tone, the complementary color of blue, to create an interesting contrast. We use several pigments to enrich the mix, as pigments do not merge as paint does—they remain independent. We add a bit of fluorescent orange and pure red to increase saturation.
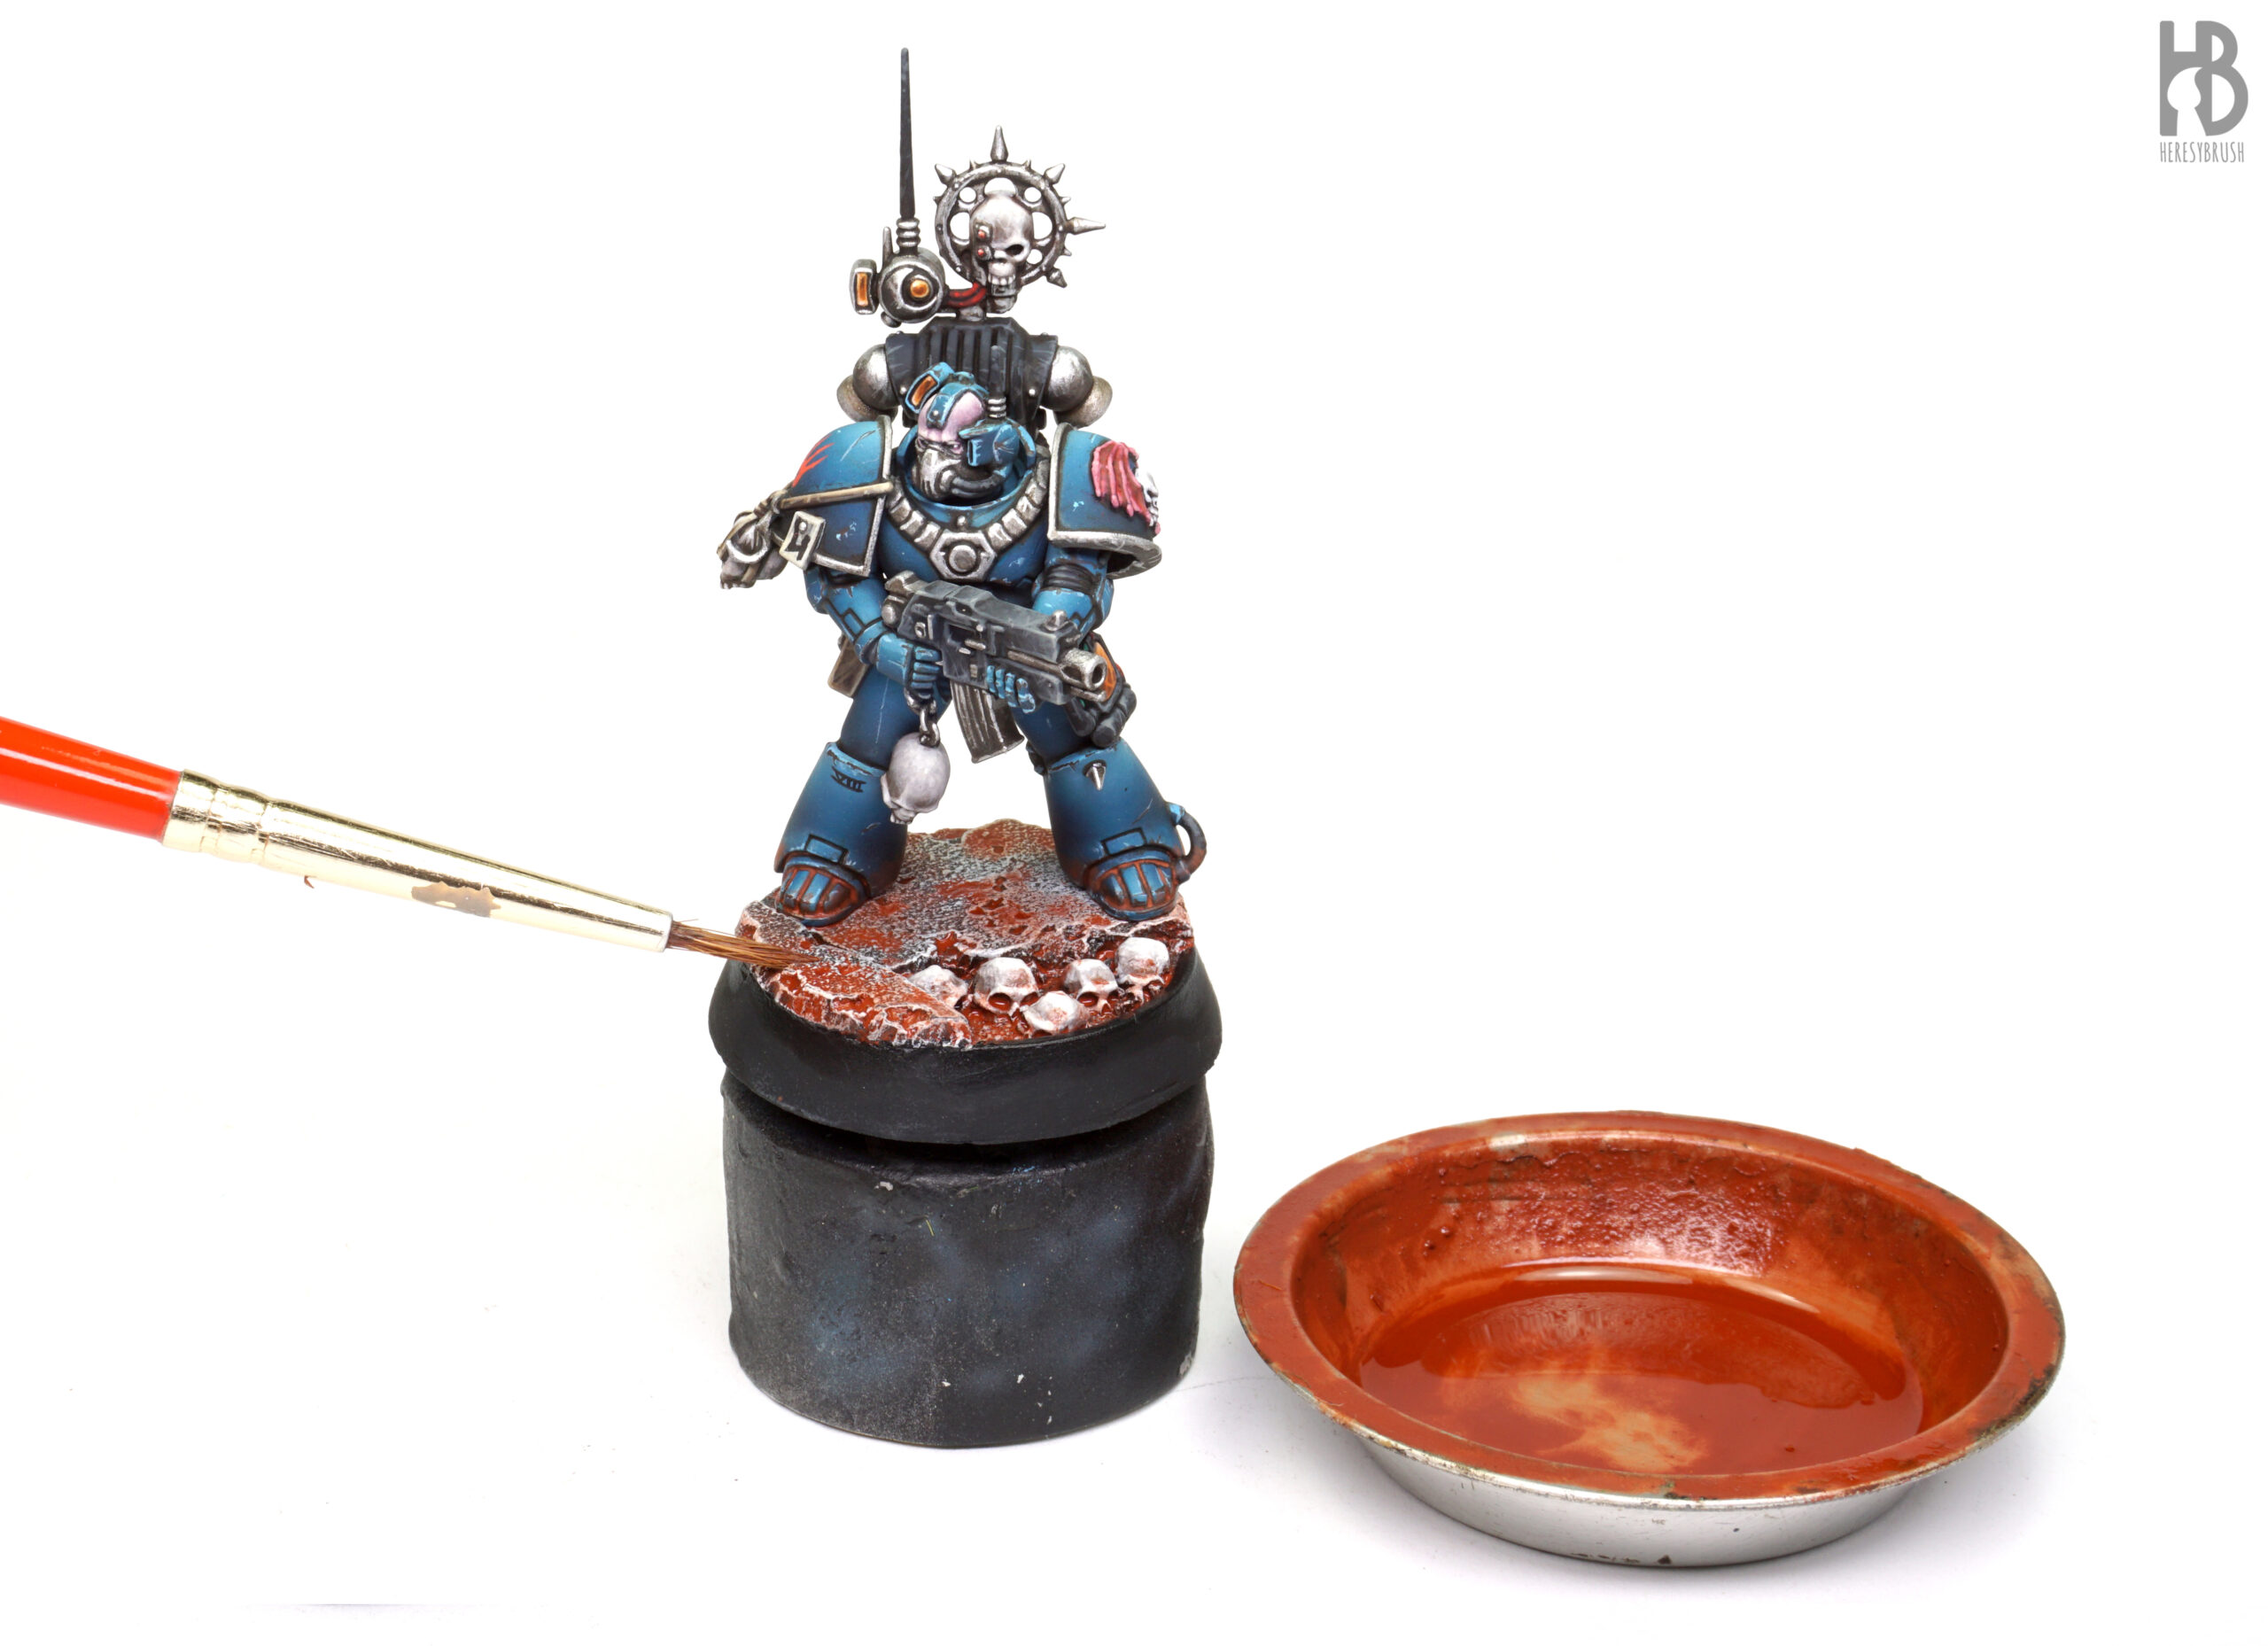
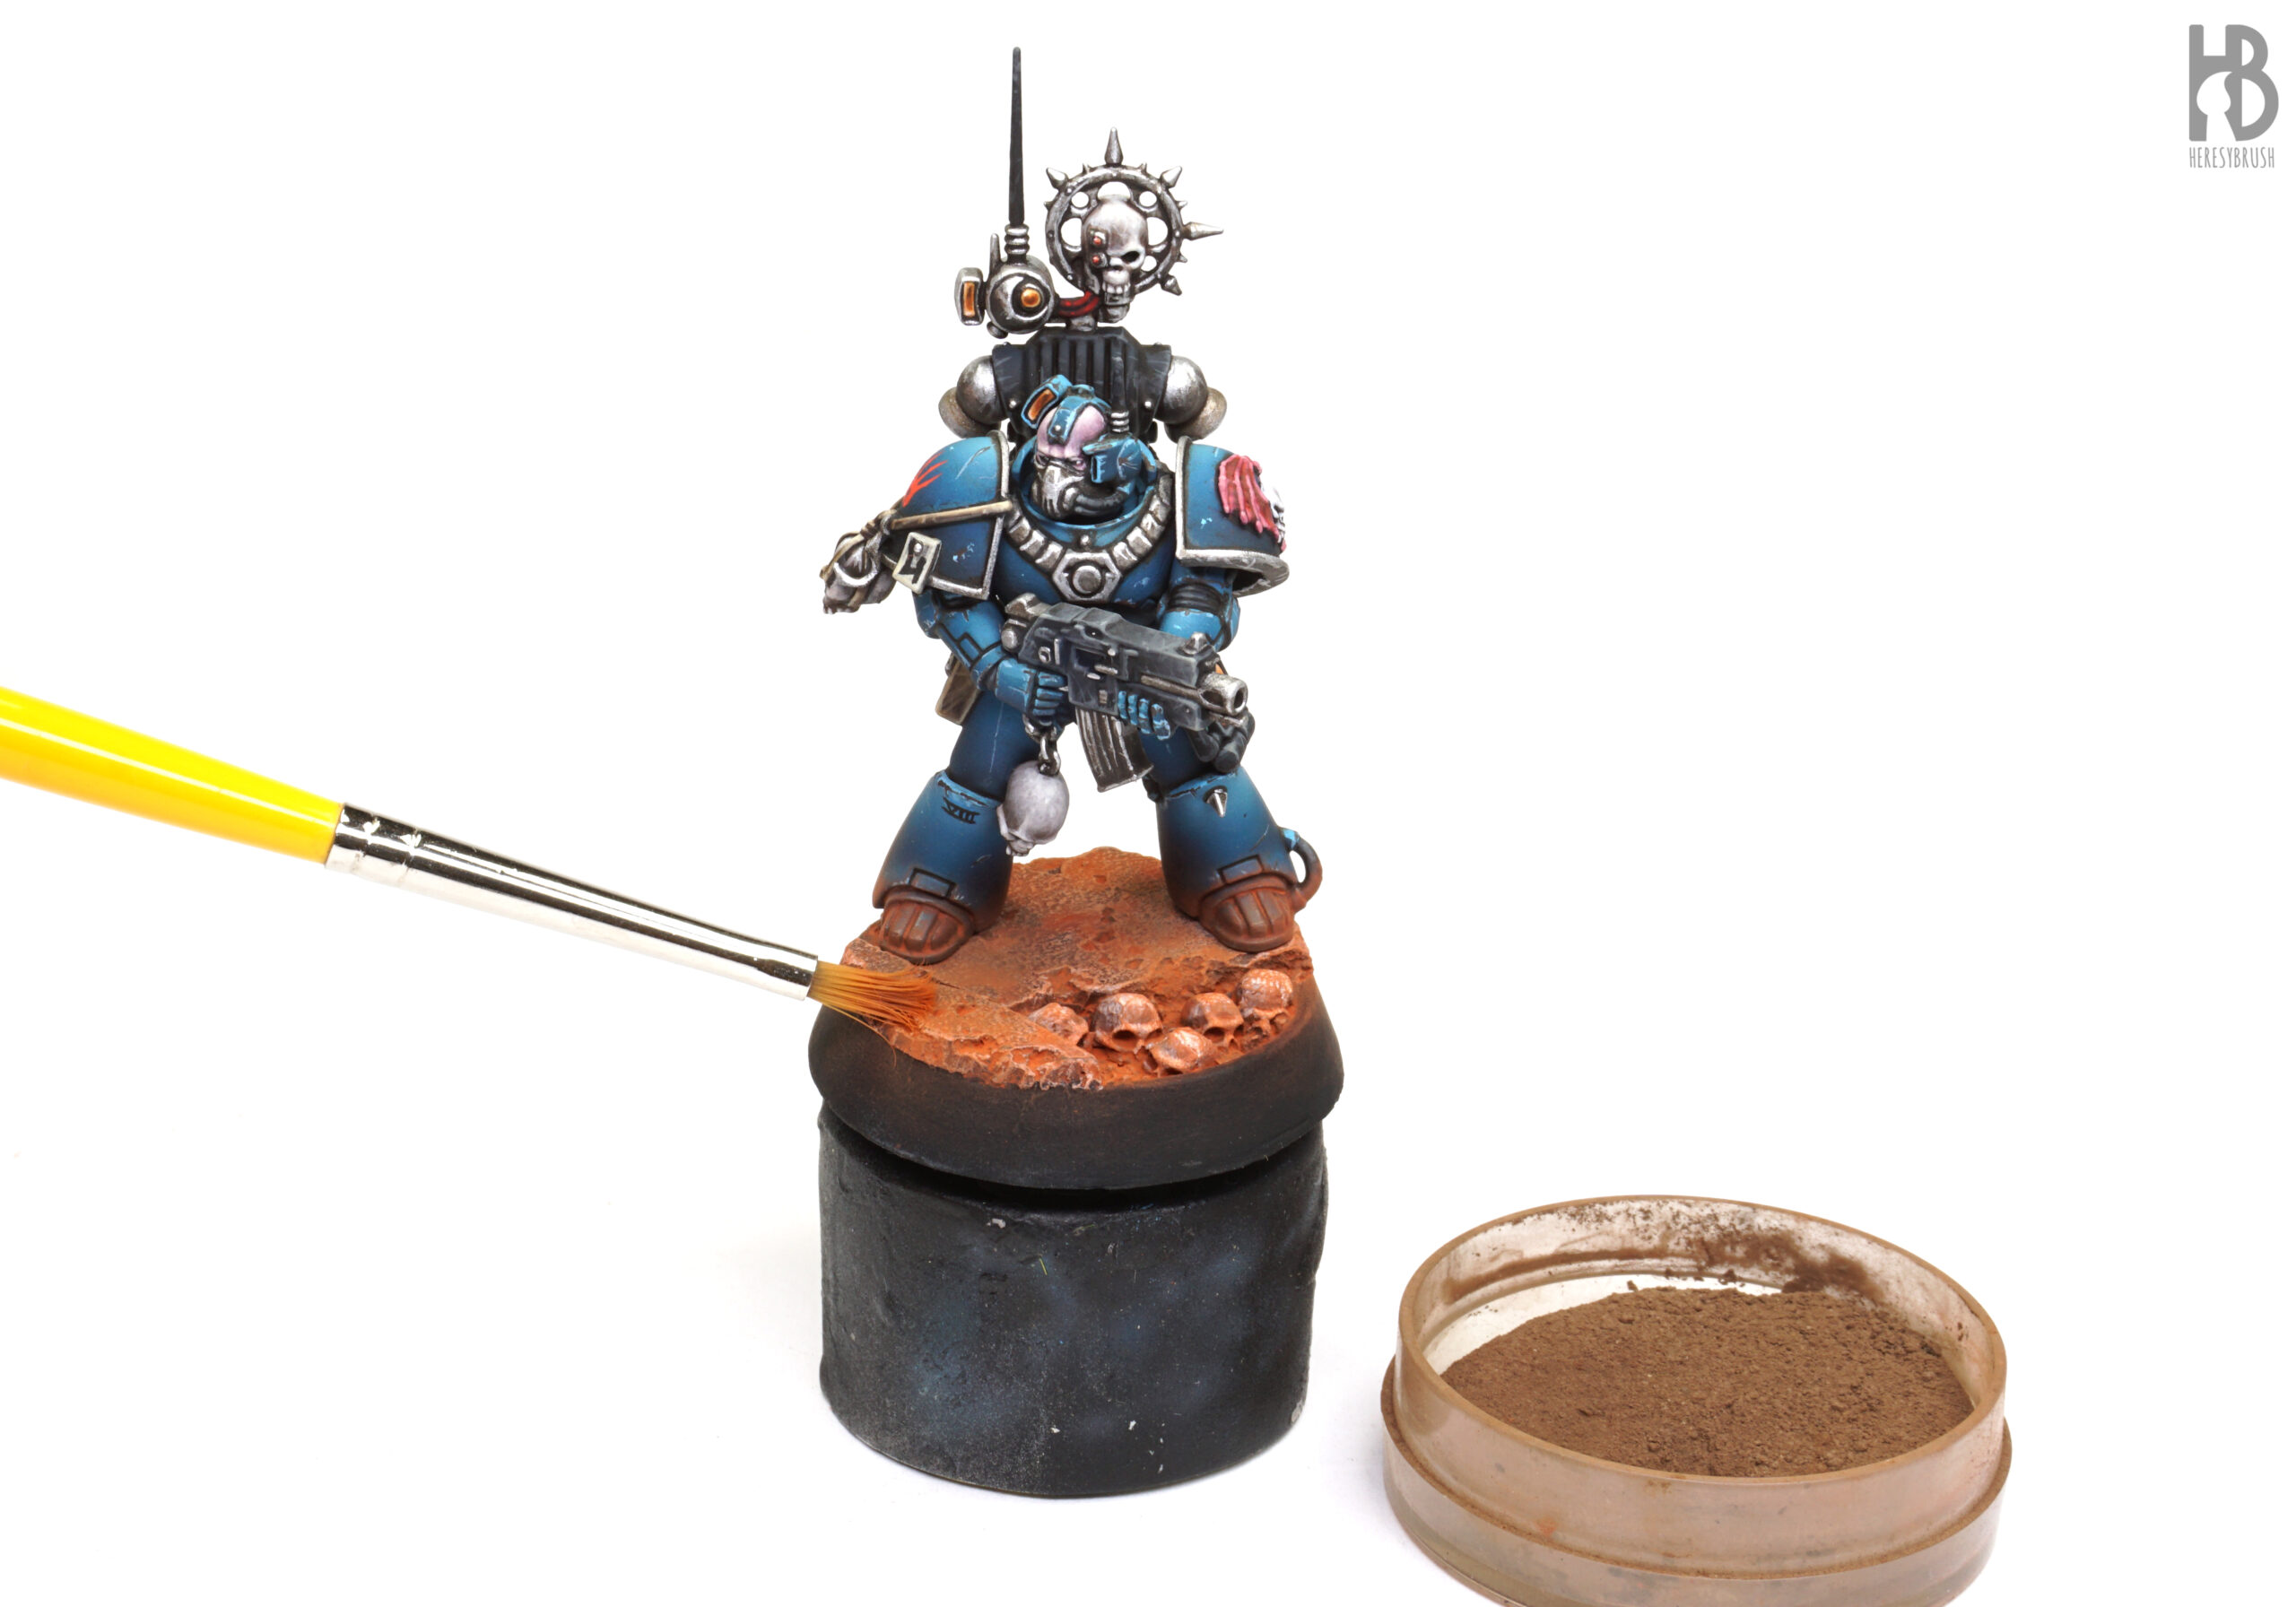
We will use the pigments wet, mixing them with 50% odorless enamel thinner to create a wash. Then, we apply a little bit randomly on the base using a brush, focusing mainly on the nooks and recesses of the rocks and skulls, as well as the lower part of the miniature. It is better to start with less than needed, as we can always add more later if necessary.
Let allow the pigments to dry completely for several hours or overnight. They should regain their ultra-matte and dusty appearance.

Next, we use an old brush to spread the pigment more evenly around the base. When applying the pigments as a wash, we can accumulate them in the recesses, but now we’re focusing on the most exposed areas.
 We can add some color nuances using another mix of pigments, such as dark brown, applying it here and there with a brush. In this case, we use the pigments dry instead of wet.
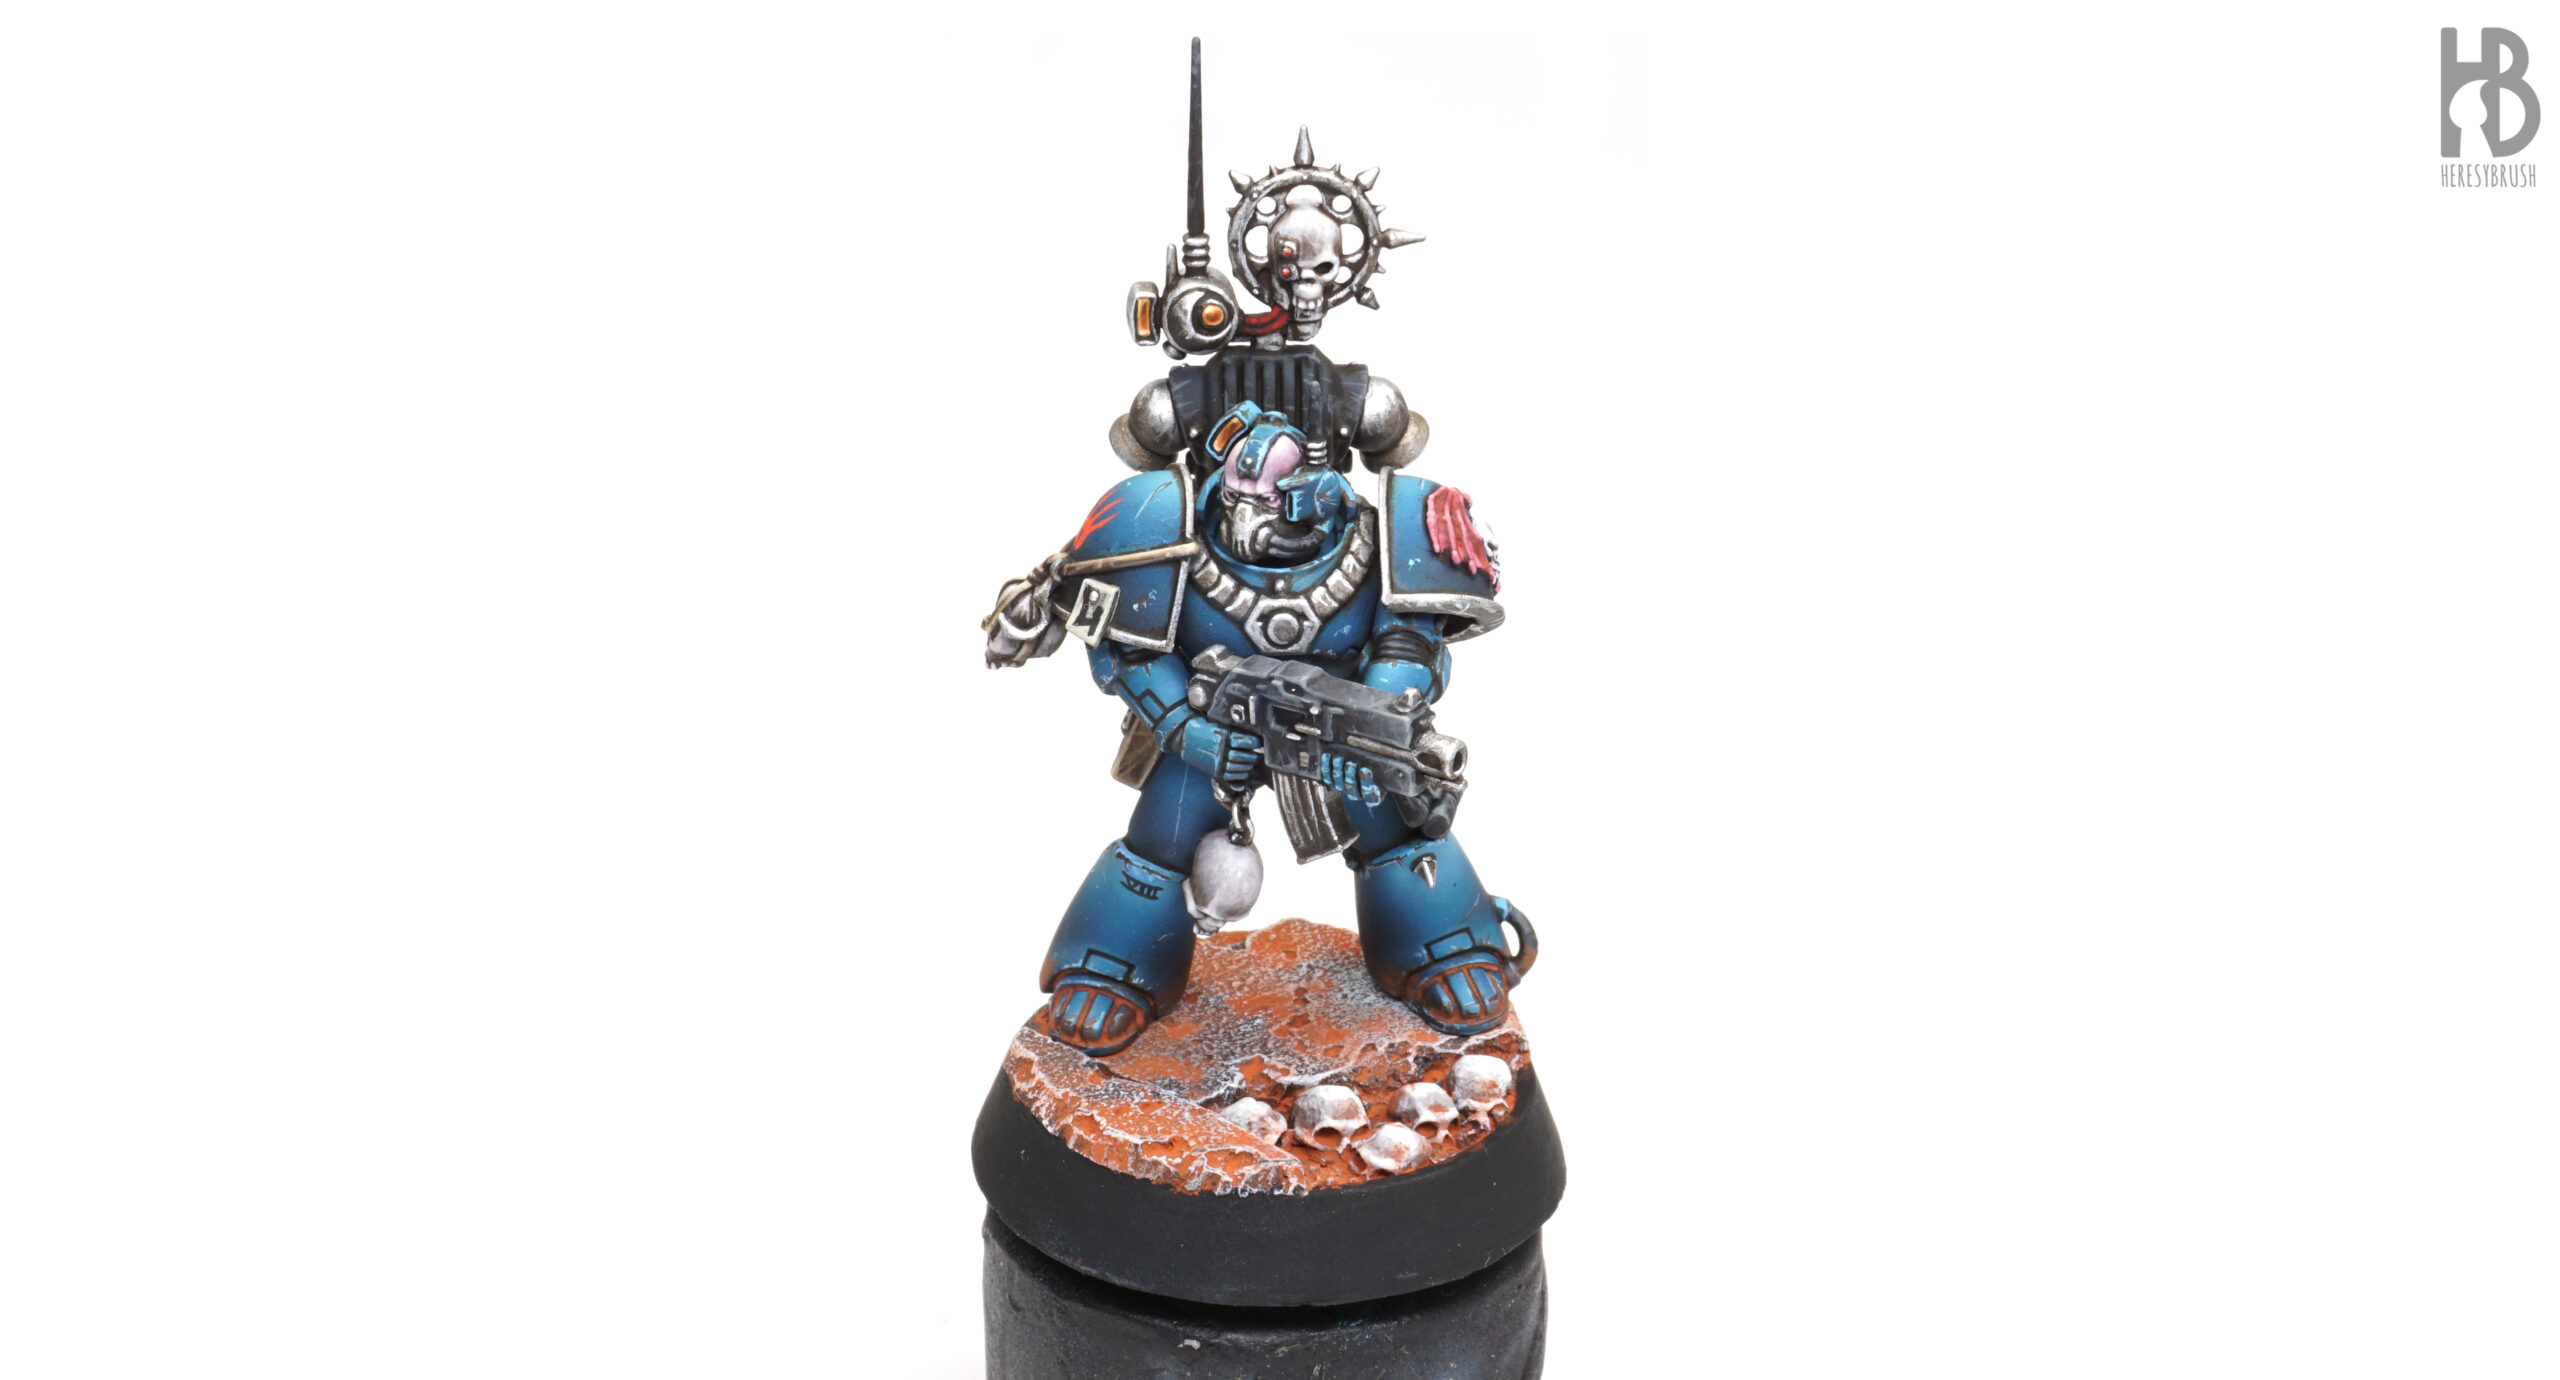
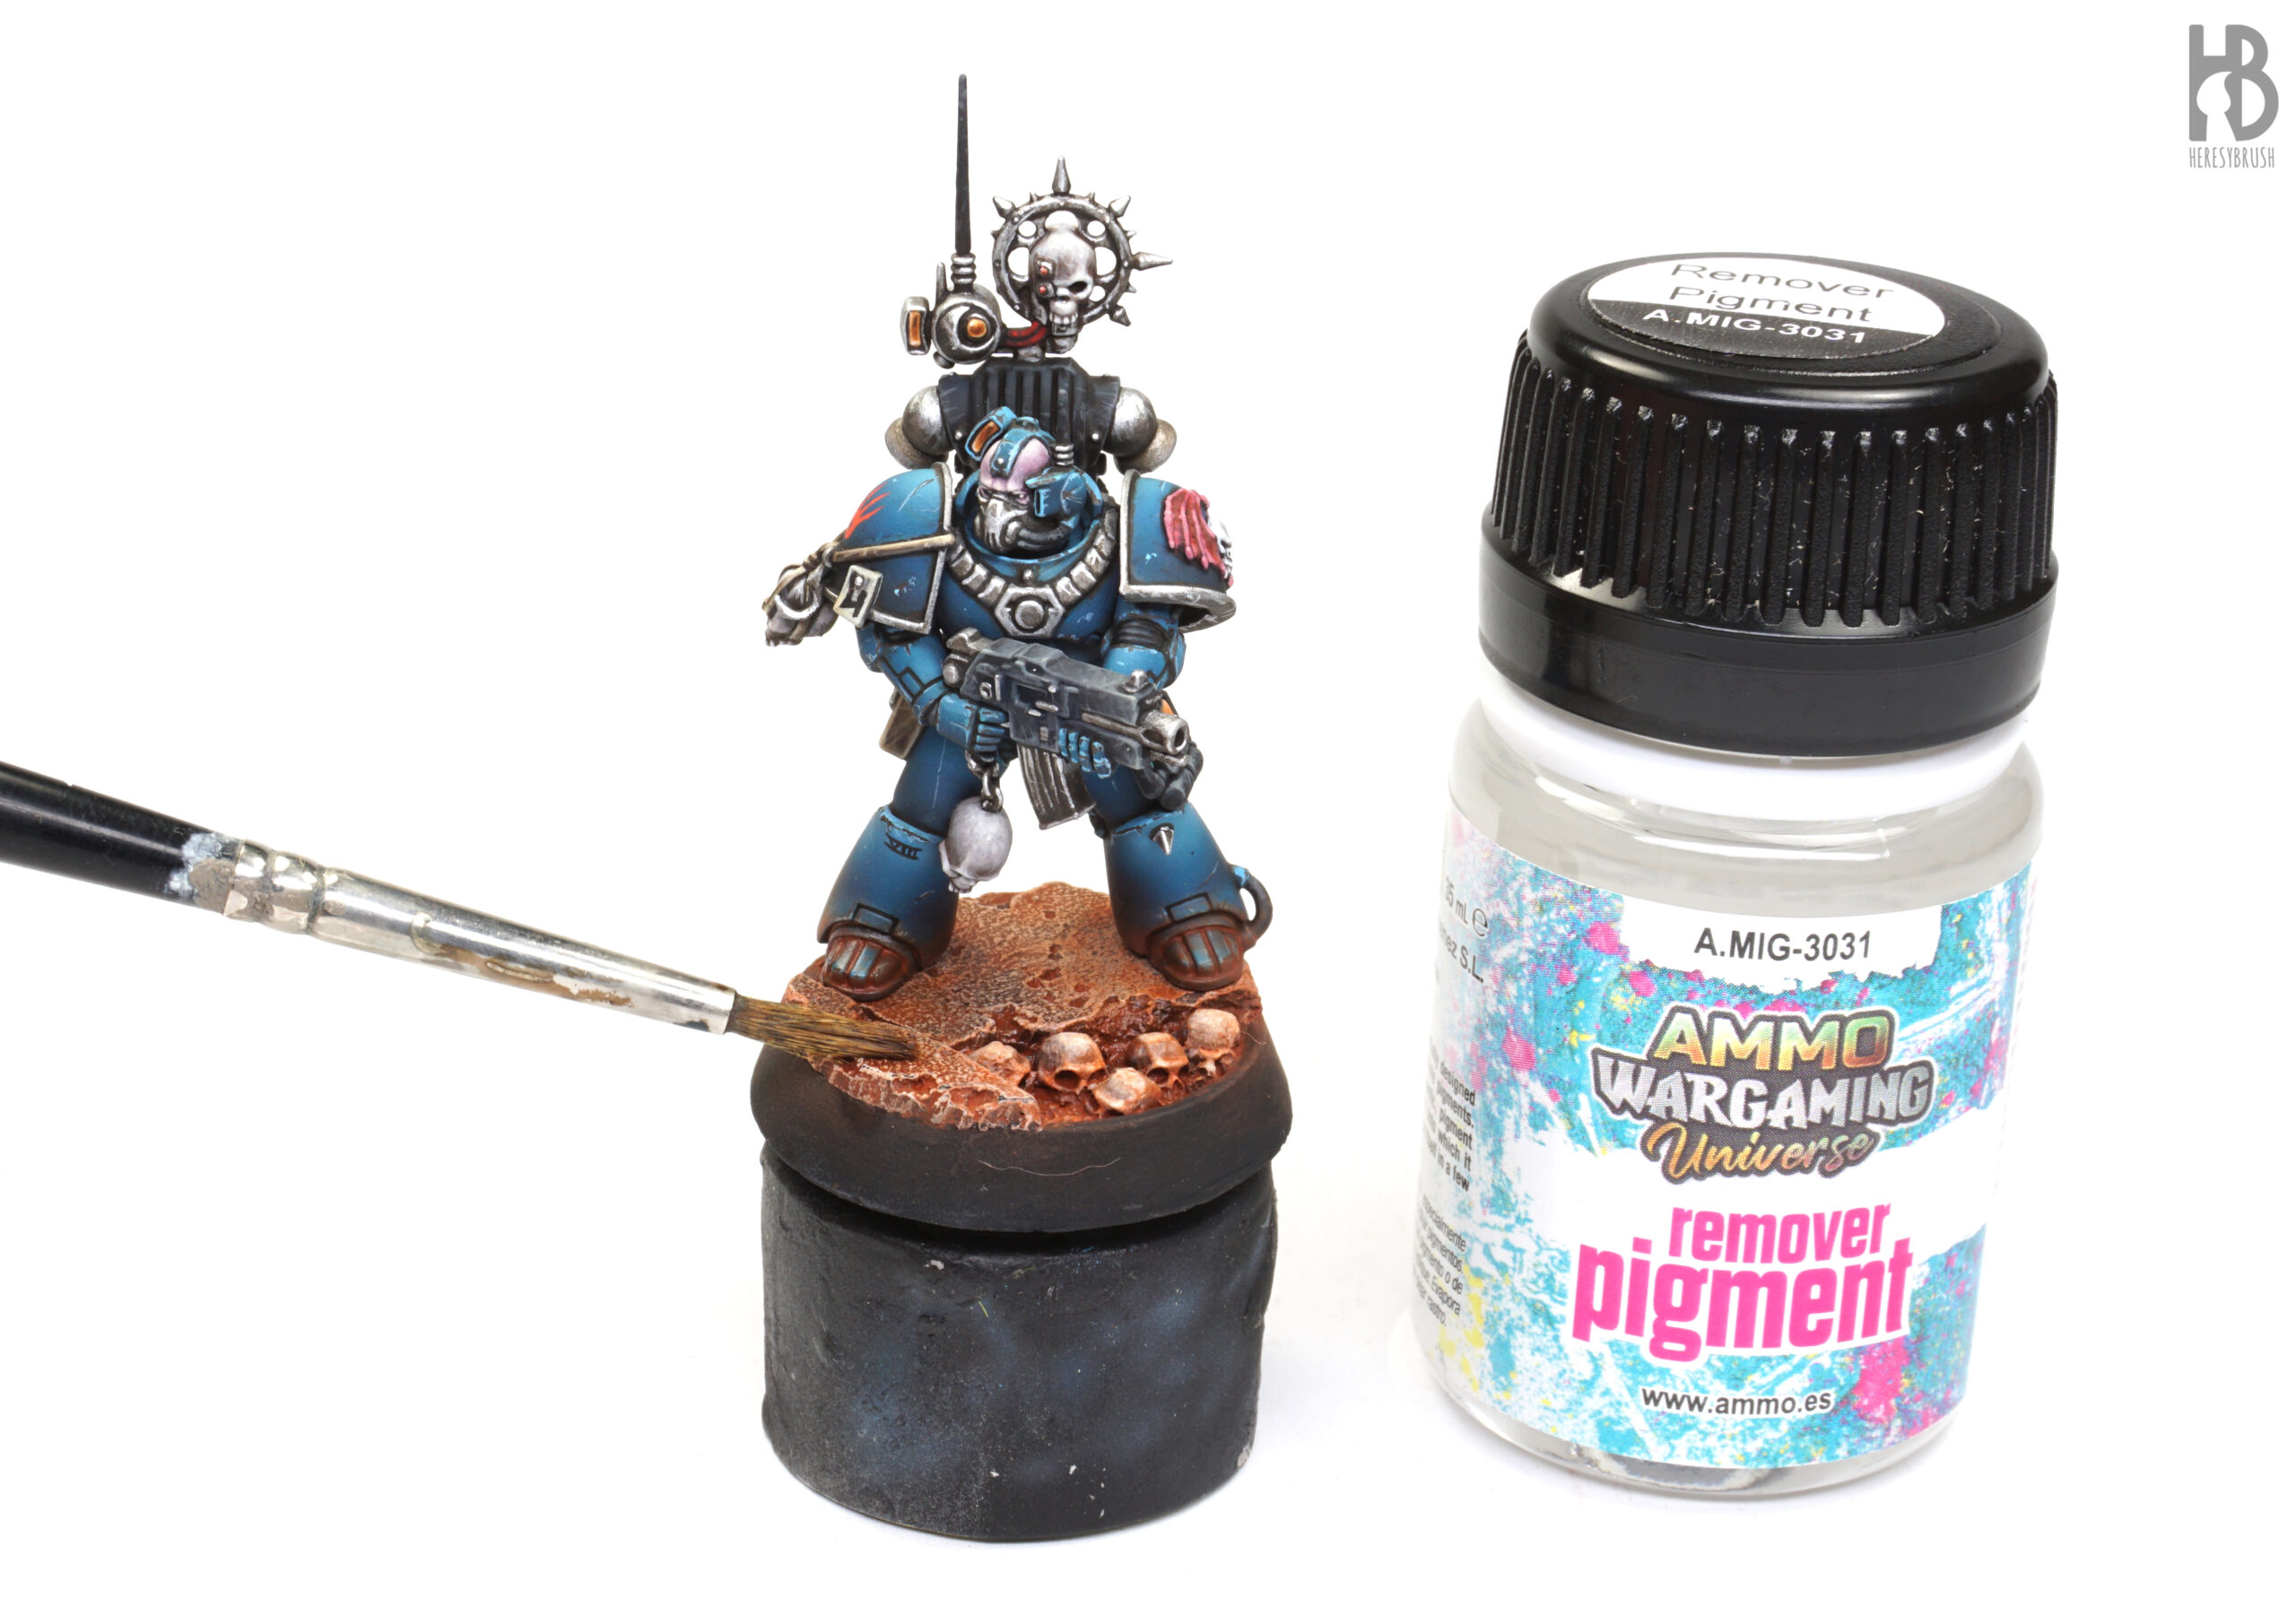 Finally, we remove the excess pigment using a bit of Pigment Remover to adjust the final effect. We let it dry completely, which takes about 10 minutes. If needed, we can add more pigments to areas where we removed too much.
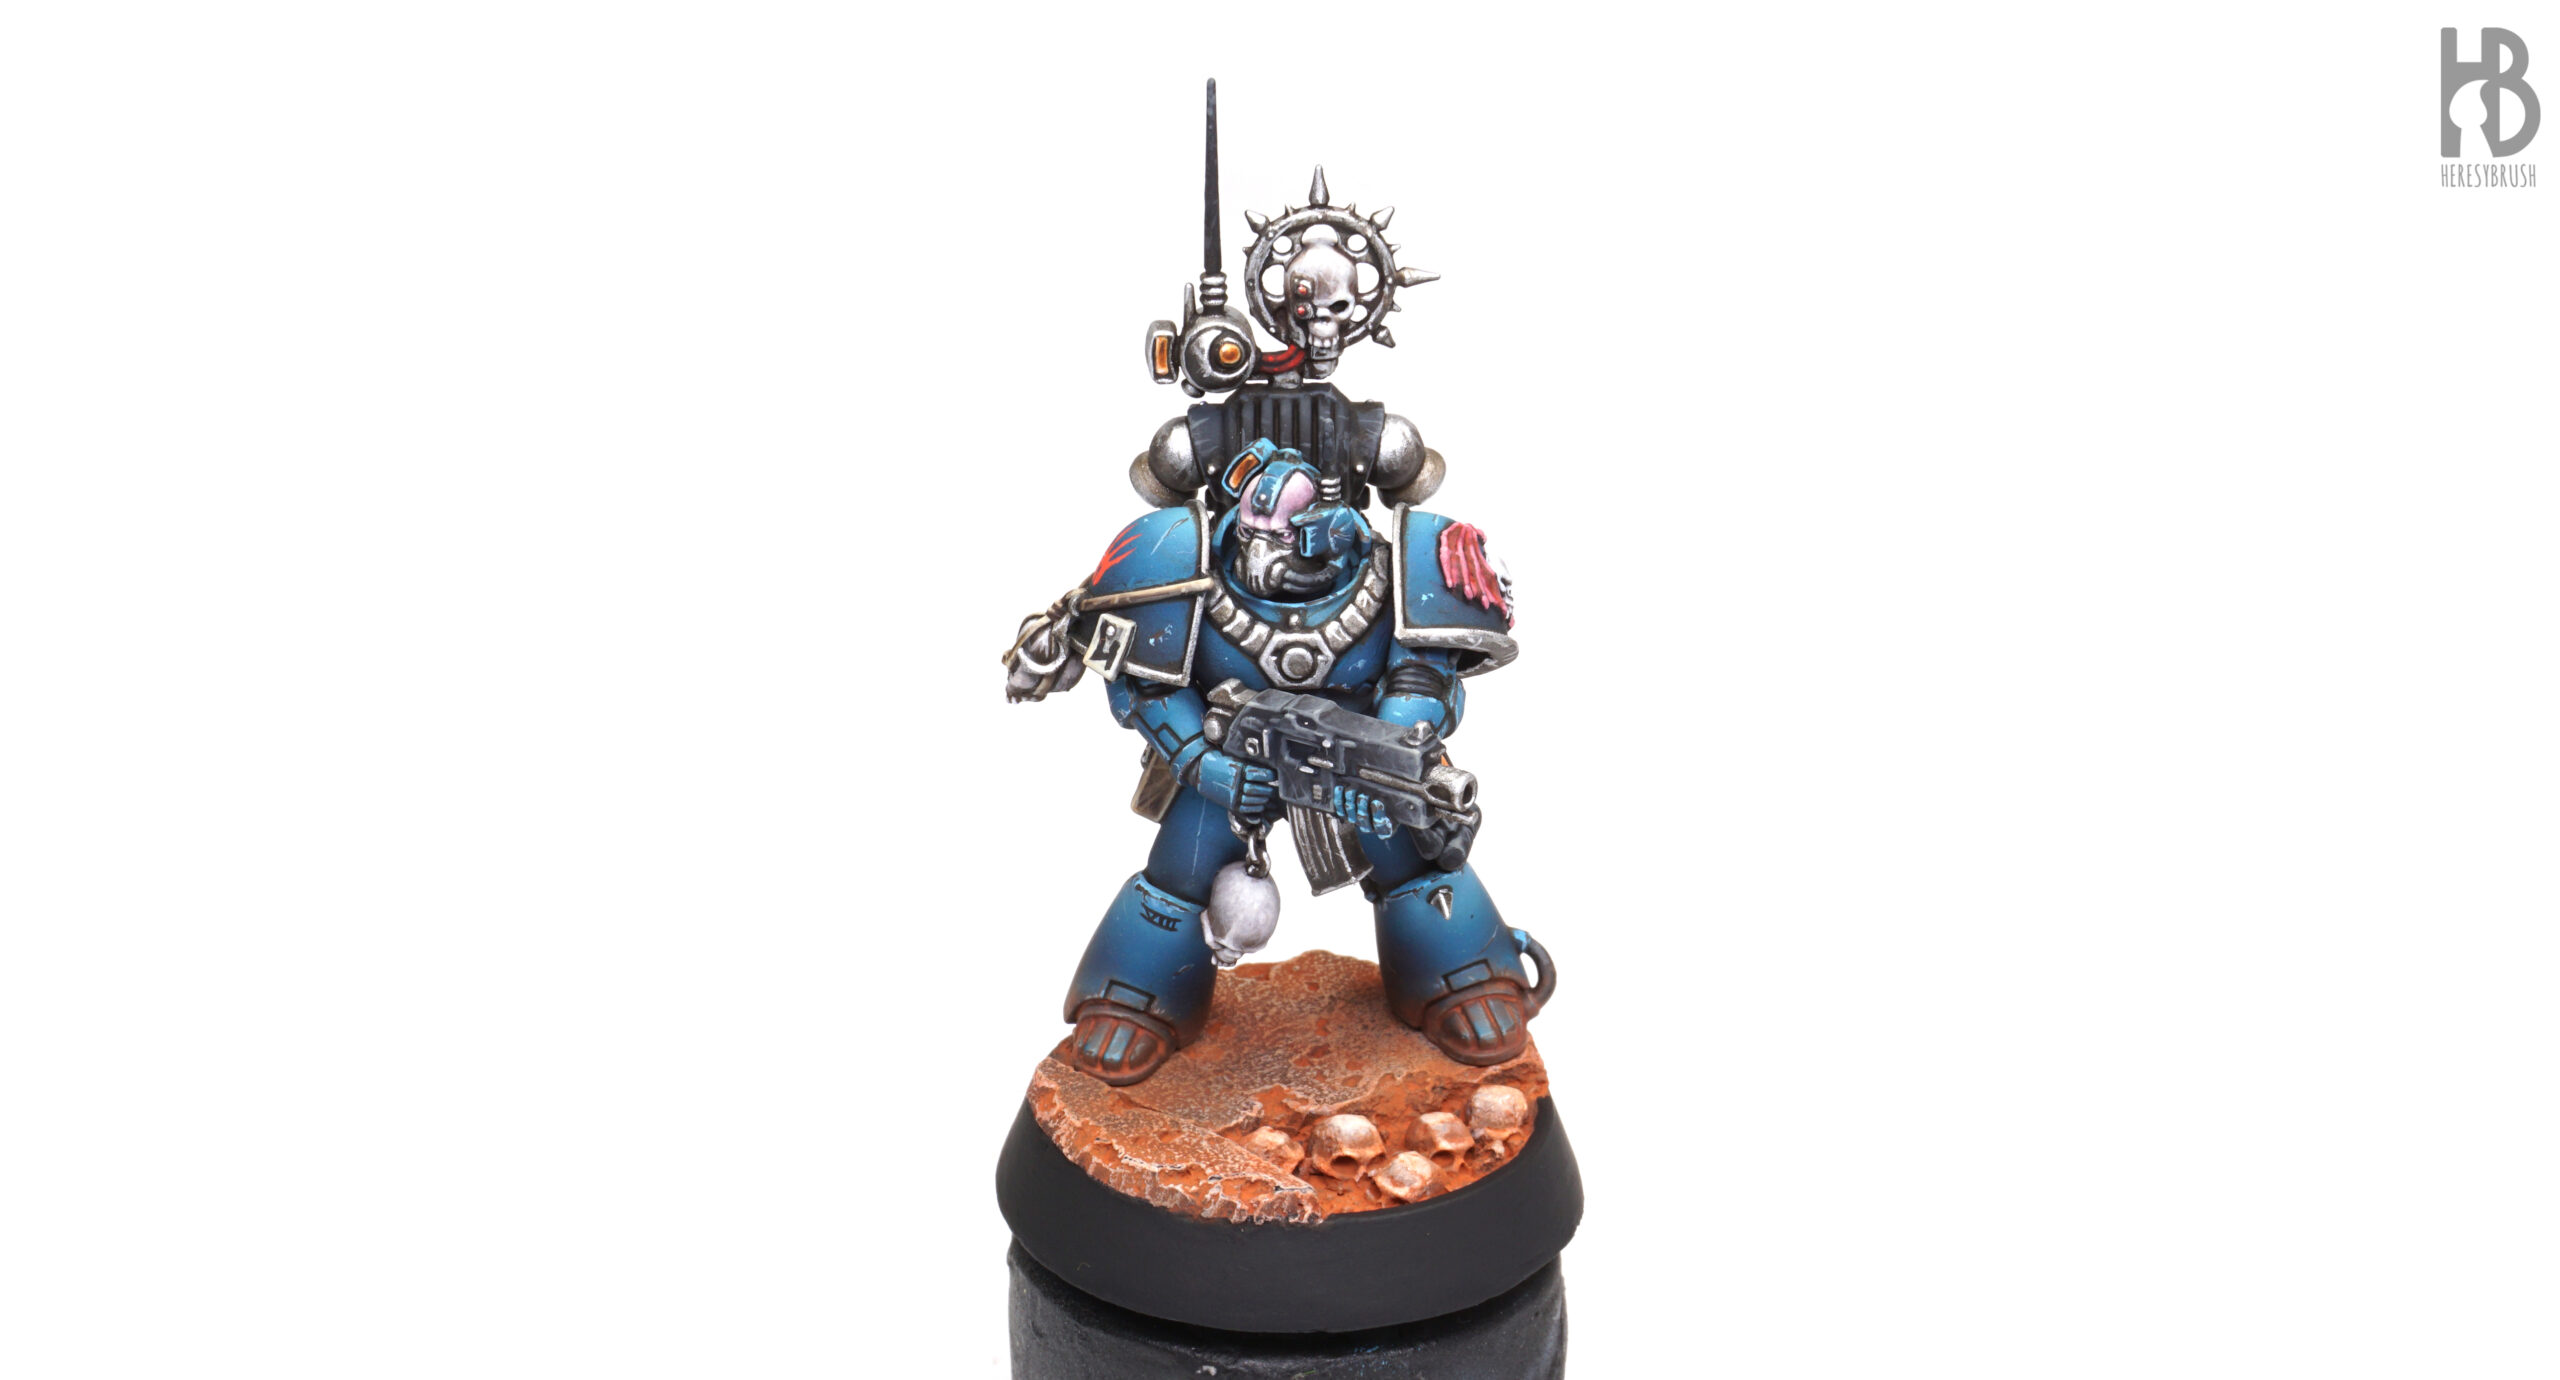
We complete the miniature repainting the black ribbon and applying a layer of matt or ultra-matt layer.
This is the list of paints used in the tutorial:
AMMO ATOM Acrylics
- ATOM-20106 – Navy Blue
- ATOM-20117 – Duck Blue
- ATOM-20112 – Bright Blue
AMMO IONIC Acrylics
- IONIC-0172 – Black
- IONIC-0160 – Black Brown
- IONIC-0161 – Burnt Umber
- IONIC-0174 – Steel
- IONIC-0175 – Silver
- IONIC-0180 – Brass
- IONIC-0058 – Dark Red
- IONIC-0032 – Dwarf Skin
- IONIC-0012 – Vanilla
- IONIC-0046 – Light Orange
- IONIC-0021 – Golden Yellow
AMMO Enamels & Weathering Products
- A.MIG-1005 – Dark Brown for Green Vehicles (enamel wash)
- A.MIG-2018 – Odourless Enamel Thinner
- A.MIG-3009 – Pigment Remover
You can get all the paints mentioned above at AMMO by Mig Jimenez website with 10% off using the affiliate code: Heresy10Ionic